Reviews

Book Review: Sew Illustrated

Sew Illustrated has 16 projects in it and is by Minki Kim and Kristin Esser. If you love Minki Kim’s adorable little appliqué sketch creations, you’ll love Sew Illustrated. If you haven’t heard of Minki Kim, where have you been? I adore her small sketches where she uses bits of fabric and black outline stitching to create charming projects.

 
Photo courtesy of C & T Publishing

Photo courtesy of C & T Publishing


All of the designs are included in the back of the book as iron-on transfers, which makes it very easy to put them on your fabric. There are other ways to transfer these designs and Minki explains these other options in the beginning of the book.

Minki’s designs are small, so this is a great book if you have lots of scrap fabrics that you’d like to use up. The projects are a combination of appliqué, hand embroidery and free motion quilting to finish off the appliqué pieces.

You’ll find a variety of projects in the book from mug rugs to pin cushions. Due to the small nature of the projects, they won’t use much fabric and they won’t take a lot of time to complete. Many of these projects would be perfect for quick gifts.

 
Sew Illustrated pillow.jpg
 

You’ll find a variety of projects in the book from mug rugs to pin cushions. Due to the small nature of the projects, they won’t use much fabric and they won’t take a lot of time to complete. Many of these projects would be perfect for quick gifts.

I like the full-size templates in the book (I really don’t like to enlarge any pieces!) and the complete step-by-step instructions that she provides in Sew Illustrated.

Click on the image below for a more detailed look at Sew Illustrated. If you’d like to add Sew Illustrated to your quilting book library, click here.

Creatively,

Kim's signature small aqua.jpg
 

P.S. Do you strive to improve your quilting skills? Do you want to have fun doing it? Do you want to meet other quilters in a supportive, safe environment?  If you answered “yes” to these questions, you need to join The Quilter’s Way. The Quilter’s Way is the only quilting membership site that includes both training and an active, supportive online community. It’s not your grandmother’s quilting circle! Don’t wait another day! Join now.

P.P.S. Did you know that you can sign up to receive emails full of FREE quilting goodness? Click here to receive FREE content directly in your email inbox every few weeks from Chatterbox Quilts. I know you'll be glad you did!

P.S. I am an Amazon affiliate and, if you purchase items by clicking through the links in this post, I will receive a small amount of commission. This doesn’t cost you any more $$$, but helps me to continue creating free content for you. Thanks!

Book Review: Quilts With An Angle

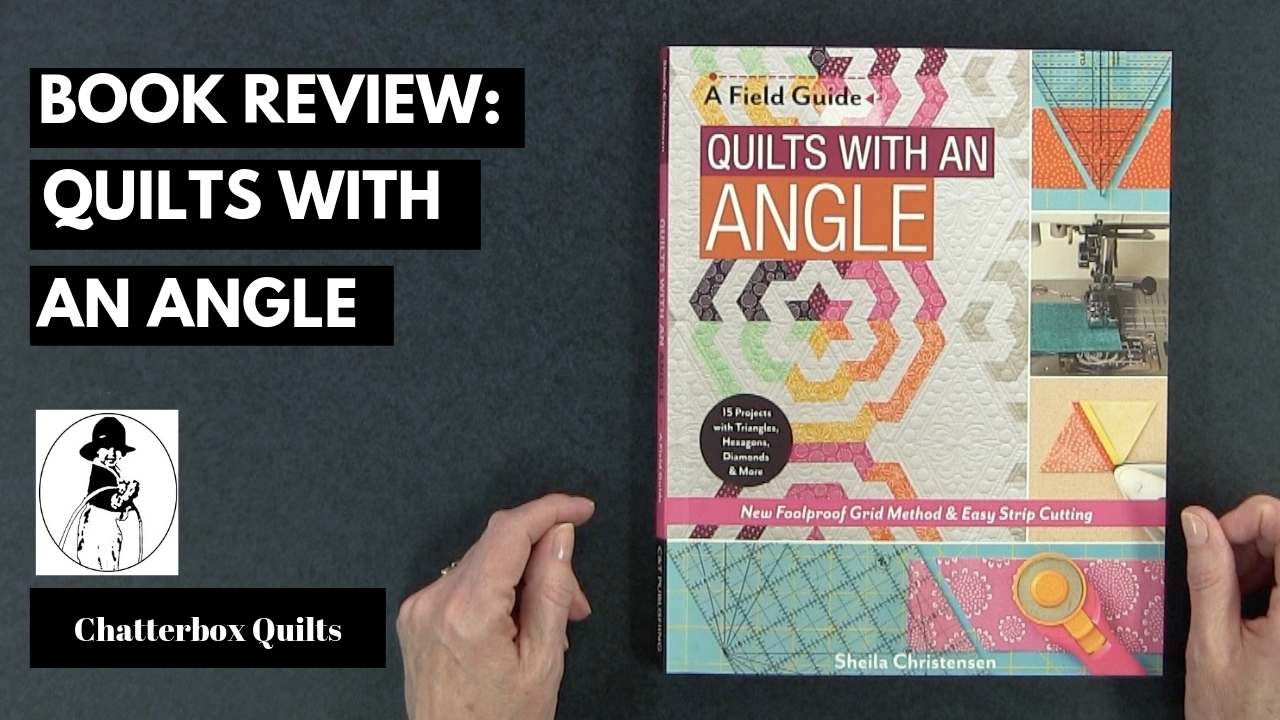
If you are hesitant about stitching up blocks with 60 degree angles in them, you’ll want to take a look at Quilts with an Angle – a Field Guide by Sheila Christensen and published by C & T Publishing.

 
Photo courtesy of C & T Publishing

Photo courtesy of C & T Publishing


This is an in-depth look at how to create these types of blocks successfully. Quilts with an Angle not only explains how to stitch up blocks with different geometric shapes, all with 60 degree angles, but also talks about the tools you can use to get these degrees.

The book is divided into different sections, with a specific geometric shape, in each section. There are triangles, trapezoids, hexagons (so many quilters love these!), diamonds, and more!

I’ve got to admit that I haven’t made a quilt with 60 degree angles. They just seem to intimidating to me. Quilts with an Angle breaks these 60 degree angle shapes down to the basics and explains in detail how you can successfully create and incorporate them into quilt projects. There are lots of photos in this book to explain the techniques, as well as reference charts to help you.

 
Photo courtesy of C & T Publishing

Photo courtesy of C & T Publishing


Of course, it wouldn’t be much use to learn how to create these blocks without having projects to use them in, would it? No worries, there are projects in each section to demonstrate how you can use those particular shapes in them. By the time you’ve made these projects, you’ll be an expert in cutting a geometric shape with 60 degree angles.

 
Photo courtesy of C & T Publishing

Photo courtesy of C & T Publishing


Click on the image below to see more of Quilts with an Angle – a Field Guide. To get your own copy of Quilts with an Angle, click here.

Do you use 60 degree angles in your projects? Let me know your favourite tool for cutting shapes with 60 degree angles in the Comments below.

Creatively,

Kim's signature small aqua.jpg
 

P.S. Do you want to improve your quilting skills? Do you want to have fun doing it? Do you want to meet other quilters in a supportive, safe environment?  If you answered “yes” to these questions, you need to join The Quilter’s Way. The Quilter’s Way is the only quilting membership site that includes both training and an active, supportive online community. It’s not your grandmother’s quilting circle! Don’t wait another day! Join now.

P.P.S. Did you know that you can sign up to receive emails full of FREE quilting goodness? Click here to receive FREE content directly in your email inbox every few weeks from Chatterbox Quilts. I know you'll be glad you did!

P.S. I am an Amazon affiliate and, if you purchase items by clicking through the links in this post, I will receive a small amount of commission. This doesn’t cost you any more $$$, but helps me to continue creating free content for you. Thanks!

Precision Fusing Mat Review

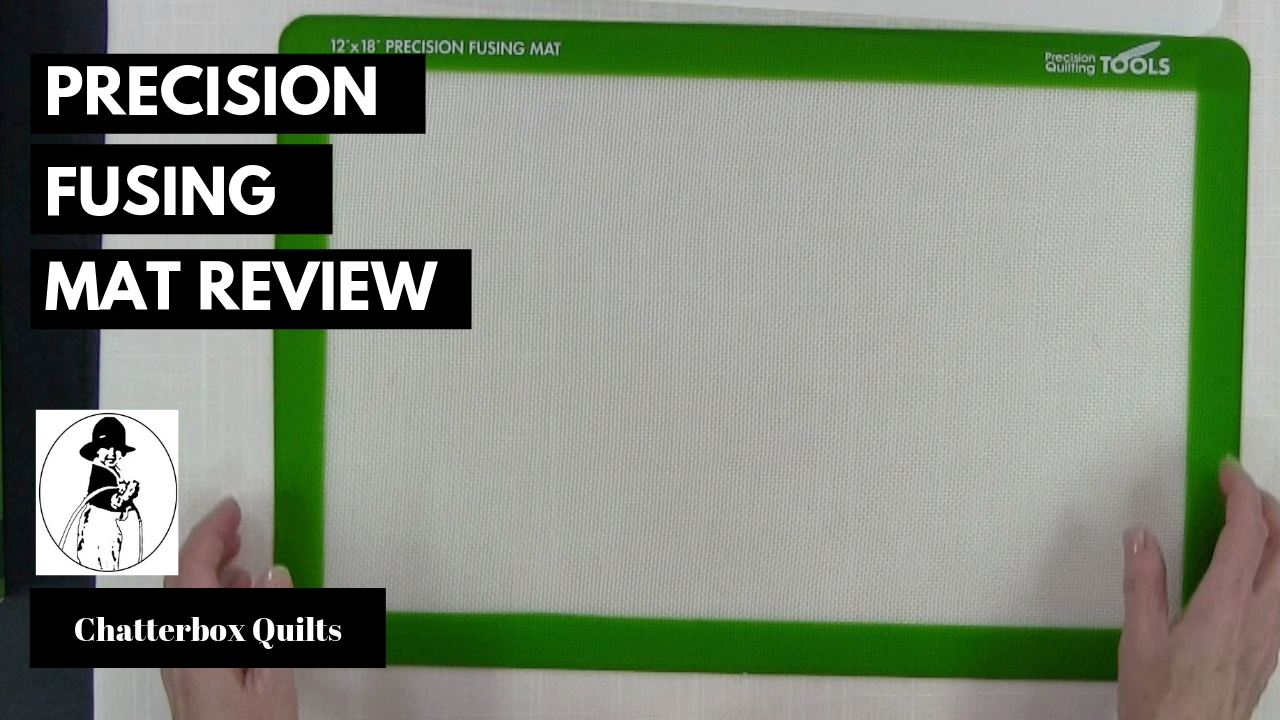
Raw edge appliqué, or as I call it, fusible web appliqué, is my favourite quilting technique. I’ve been creating projects using this technique for years and am always on the lookout for tools that will make this already easy appliqué method even easier, and I’ve found one: the Precision Fusing Mat from Precision Quilting Tools. This combination of fusing mat and overlay covers all the bases when it comes to creating a fusible web appliqué project. Let’s take a closer look at this amazing product.

When doing fusible web appliqué, you need to trace the appliqué pieces onto the paper side of the fusible web using a lightbox or a window. One of the challenges in doing this is that the fusible web sheet can slide around and make it difficult to get accurate tracing. Enter the Precision Fusing Mat!

One part of this product, the green-edged vinyl mat – I’ll call it “the mat” – goes over your pattern and is non-slip so your paper pattern stays firmly in place underneath it. You then place the fusible web, paper side up, on top of the mat and again, due to the non-slip nature of it, the fusible web doesn’t slide around. This makes for perfectly accurate tracing!

The other use for this is as a teflon overlay - I’ll call it “the sheet” - allows you to layer your appliqué design on top of the sheet. Place your appliqué placement pattern underneath the sheet and you’ll be able to perfectly place and fuse your appliqué pieces on top of the sheet. You can then peel off the fused appliqué shape and fuse it to the background fabric. If I’m working with a multi-piece appliqué design, I like to fuse the pieces together into one unit before placing it on the background. The Precision Fusing Mat allows me to do this easily.

I love the multi-function of the Precision Fusing Mat and know that it’s going to be one of my favourite tools in my quilt studio.

For more information on the Precision Fusing Mat, click on the image below. To get your own Precision Fusing Mat, click here.

Have you tried fusible web appliqué? Do you have any products that work well for you when doing this technique? Share them in the Comments below.

 Creatively,

Kim's signature small aqua.jpg
 

Download the free Get Out of the Ditch! guide to learn how to start free motion quilting by clicking here.

P.S. Are you serious about improving your quilting? Do you want to connect with other committed quilters in a supportive, safe environment?  If you answered “yes” to these questions, you need to join The Quilter’s Way. The Quilter’s Way is the only quilting membership site that includes both training and an active, supportive online community. Don’t wait another day! Join now.

P.P.S. Did you know that you can sign up to receive emails full of FREE quilting goodness? Click here to receive FREE content directly in your email inbox every few weeks from Chatterbox Quilts. I know you'll be glad you did!

P.S. I am an Amazon affiliate and, if you purchase items by clicking through the links in this post, I will receive a small amount of commission. This doesn’t cost you any more $$$, but helps me to continue creating free content for you. Thanks!

Book Review: Stitched So Sweet

I was excited to take a look at Stitched So Sweet by Tracy Souza as I’m a big fan of hand embroidery. I love sweet, whimsical designs and Stitched So Sweet is full of these types of designs.

 
Photo courtesy of Martingale Publishing

Photo courtesy of Martingale Publishing


The projects in Stitched So Sweet are small, which makes them perfect for wall hangings or to put into frames to display in your quilt studio. As they aren’t large projects, they won’t take long to stitch up and their sizes make them perfect for those wanted to dip their toes (finger) into hand embroidery.

 
Photo courtesy of Martingale Publishing

Photo courtesy of Martingale Publishing


The projects in Stitched So Sweet are seasonal and there are designs for spring, summer, fall and winter in each of the patterns in the book. Stitch one or all of them so you can rotate them throughout the year.

 
Photo courtesy of Martingale Publishing

Photo courtesy of Martingale Publishing


It can sometimes be tricky to quilt hand embroidery projects, so Tracy provides you with instructions on how to put the finished project into a picture frame so you can avoid the whole “how do I quilt this?” dilemma.

 
Photo courtesy of Martingale Publishing

Photo courtesy of Martingale Publishing


For a more detailed look at Stitched So Sweet, click on the image below. 

Are you a fan of hand embroidery? Let me know in the Comments below.

Creatively,

Kim's signature small aqua.jpg
 

P.S. Are you serious about improving your quilting? Do you want to connect with other committed quilters in a supportive, safe environment?  If you answered “yes” to these questions, you need to join The Quilter’s Way. The Quilter’s Way is the only quilting membership site that includes both training and an active, supportive online community. Don’t wait another day! Join now.

P.P.S. Did you know that you can sign up to receive emails full of FREE quilting goodness? Click here to receive FREE content directly in your email inbox every few weeks from Chatterbox Quilts. I know you'll be glad you did!

P.S. I am an Amazon affiliate and, if you purchase items by clicking through the links in this post, I will receive a small amount of commission. This doesn’t cost you any more $$$, but helps me to continue creating free content for you. Thanks!