Sewing Machines

Free Motion Quilting Feet for the Janome MC9450

Quilters are always asking me what feet and settings they should be using for free motion quilting on the Janome MC9450. It’s a good question because there are a variety of feet that are included with the Janome MC9450. Let’s take a look at the free motion quilting feet that come with the Janome MC9450 and learn what settings to use for each of them.

 
#1 FMQ Feet and Needle Plate.jpg
 

Let’s start with the most common free motion quilting foot, the PD-H foot. It’s often called the darning foot, but it works so well for free motion quilting. There are actually two of them included with the Janome MC9450 – a closed-toe foot and an open-toe foot. They both operate the same way and I like to use the open toe foot as it has great visibility. The only thing you need to be careful of when using an open-toe foot, is that you don’t get caught on only loose threads or on appliqué pieces.

 
PD-H Open-Toe Darning Foot

PD-H Open-Toe Darning Foot


There are three other free motion quilting feet that you can use with the Janome MC9450: the QO (free motion quilting open-toe foot), the QC (free motion quilting closed-toe foot), and the QV (free motion quilting zigzag foot). These are quite big names for such small feet! The QO and QC feet are, like the PD-H feet, the same except that one is open while the other is closed. Can you guess which is which?

 
QO Free Motion Quilting Open-Toe Foot

QO Free Motion Quilting Open-Toe Foot


The QV foot works really well for quilting around appliqué pieces as its saucer shape allows you to get really close to those pieces without worrying about getting snagged on them. All of these feet fit on the regular foot holder.

 
QV Free Motion Quilting Zigzag Foot

QV Free Motion Quilting Zigzag Foot


The last “free motion quilting” foot that comes with the Janome MC9450 is the QR, ruler foot. I never know whether to consider ruler quilting as free motion quilting, but I consider it the same as the machine is set up the same way as I would have it set up for free motion quilting. The big difference is that you will be using the QR foot with a ruler (make sure you are using one specifically for ruler quilting on your sewing machine; the quilting rulers you use for cutting will not work for this application). The QR foot is already attached to a foot holder and it is easy to distinguish with its high base.

 
QR Ruler Foot

QR Ruler Foot


There are certain settings to use with each of these feet and if you click on the image below, you can watch the video that explains all of the various choices.


 Give the various free motion quilting feet on the Janome MC9450 a try to see which one you like to use for various types of free motion quilting. There’s a free motion quilting foot for every application.

What free motion quilting foot do you like to use on your Janome MC9450? Leave a Comment below to let me know your preference.

 NOTE: If you have upgraded your Janome MC9400, you will also have these feet and the settings will be the same.

Creatively,

Kim's signature small aqua.jpg
 

P.S. Are you serious about improving your quilting? Do you want to connect with other committed quilters in a supportive, safe environment?  If you answered “yes” to these questions, you need to join The Quilter’s Way. The Quilter’s Way is the only quilting membership site that includes both training and an active, supportive online community. Don’t wait another day! Join now.

P.P.S. Did you know that you can sign up to receive emails full of FREE quilting goodness? Click here to receive FREE content directly in your email inbox every few weeks from Chatterbox Quilts. I know you'll be glad you did!

P.S. I am an Amazon affiliate and, if you purchase items by clicking through the links in this post, I will receive a small amount of commission. This doesn’t cost you any more $$$, but helps me to continue creating free content for you. Thanks!

Create a Cute Ornament with the Circular Sewing Attachment on the Janome MC9450

I love to collect buttons, but then never seem to quite know what to do with them. I want to have them displayed so I can enjoy them, so I decided to create a little hanging ornament to do just that. I used the Circular Sewing Attachment on the Janome MC9450 to stitch several circles around the button to showcase it, added a hanging loop and it was done!

 
Circular Sewing Attachment 9450 YT.jpg
 

If you’d like to use your Circular Sewing Attachment to create a similar ornament, here’s what you’ll need:

Fabric for the top

Batting

Fabric for the backing

Ribbon or trim for the hanging loop

Fabric stabilizer (Click here for information on using this with decorative stitches)

Decorative button(s)

Circular Sewing Attachment and Janome MC9450 sewing machine

 
Remote control not required for project ;)

Remote control not required for project ;)


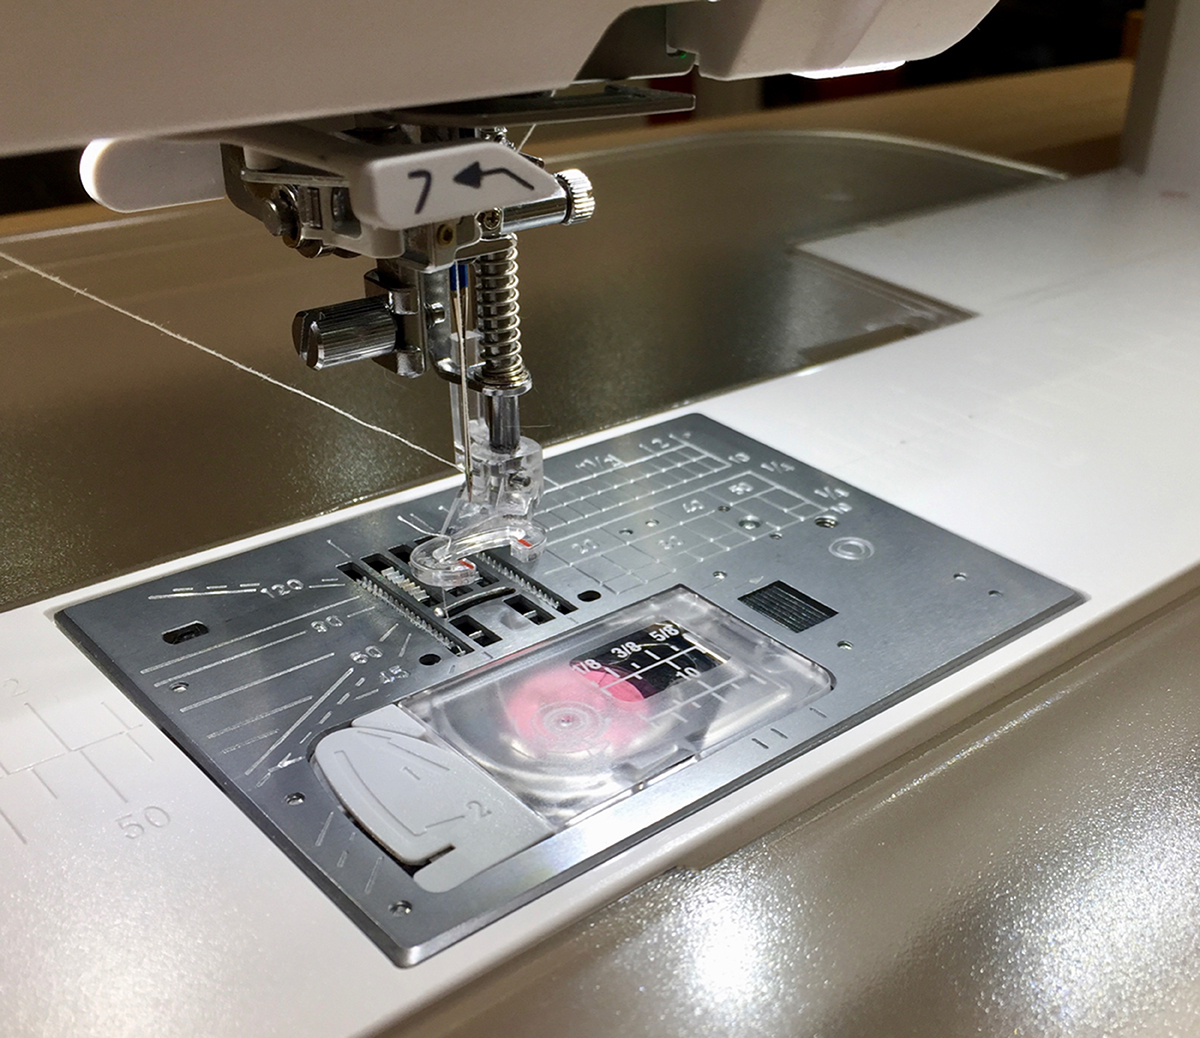
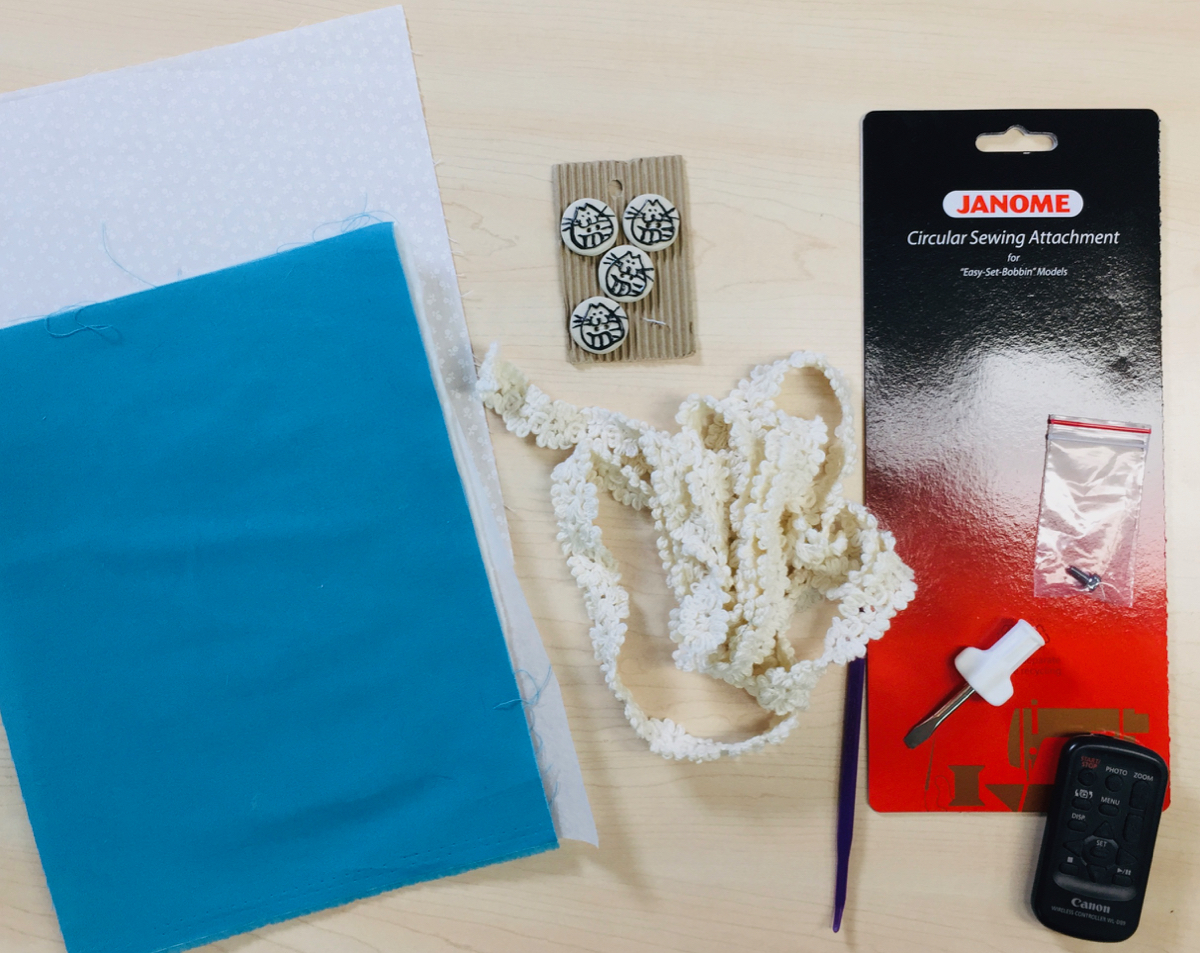
The Circular Sewing Attachment that fits the Janome MC9450 installs with a set screw that is included with this optional accessory. You just need to remove the bobbin cover, pop in the Circular Sewing Attachment and screw it down. Very quick and easy to do! The packaging for this accessory includes information on how to attach it and stitch with it, so be sure to keep it somewhere safe!

You’ll notice a black cap that is attached to the Circular Sewing Attachment. It covers the pin that you will use to attach your fabric to the accessory. Be sure to always replace this black cap as that pin is very sharp and you don’t want to injure yourself on it!

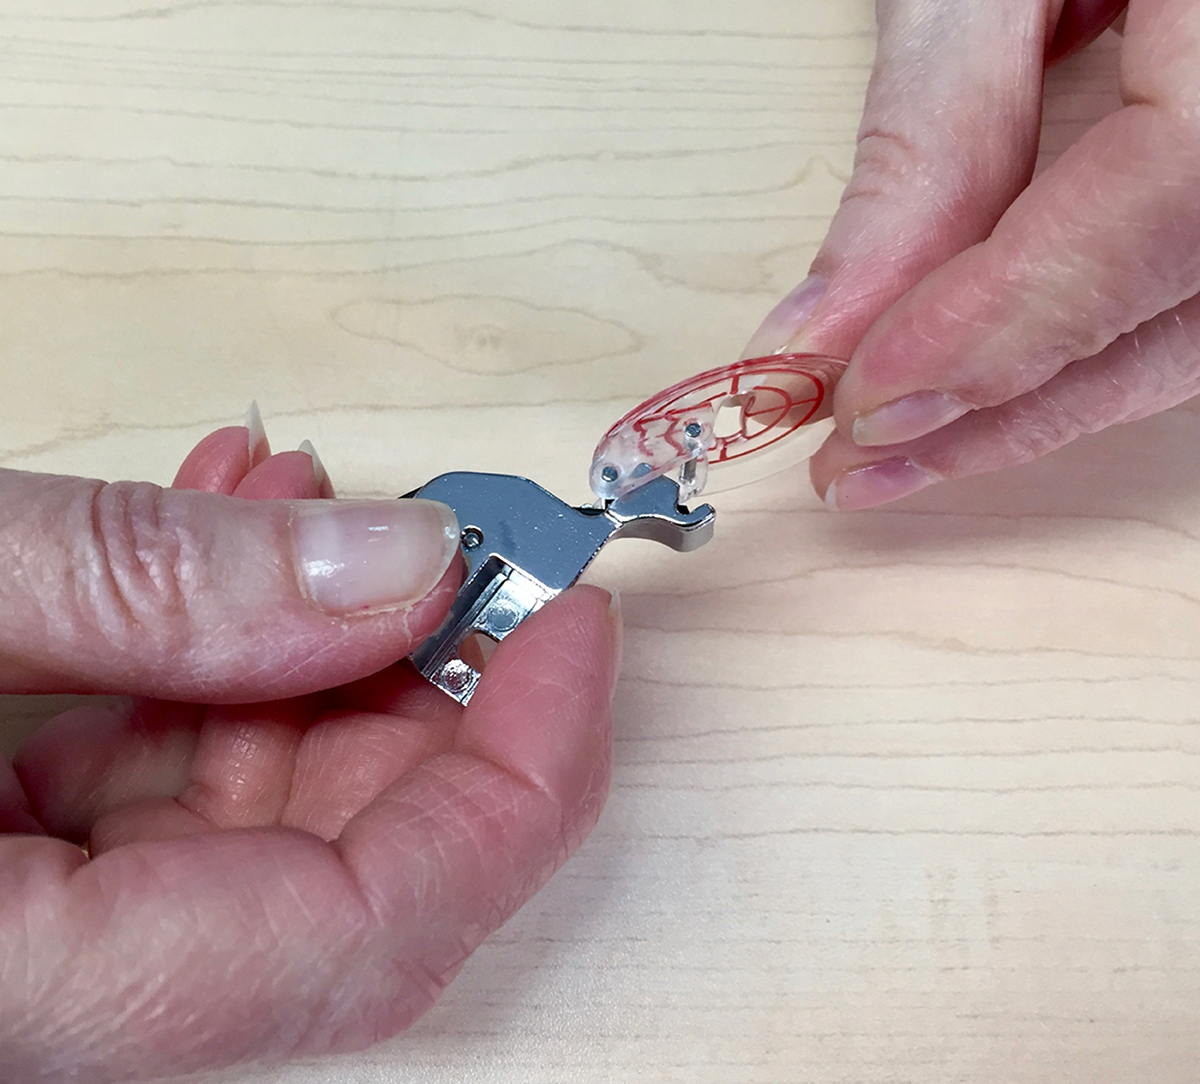
There is a locking mechanism on the Circular Sewing Attachment: you unlock this part, slide it along and then lock it before stitching your circle. The closer to the needle this part is, the smaller the stitched circle. I like to unlock the attachment and slide it away from the needle to attach the fabric with the pin. I can then move the attachment to the specific spot I want that will give me the stitch I want before locking it up.

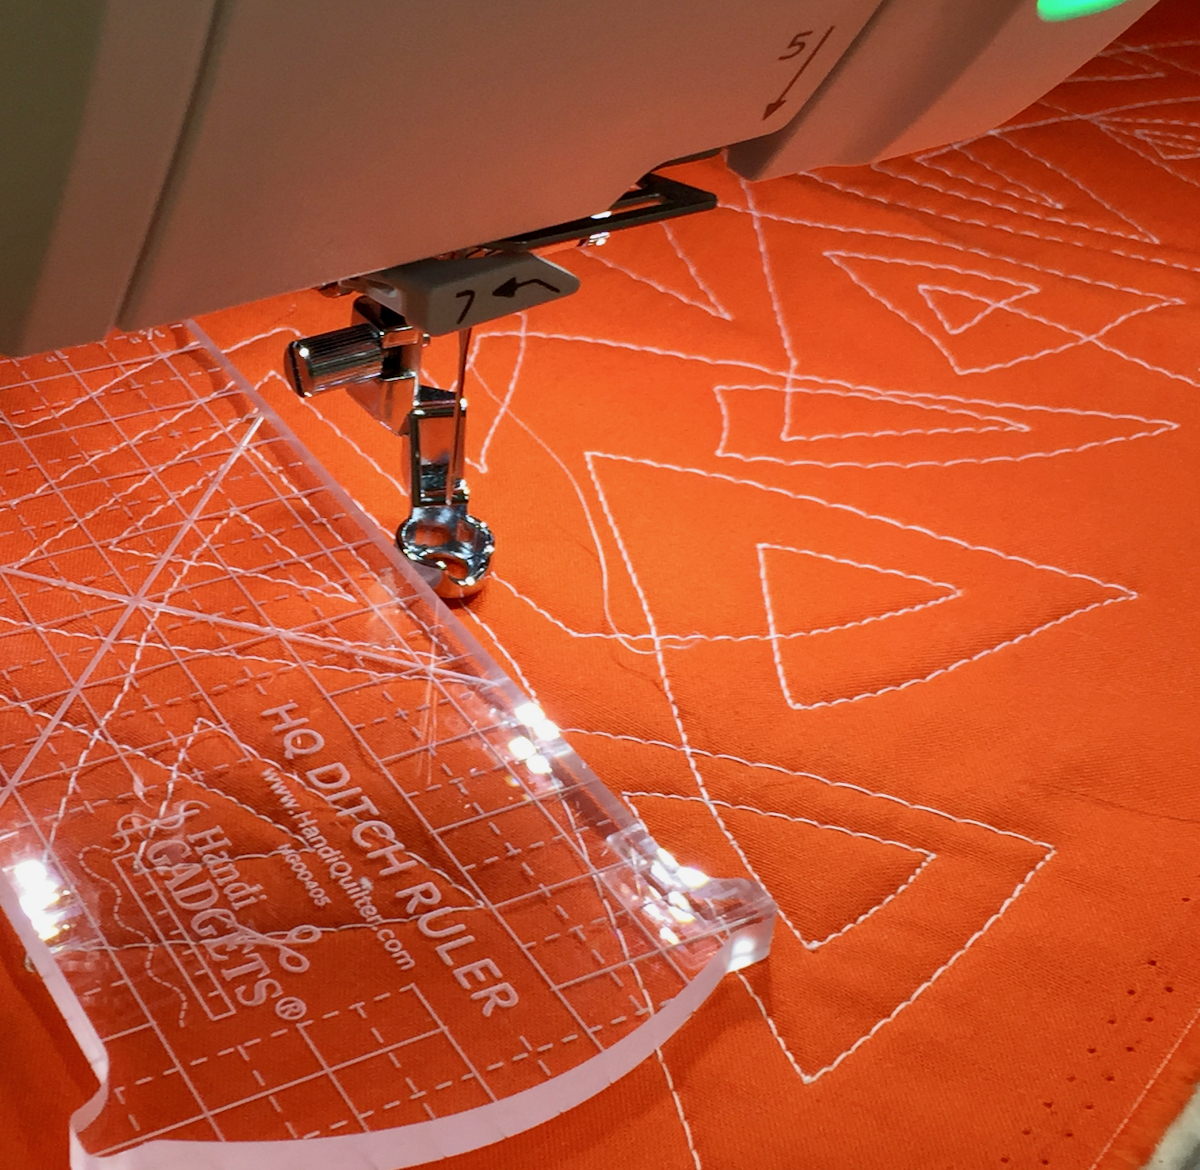
I like to use an open toe foot (F2) when stitching with the Circular Sewing Attachment so I can see that everything is stitching along as it should.

Choose and practice your decorative stitches to ensure that they are the width and length you want before stitching them to your project. Click here for information on saving your adjusted stitches on the Janome MC9450. Put fabric stabilizer behind the fabric or sandwich to ensure that the decorative stitches won’t scrunch up.

I like to use a larger piece of fabric than I actually need and trim it up after all of the stitching is done. This way I don’t run off the fabric as I increase the size of my circles.

Start with smallest circle and work out from there. Leave space between each circle and check to ensure that there is enough fabric so the circles won’t stitch off it.

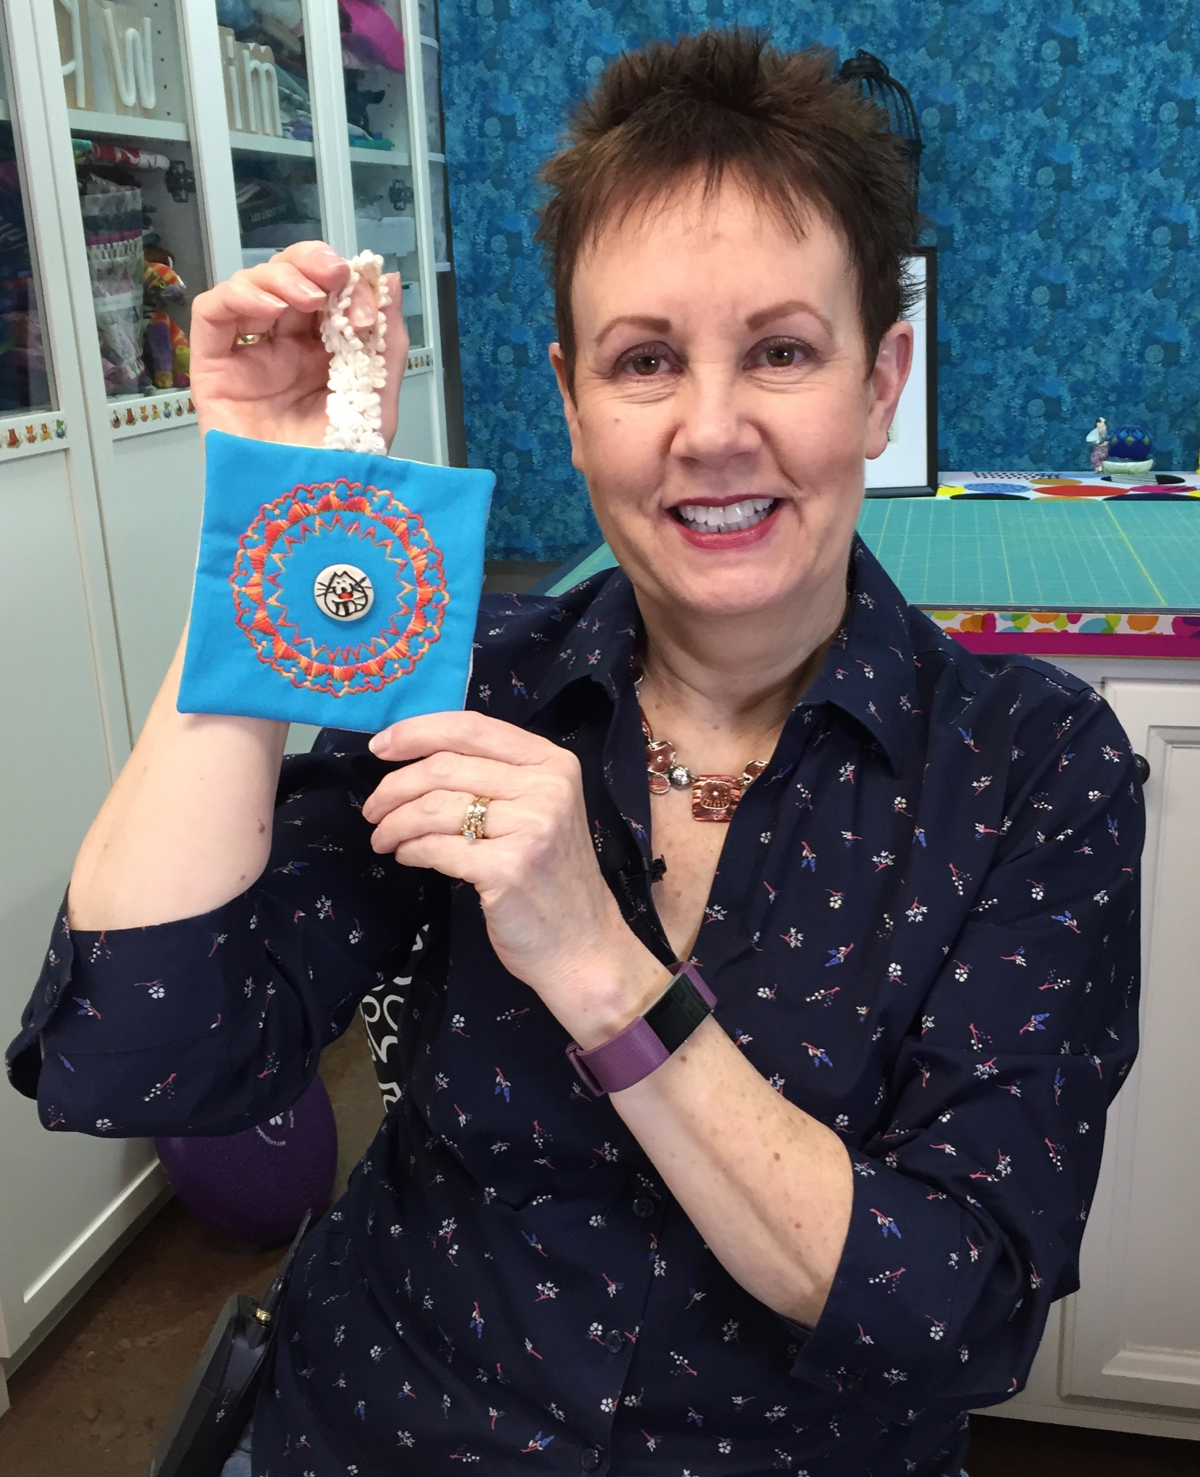
For this hanging ornament, I layered the top fabric, batting and fabric stabilizer before attaching this sandwich to the Circular Sewing Attachment. I stitched 3 circles, starting with the smallest one and working out. After I’d stitched the circles, I added the backing using the pillowcase method, ensuring that the hanging loop was inserted in the sandwich before stitching. While I could’ve hand stitched the opening closed, I chose to use a glue stick to seal this open seam and pressed it with the iron. Shhh, don’t tell the quilting police!

 
Circular Sewing Attachment 9450 - 5.jpg
 

I added my special button by using Button foot T on the Janome MC9450. For information on how to use the Janome MC9450 to sew on a button, click here.

For more information on creating an ornament with the Circular Sewing Attachment, click on the image below.


What other uses can you think of for the Janome Circular Sewing Attachment? Leave your ideas in the Comments below.

Creatively,

Kim's signature small aqua.jpg
 

P.S. Are you serious about improving your quilting? Do you want to connect with other committed quilters in a supportive, safe environment?  If you answered “yes” to these questions, you need to join The Quilter’s Way. The Quilter’s Way is the only quilting membership site that includes both training and an active, supportive online community. Don’t wait another day! Join now.

P.P.S. Did you know that you can sign up to receive emails full of FREE quilting goodness? Click here to receive FREE content directly in your email inbox every few weeks from Chatterbox Quilts. I know you'll be glad you did!

P.S. I am an Amazon affiliate and, if you purchase items by clicking through the links in this post, I will receive a small amount of commission. This doesn’t cost you any more $$$, but helps me to continue creating free content for you. Thanks!

Button Sewing on the Janome MC9450

Did you know that you can use your Janome MC9450 to sew buttons to your projects or garments? It’s so easy and saves hand sewing those buttons on – and I love to avoid this part of the process!

You can sew on a variety of button types, from flat buttons to those with shanks. I’ve tried both and the Janome MC9450 works really well in either situation. You’ll need to use the Button foot T for this technique. It’s the cute little open toe blue foot! Attach this to your foot holder and then to your Janome MC9450 and you’ll be almost ready to start.

To start, you’ll need a button and the garment or fabric on which you want to stitch the button. I guess this is fairly obvious, but still…

 
Circular Sewing Attachment 9450 - 1.jpg
 

You next need to use the “Button” setting on the Janome MC9450. You can find it in the Sewing applications area (the t-shirt icon). Scroll through the various options until you find the Button setting and select it. You’ll notice that there are two choices: one for flat buttons and one for buttons with a shank or for which you will create a shank with thread. If you choose the shank button option, you’ll need to use the button shank plate, which you will place between the fabric and the button. In my particular situation, I didn’t need to use this as I was attaching a flat button.

Before you start stitching, the Janome MC9450 will ask you to drop the feed dogs. Once you do this, you are ready to go!

 
Circular Sewing Attachment 9450 - 2.jpg
 

Decide where you want to attach the button, and, using the handwheel, slowly drop the needle into the left button hole. Again, using the handwheel, drop the needle into the right button hole. You may need to adjust the stitch width to ensure that the needle will go into the buttonhole and not into the button! Once you are sure that the stitch width is appropriate for your button, you can use your foot pedal to stitch on the button. The Janome MC9450 will automatically stop stitching when the button is secure. Cut the thread and you are done.

To see this process in detail, click on the image below.


Creatively,

Kim's signature small aqua.jpg
 

P.S. Are you serious about improving your quilting? Do you want to connect with other committed quilters in a supportive, safe environment?  If you answered “yes” to these questions, you need to join The Quilter’s Way. The Quilter’s Way is the only quilting membership site that includes both training and an active, supportive online community. Don’t wait another day! Join now.

P.P.S. Did you know that you can sign up to receive emails full of FREE quilting goodness? Click here to receive FREE content directly in your email inbox every few weeks from Chatterbox Quilts. I know you'll be glad you did!

P.S. I am an Amazon affiliate and, if you purchase items by clicking through the links in this post, I will receive a small amount of commission. This doesn’t cost you any more $$$, but helps me to continue creating free content for you. Thanks!