Sewing Machines

Favorite Stitch Adjustment Feature on the Janome MC9450

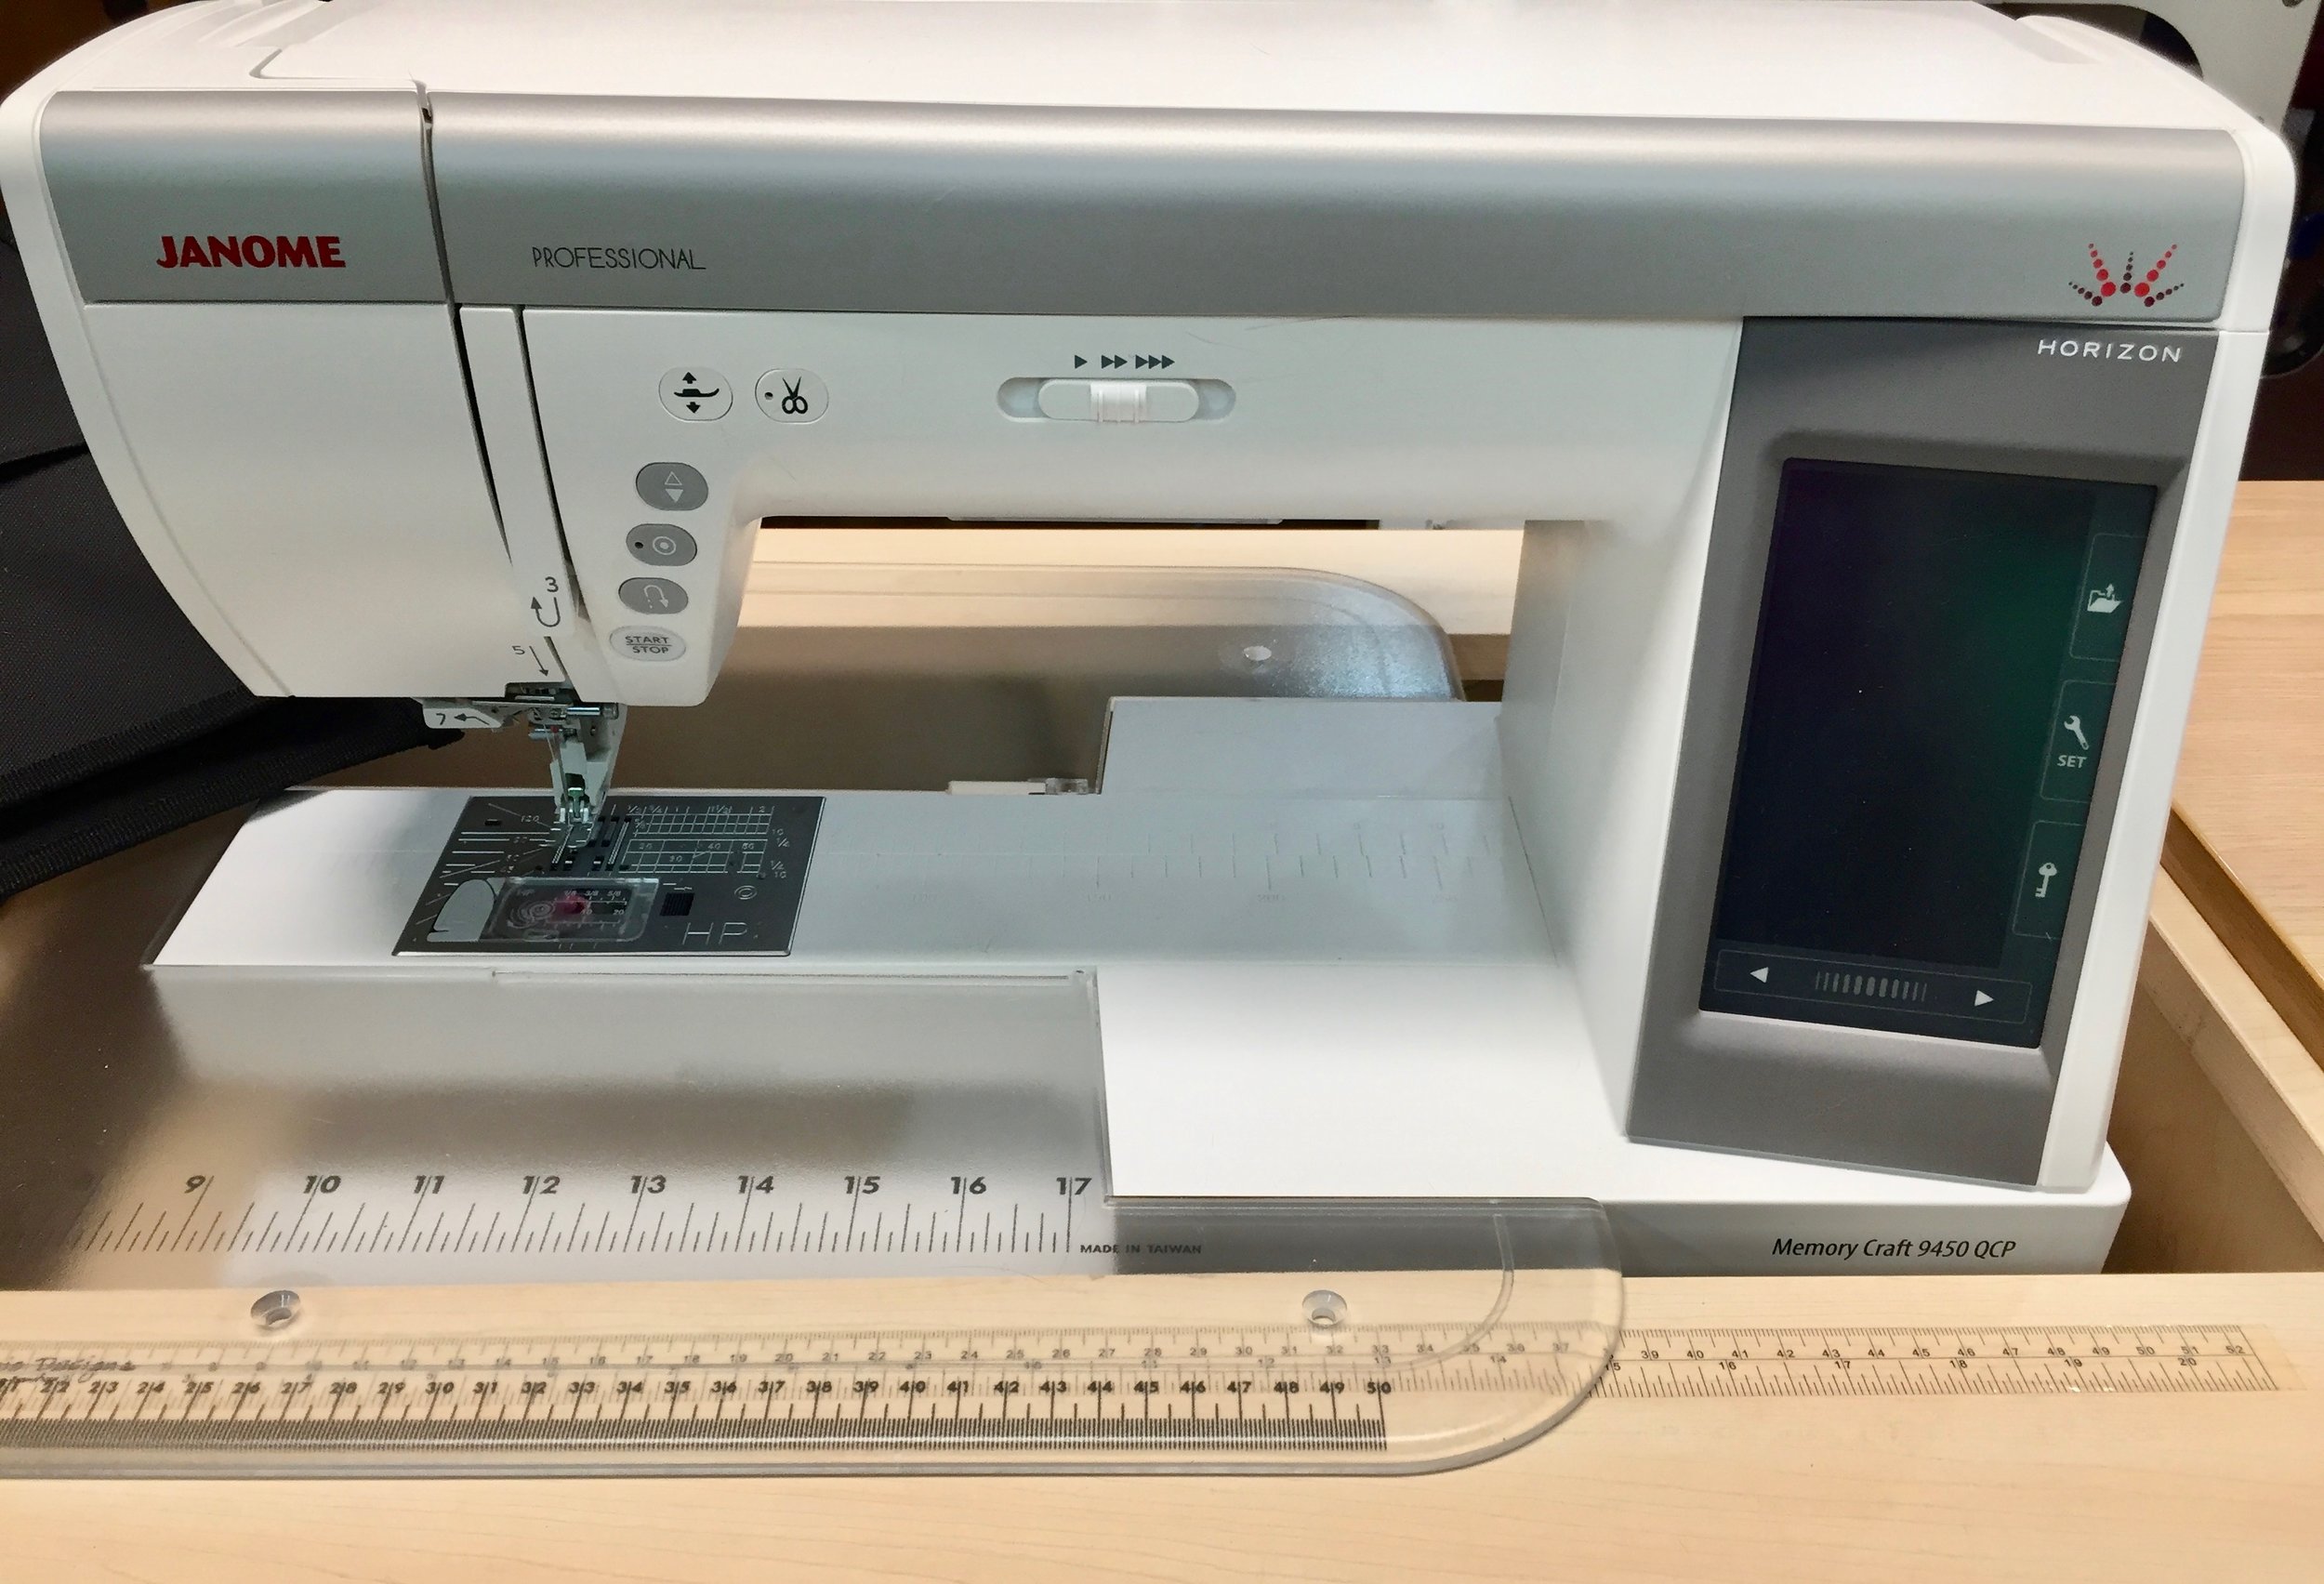
You know that you can adjust the width and length on most of the decorative stitches on the Janome MC9450, right? But… do you know how to save those adjusted stitches? It’s easy! Let me show you how it’s done.

All of the stitches on the Janome MC9450 have a default setting which will show up when you select a particular stitch. This is the optimal setting for this stitch, but you can adjust many of the stitches on the sewing machine. Once you have made your adjustments you can save these as “Favorite Stitches”, but this setting has to first be turned on in the Settings area.

 
Janome MC9450 top stitches - 1.jpg
 

To activate the Favorite Stitch Adjustment feature on the Janome MC9450, click on “Set” on your display screen. Next, go to the second sewing machine icon in the Settings menu and click on it. You will then see a variety of options that are available on several pages. Use the arrow at the bottom of the display screen to go to the fourth page where you will see “Favorite Stitch Adjustment”. Be sure that it is set to “On”. If it is set to “Off”, you won’t be able to save any of the adjustments you’ve made to stitches on the machine.

 
Janome 9450 display - 1.jpg
 

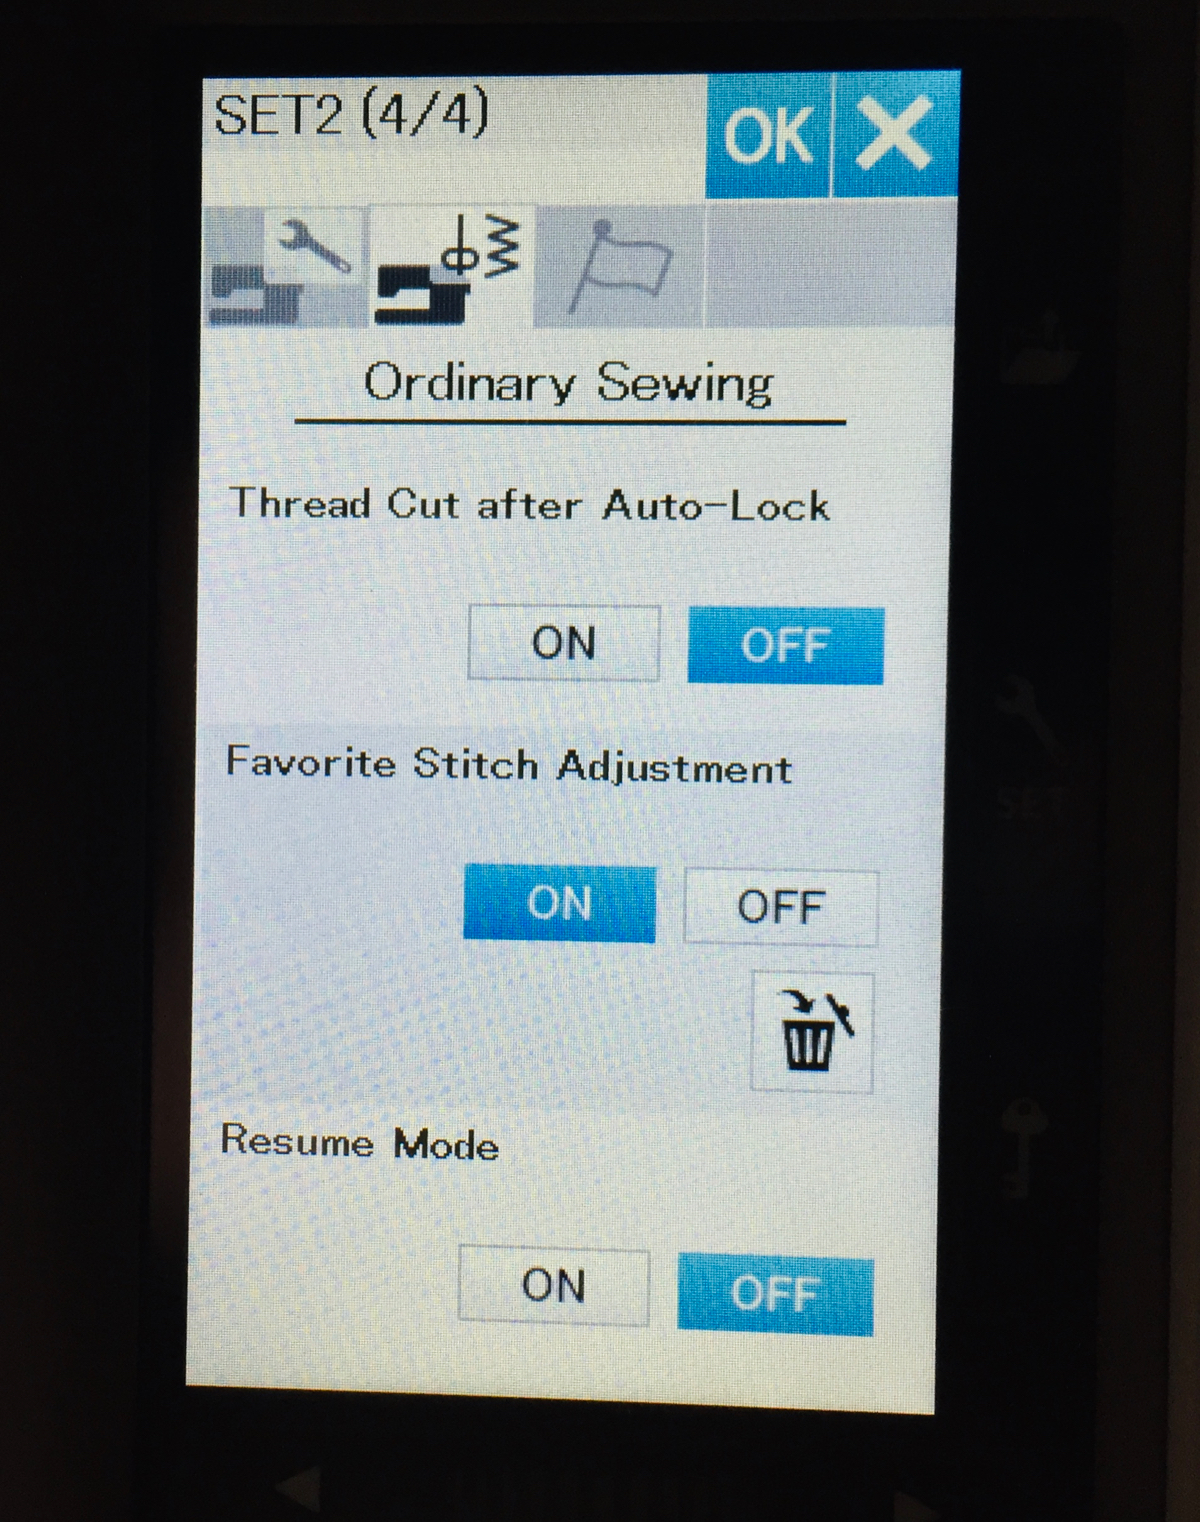
Exit this menu area by clicking “OK” at the top of the display screen and then you are ready to go!

To see exactly how to save your “new” stitch, click on the image below.


Do you use the “Favorite Stitch Adjustment” feature on your Janome MC9450? Let me know in the Comments below.

Creatively,

Kim's signature small aqua.jpg
 

P.S. Are you serious about improving your quilting? Do you want to make new quilting friends in a supportive, safe environment?  If you answered “yes” to these questions, you need to join The Quilter’s Way. The Quilter’s Way is the only quilting membership site that includes both training and an active, supportive online community. Don’t wait another day! Join now.

P.P.S. Did you know that you can sign up to receive emails full of FREE quilting goodness? Click here to receive FREE content directly in your email inbox every few weeks from Chatterbox Quilts. I know you'll be glad you did!

P.S. I am an Amazon affiliate and, if you purchase items by clicking through the links in this post, I will receive a small amount of commission. This doesn’t cost you any more $$$, but helps me to continue creating free content for you. Thanks!

What Feet and Accessories are Included with the Janome MC9450?

Have you ever bought a sewing machine and then needed to buy additional feet or accessories as they weren’t included with the machine? I’m sure we’ve all been there, but this isn’t the case with the Janome MC9450. This machine comes pre-loaded with all the feet you’ll need whether you are a quilter or another type of sewist.


As a quilter, you are looking for a machine that has an accurate ¼” foot, a walking foot, and a free motion foot The Janome MC9450 has you covered with an assortment of feet in all of these areas. There are several foot choices for stitching that perfect ¼” seam (any deviations are definitely operator error in my case!) from the O foot – with or without seam guide - to the definitely-my-favourite HP foot and needle plate.

If you like to use a walking foot to add borders or binding, you now have the choice of either the AD Dual Feed foot or the new HP2 AcuFeed Flex professional grade foot. You’ll quickly become obsessed with this foot which is the perfect combination of a ¼” foot as well as a walking foot. It doesn’t get any better than this for stitching on long borders or binding strips since that perfect ¼” seam is guaranteed.


When it comes to free motion or ruler quilting, again, you’ll have all the feet you’ll need with the Janome MC9450. Whether you want to do some ruler quilting with the QR Ruler Work foot or need to do some free motion quilting around an appliqué with the QV Free Motion Quilting Zigzag foot (yes, it’s for variable zigzag stitching, but its dish-shape works so well to avoid catching on appliqué pieces) , the Janome MC9450 comes pre-packaged with these and many more free motion friendly feet.

What if you’re a garment sewist? No problem! The Janome MC9450 has feet for that purpose too. The HP AcuFeed Flex foot can help when you want walking foot capability in a narrow area. Need to add a zipper to your dress or pillowcase? The Janome MC9450 comes with the E Zipper foot that allows you to stitch zippers with ease (i’ve used it for pouches). The Janome MC9450 includes the Automatic Buttonhole Foot  R with a Stabilizer Plate that allows you to create different buttonhole styles. You’ll also receive the Button Sewing Foot T so you can use the Janome MC9450 to sew on your buttons – no hand stitching required!

If you need help with blind stitching your hems (no one wants to see the stitches on hems!), you’ll find the Blind Hemming foot G very helpful. The Cloth Guide will help ensure that your seams are stitched exactly where they need to be and it is included with the Janome MC9450.


Now you’re probably wondering how you are going to store all of these feet and accessories. Again, the Janome MC9450 has you covered with a two-sided accessory storage bin that fits around the machine bed. New with this machine is the separate accessory case which has a lift-out tray and additional storage underneath it. Lots of room for the feet and accessories that came with the Janome MC9450 and room for any additional accessories you might purchase.

I’ve only mentioned a few of the feet and accessories included with the Janome MC9450. Click on the image below to see all that you’ll receive when you purchase the Janome MC9450. You’re going to be amazed!

Whether you’re a quilter or another type of sewist, I’d like to know what your go-to foot or accessory is on your sewing machine. Let me know in the Comments below.

Creatively,

Kim's signature small aqua.jpg
 

P.S. Are you serious about improving your quilting? Do you want to connect with other committed quilters in a supportive, safe environment?  If you answered “yes” to these questions, you need to join The Quilter’s Way. The Quilter’s Way is the only quilting membership site that includes both training and an active, supportive online community. Don’t wait another day! Join now.

P.P.S. Did you know that you can sign up to receive emails full of FREE quilting goodness? Click here to receive FREE content directly in your email inbox every few weeks from Chatterbox Quilts. I know you'll be glad you did!

P.S. I am an Amazon affiliate and, if you purchase items by clicking through the links in this post, I will receive a small amount of commission. This doesn’t cost you any more $$$, but helps me to continue creating free content for you. Thanks!

It's Here: the Tapering Feature on the Janome MC9450!

One of the new features on the Janome MC9450 is the tapering function. You’ll notice it right away when you turn on the machine as it’s the “new button on the block”, I mean, on the display menu.

 
Janome MC9450 tapering menu.jpg
 

I was quite excited when I found out that the Janome MC9450 had this feature and was eager to try it out to see how it worked. Let me explain what it is and how to use it.

The tapering function works with some of the decorative stitches on the Janome MC9450, allowing you to taper the beginning and/or end of the stitch at a specific angle.

While you can’t use the tapering feature with every decorative stitch, you can use it with 40 of them. As with any decorative stitch, you have the ability to increase or decrease the stitch width or length, although there are some limitations when doing this. The nice thing about using the tapering feature is that you can preview it on the display screen on the Janome MC9450 before you stitch it out.

It’s difficult to accurately explain the various choices you can make when using the tapering feature and how well it works, so click on the image below to learn all about it.

 You might wonder when you would use this feature. Well, if you are a quilter who likes to do appliqué, you’re going to love the tapering function! Rather than having to decrease your stitch width as you approach a corner or a point, you’ll be able to use the tapering feature and have it automagically come to an angle and then start up the next side, matching the first part of the stitch to where it previously finished. It’s just like magic!

 
Tapering feature frames.jpg
 

If you are a garment sewist, you’ll be able to use the tapering feature in a similar way when adding decorative stitches to a garment. You could also “create” new stitches by using the tapering feature to end a line of stitching and then start it again with the same angle – sort of a narrow and then expand again look. You could also use the tapering feature to create a frame around a specific part of a garment or around a particular design in the fabric.

Once you’ve created a decorative stitch using the tapering feature, you can actually save it on your Janome MC9450 or on a USB stick. You can also mirror the stitch that you have created.

I’d love to know what uses you can think of for the tapering function on the Janome MC9450. Let me know in the comments below.

Creatively,

Kim's signature small aqua.jpg
 

P.S. Are you serious about improving your quilting? Do you want to connect with other committed quilters in a supportive, safe environment?  If you answered “yes” to these questions, you need to join The Quilter’s Way. The Quilter’s Way is the only quilting membership site that includes both training and an active, supportive online community. Don’t wait another day! Join now. The Quilter’s Way is the only quilting membership site that includes both training and an active, supportive online community. Don’t wait another day! Join now.

P.P.S. Did you know that you can sign up to receive emails full of FREE quilting goodness? Click here to receive FREE content directly in your email inbox every few weeks from Chatterbox Quilts. I know you'll be glad you did!

Book Review: You and Your Sewing Machine

You might think that You and Your Sewing Machine wouldn’t be for you because you don’t get down and dirty with your sewing machine, but you’d be wrong. This isn’t a manual on how to repair your sewing machine, but more of an informational guide to your sewing machine. It will help you better understand how it works and help you solve issues when it isn’t performing as it should.

 
Image courtesy of amazon.com

Image courtesy of amazon.com


 There is a lot of helpful information in this book and before you again start thinking that this will be a boring, technical manual, I think you’ll find that You and Your Sewing Machine is a really interesting read.

First of all, I love it that Bernie uses the word “sewist” rather than “sewer” in the title. Just sounds so much more inclusive and elegant.

As Bernie explains in the Introduction, he has been a technician for over 40 years and has noticed that there is a very personal relationship between a sewist and his/her sewing machine. In the book he is trying to:

“help you gain a better understanding of your sewing machine – its needs and what it is trying to communicate to you.”

If you’ve been sewing on a particular machine for a long time, you’ll become attuned to its “everything is great and I’m loving stitching with you” noises and its “something doesn’t feel quite right and I need help” noises. This book will help you to notice when things aren’t right with your machine and explain how you can ensure that it is kept running smoothly and what to do when it isn’t. 

The book is divided into 3 sections: Getting to Know Your Sewing Machine, Maintaining Your Good Relationship, and Problems and How to Fix Them.

 
Image courtesy of amazon.com

Image courtesy of amazon.com


In the first section, Bernie explains the differences between Manual, Electronic and Computerized sewing machines. I think many of us think of electronic and computerized sewing machines as being the same thing, but, as you’ll find out in You and Your Sewing Machine, there is a big difference. Bernie explains additional features on sewing machines and has a section on Questions to ask when buying a sewing machine at the end of this section, which I love! So handy!

In the second section, Bernie goes into extensive detail on sewing machine feet and when and when not to use them. I’m sure that many of us have never had anyone explain this to us before. I found this section very informative and know that I’ll be referring to it in the future.

 
Image courtesy of amazon.com

Image courtesy of amazon.com


He continues on to explain about maintaining your machine so you can avoid expensive repairs. There are lots of photos showing you exactly how to clean various areas on your machine and when and where you should apply oil.

I know that most readers will find the last section on solving problems to be a lifesaver – or machine saver. Let’s face it, our machines don’t run perfectly all the time and this book is great reference for when things don’t go as we hoped. Even if this was the only section in the book that you ever looked at, it would be well worth buying this book! From tension issues to poorly wound bobbins, Bernie covers it all.

The last part of the You and Your Sewing Machine is a list of problems and possible causes and solutions. This guide will be something that you will constantly refer to when you encounter an issue with your sewing machine. 

The book is full of detailed photos and up-close shots so you can easily see the various parts and problems to which Bernie is referring.

What I really liked about this book was how the material was presented logically and in an easy to understand format. I like how Bernie explains how various parts on the sewing machine work so that you understand first and are then better able to determine what might cause a problem and how to fix it. I believe that understanding a sewing machine first is the best way to start off your relationship with it. If you don’t understand how tension works, you won’t know why it’s important to thread your machine with the presser foot up (in most cases).

Once you understand how your sewing machine operates, you’ll be better set up to keep it running smoothly.

For a closer look at You and Your Sewing Machine, click on the image below. 

If you are a true sewist, you’ll definitely want to have You and Your Sewing Machine in your library.

Creatively,

Kim's signature small aqua.jpg
 

P.S. Are you serious about improving your quilting? Do you want to connect with other committed quilters in a supportive, safe environment?  If you answered “yes” to these questions, you need to join The Quilter’s Way. The Quilter’s Way is the only quilting membership site that includes both training and an active, supportive online community. Don’t wait another day! Join now.

P.P.S. Did you know that you can sign up to receive emails full of FREE quilting goodness? Click here to receive FREE content directly in your email inbox every few weeks from Chatterbox Quilts. I know you'll be glad you did!

P.S. I am an Amazon affiliate and, if you purchase items by clicking through the links in this post ,I will receive a small amount of commission. This doesn’t cost you any more $$$, but helps me to continue creating free content for you. Thanks!

New Janome MC9450 Overview

  I’m thrilled to introduce you to my newest sewing machine: the Janome MC9450. Maybe I should say that Victor would like to introduce you to the new machine!

 
- 1.jpg
 

This wonderful new machine has so many wonderful features that it’s difficult to say which is my favourite. You can expect to see more videos and blogposts about the Janome MC9450 in the future, but today I just want to give you an overview of some of its helpful features.

 
-+17.jpg
 

The first thing I noticed is the excellent lighting on the Janome MC9450. There are LED lights in the throat space and with the pull out High Light, there won’t be any dark areas when you are sewing or quilting with this machine. I definitely need lots of light when I’m quilting and the Janome MC9450 certainly delivers in this area! No additional clip on or set-up-next-to-the-machine lights required.

 
Janome 9450 High Light - 1.jpg
 

In addition to good lighting, I need a sewing machine that threads itself. Okay, there aren’t really any of those (yet) on the market, but the Janome MC9450 comes close with its superior needle threader. This machine has an upgraded thread guide that feeds the thread right into the needle threader and it works every time. I consider a good needle threader an essential feature on a sewing machine due to my monovision which makes threading a sewing machine needle quite difficult for me. This may be my most favourite feature on the Janome MC9450.

As a quilter, I need a good ¼” foot, a walking foot and a ruler foot and the Janome MC9450 comes standard with all of these feet and many more. There are several choices for the ¼” foot from the O foot with a guide to the O foot without a guide, as well as the HP foot and needle plate. The Janome MC9450 comes with the AD AcuFeed Flex foot – what I call a walking foot – and an additional narrower AcuFeed Flex HP2 foot which combines the technology of the AcuFeed Flex system as well as a ¼” foot. The perfect combination when I’m sewing on borders or binding strips.


The Janome MC9450 comes with so many feet and accessories that I was worried about storage, but I shouldn’t have been as this machine comes with 3 storage areas. There is the storage container that fits around the machine bed and opens up with 2 storage areas. In addition, the Janome MC9450 comes with a separate box that holds all of the remaining accessories and has room for those additional ones that you might want to purchase.


One of the new features that I haven’t yet had a chance to try is the Tapering function. I know that this is going to be so handy for garment sewists and quilters too. I love doing fusible web appliqué and can see how helpful the Tapering function will be in reducing the width of my stitches when I am coming to a point on an appliqué. I’m looking forward to exploring this function and will let you know all about it in next month’s Janomelife blogpost.

Click on the image below to watch a video highlighting these, and more, features on the Janome MC9450.

More videos on the Janome MC9450 will be on my blog and YouTube channel, so be sure to subscribe so you’ll be notified when new blogposts are available.

Creatively,

Kim's signature small aqua.jpg
 

P.S. Are you serious about improving your quilting? Do you want to connect with other committed quilters in a supportive, safe and fun environment?  If you answered “yes” to these questions, you need to join The Quilter’s Way. The Quilter’s Way is the only quilting membership site that includes both training and an active, supportive online community. Don’t wait another day! Join now.

P.P.S. Did you know that you can sign up to receive emails full of FREE quilting goodness? Click here to receive FREE content directly in your email inbox every few weeks from Chatterbox Quilts. I know you'll be glad you did!

P.S. I am an Amazon affiliate and, if you purchase items by clicking through the links in this post ,I will receive a small amount of commission. This doesn’t cost you any more $$$, but helps me to continue creating free content for you. Thanks!