
CHATTERBOX QUILTS’ BLOG
Helping Quilters Learn and Improve
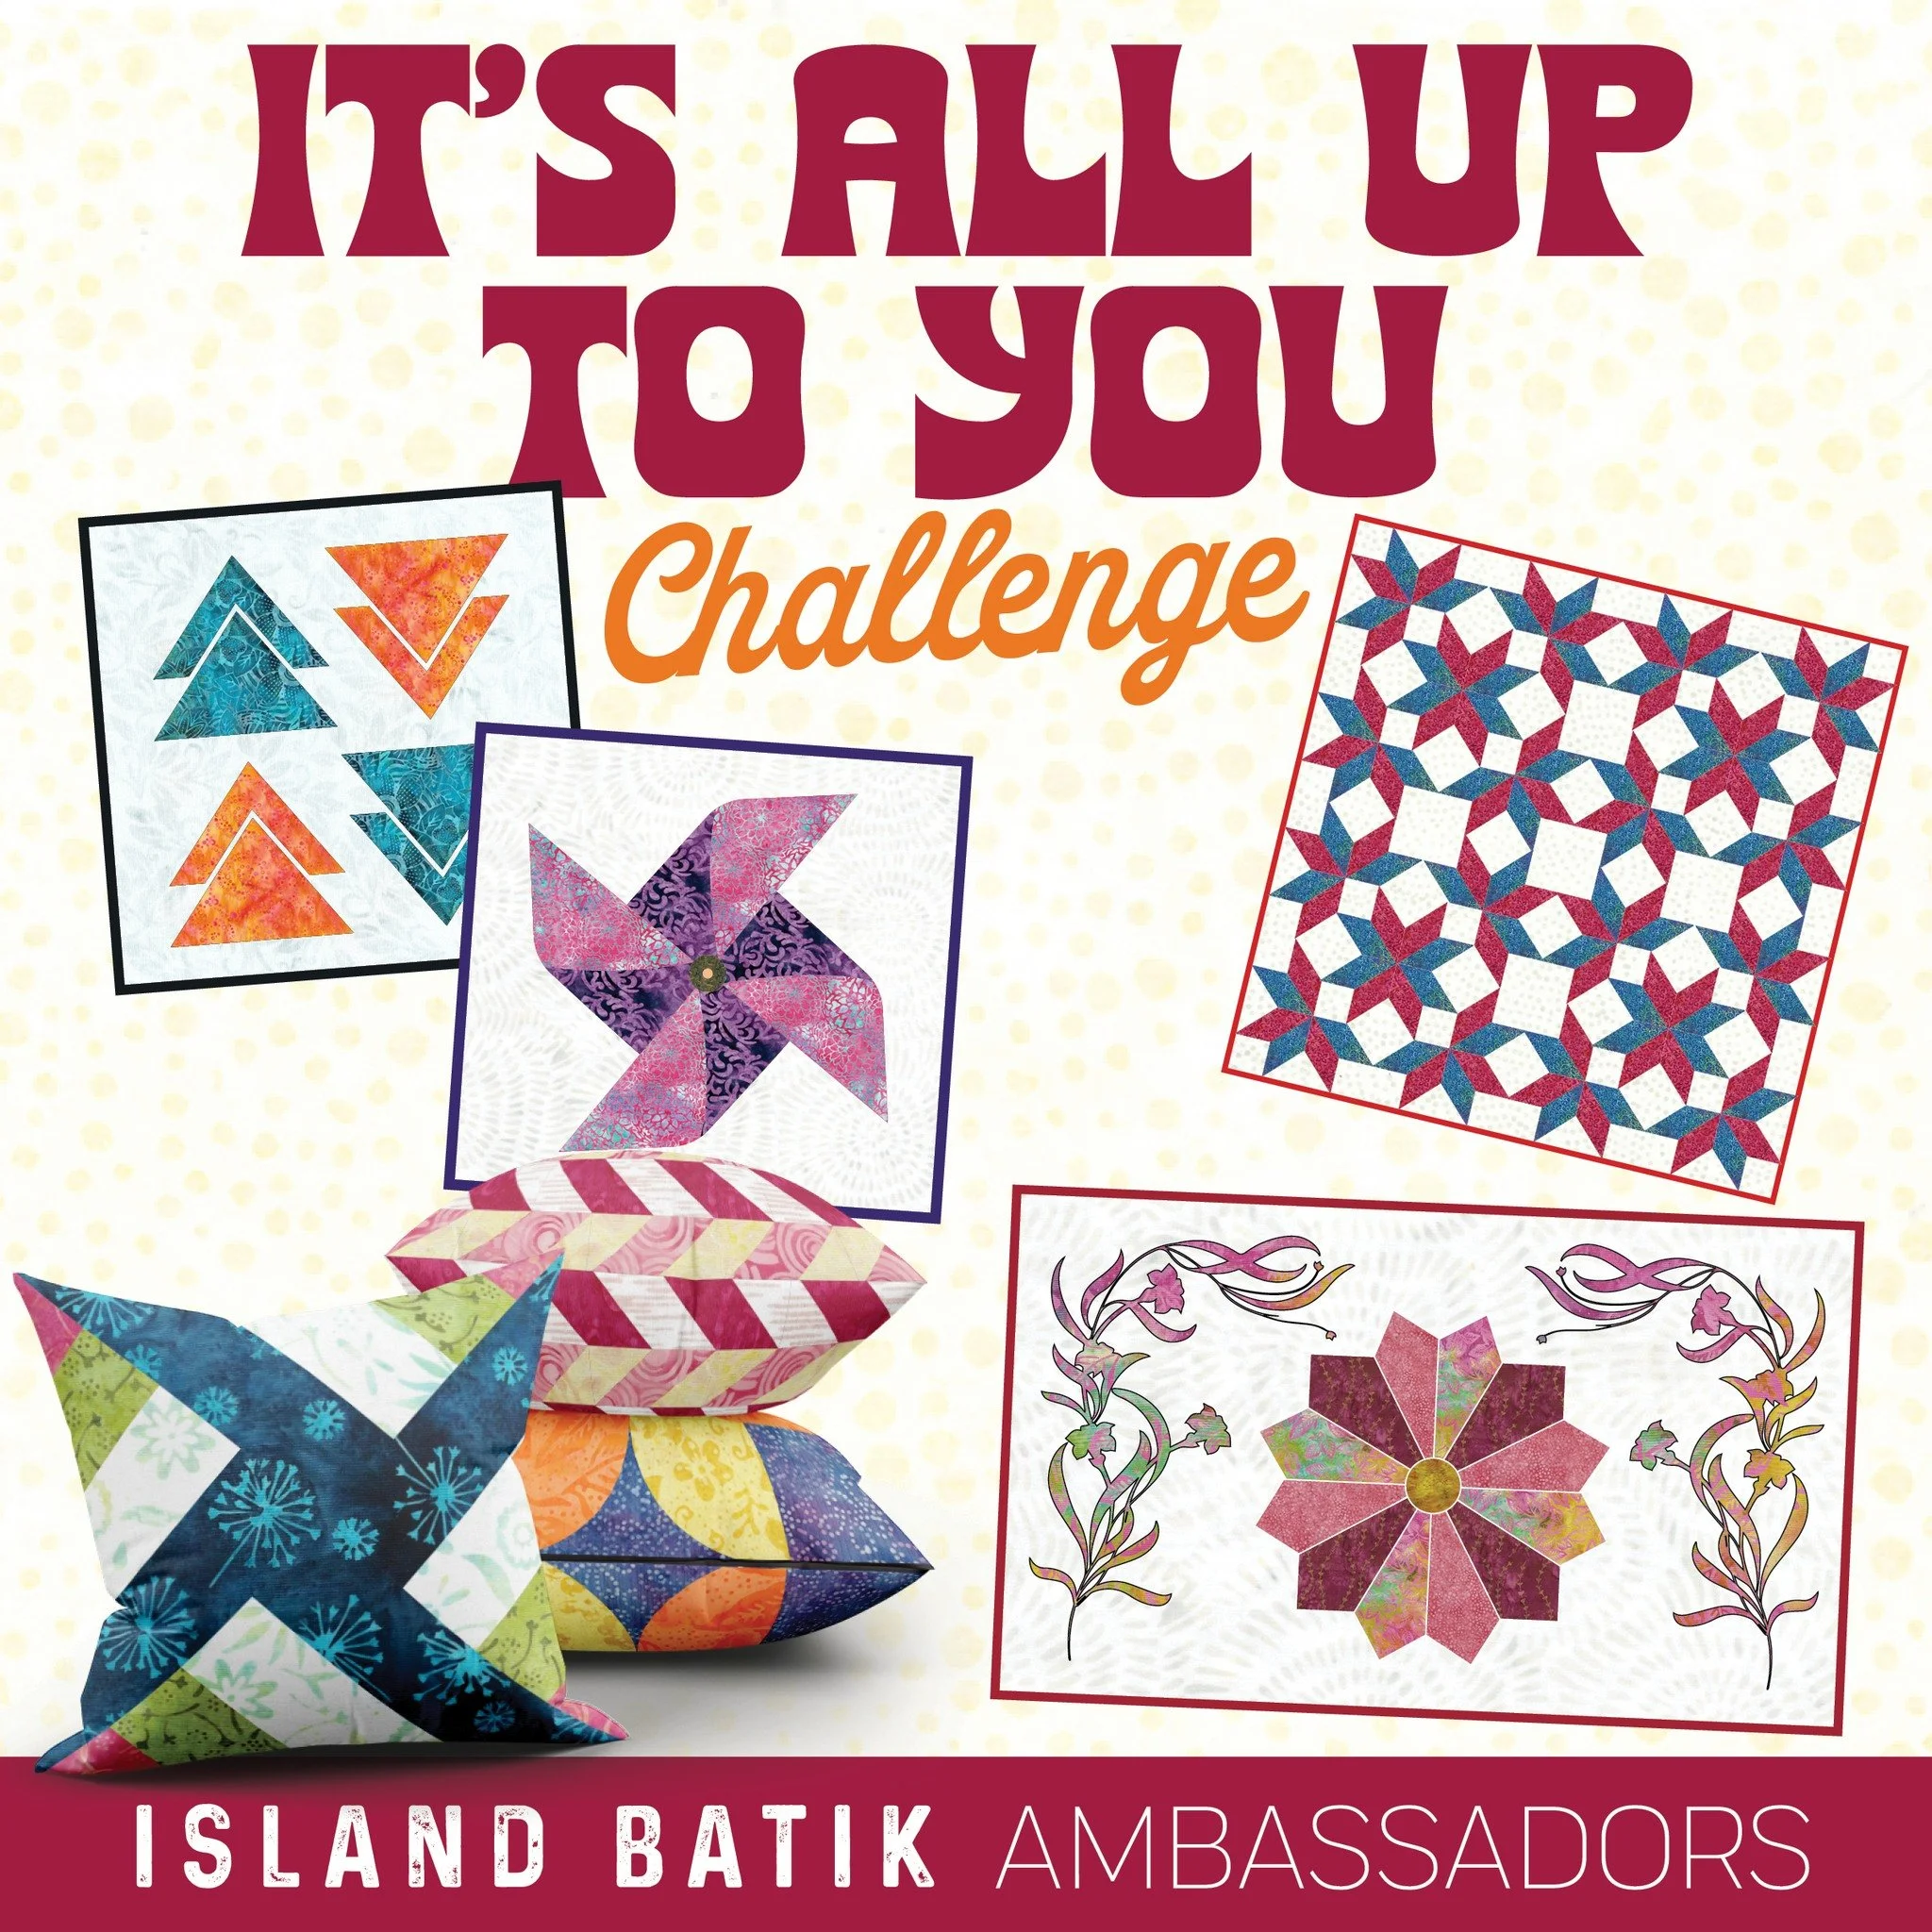
Island Batik Ambassador Challenge for December 2025 - It’s All Up to You!
Welcome to December and the final project that I’ve created as an Island Batik Ambassador. Our theme this month was “It’s All Up to You” so the possibilities were (almost) endless!
This was the perfect opportunity to dive into some of the previous fabric collections that I received from Island Batik of Lumin Fabrics this year and to also use some of their foundation fabrics.
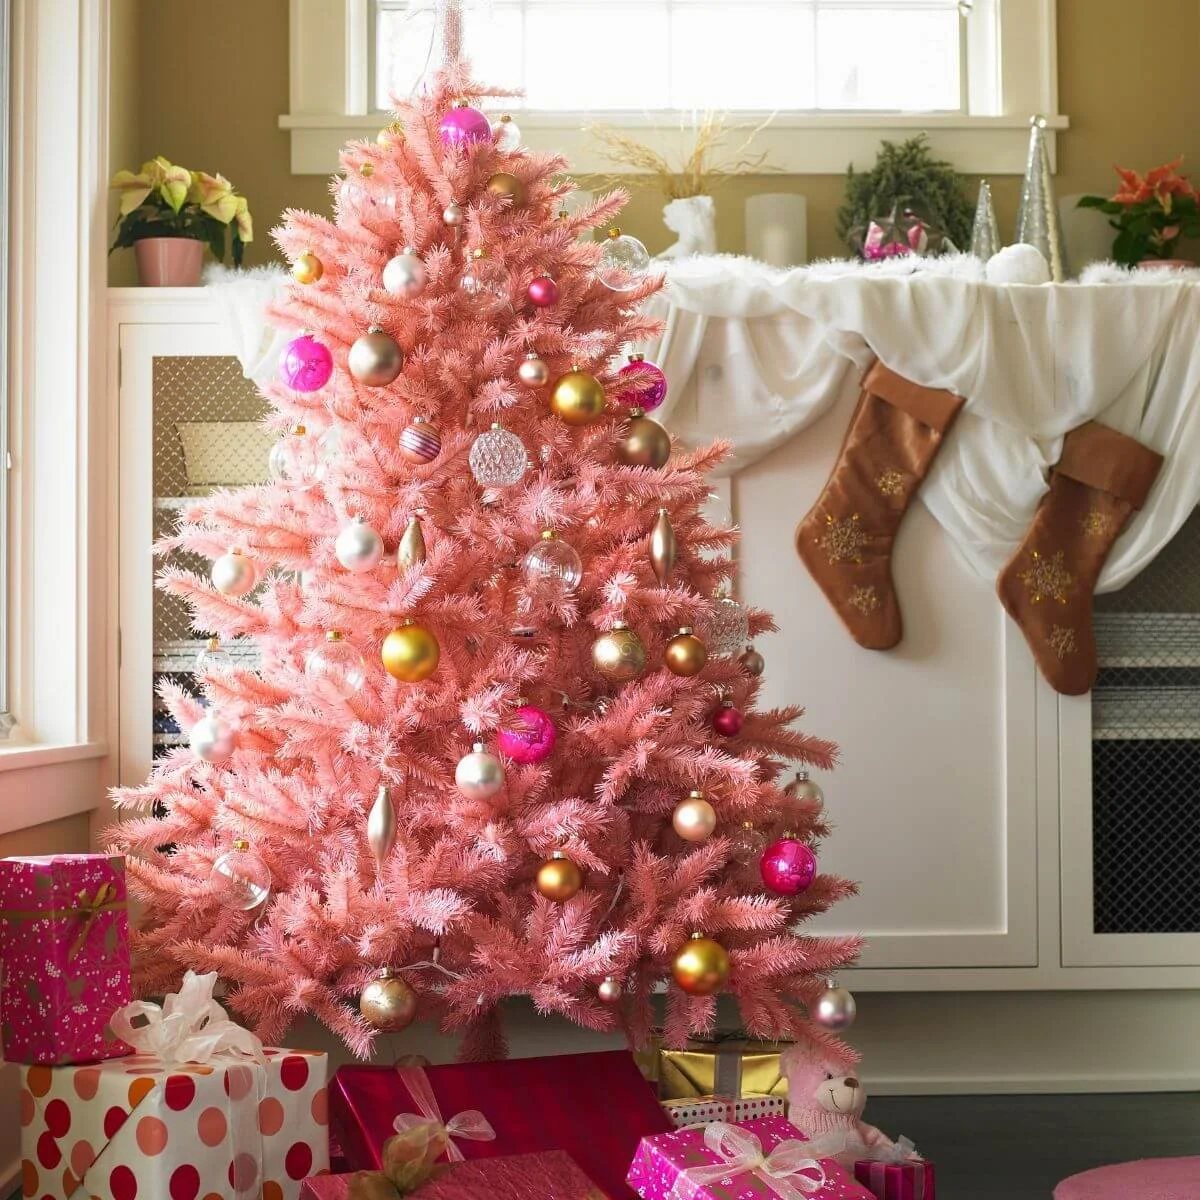
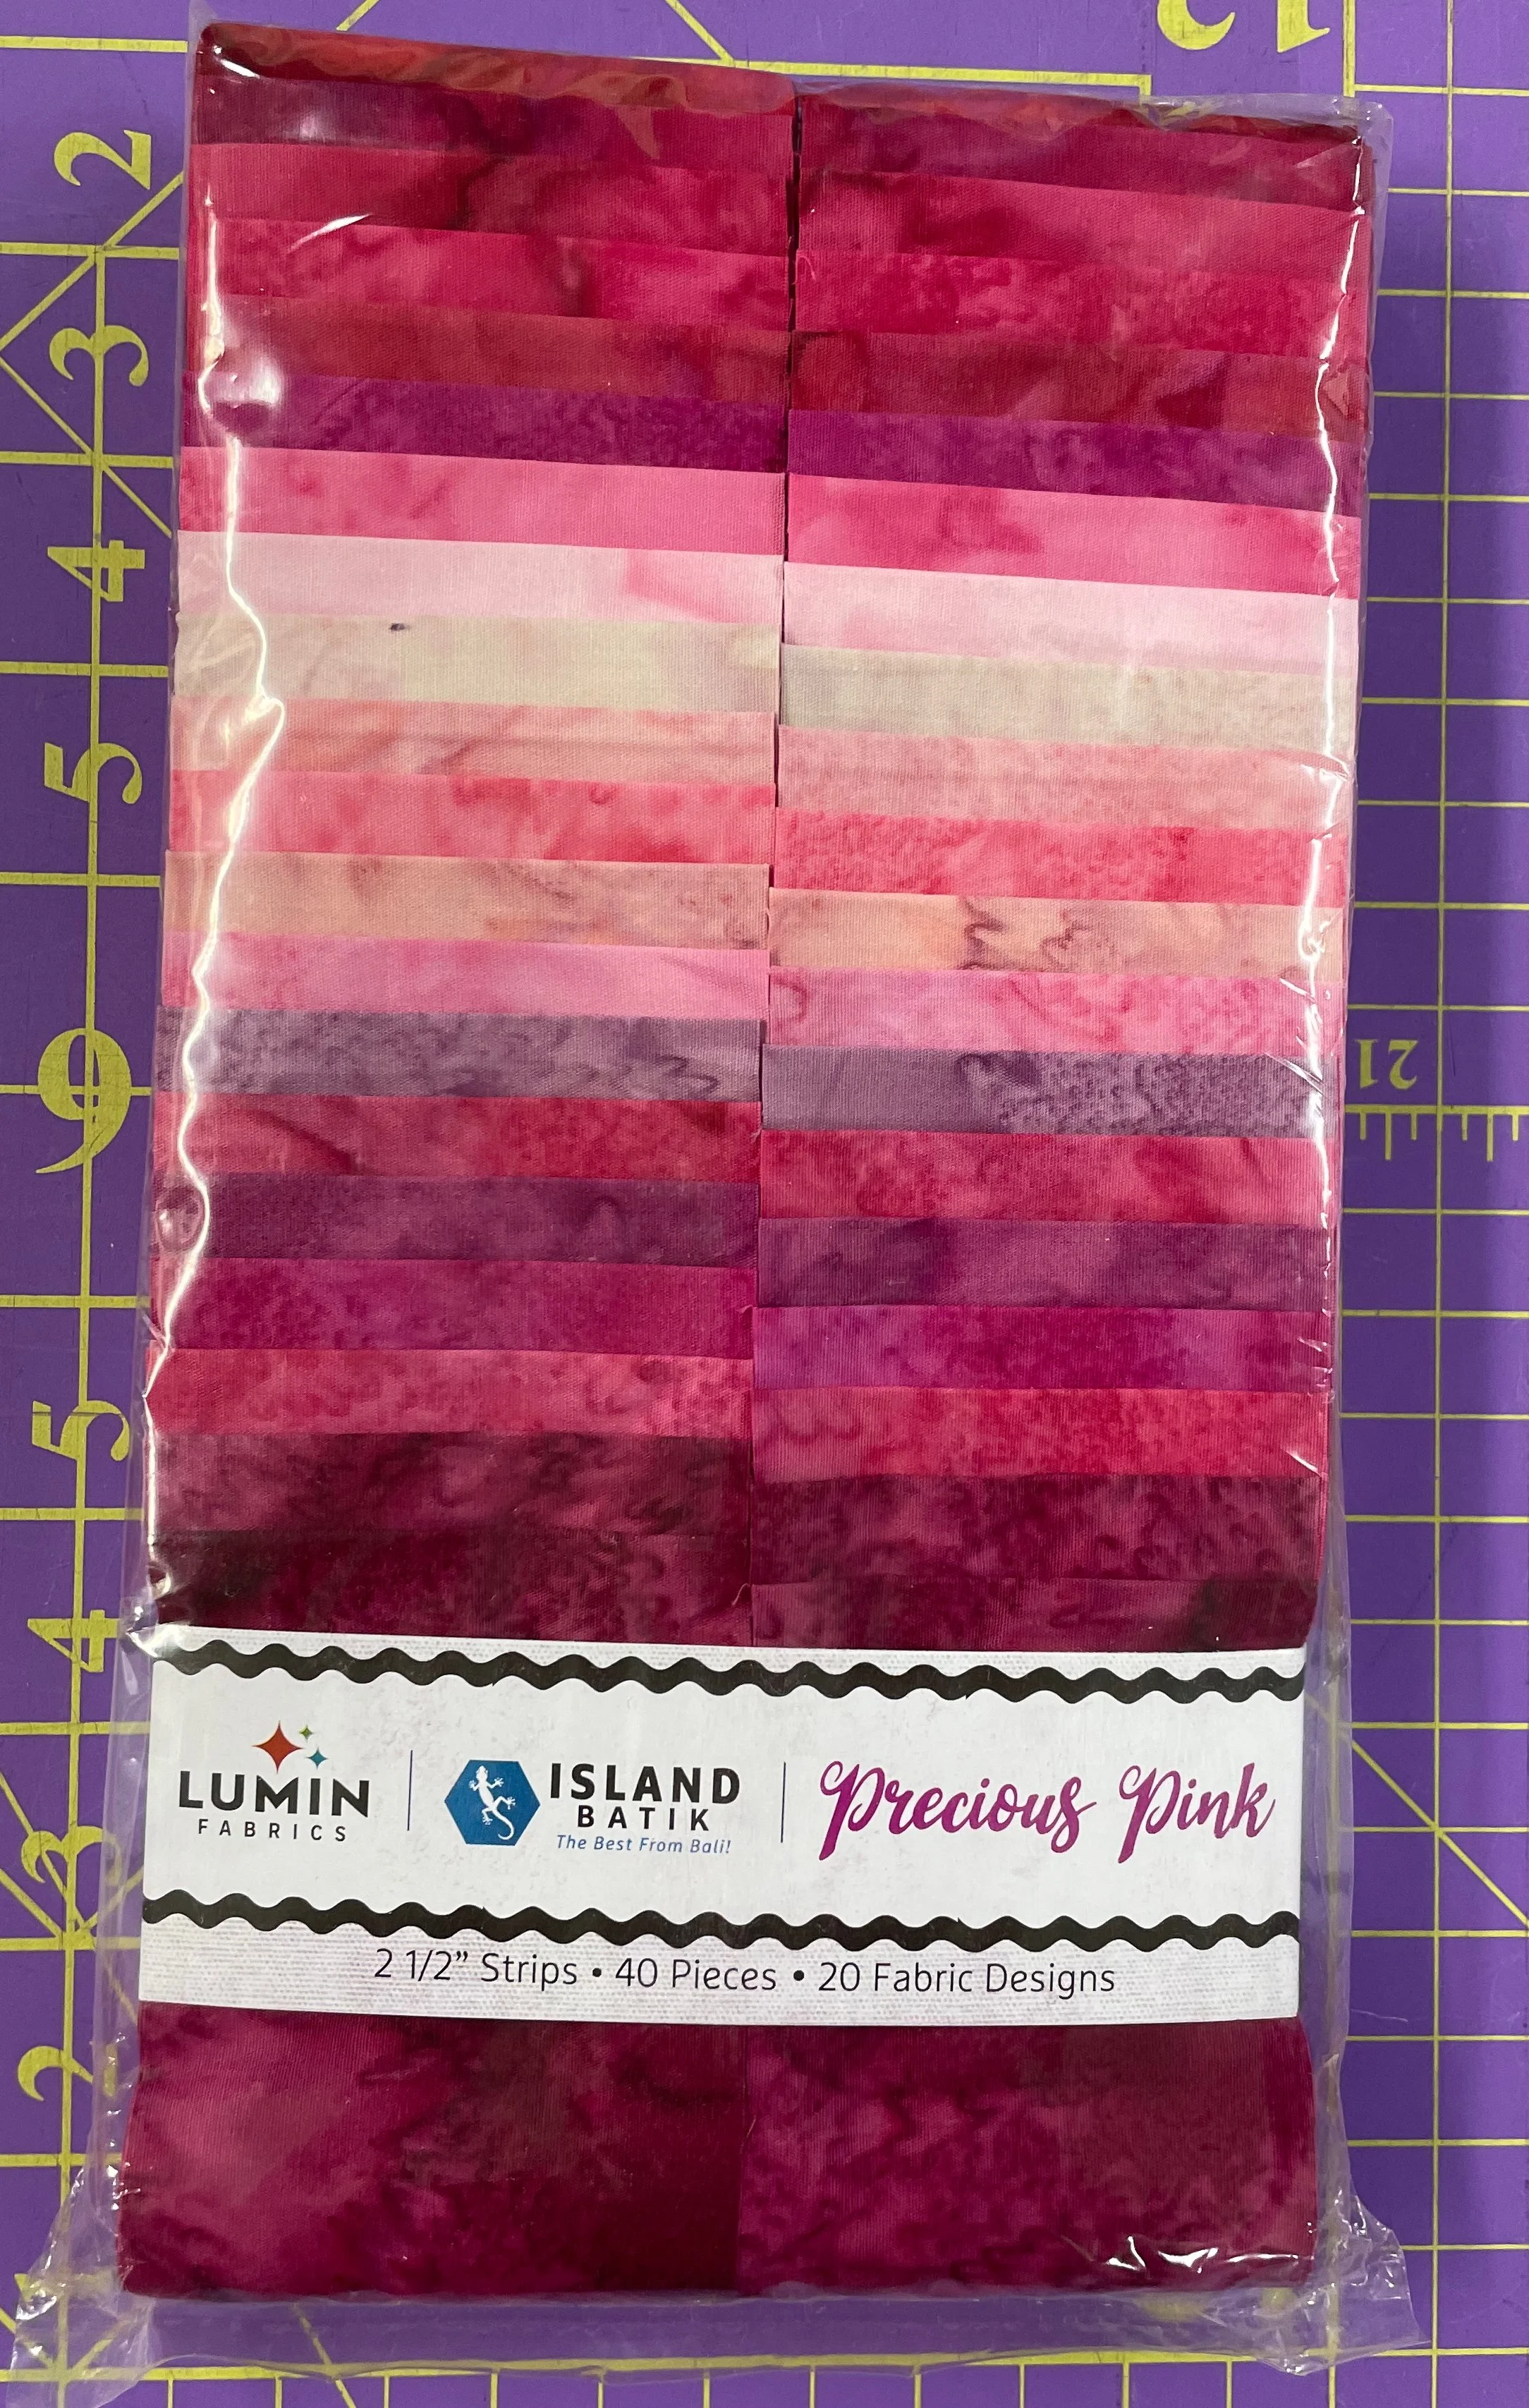
I had previously received a Strip Pack of Precious Pink and thought that this would be the perfect fabric for the project that I designed for December: a retro pink Christmas tree!
Full disclosure: I designed this project for members of The Quilter’s Way, (although pink wasn’t in my plans for them!) the online membership that I host, but knew that it would be a great project for the Island Batik Ambassador challenge this month too.
Here’s my initial design that I created in EQ8

I initially incorporated fabrics from the Under the Sea fabric collection, a Signature Collection by Jerry Khiev for Swan Sheridan of Swan Amity Studios, for the background but decided that it was a bit too busy so I substituted one of Island Batik’s Blender fabrics for the background instead.

I did keep the Under the Sea fabric for the first border. I also included 4 fabrics from various Island Batik collections in the second border (although you don’t see them in the above image).
Once I’d finalized the design it was time to start making the blocks!
The tree is composed of strip pieced blocks and strip pieced half square triangle blocks. They’re easy to make and I only used half of the Precious Pinks Strip Pack to make it - leaving more beautiful pink fabrics for another project. 😉
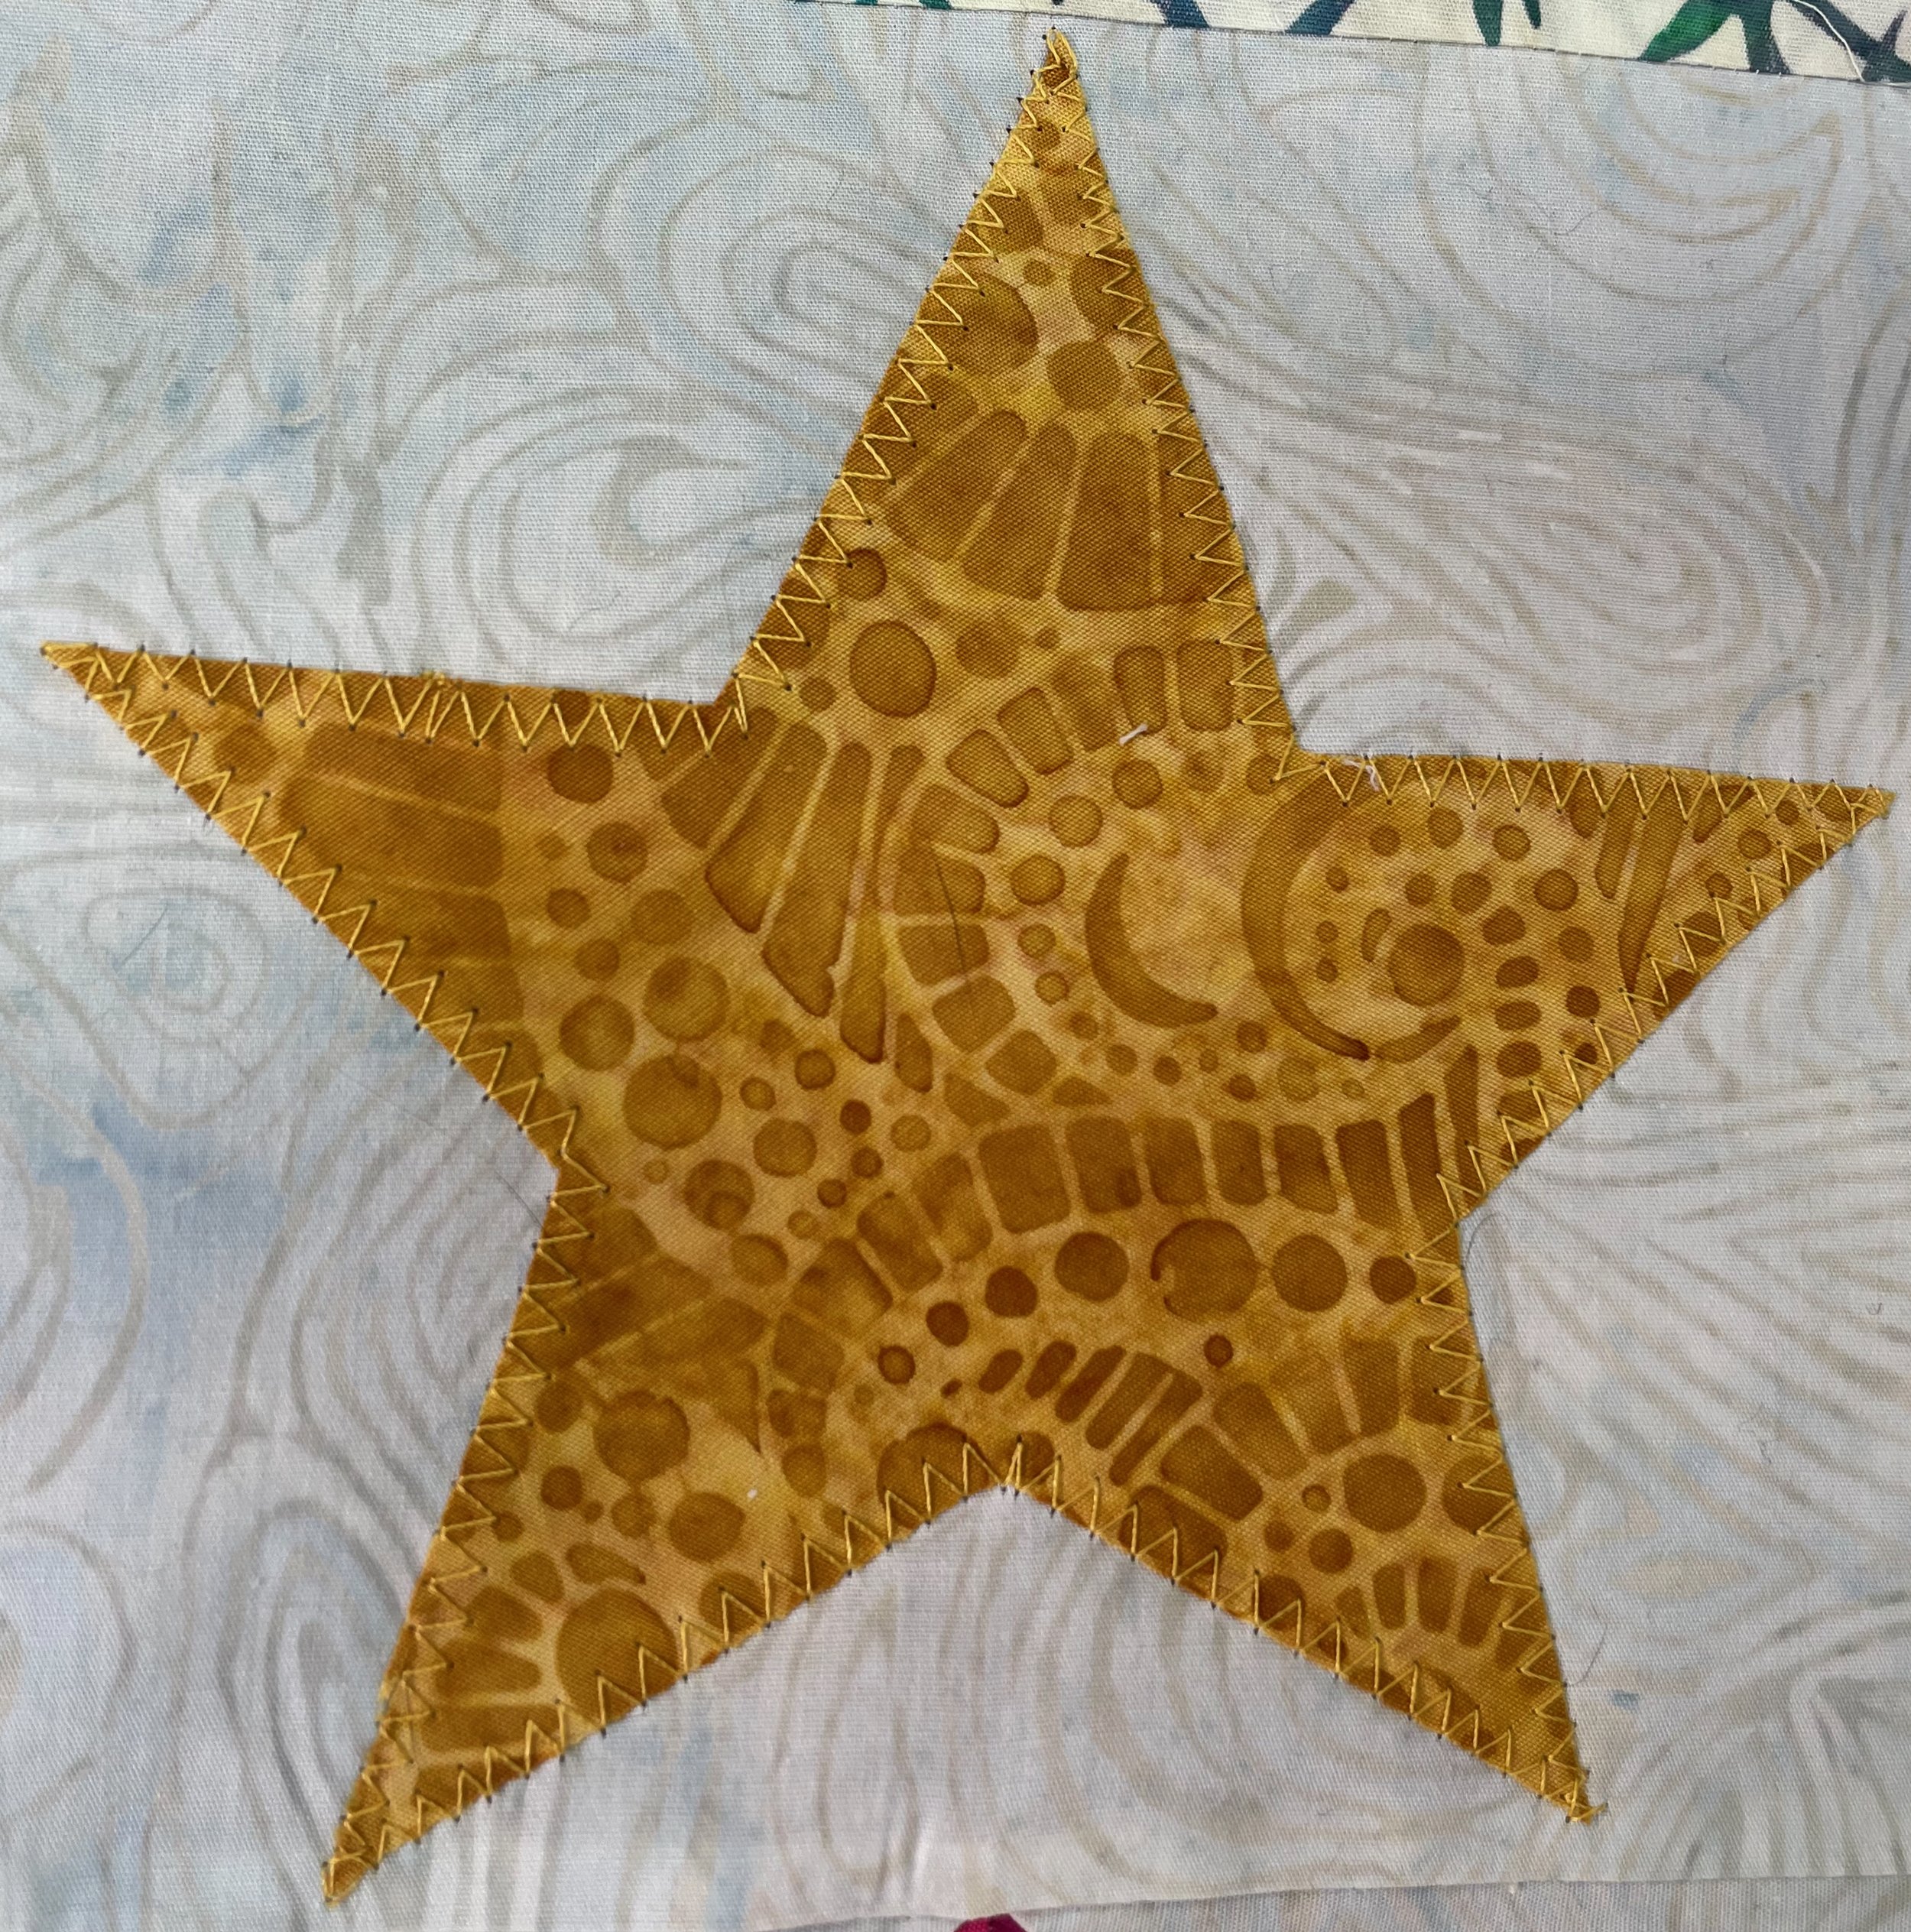
I next had to cut up blocks for the background and the tree trunk and I also needed to create the star appliqué - also from a previous Island Batik fabric collection. I also had to cut squares for the second border and stitch them together as well as make the half square triangle cornerstones for this border.
Once the blocks were cut, I stitched them together into rows, added the star appliqué at the top of the tree and then stitched the borders to the centre of the quilt top. I used Aurifil thread for the piecing and for finishing the edges of the star appliqué.
My Oliso M3 Pro Project iron was very helpful for pressing all of the seams.
The top was now done…well, almost!
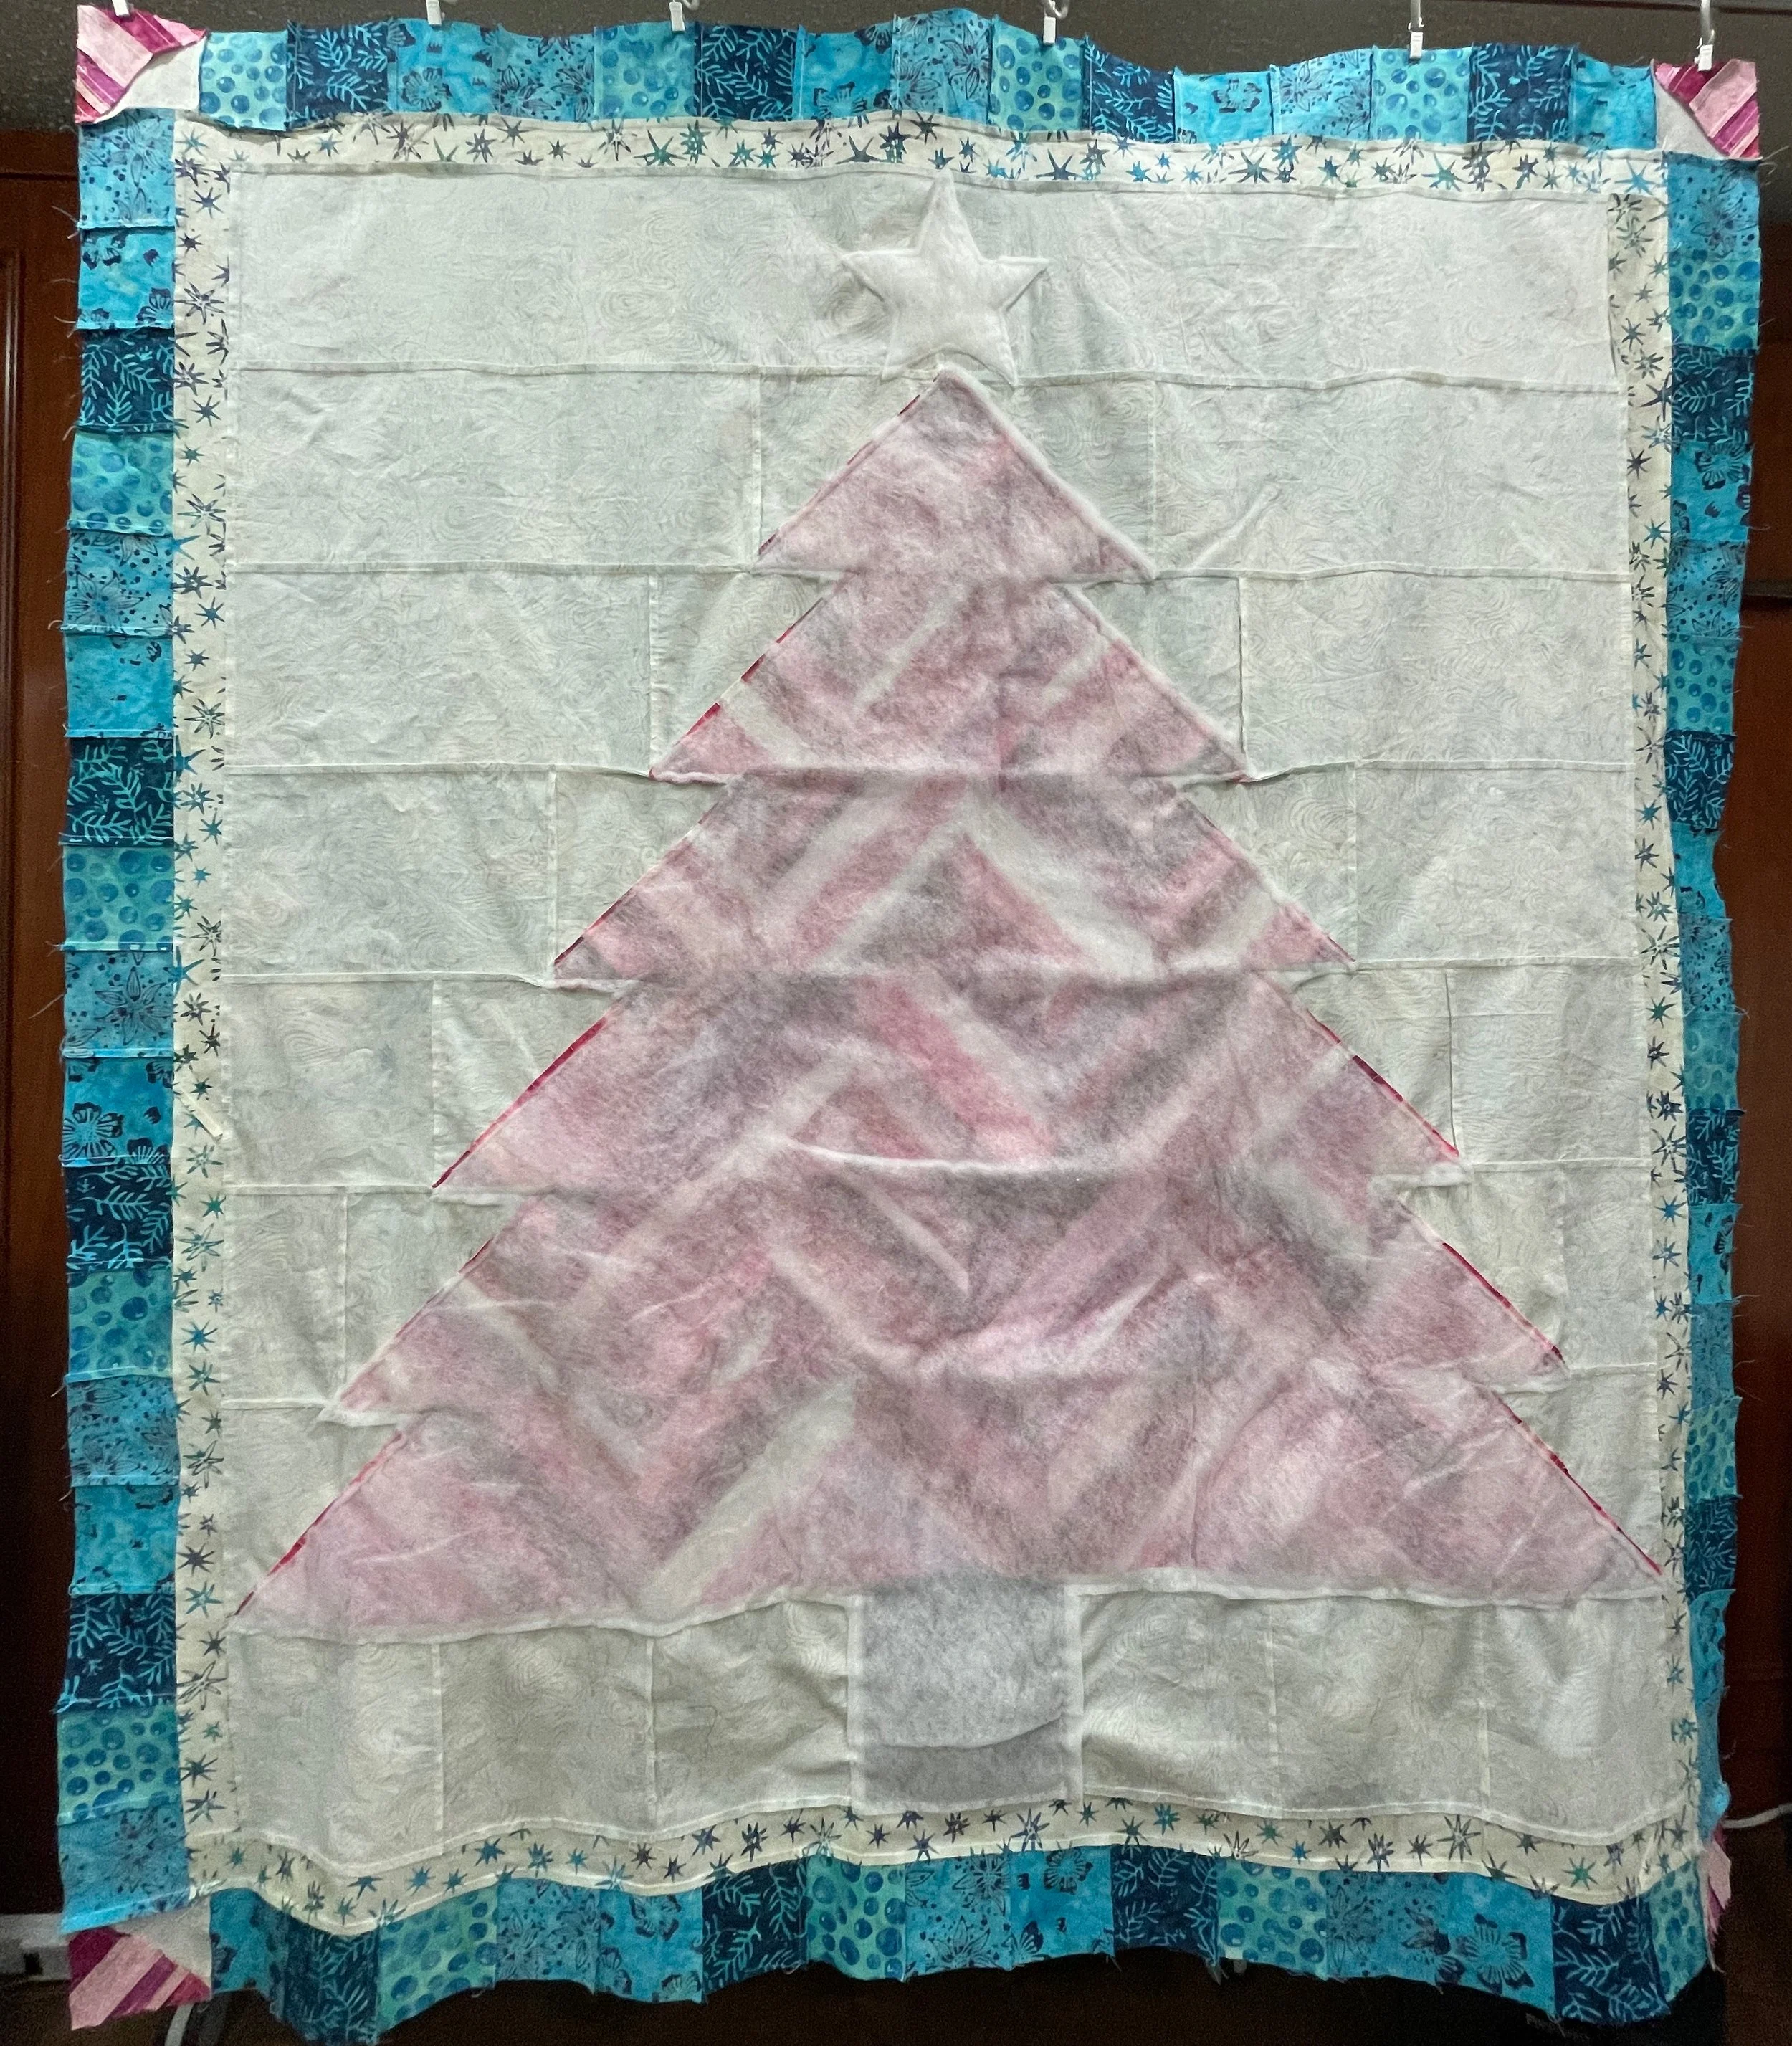
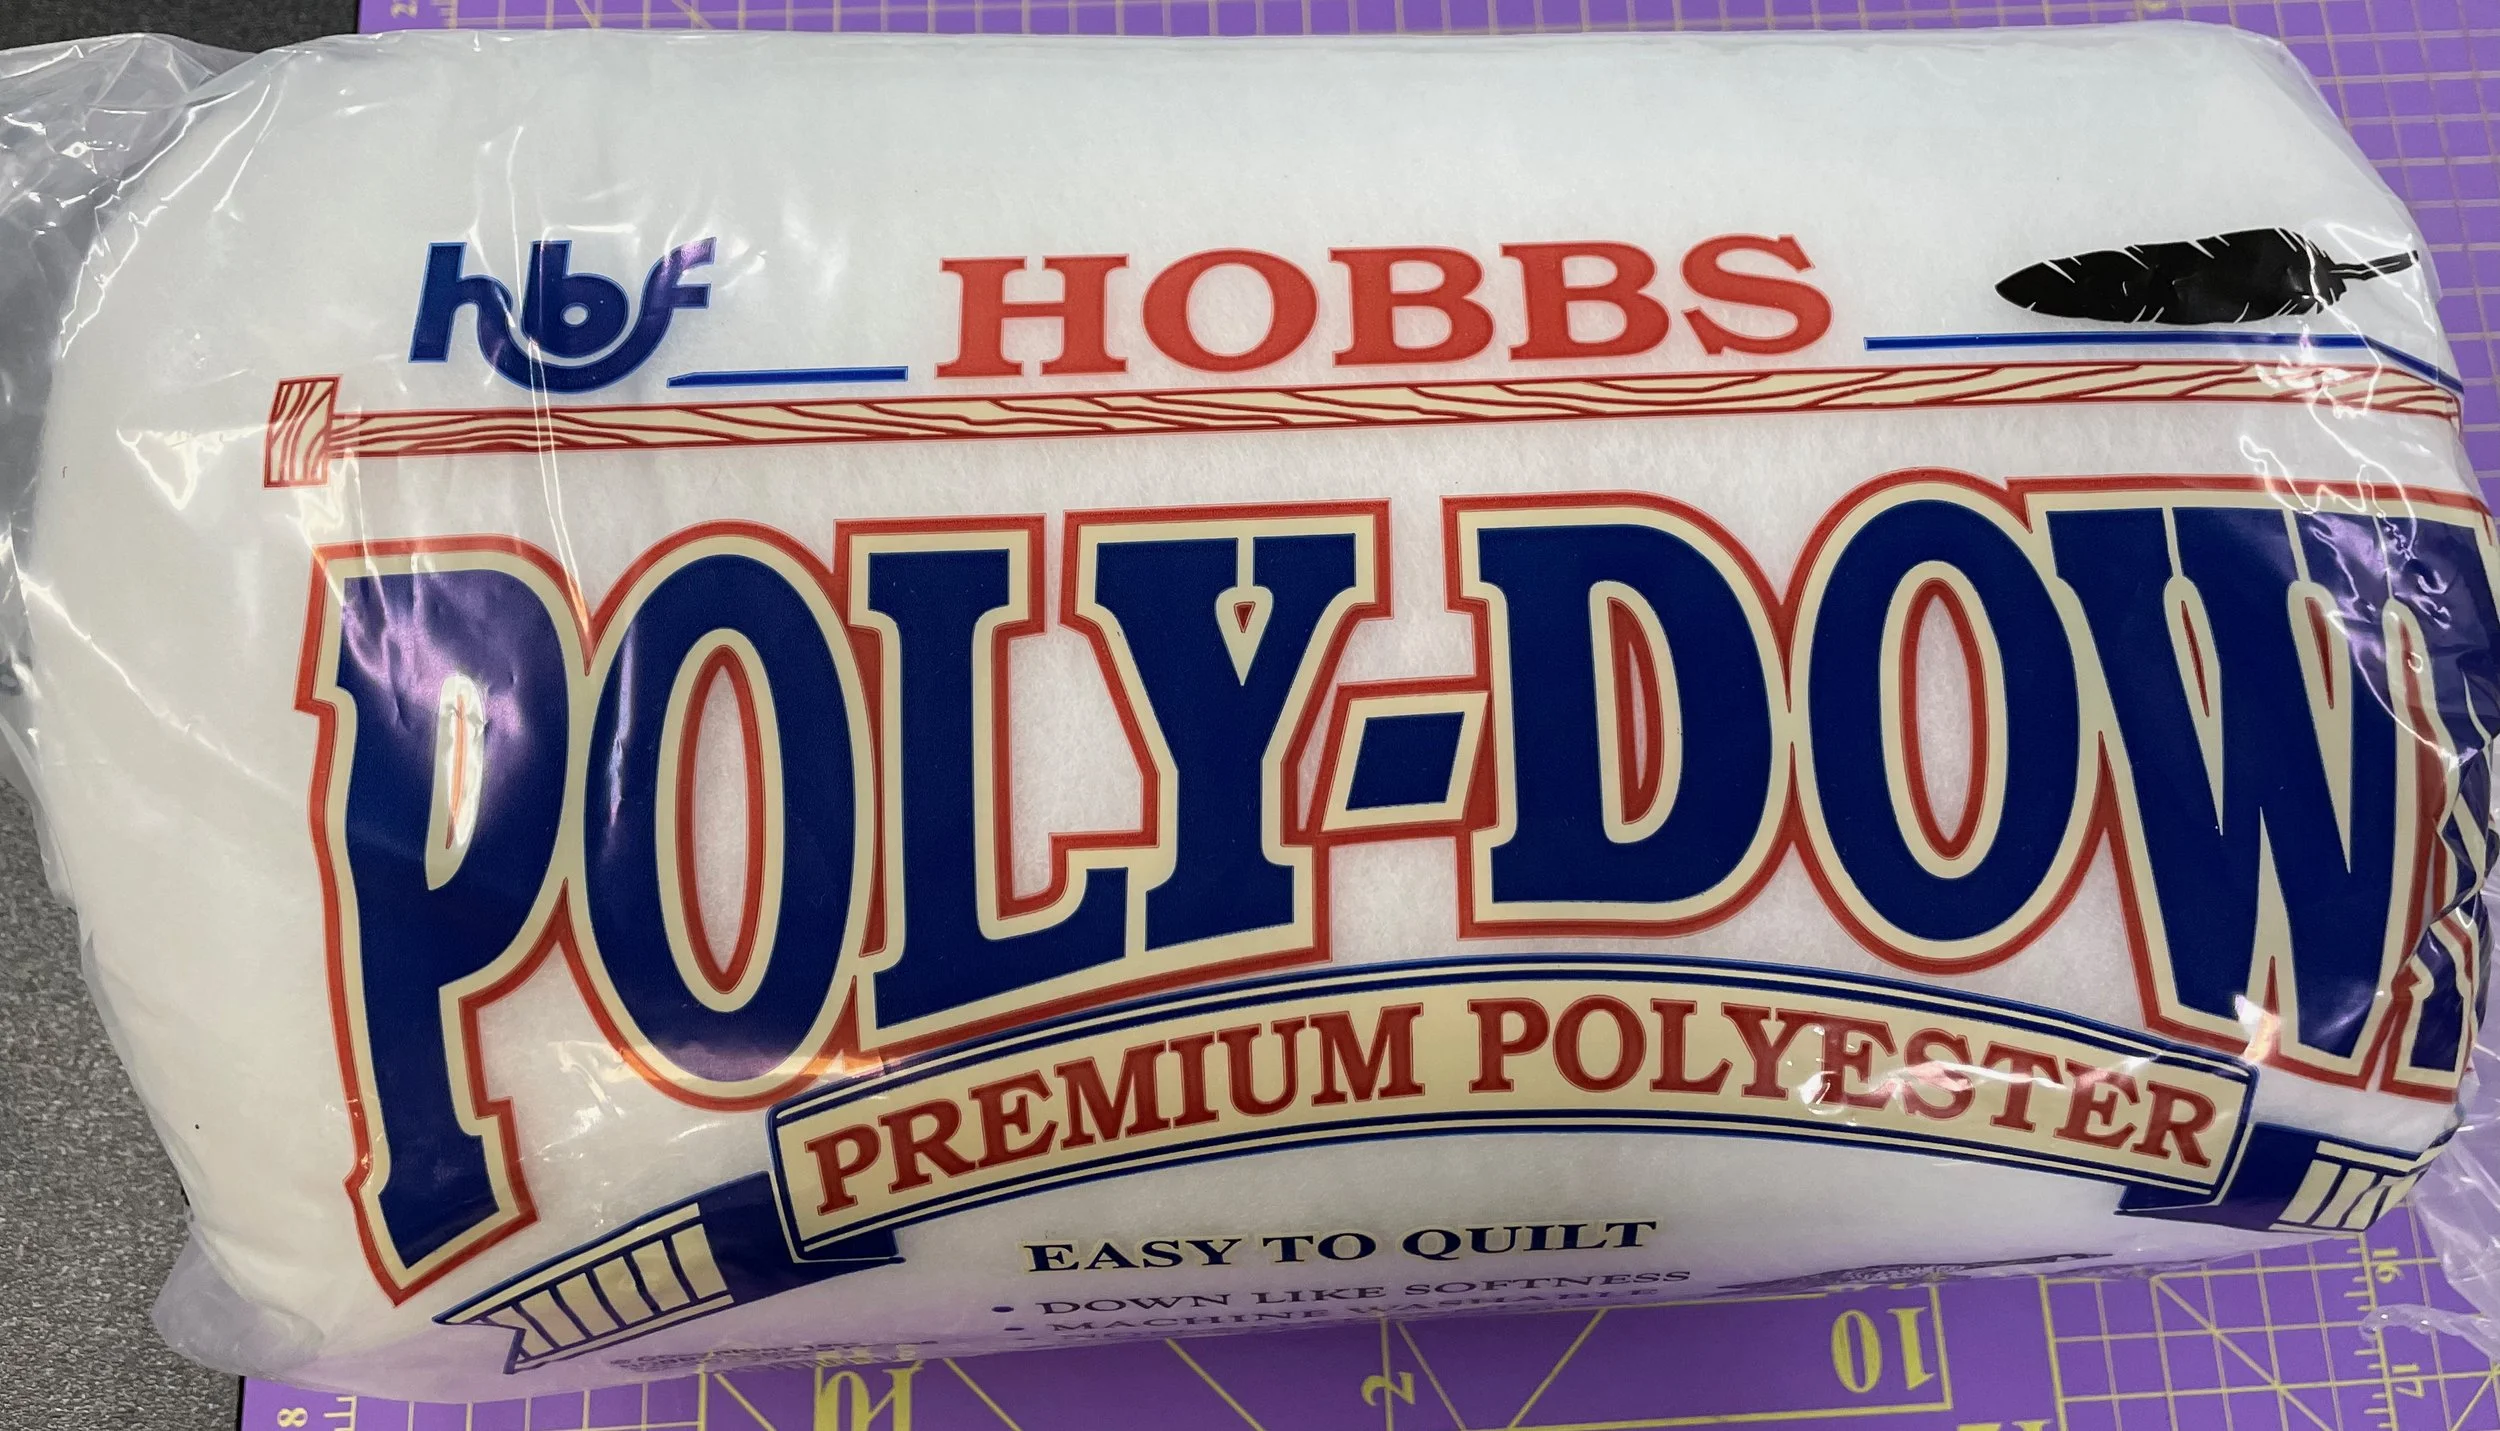
I decided to add faux trapunto to the tree, the tree trunk, and the star. This meant cutting out batting slightly larger than all these areas and I used Hobbs Poly-Down batting for this as I wanted to create additional “puffiness” with the faux trapunto. This batting was stitched to the back of these areas on the quilt top and then trimmed.
Once this was done, it was time to layer the top, batting, and backing so it could be quilted. I used Hobbs 80/20 cotton polyester batting for this step.
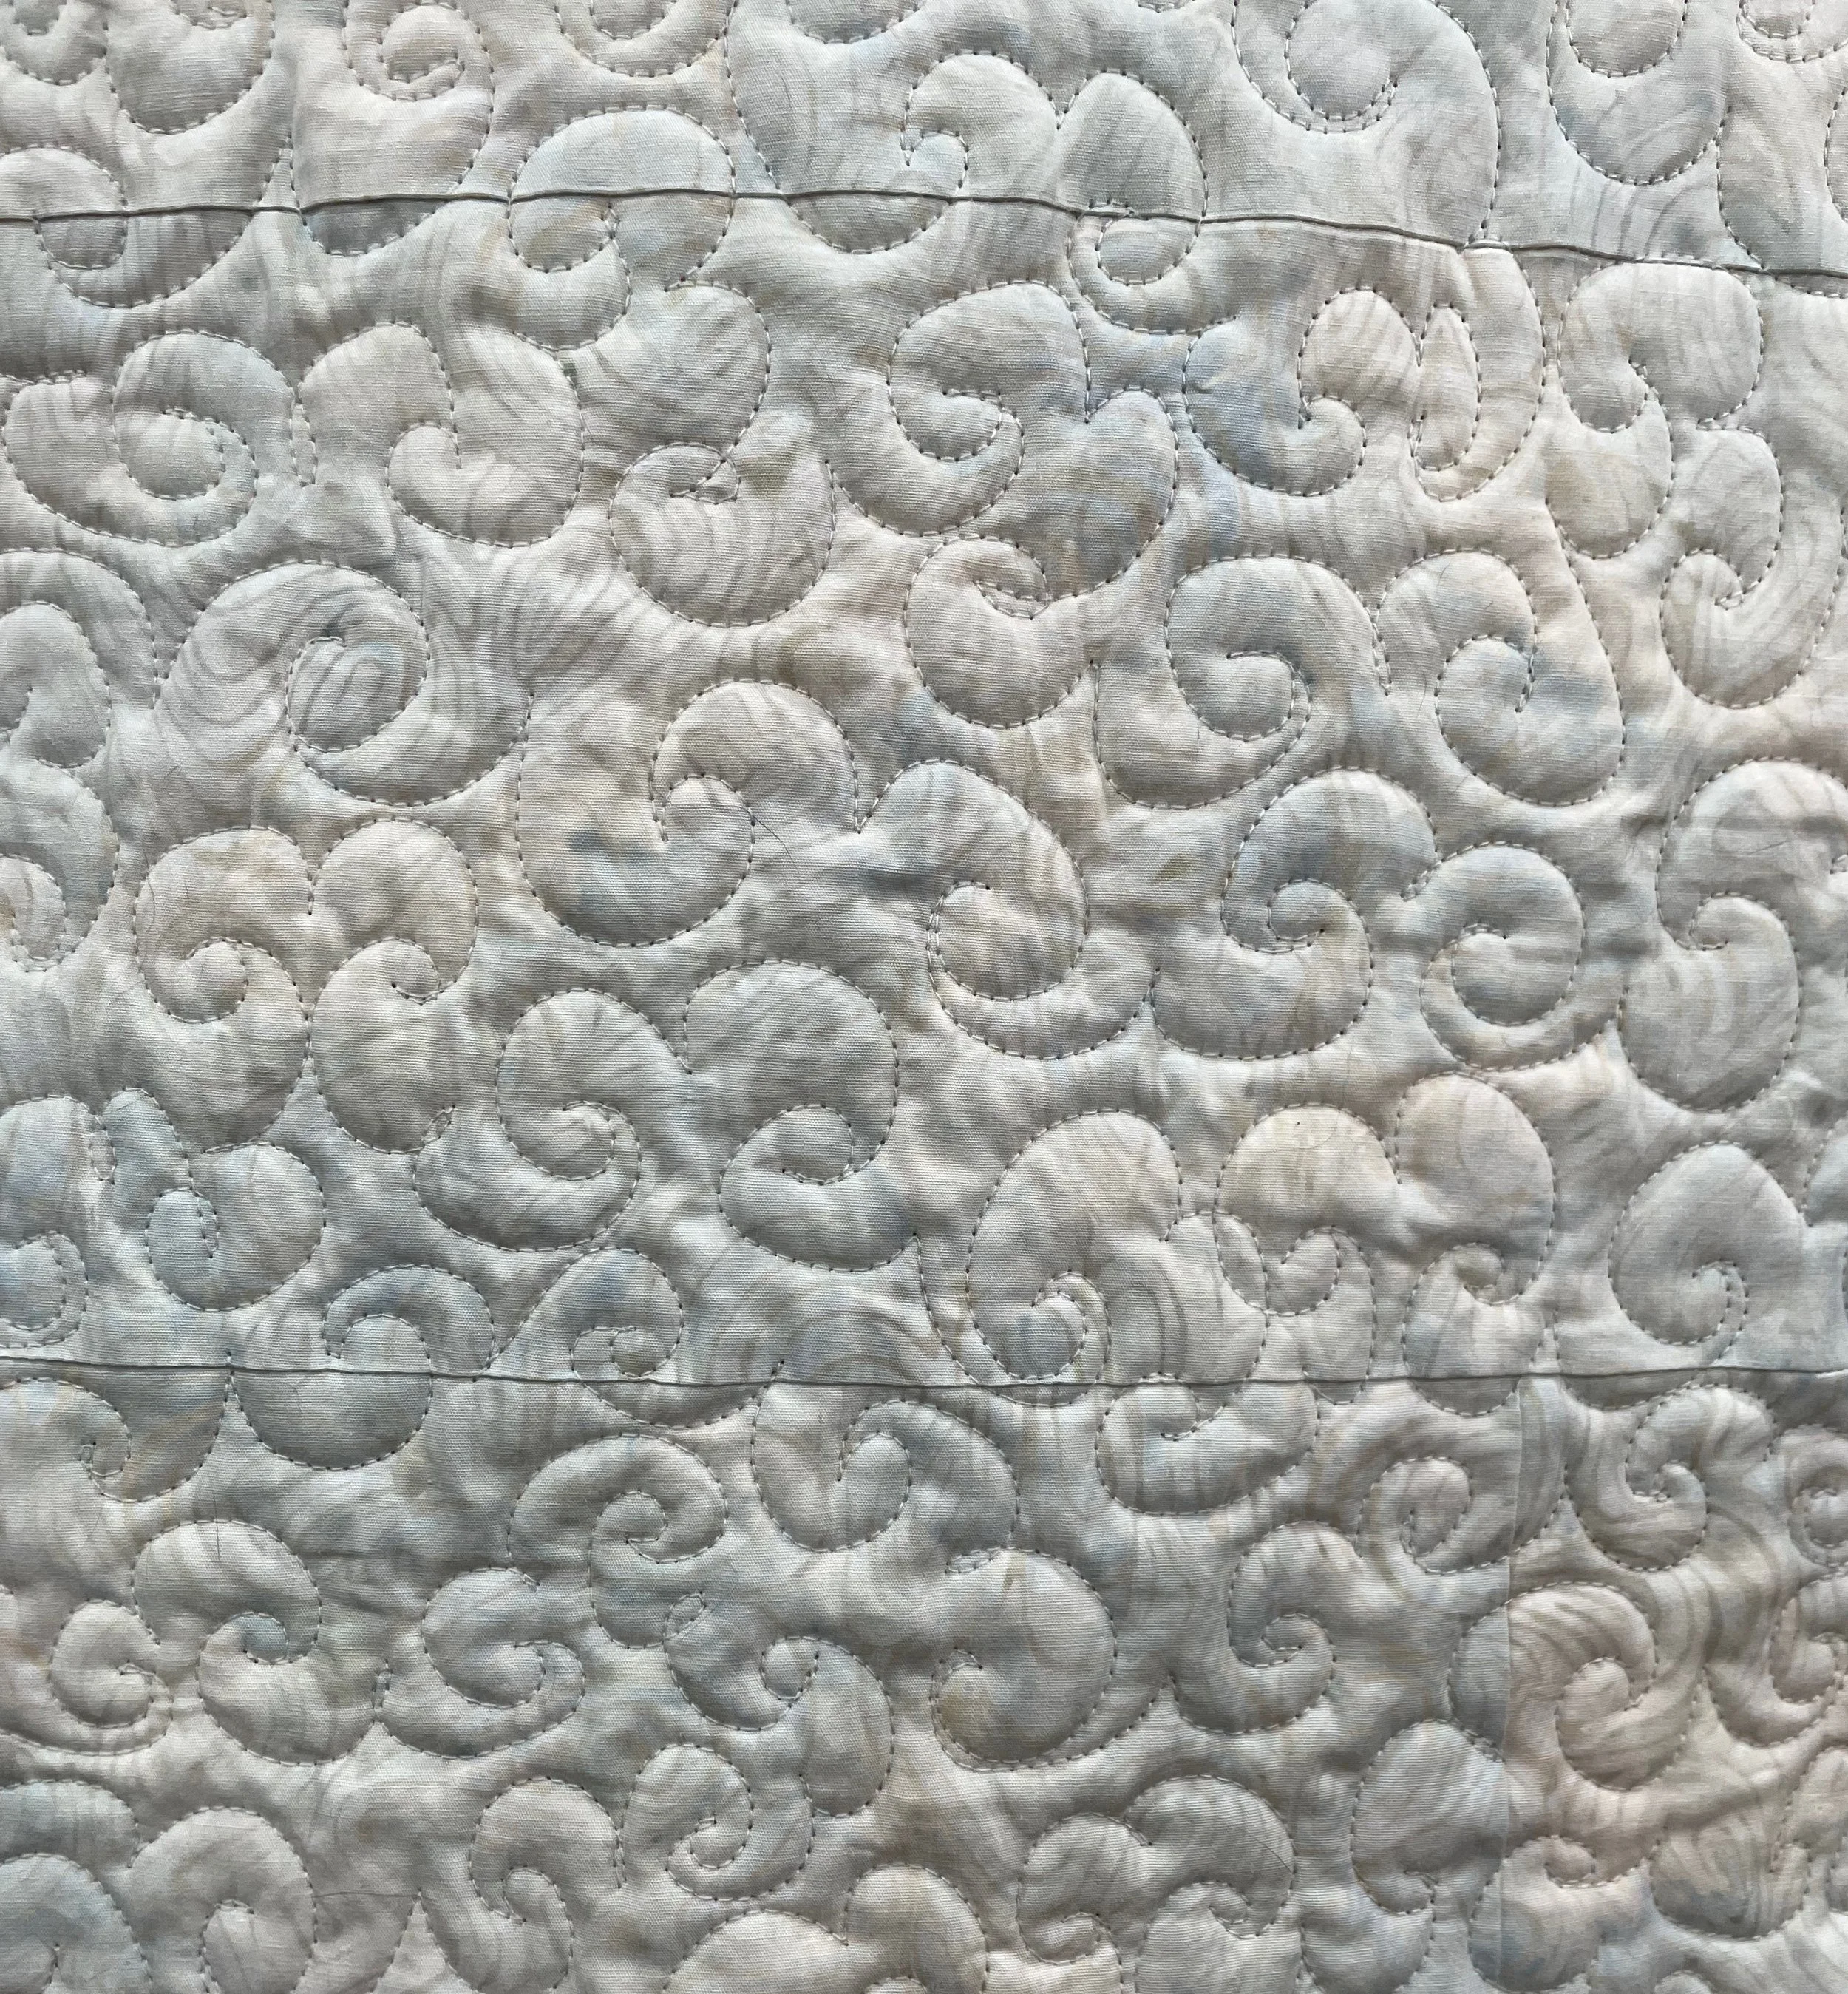
I used several different quilting motifs on this project: large wishbone for the tree, loops in the star and woodgrain in the tree trunk and then wavy lines in the first border and ls and es in the second one. Here are some detail images of the various quilting motifs.
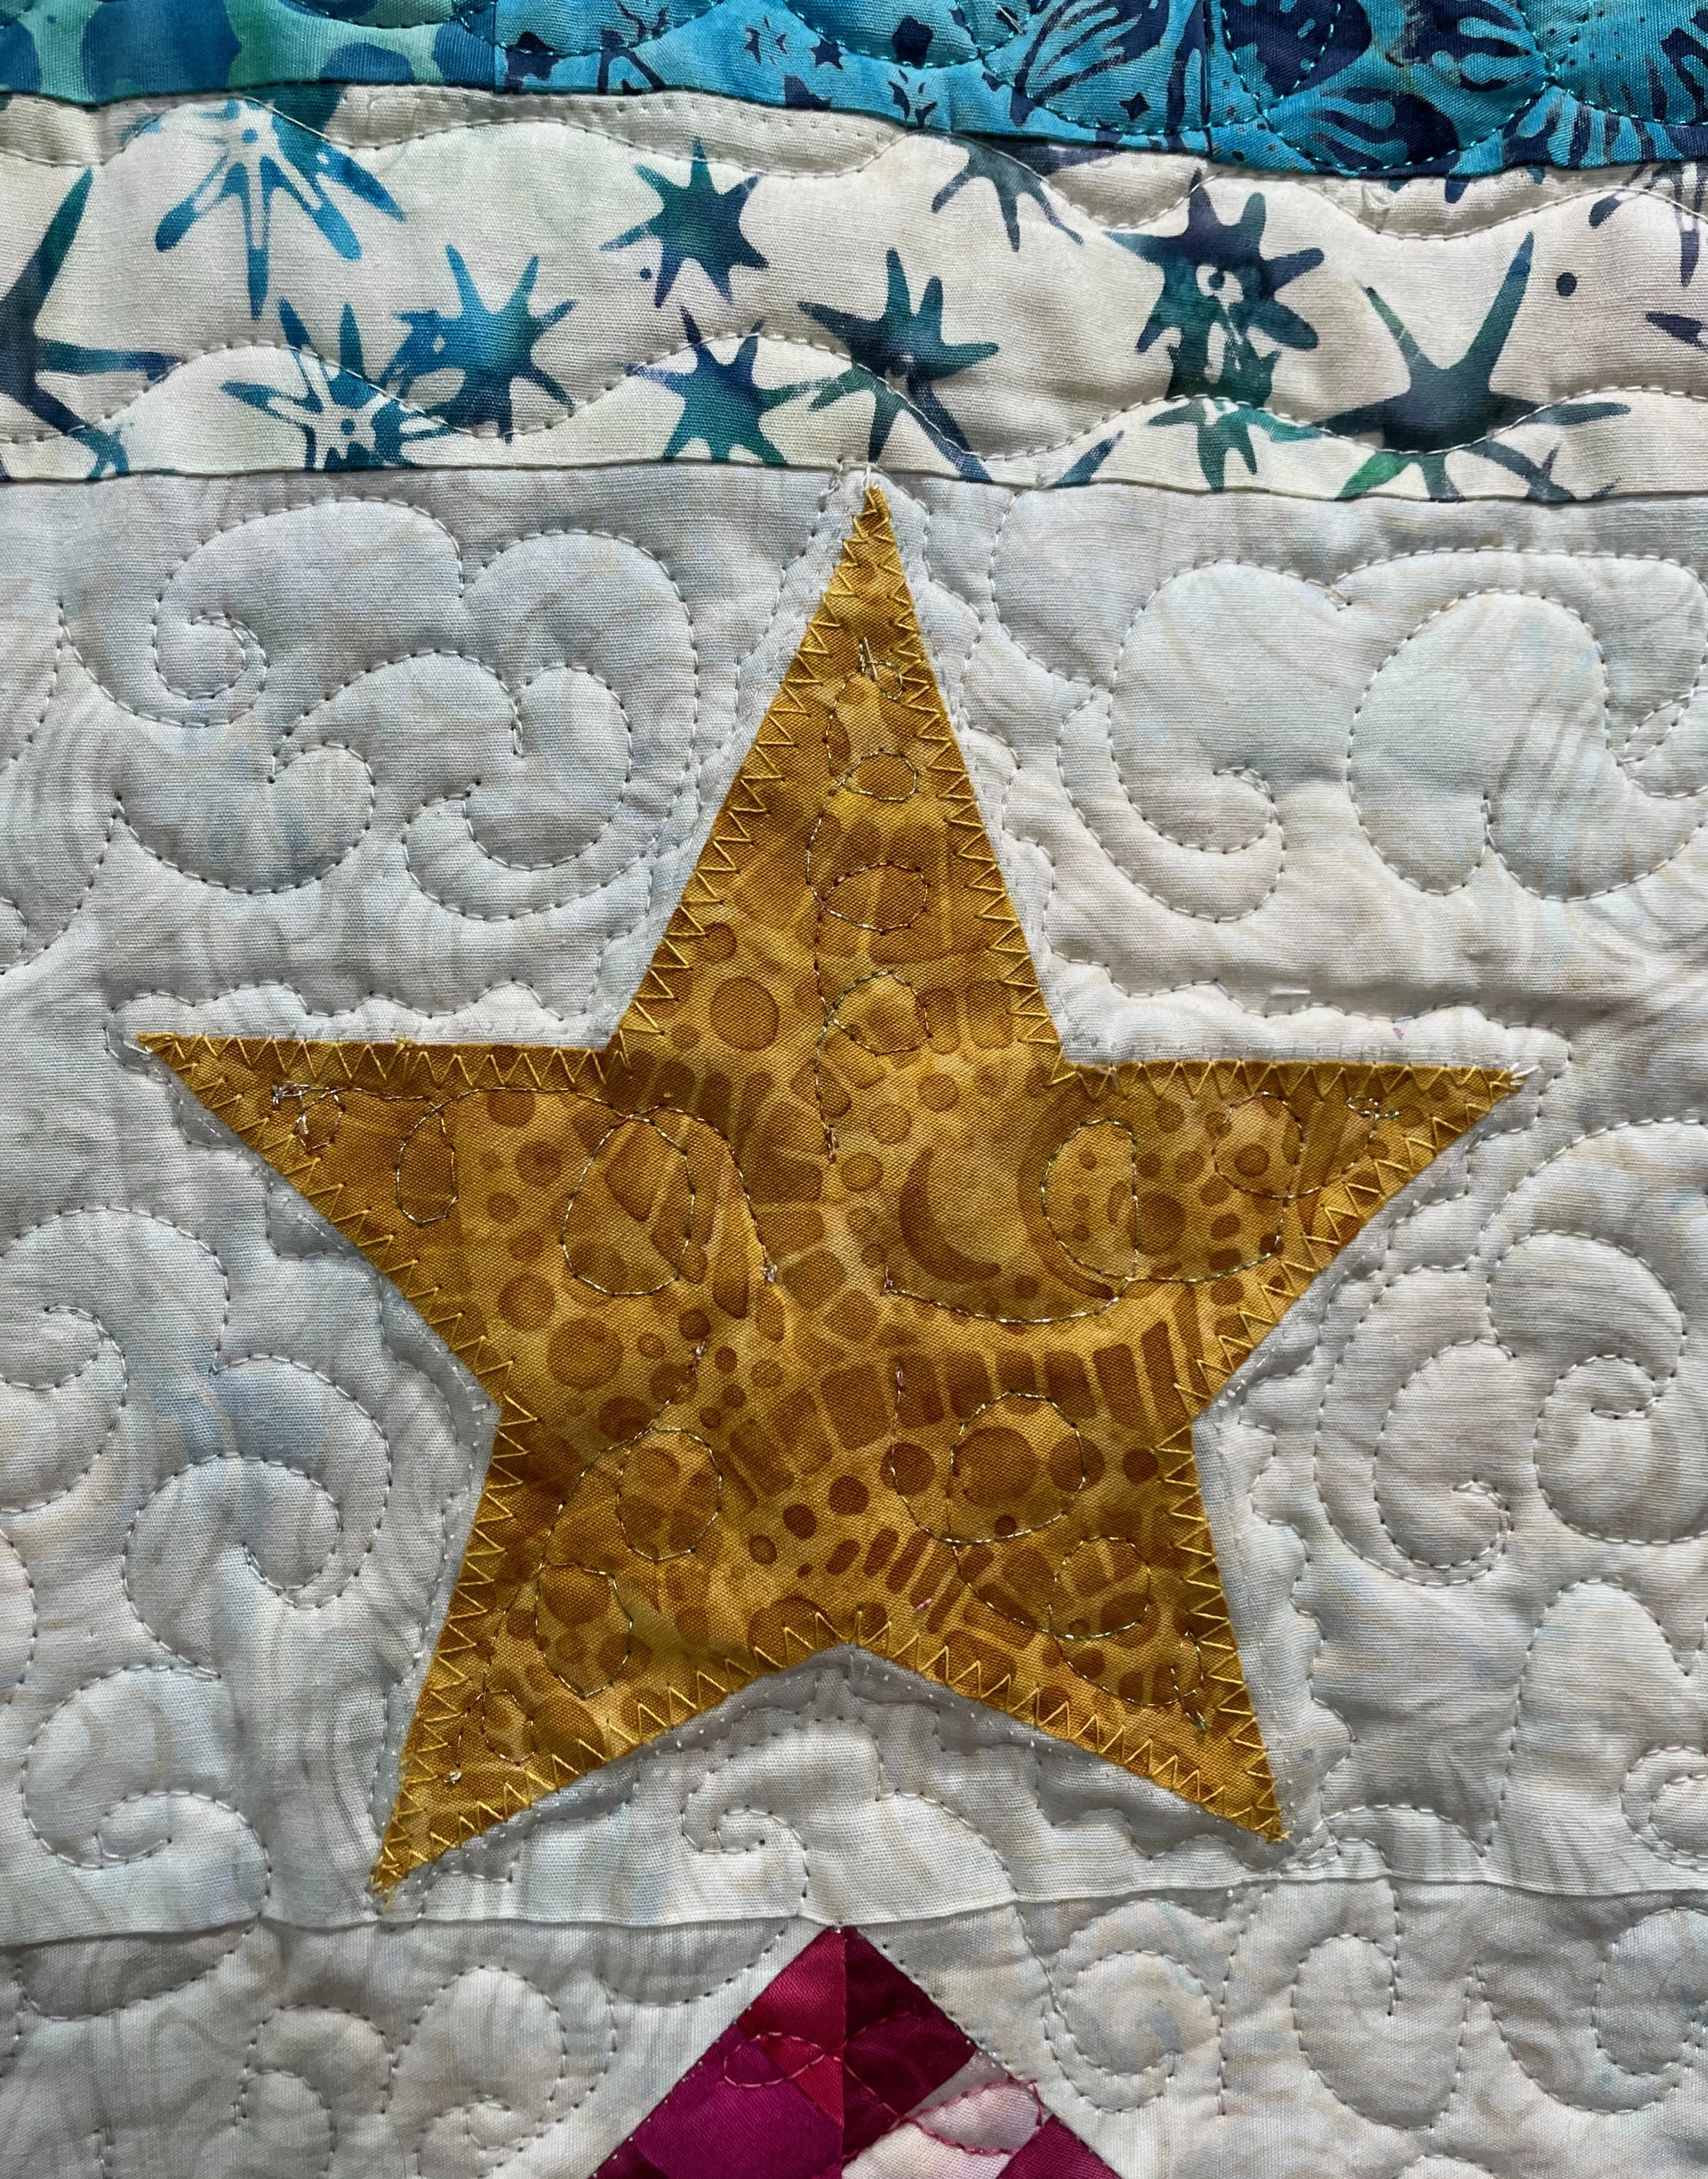
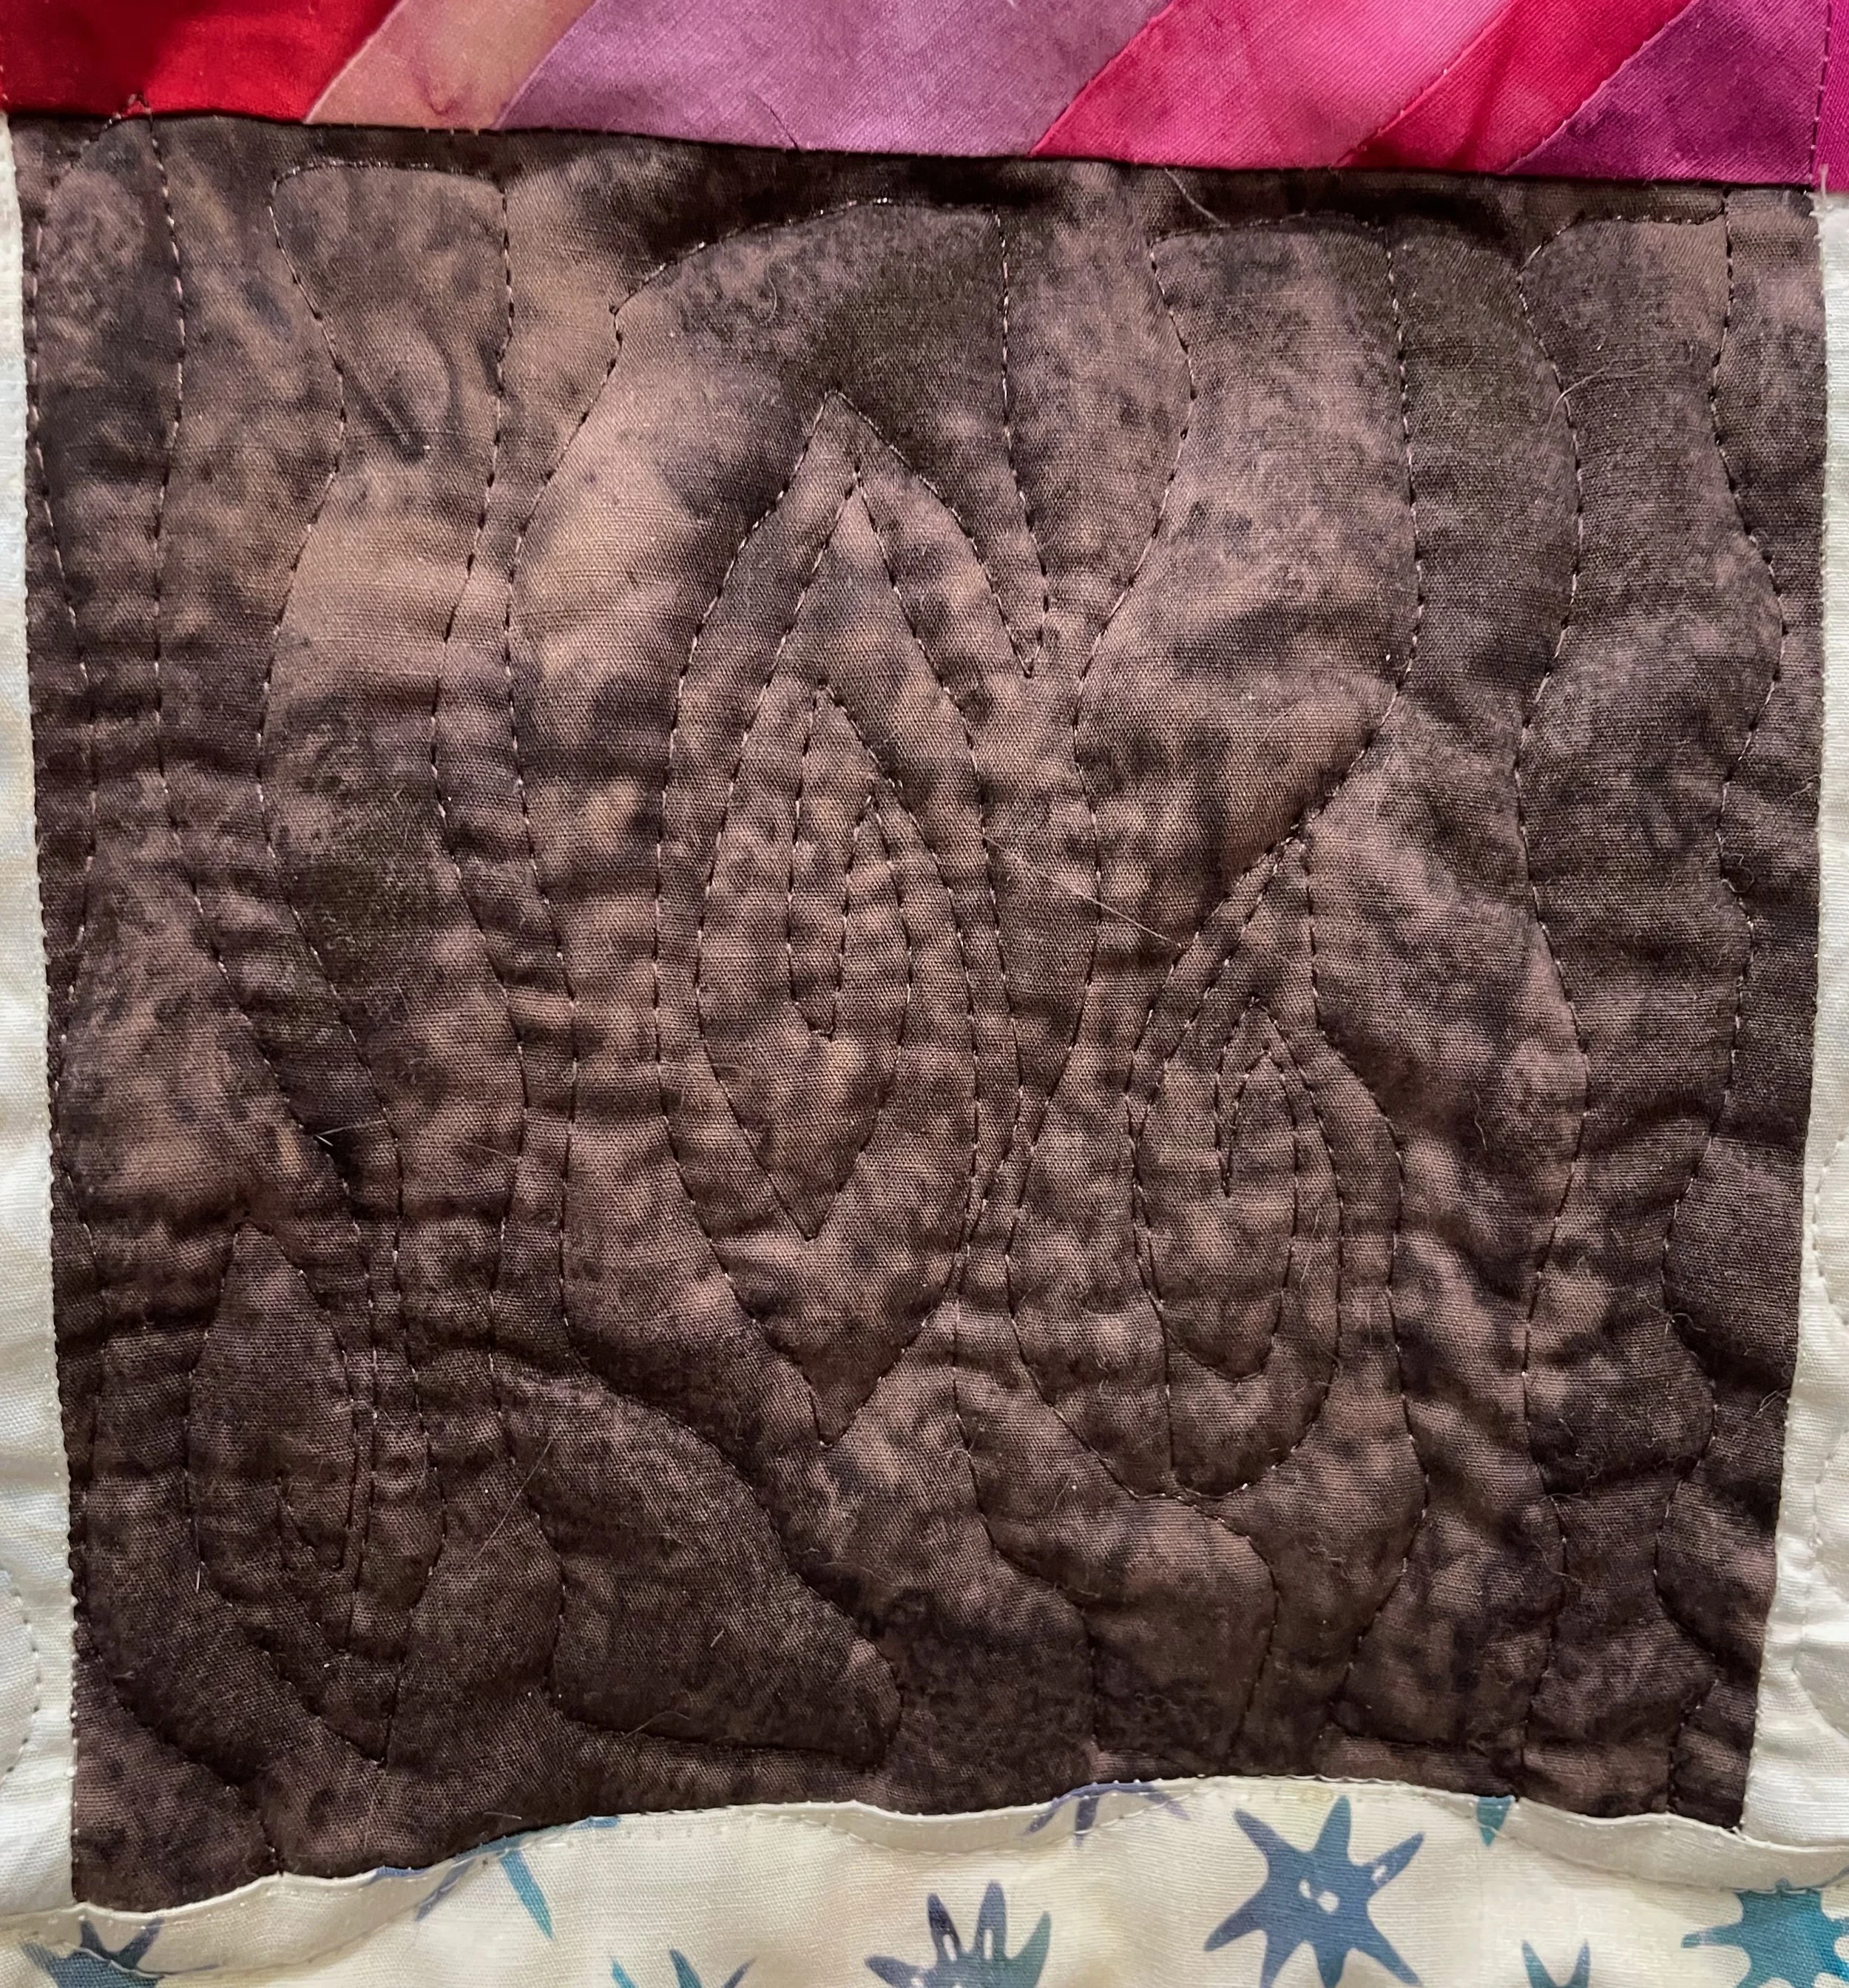

I wanted to use a smaller scale motif in the background to compress it and used Es (upper case cursive Es) and 3s in this area.
Here is Bubblegum Christmas, my own retro pink Christmas tree!

Thanks to Hobbs Quilt Batting, Oliso, Aurifil, and Island Batik for Lumin Fabrics for the items that they sent me that allowed me to create Bubblegum Christmas.
There will be more projects coming from the other Island Batik Ambassadors this month and I’m looking forward to seeing their creations.
Be sure to check out the other Island Batik Ambassadors’ websites for their December challenge projects.
Brenda Alburl ~ Songbird Designs
Renee Atkinson ~ Pink Tulip Quilting
Susan Deshensky ~ Lady Blue Quilts Studio
Tina Dillard - Quilting Affection Designs
Brittany Fisher ~ Bobbin with Brittany
Kimberly Flannagan - Kimberlys Quilts
Preeti Harris ~ Sew Preeti Quilts
Mania Hatziioannidi ~ Mania for quilts
Connie Kauffman ~ Kauffman Designs
Connie Kresin Campbell ~ Freemotion by the River
Emily Leachman ~ The Darling Dogwood
Denise Looney ~ A Quiltery
Leah Malasky ~ Quilted Delights
Lisa Pickering ~ Lisa’s Quilting Passion
Sarah Pitcher ~ Pitcher’s Boutique
Gail Sheppard ~ Quilting Gail
Carol Stanek ~ Stitch with Color
Solomae Stoycoff - Cuddle Cat Quiltworks
Jennifer Thomas ~ Curlicue Creations
Suzy Webster ~ Websterquilt
Note: The products featured in this blogpost were given to me by Island Batik and their sponsors. Thank you!
#islandbatik #islandbatikambassador #loveislandbatik #hobbsbatting, #hobbsinside, #aurifil #aurifilthreads #olisoconnects #createwitholiso
Island Batik Ambassador Challenge for November 2025
Welcome to week 3, the final week, of the Timeless Traditions blog hop from Island Batik.
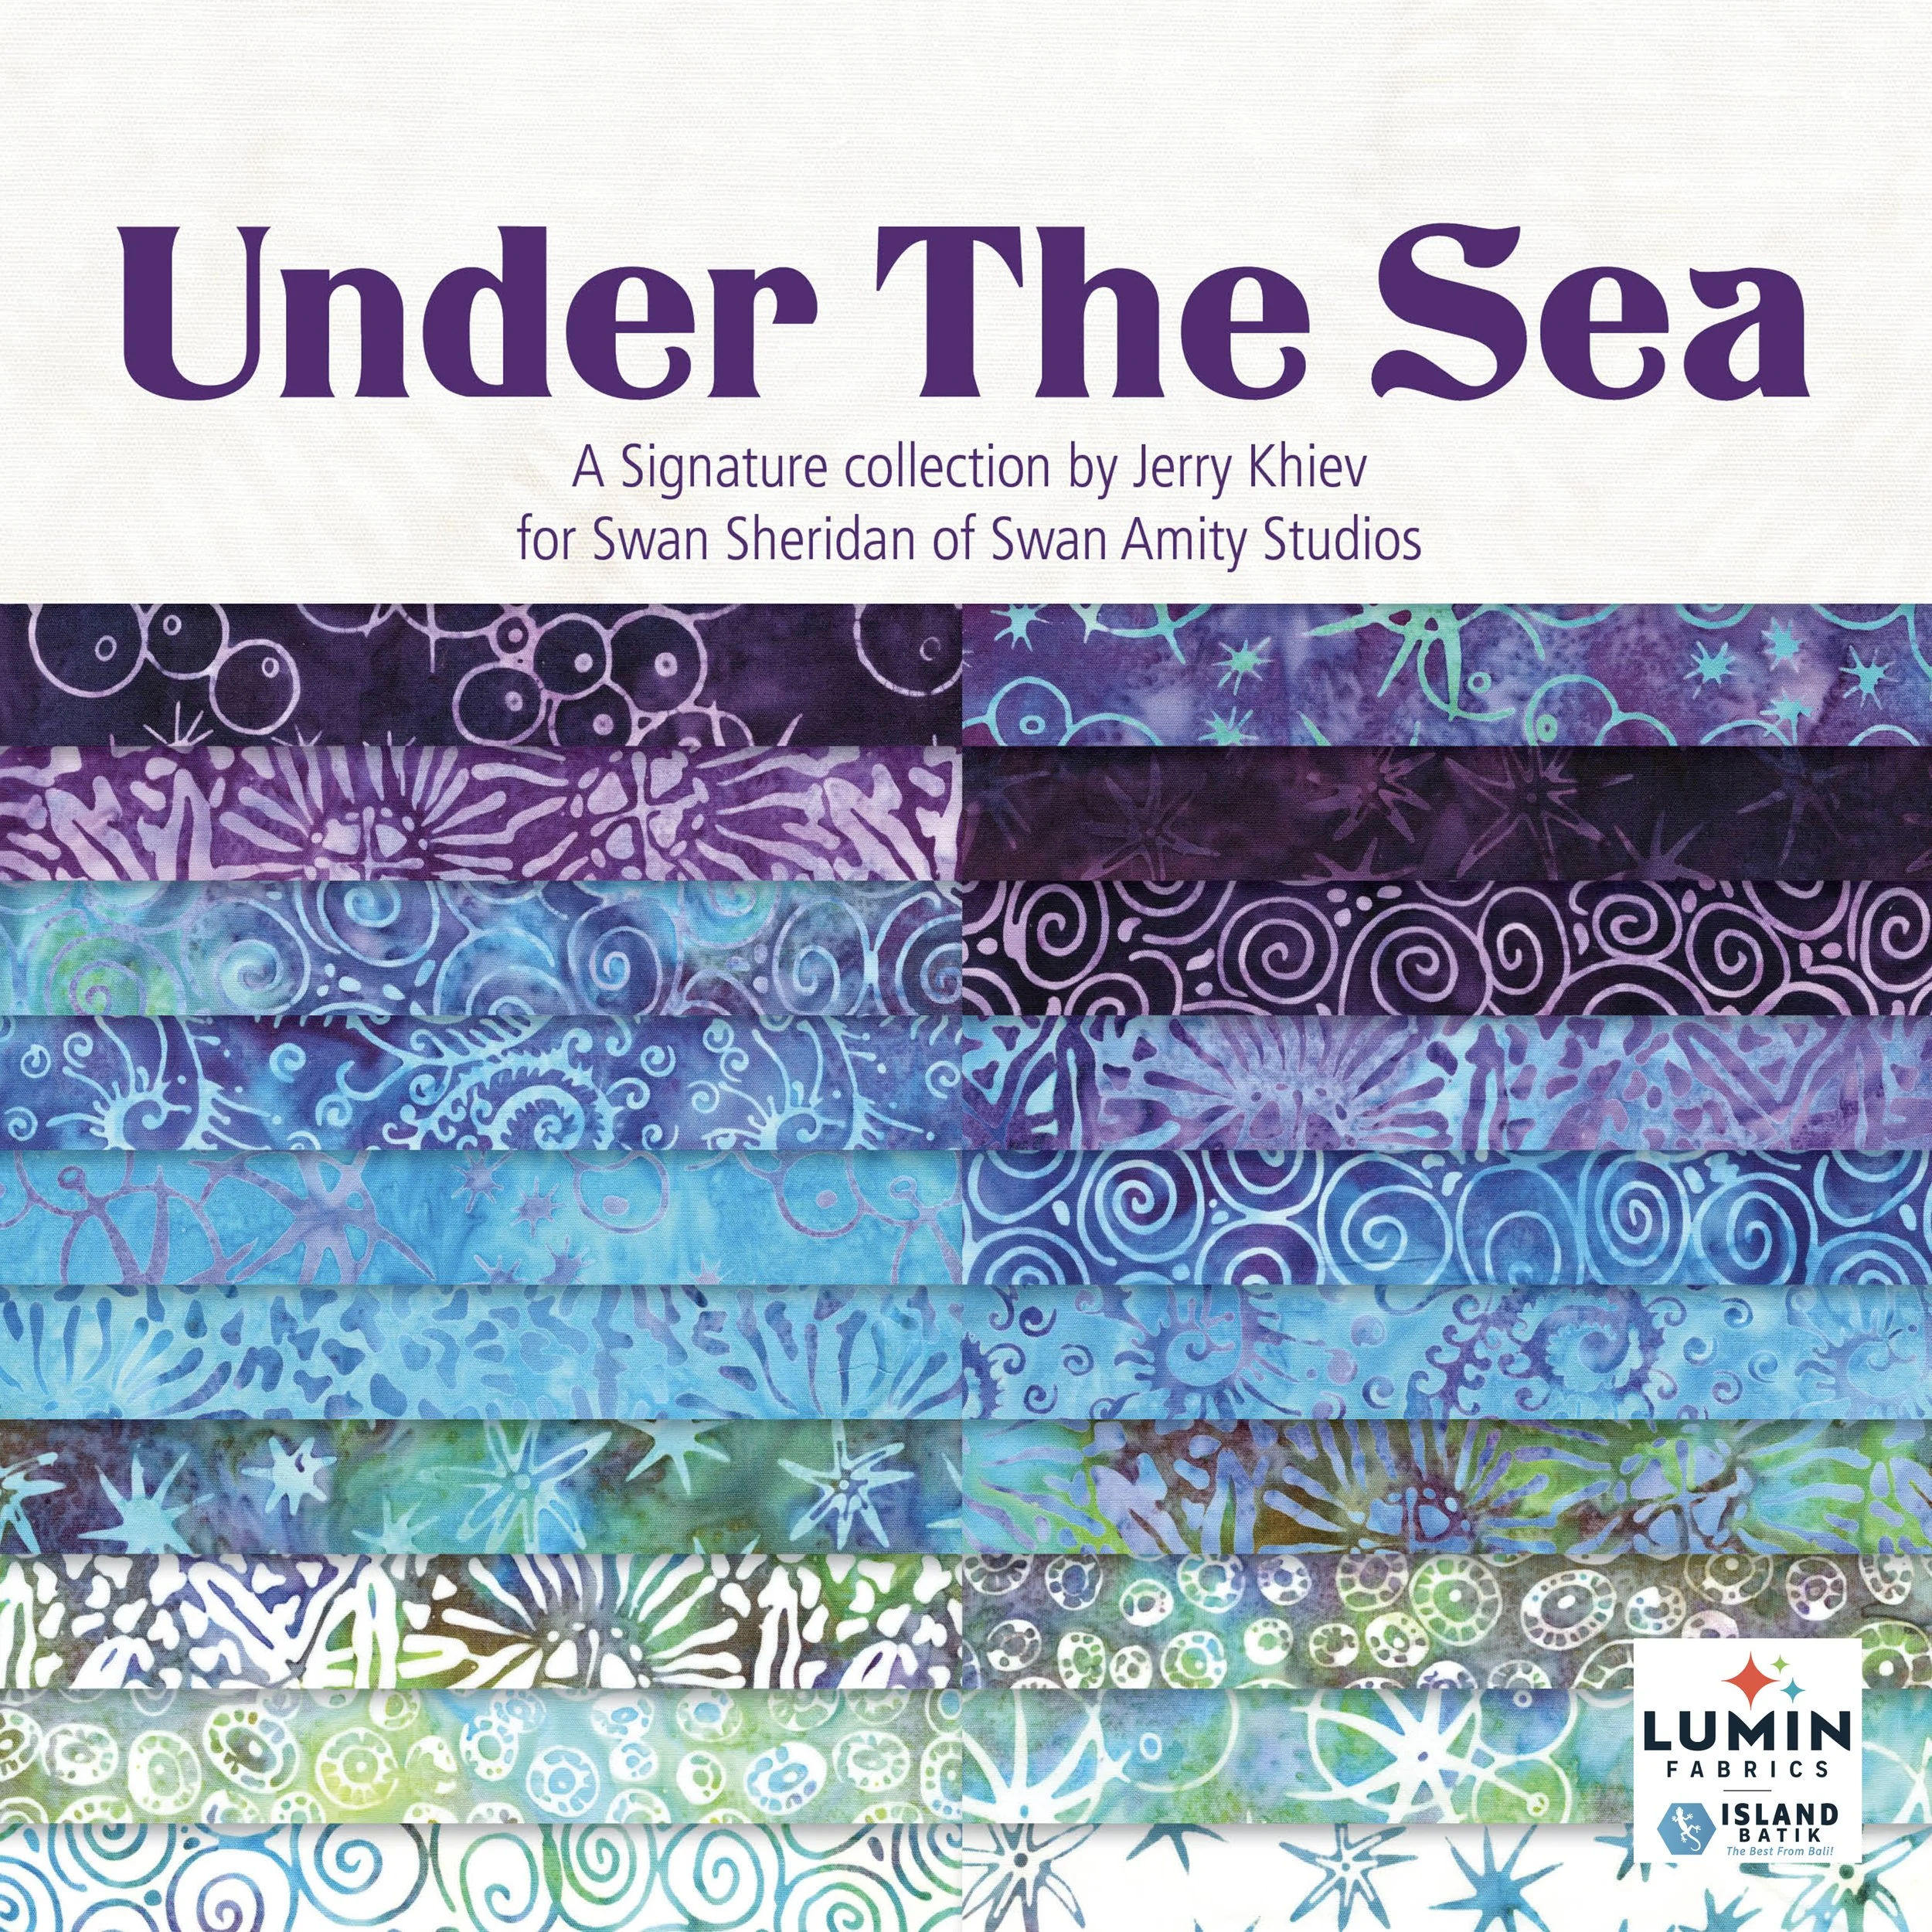
This month the challenge was to use at least 5 traditional quilt blocks to create a lap or larger size quilt using a new fabric collection from Island Batik of Lumin Fabrics. I was given the new Summer 2025 Under the Sea fabric collection by Jerry Khiev for Swan Sheridan of Swan Amity Studios for my project and I love the rich colours in this beautiful collection.
For my Starburst quilt I chose to use the following blocks: Nine Patch Chain, Flying Geese, Friendship Star, Variable Star, Four Patch, and Half Square Triangles. Although these are all easy to make traditional quilt blocks, there were some that I had never made before so this was the perfect opportunity to learn a new block.
I played with the above blocks in EQ8 and came up with the following design which used all 20 of the fabrics in the Under the Sea fabric collection.

While this was my final design decision, it wasn’t my original concept…I made a few changes mostly due to the fact that I hadn’t respected the fact that you can’t drop just any block into any size space. For example, it doesn’t work very well to put a 3 unit block into a 8” space in your quilt - the cutting math doesn’t work out very well (ask me how I know!).
After a bit of a hiccup with that issue, I changed up my design a bit and everything went smoothly after that.
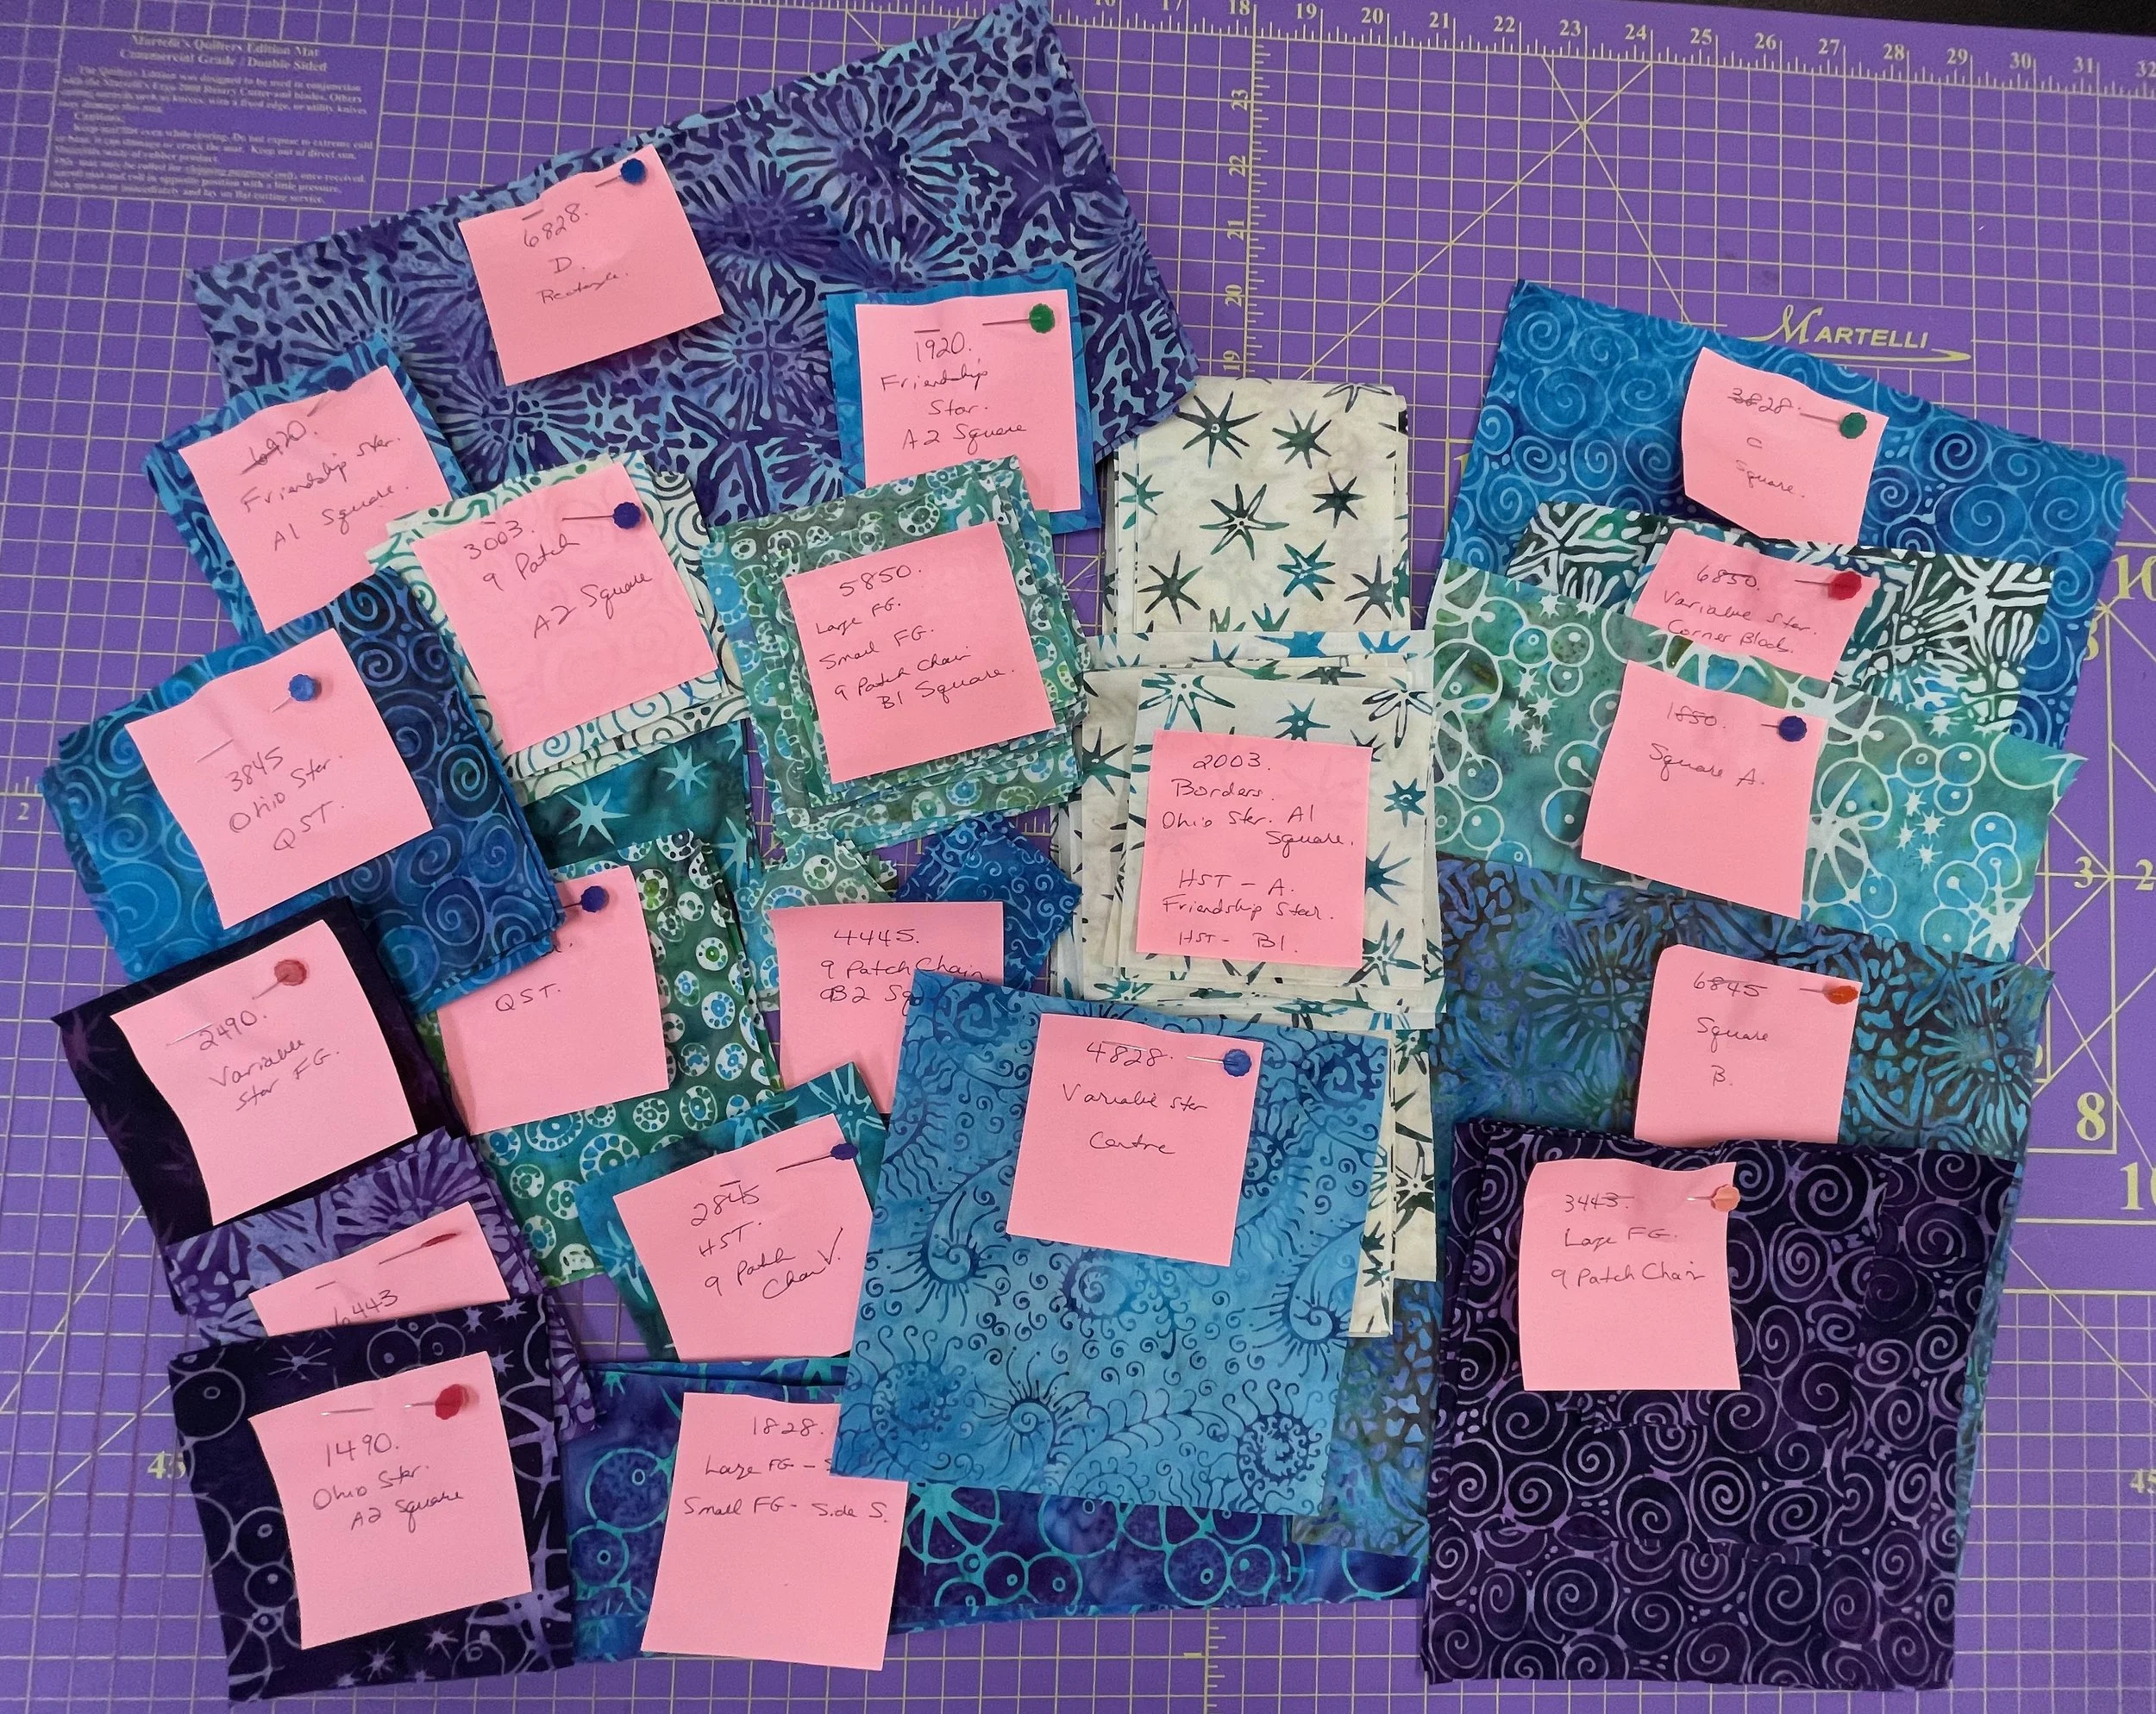
Because there was a lot of cutting and stitching to create each of the blocks (isn’t there always?!), I found it helpful to create a table of the various fabrics in each block. This included all of the fabrics in the Under the Sea collection (20 fabrics in total for the entire quilt!), the number of pieces to be cut from each fabric, and cutting dimensions.
For example, if I need 20 - 3 ½” x 3 1/2” squares of a certain fabric, this means that I’ll need to cut 2 strips of fabric 3 ½” x WOF and then sub-cut into 20 - 3 ½” x 3 1/2” squares. Once I’ve created this table, I like to print it out so I can check off each piece as I cut it. This ensures that I don’t miss any and have everything ready to start stitching the blocks together. It’s also helpful if I want to replicate the quilt again in the future.
Once all of the fabric had been cut, I labelled each one with the block name and piece so I could start stitching the blocks together.
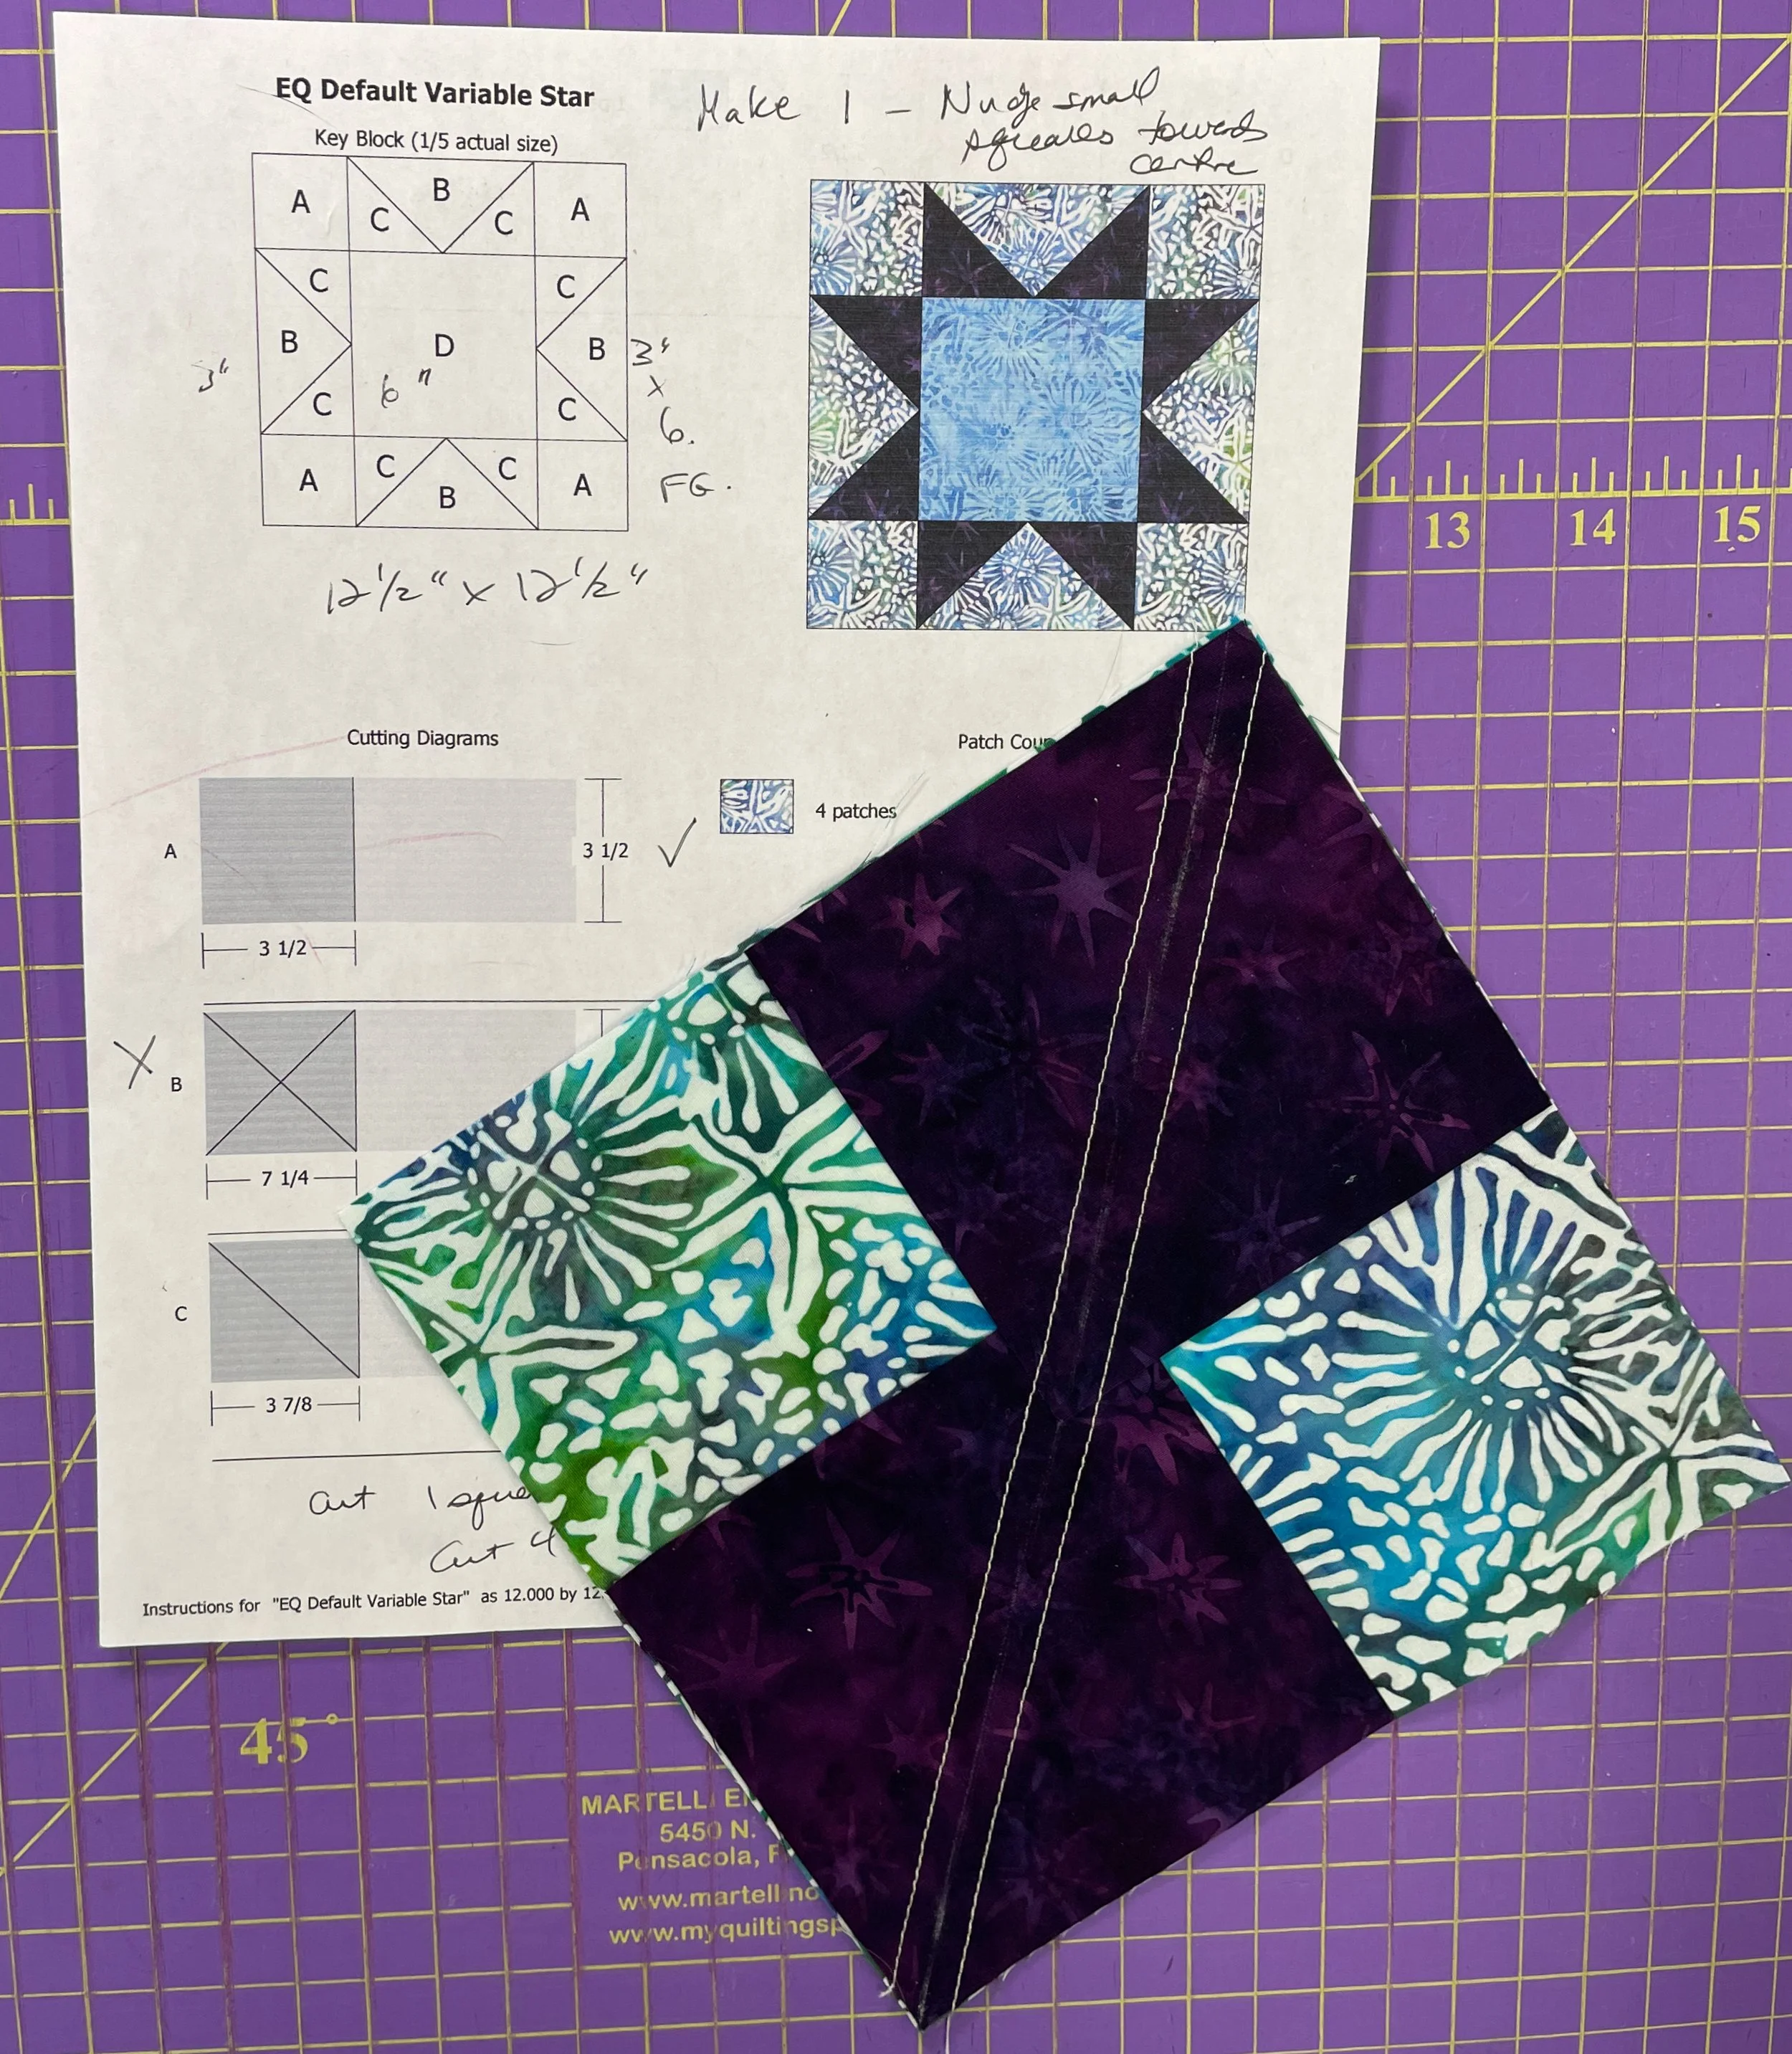
As there were several Flying Geese blocks in the quilt and also used to make the Variable Star block, I used the 4-in-1 method to create them. I like to make these a bit bigger and trim them down with the Studio 180 Design Wing Clipper tool - very helpful and makes for very nice results.
And, of course, I had help from my purry assistants while making this project. Here’s Victor modelling the finished Variable Star block 🤣.

Once all of the blocks were stitched together, I placed them on my design wall and started constructing the quilt top. It all went together easily (thankfully!).
And here’s the final result.
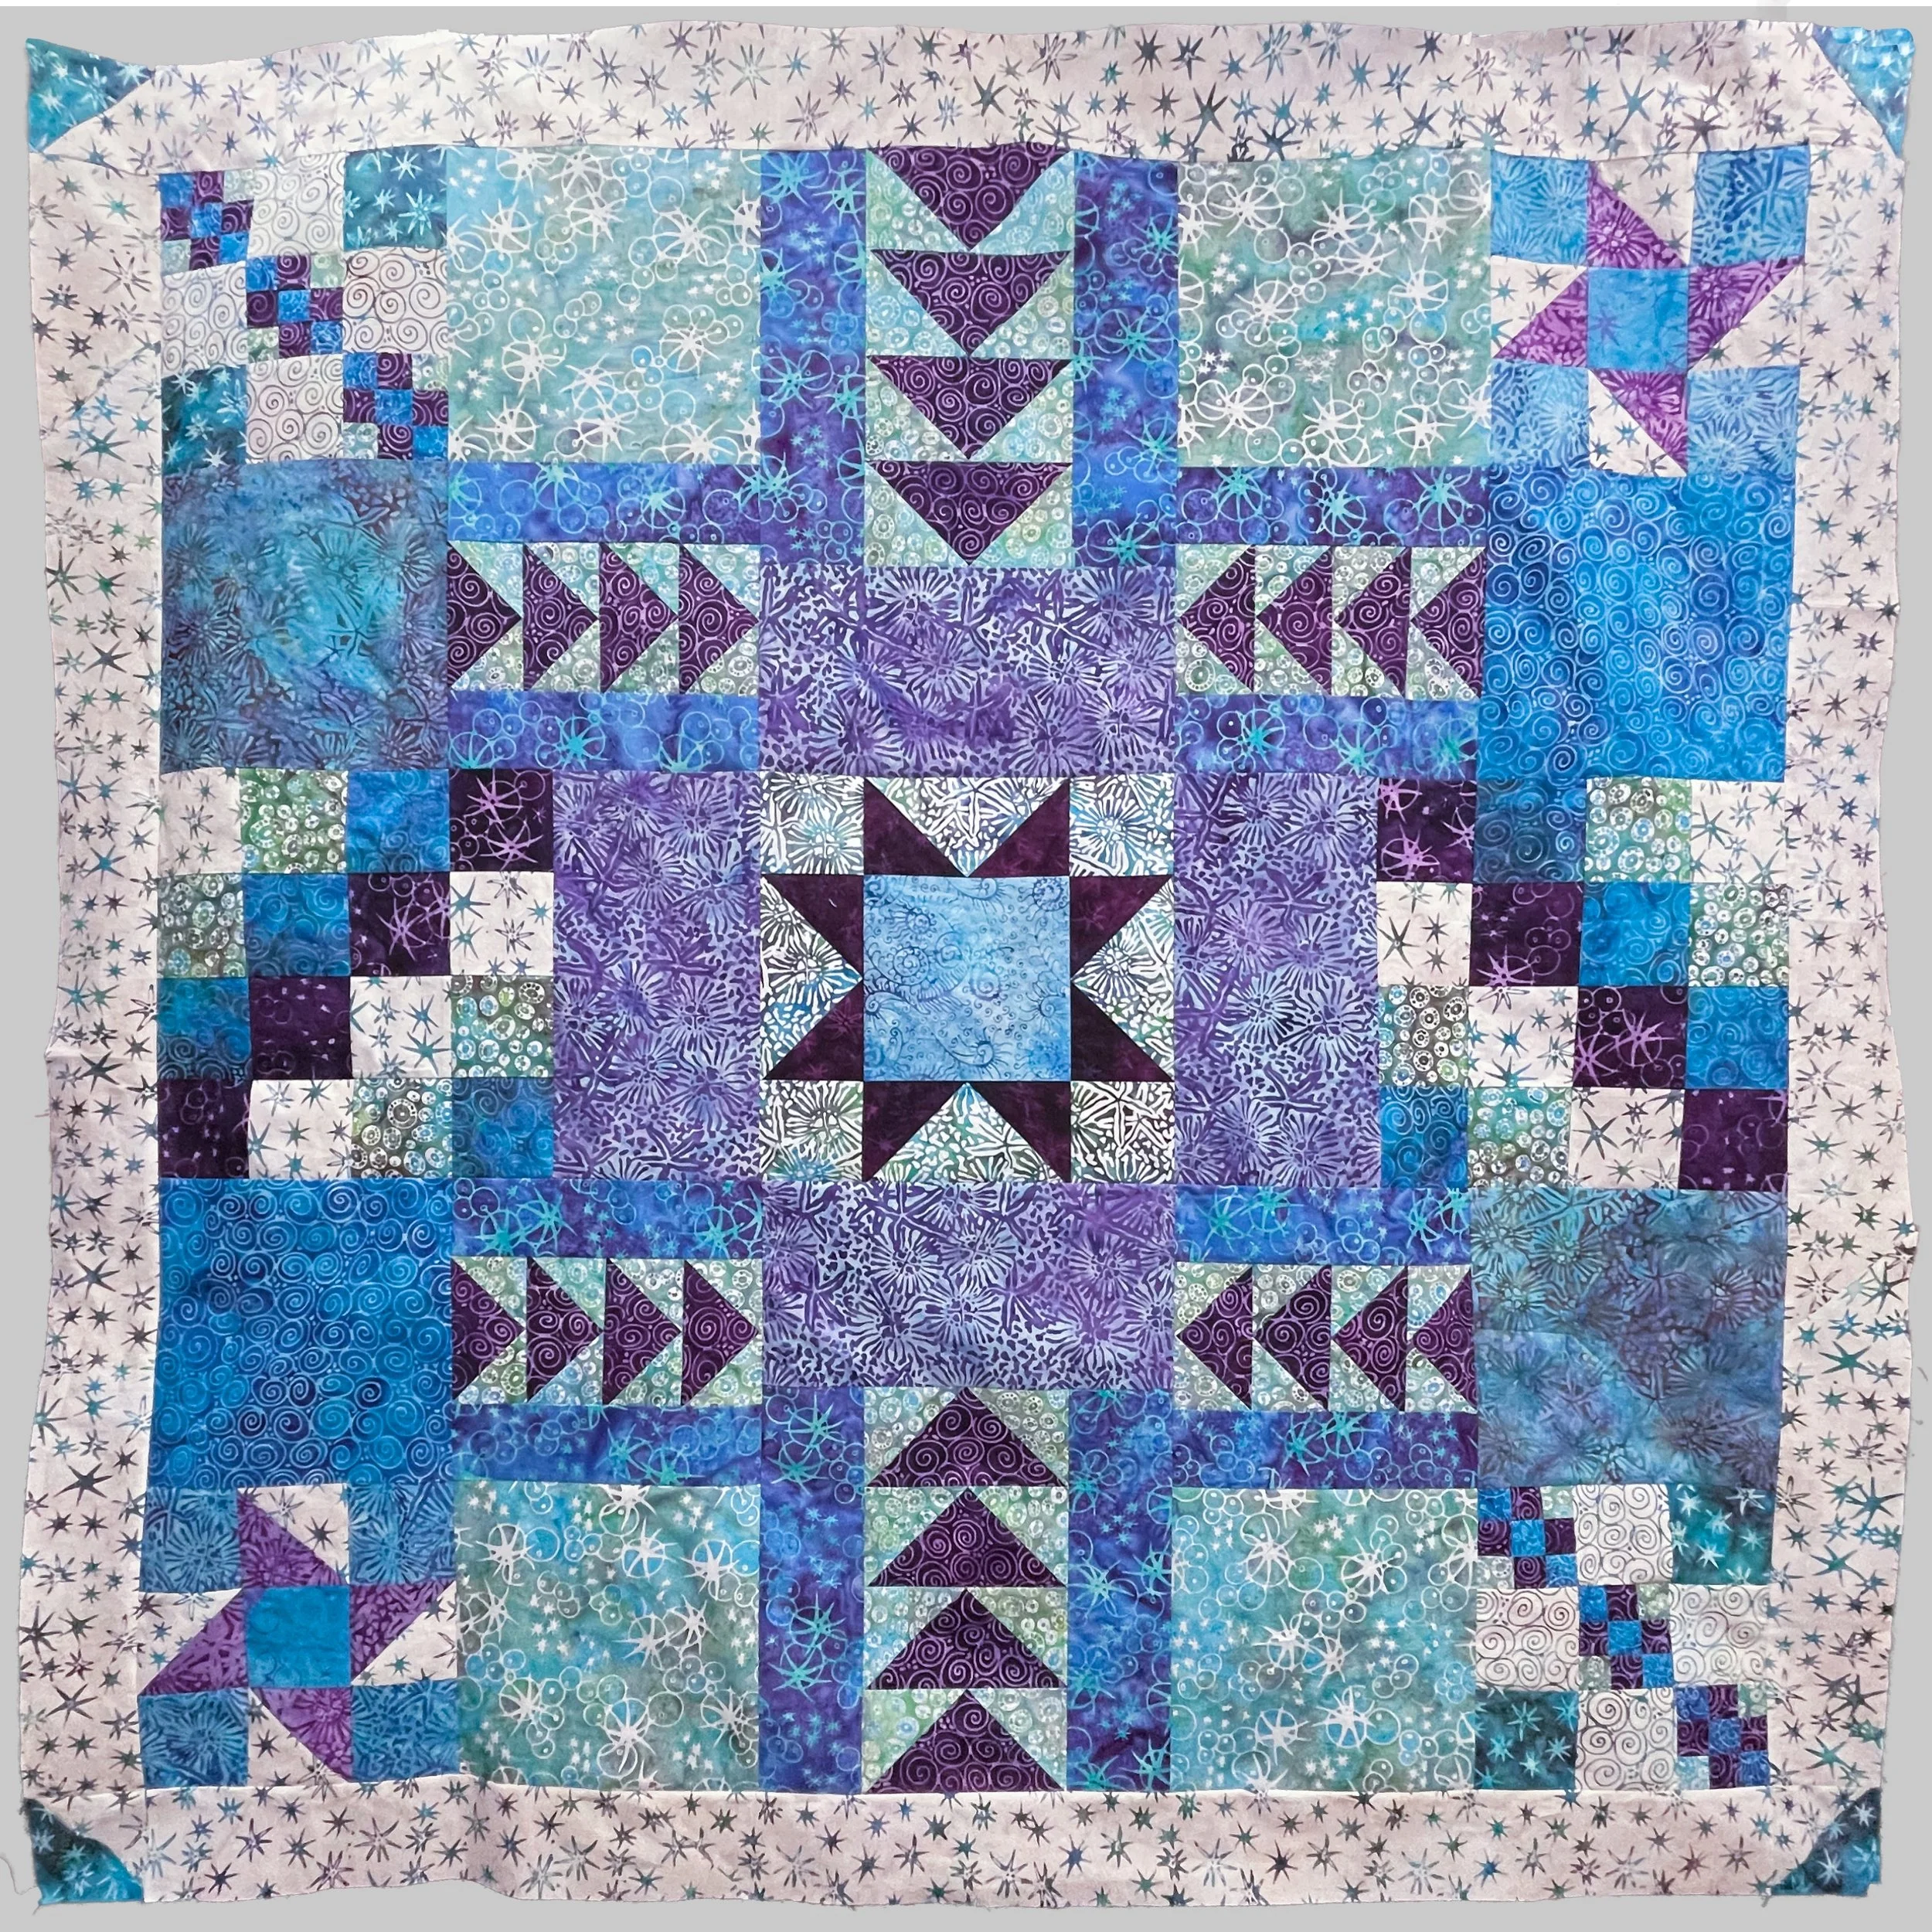
Notice that I haven’t quilted this project…yet! I’ve had a few family issues to deal with and some unanticipated travel so I haven’t yet quilted Starburst as I want to be able to do it justice - and rushing the quilting part never ends well. I have lots of ideas and will be quilting it in the future with some ruler work and free motion quilting.
As this is the last week of the Timeless Traditions blog hop, it’s also your last chance to win one of two fat quarter bundles of either Paisley Pop or Under the Sea (yes, the fabrics I used to make my Starburst quilt!).
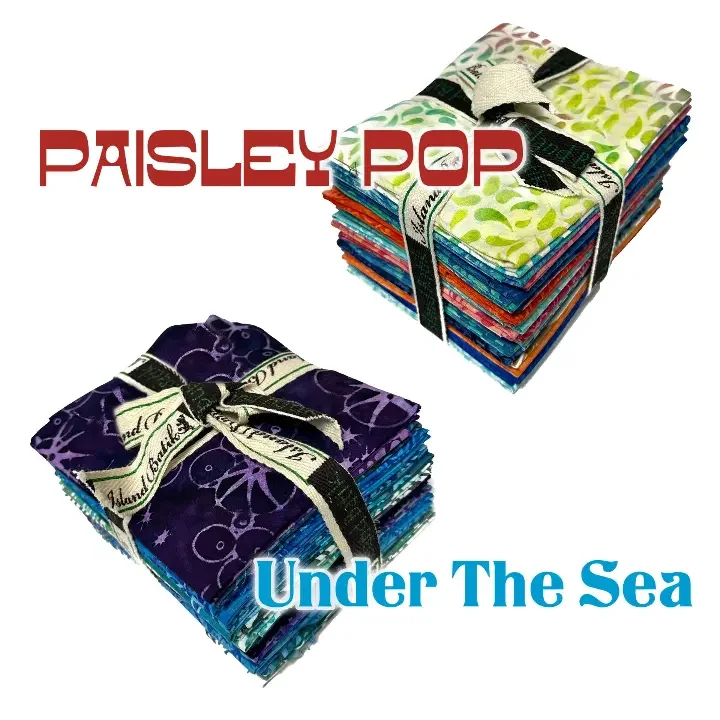
To enter to win, enter a comment on this Lumin Fabrics Facebook post or on their Instagram post.
NOTE: You must leave the comment on these posts only to be eligible to win - don’t leave a comment on my blog post.
Be sure to check with your local quilt shop to get the latest Island Batik of Lumin Fabrics fabrics.
Thanks to Hobbs Quilt Batting, Oliso, Aurifil, Studio 180 Design, Schmetz Needles, and Island Batik of Lumin Fabrics for the items that they sent me that allowed me to create this month’s project.
If you’ve missed any of the projects from other Island Batik Ambassadors for the Timeless Traditions blog hop, you can find them at the following websites.
Brenda Alburl ~ Songbird Designs
Renee Atkinson ~ Pink Tulip Quilting
Susan Deshensky ~ Lady Blue Quilts Studio
Tina Dillard - Quilting Affection Designs
Brittany Fisher ~ Bobbin with Brittany
Kimberly Flannagan - Kimberlys Quilts
Preeti Harris ~ Sew Preeti Quilts
Mania Hatziioannidi ~ Mania for quilts
Connie Kauffman ~ Kauffman Designs
Connie Kresin Campbell ~ Freemotion by the River
Emily Leachman ~ The Darling Dogwood
Denise Looney ~ A Quiltery
Leah Malasky ~ Quilted Delights
Lisa Pickering ~ Lisa’s Quilting Passion
Sarah Pitcher ~ Pitcher’s Boutique
Gail Sheppard ~ Quilting Gail
Carol Stanek ~ Stitch with Color
Solomae Stoycoff - Cuddle Cat Quiltworks
Jennifer Thomas ~ Curlicue Creations
Suzy Webster ~ Websterquilt
Be sure you’re following me on Facebook so you won’t miss out on what I’ll be creating next with Island Batik fabrics!
Note: The products featured in this blogpost were given to me by Island Batik and their sponsors. Thank you!
#islandbatik #islandbatikambassador #loveislandbatik #hobbsbatting, #hobbsinside, #aurifil #aurifilthreads #olisoconnects #createwitholiso
Sew Stylish with ByAnnie.com!
Welcome to October and a new Island Batik Ambassador challenge!
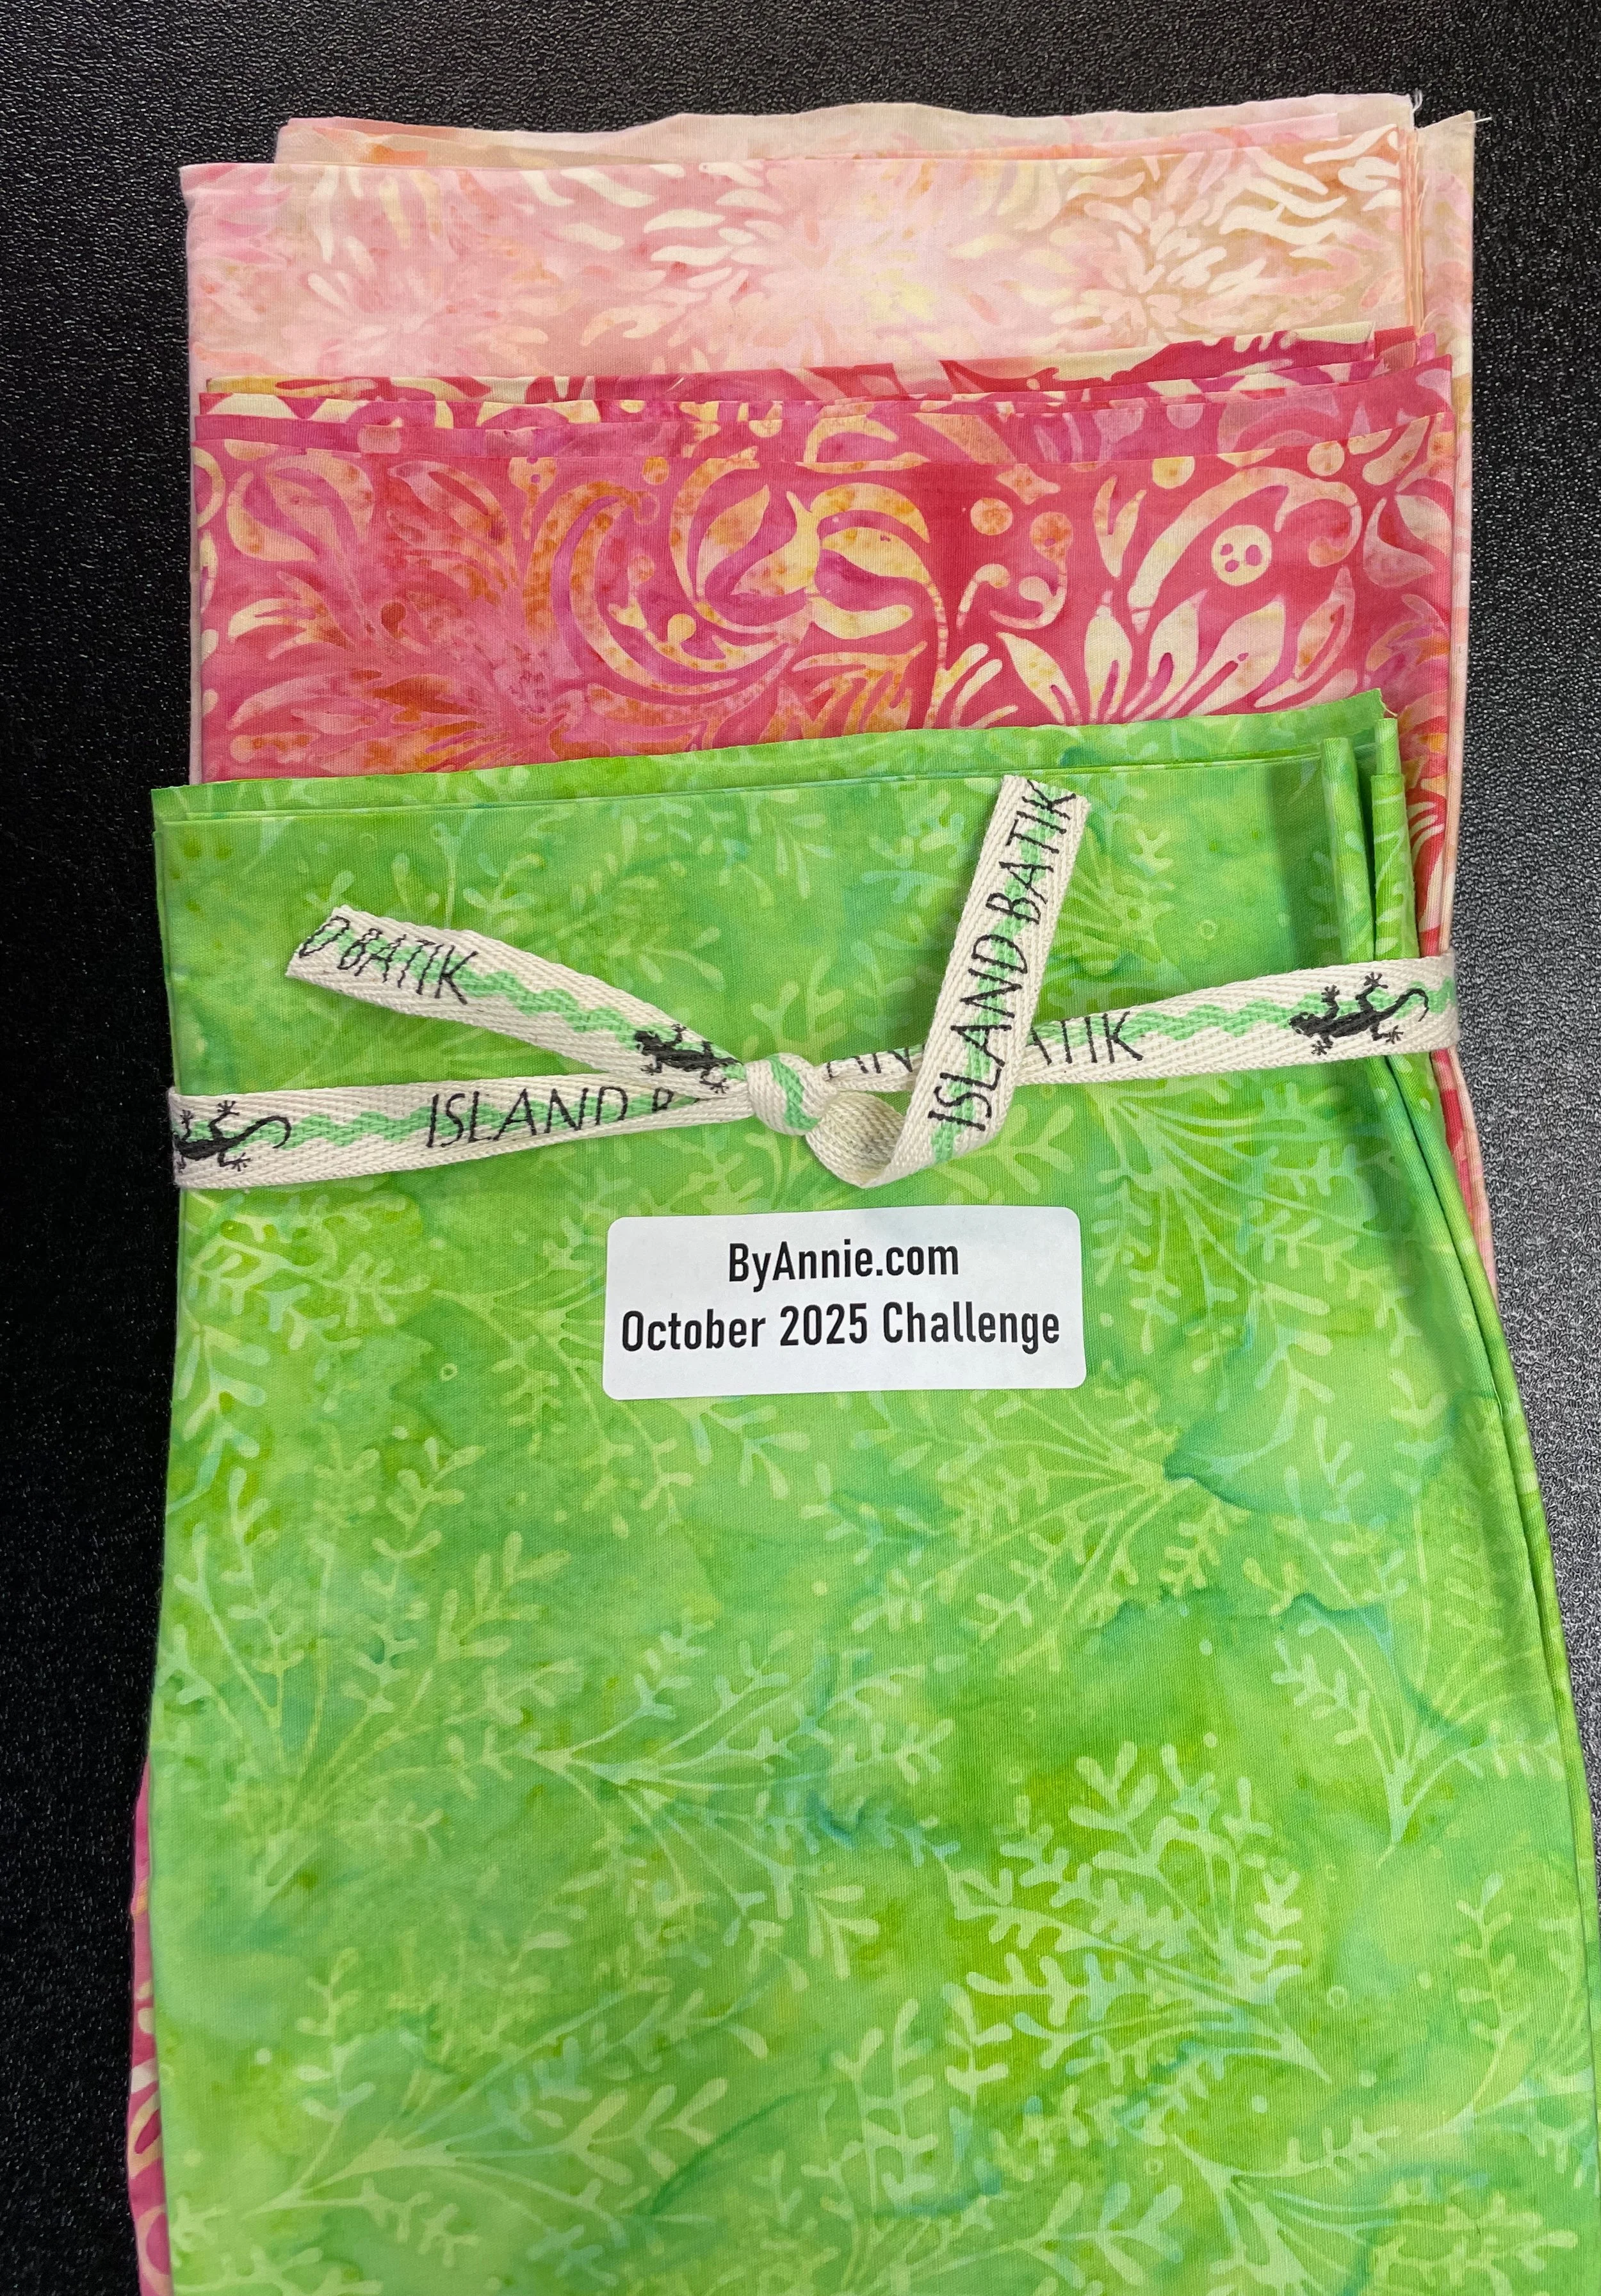
This month, the theme is “Sew Stylish” and Ambassadors were challenged to create a pattern from ByAnnie.com using Island Batik of Lumin Fabrics fabrics.

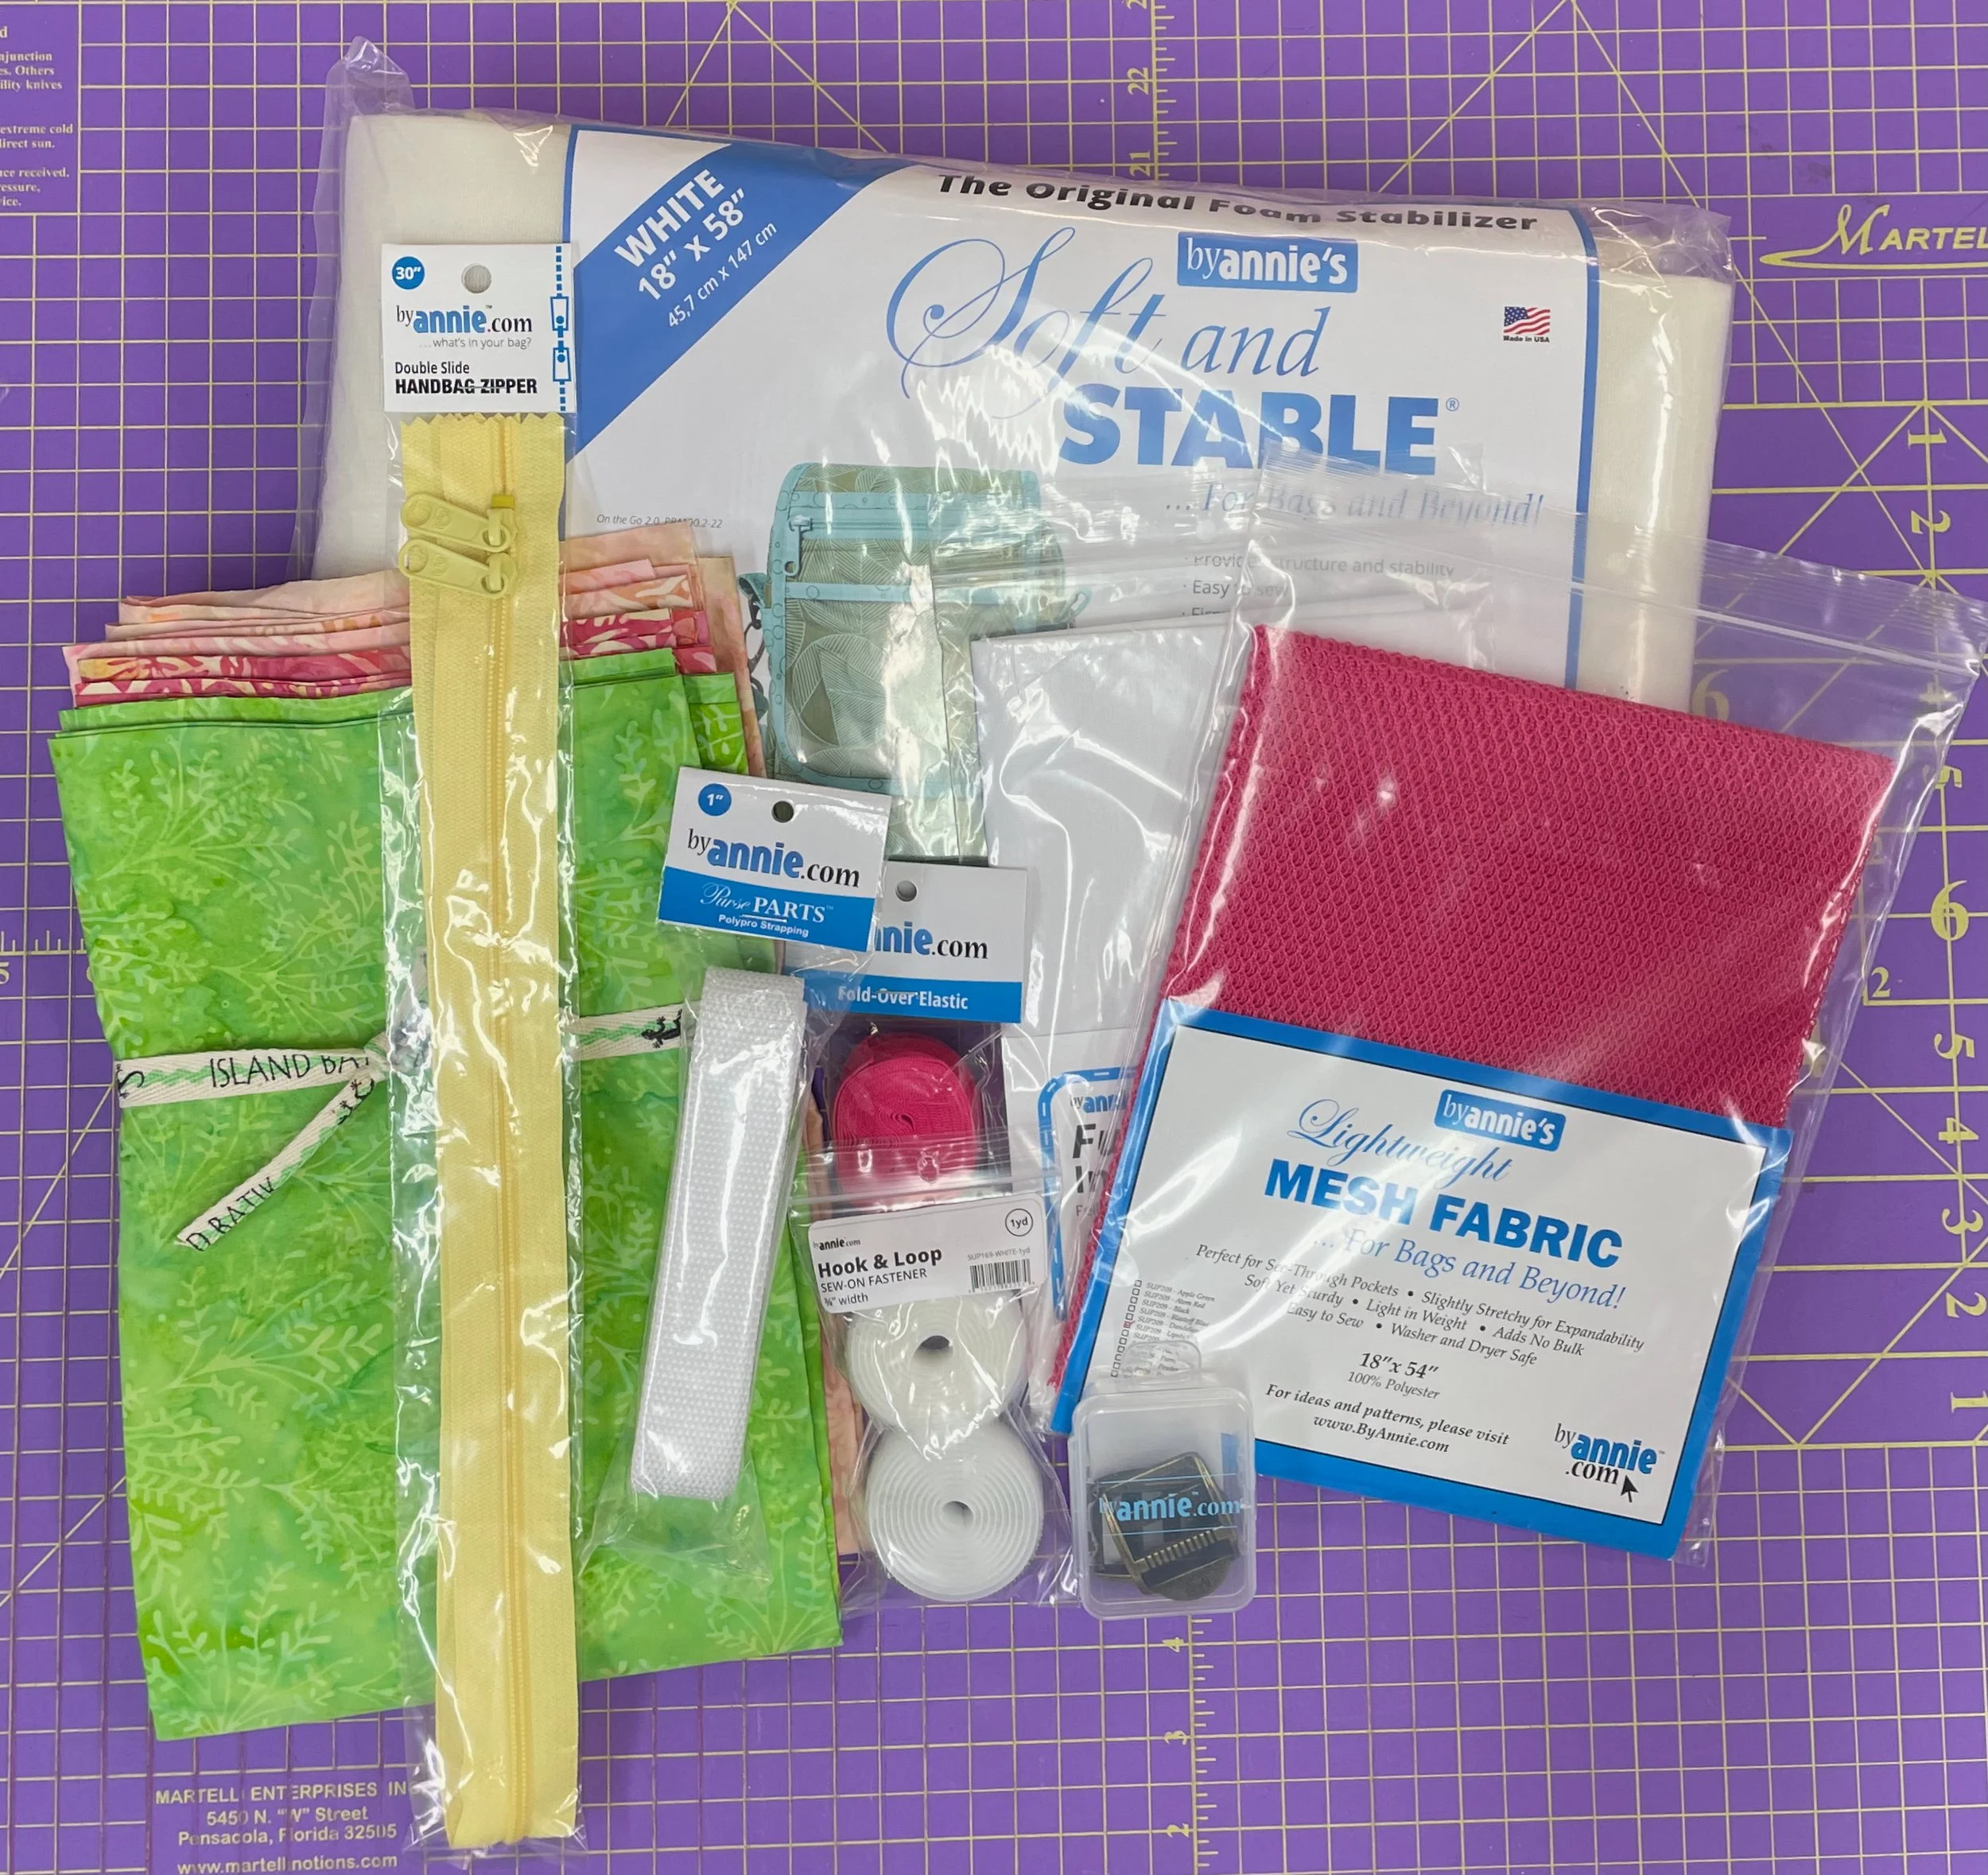
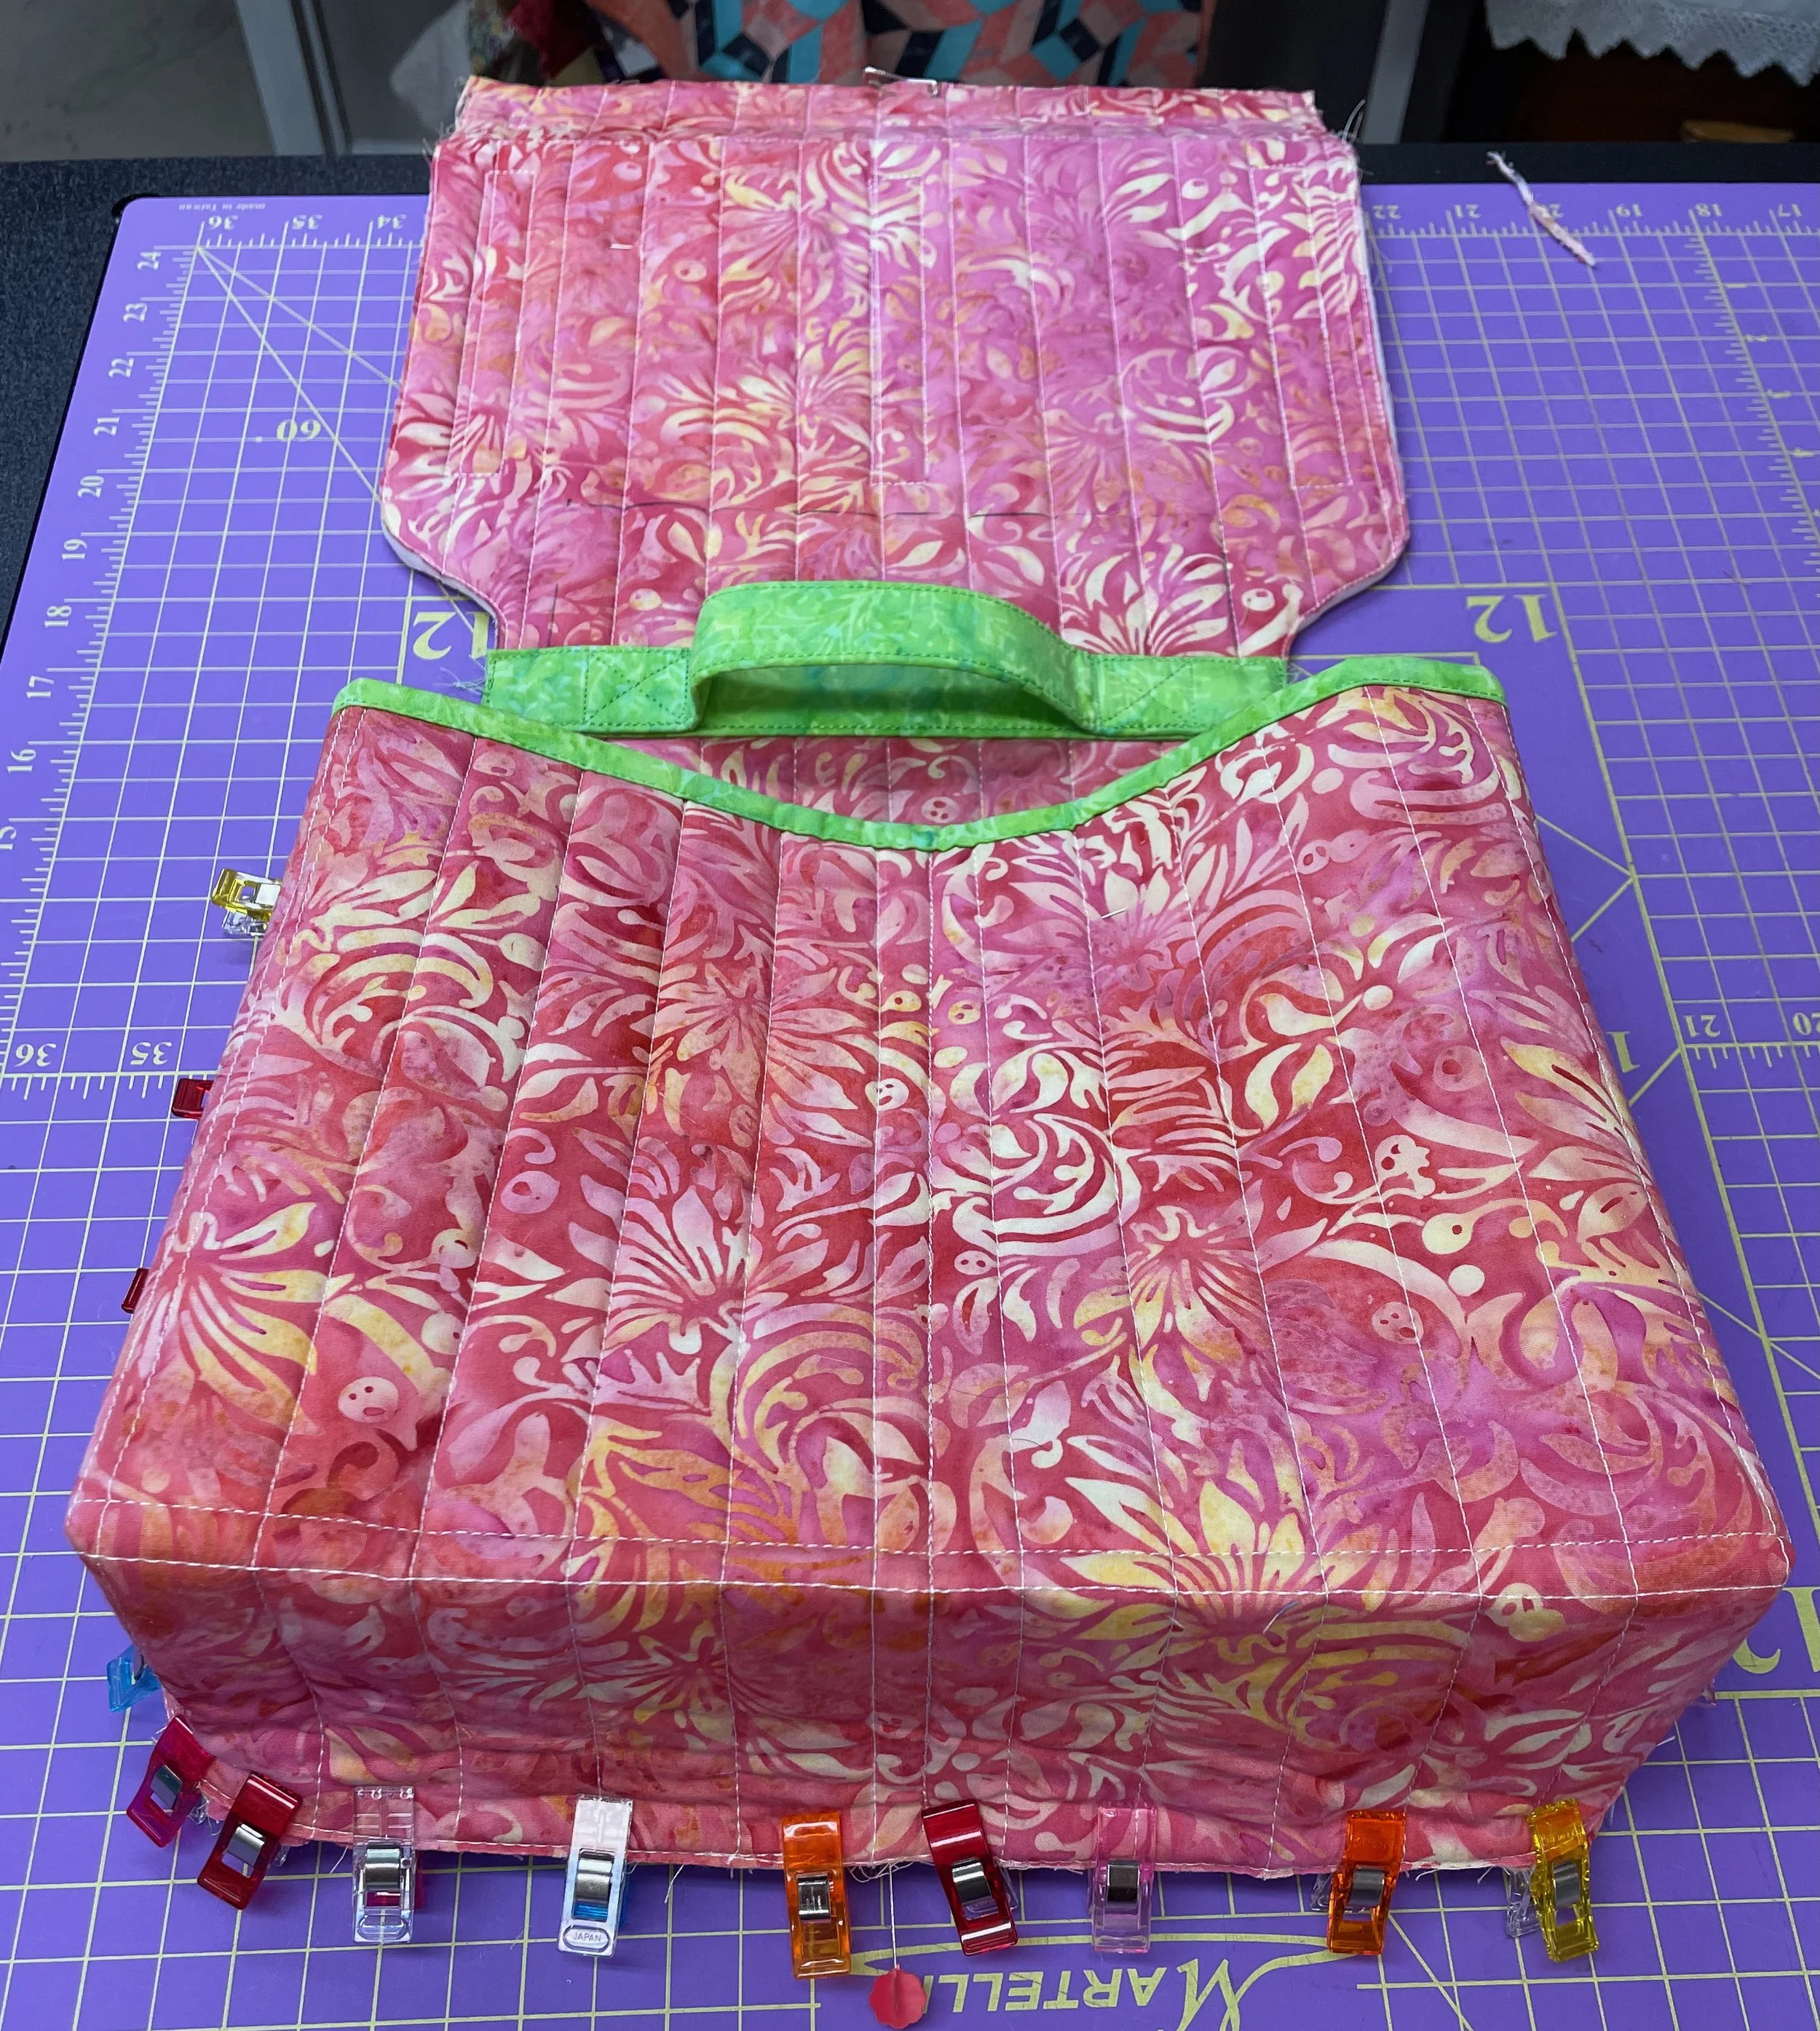
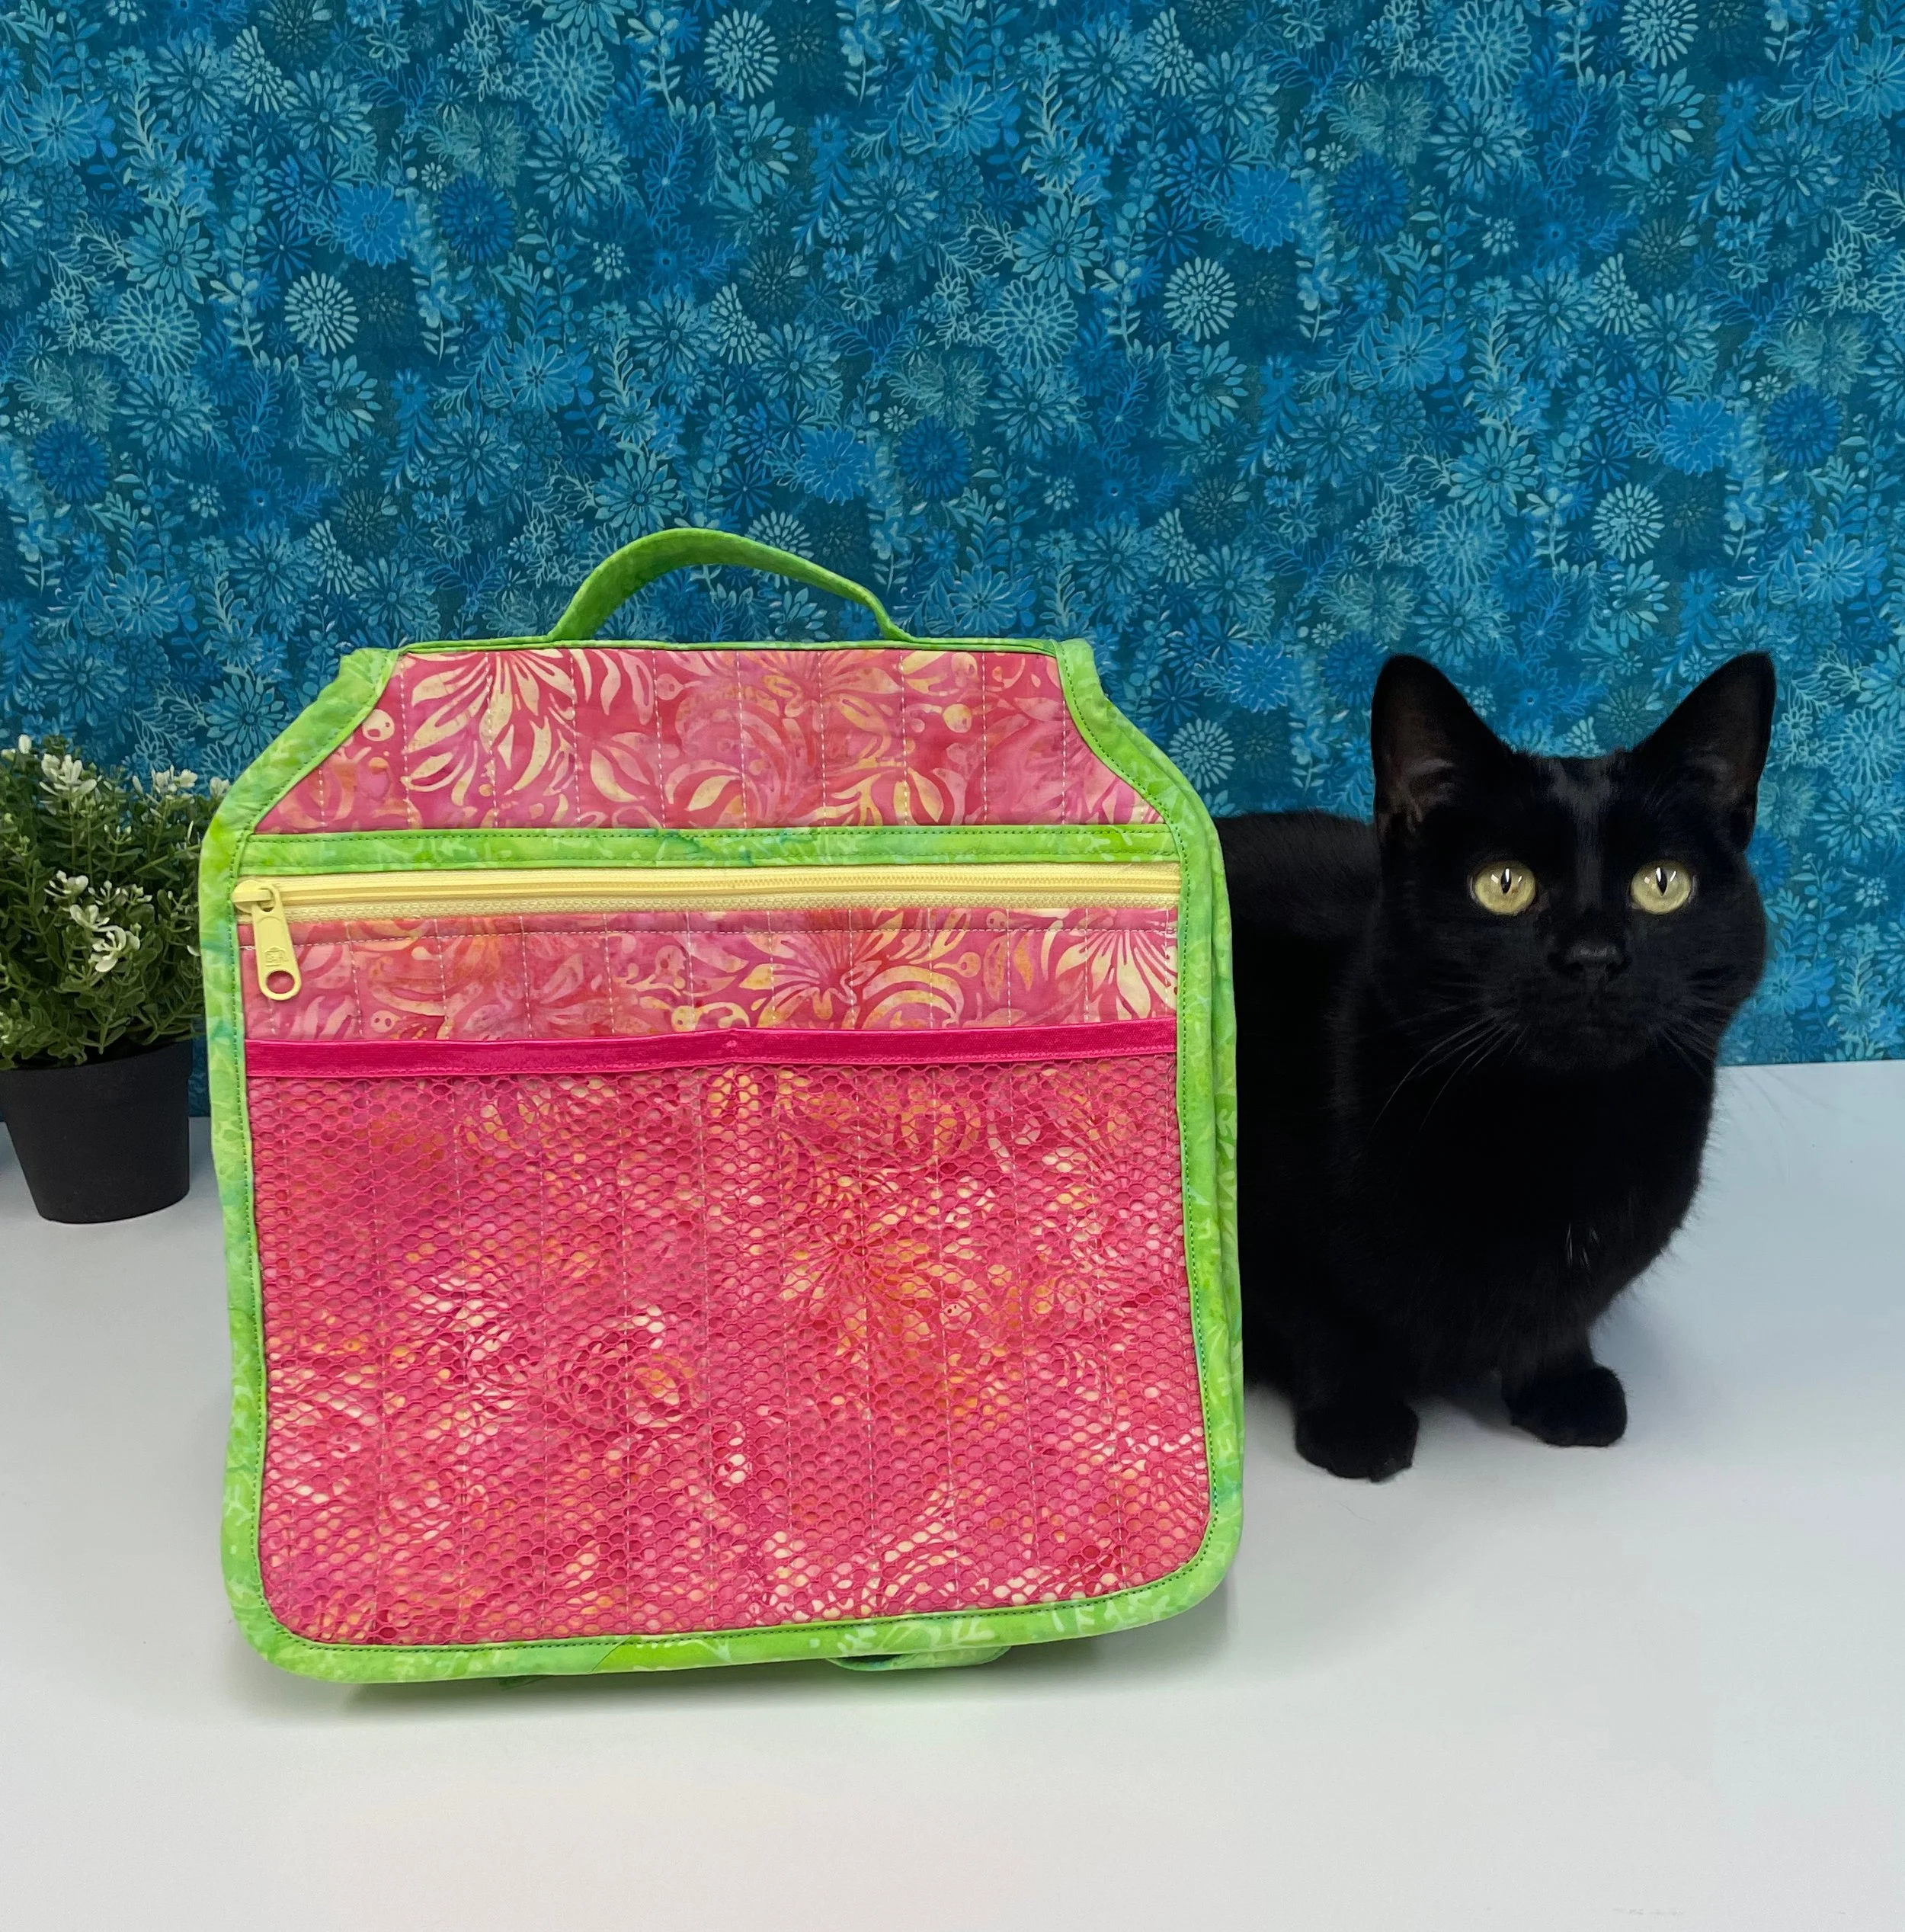
For my project, I chose “Sidekick” which is a saddlebag organizer that has lots of pockets for storage and is made for use with either a chair or a walker.

I thought this would be perfect for my Mom to use with her walker to carry various items. Big thanks to ByAnnie.com for providing all of the notions needed to make the Sidekick pattern: strapping, Soft & Stable, hook and loop tape, fold-over elastic, and more!
I was really pleased with the final result but there were times when I felt a bit overwhelmed by this project and wasn’t sure if I’d be able to make it successfully. I’m not a bag maker. My previous bag experience was making a pouch project so this was a big step out of my comfort zone but that’s what challenges are all about, right?! 😉 Thanks to the excellent instructions in the ByAnnie.com pattern and the Add-on Videos for this pattern, I was able to persevere and I’m thrilled with the result.
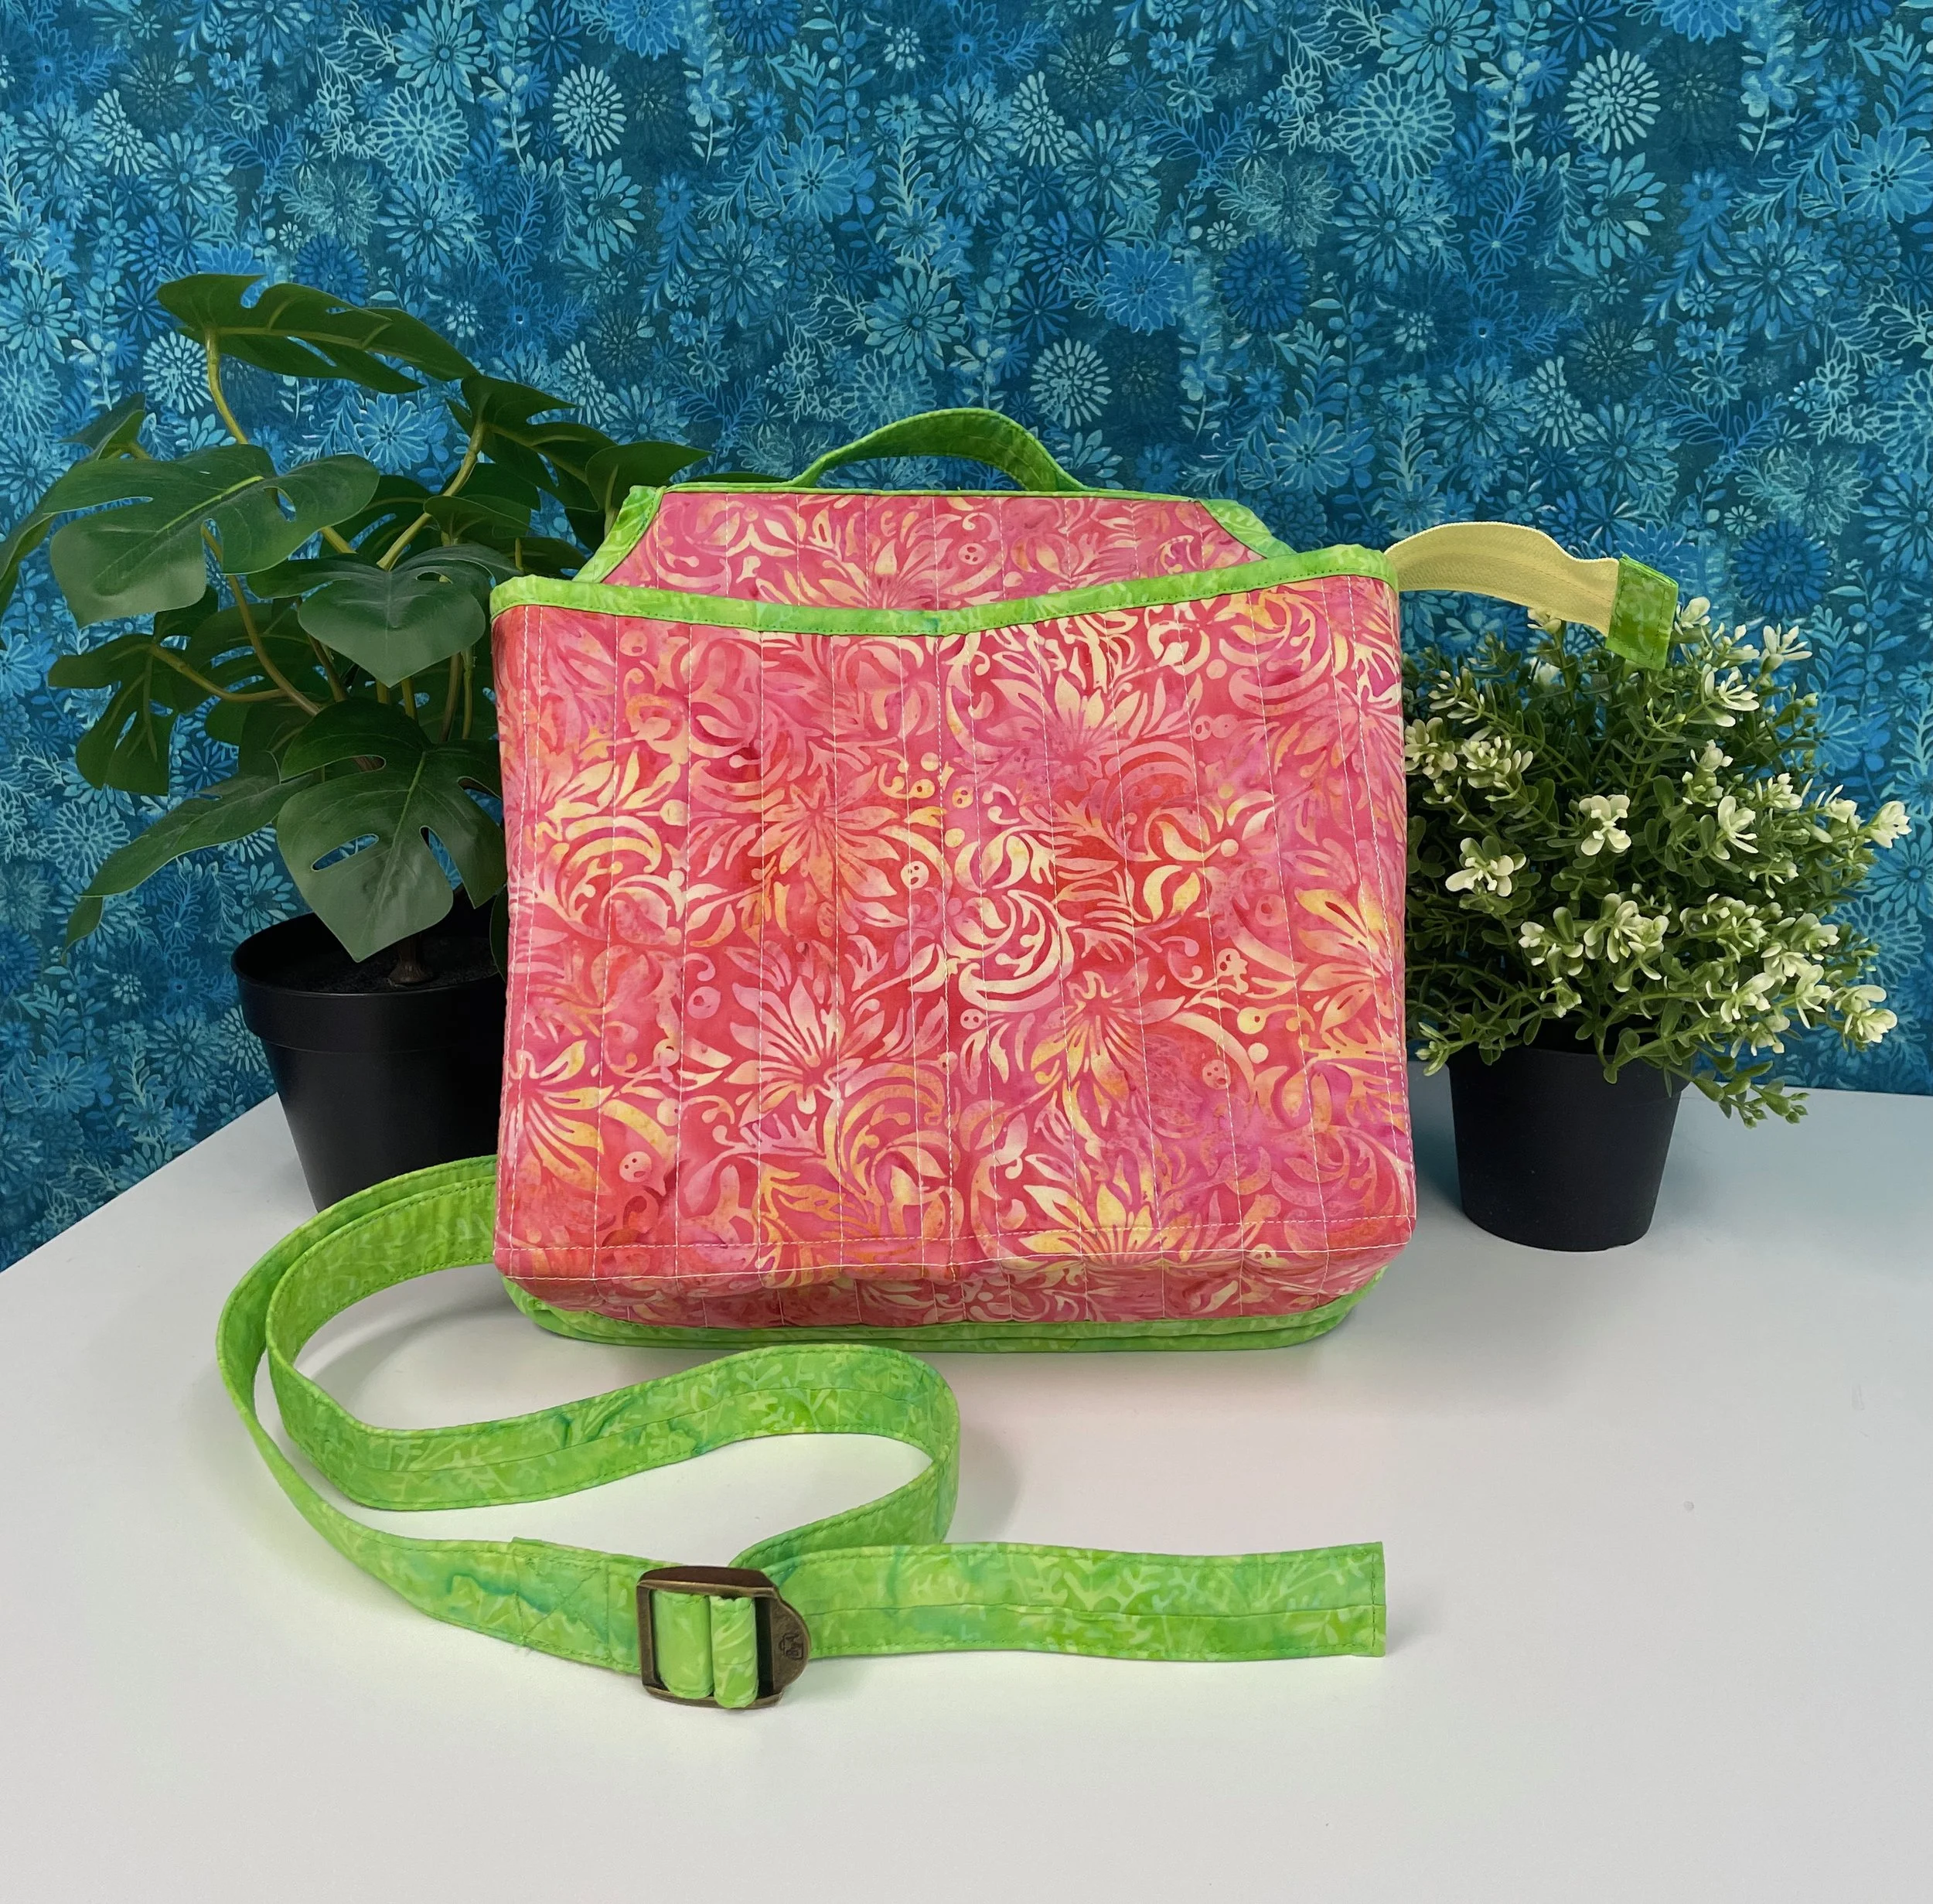
Sidekick front
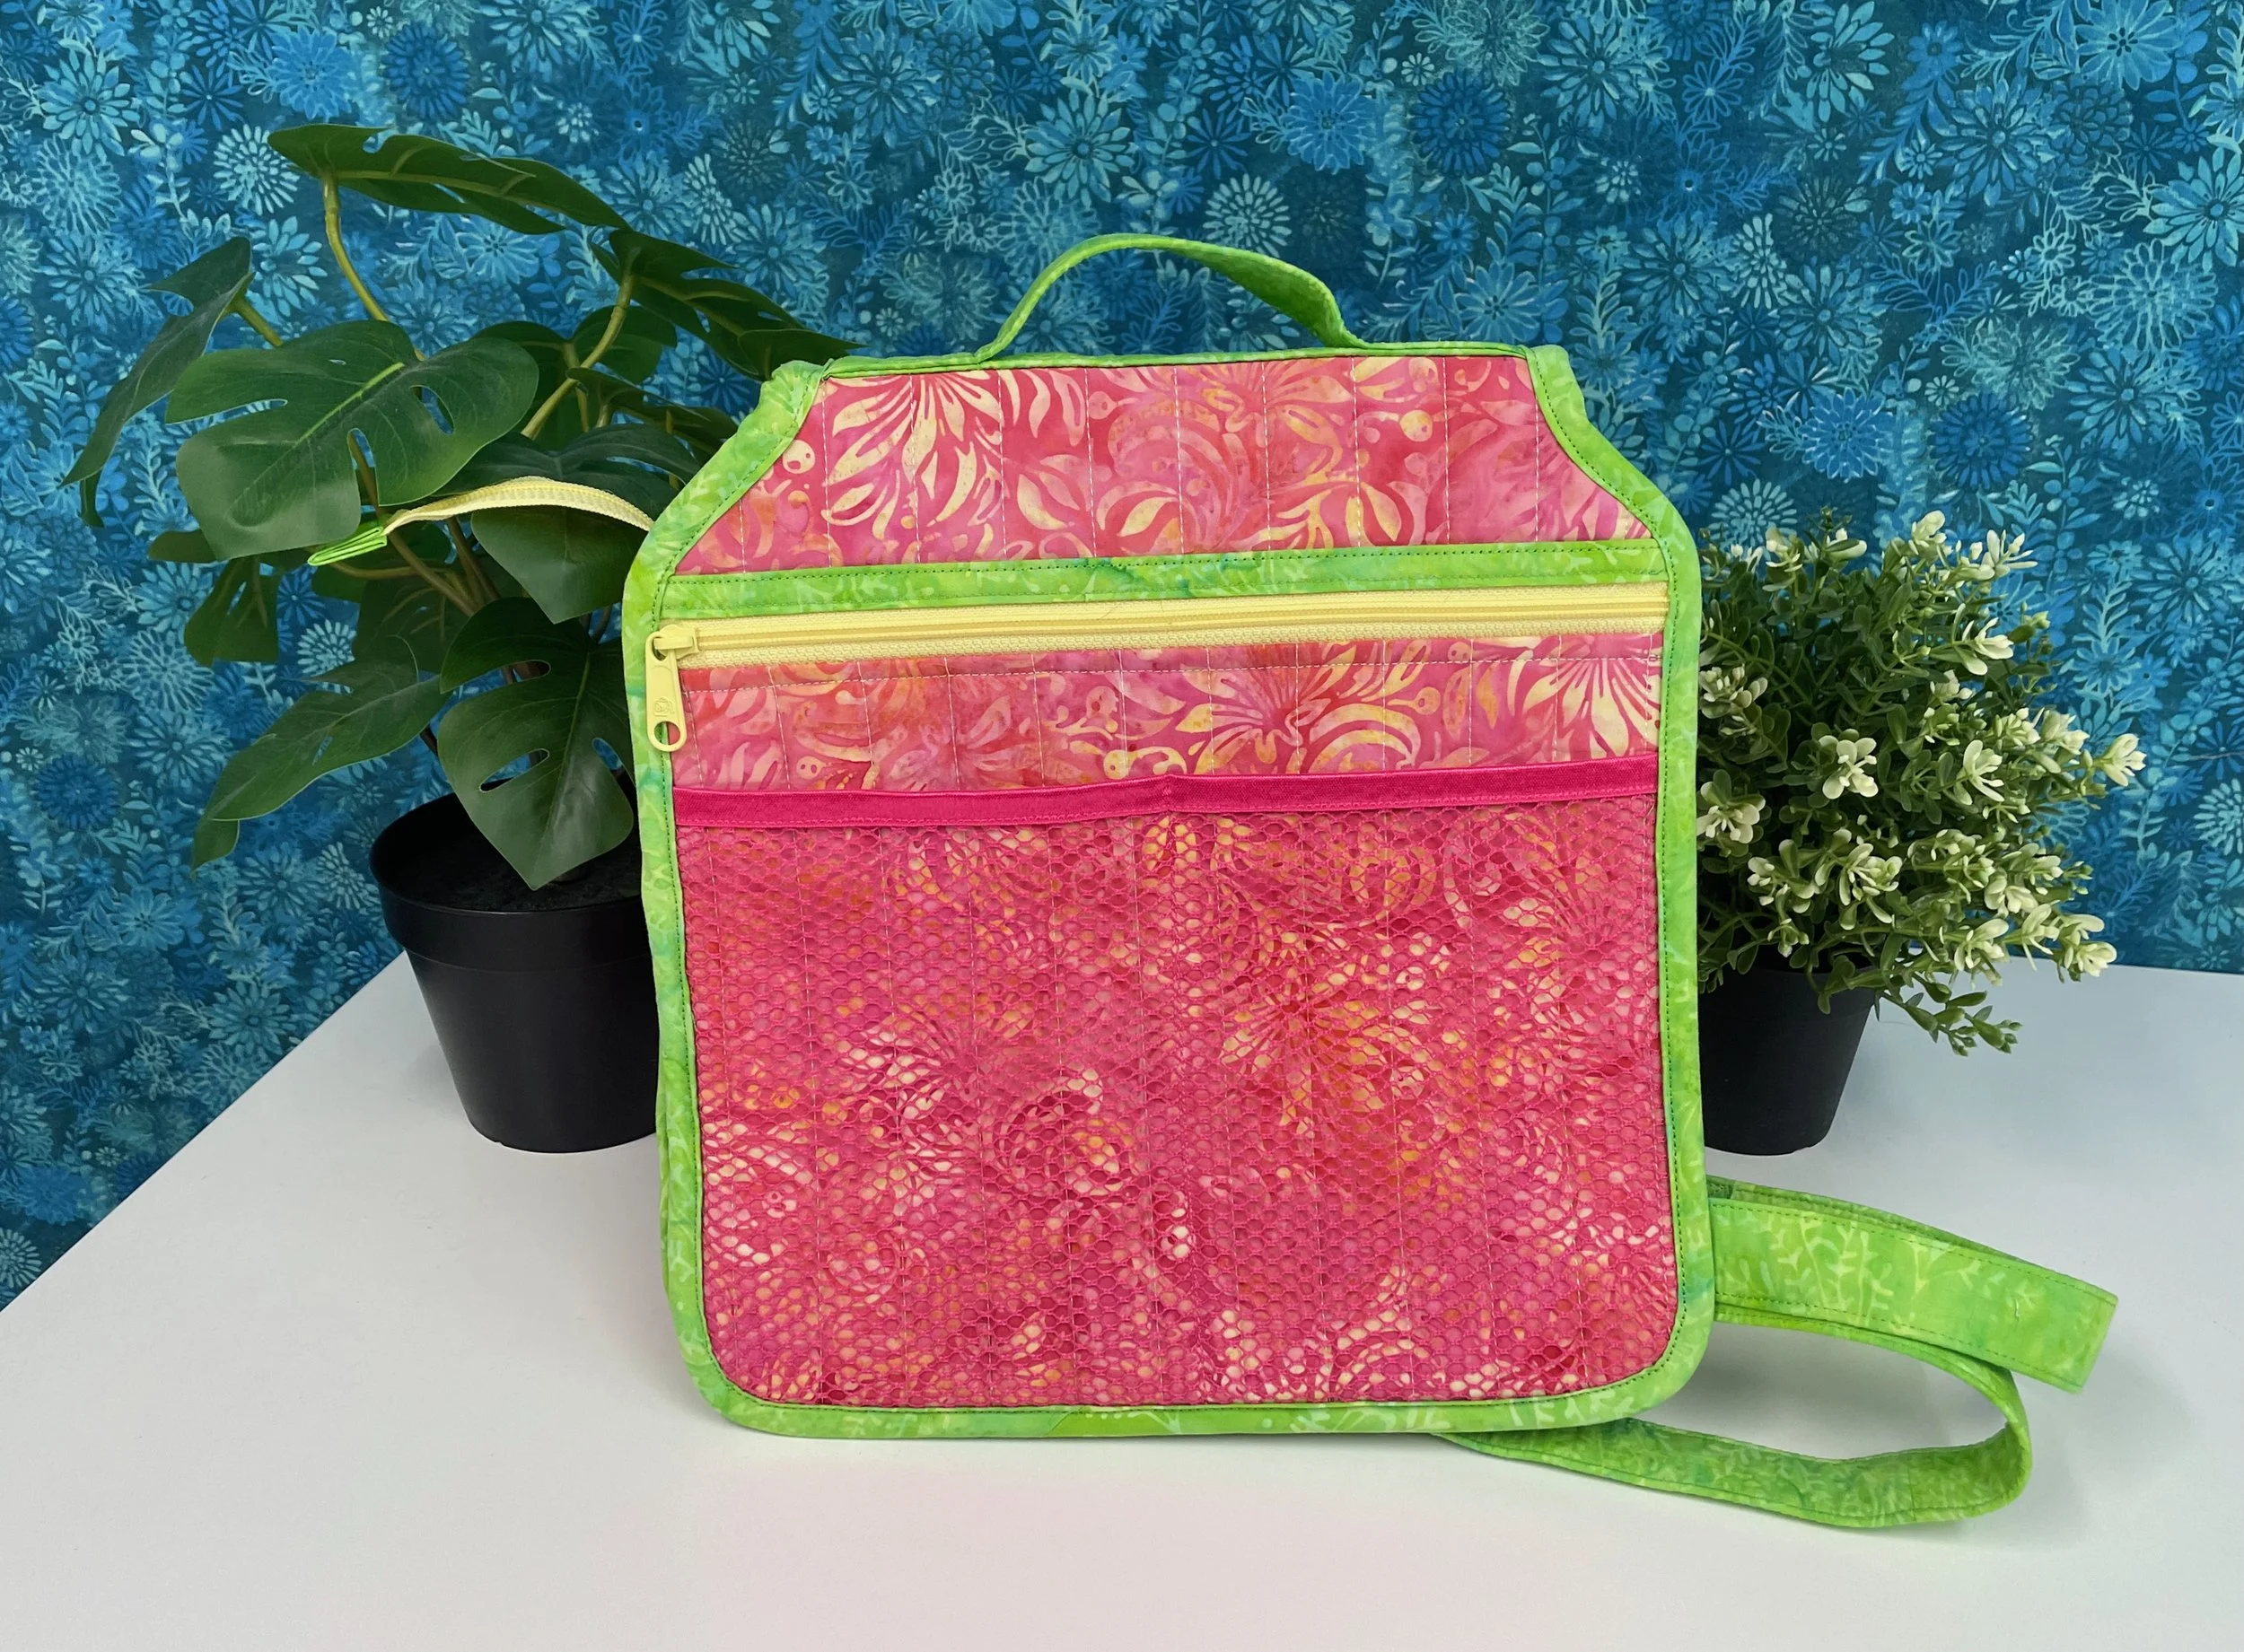
Sidekick back
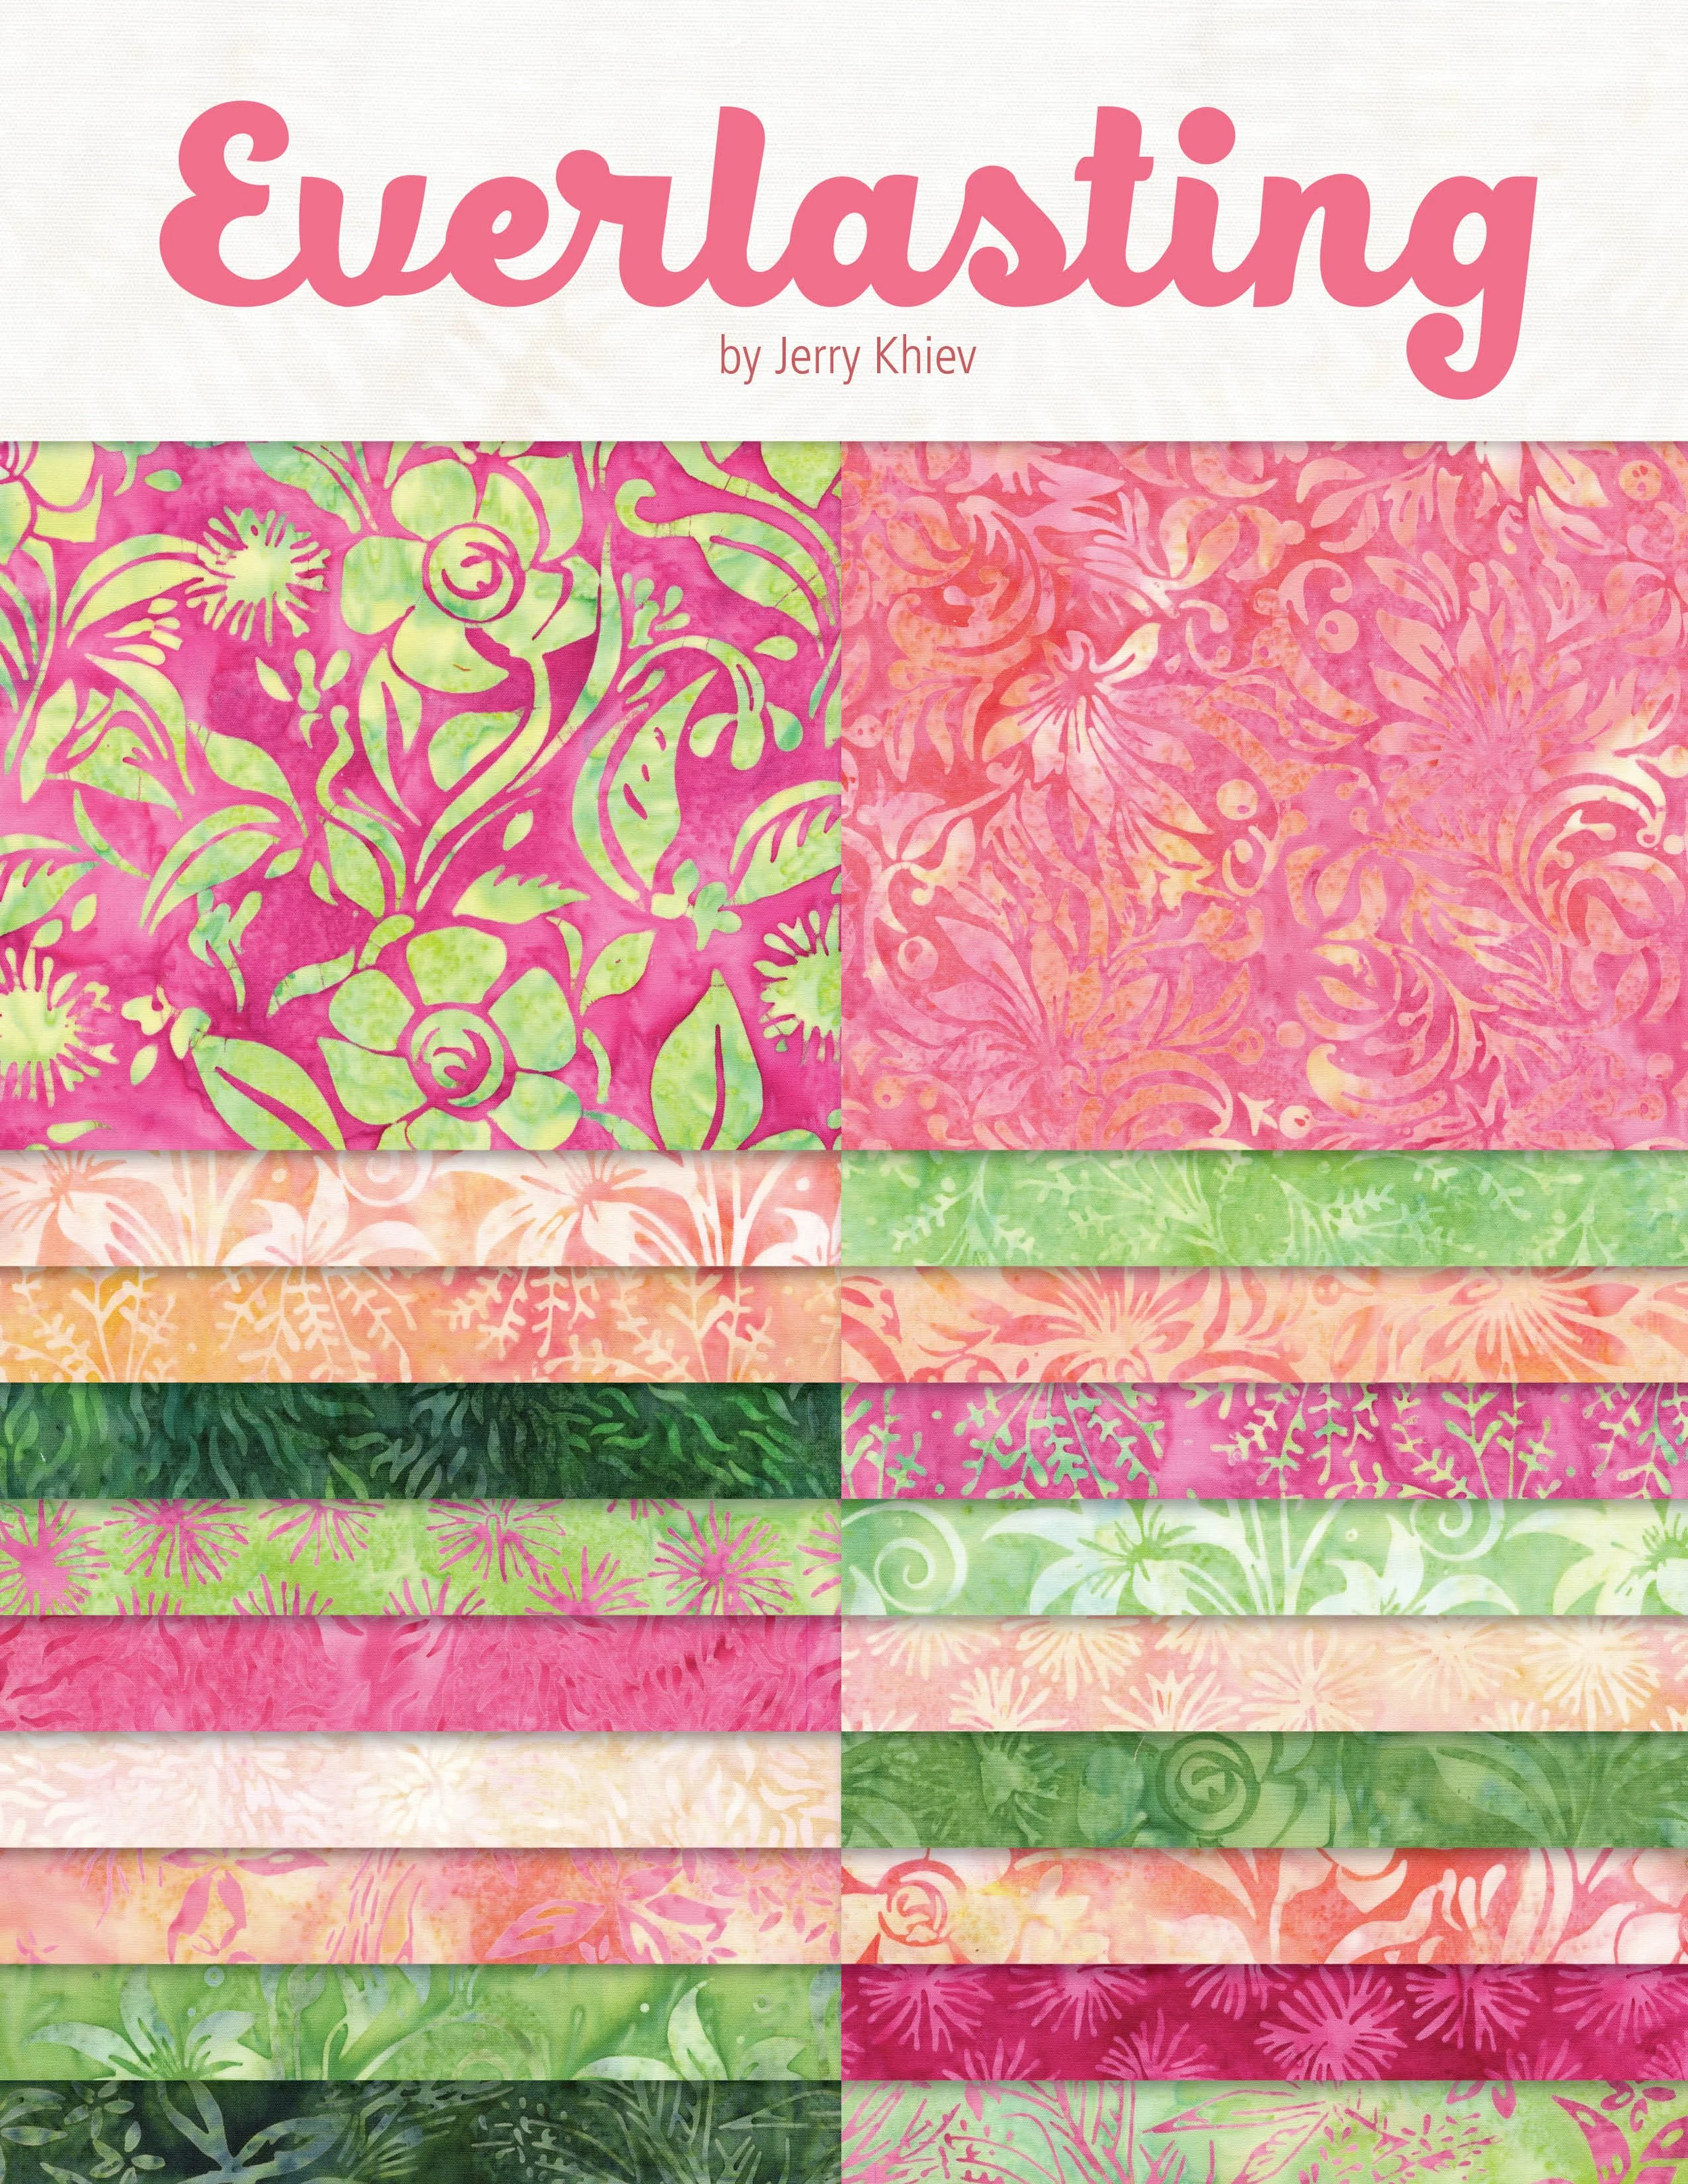
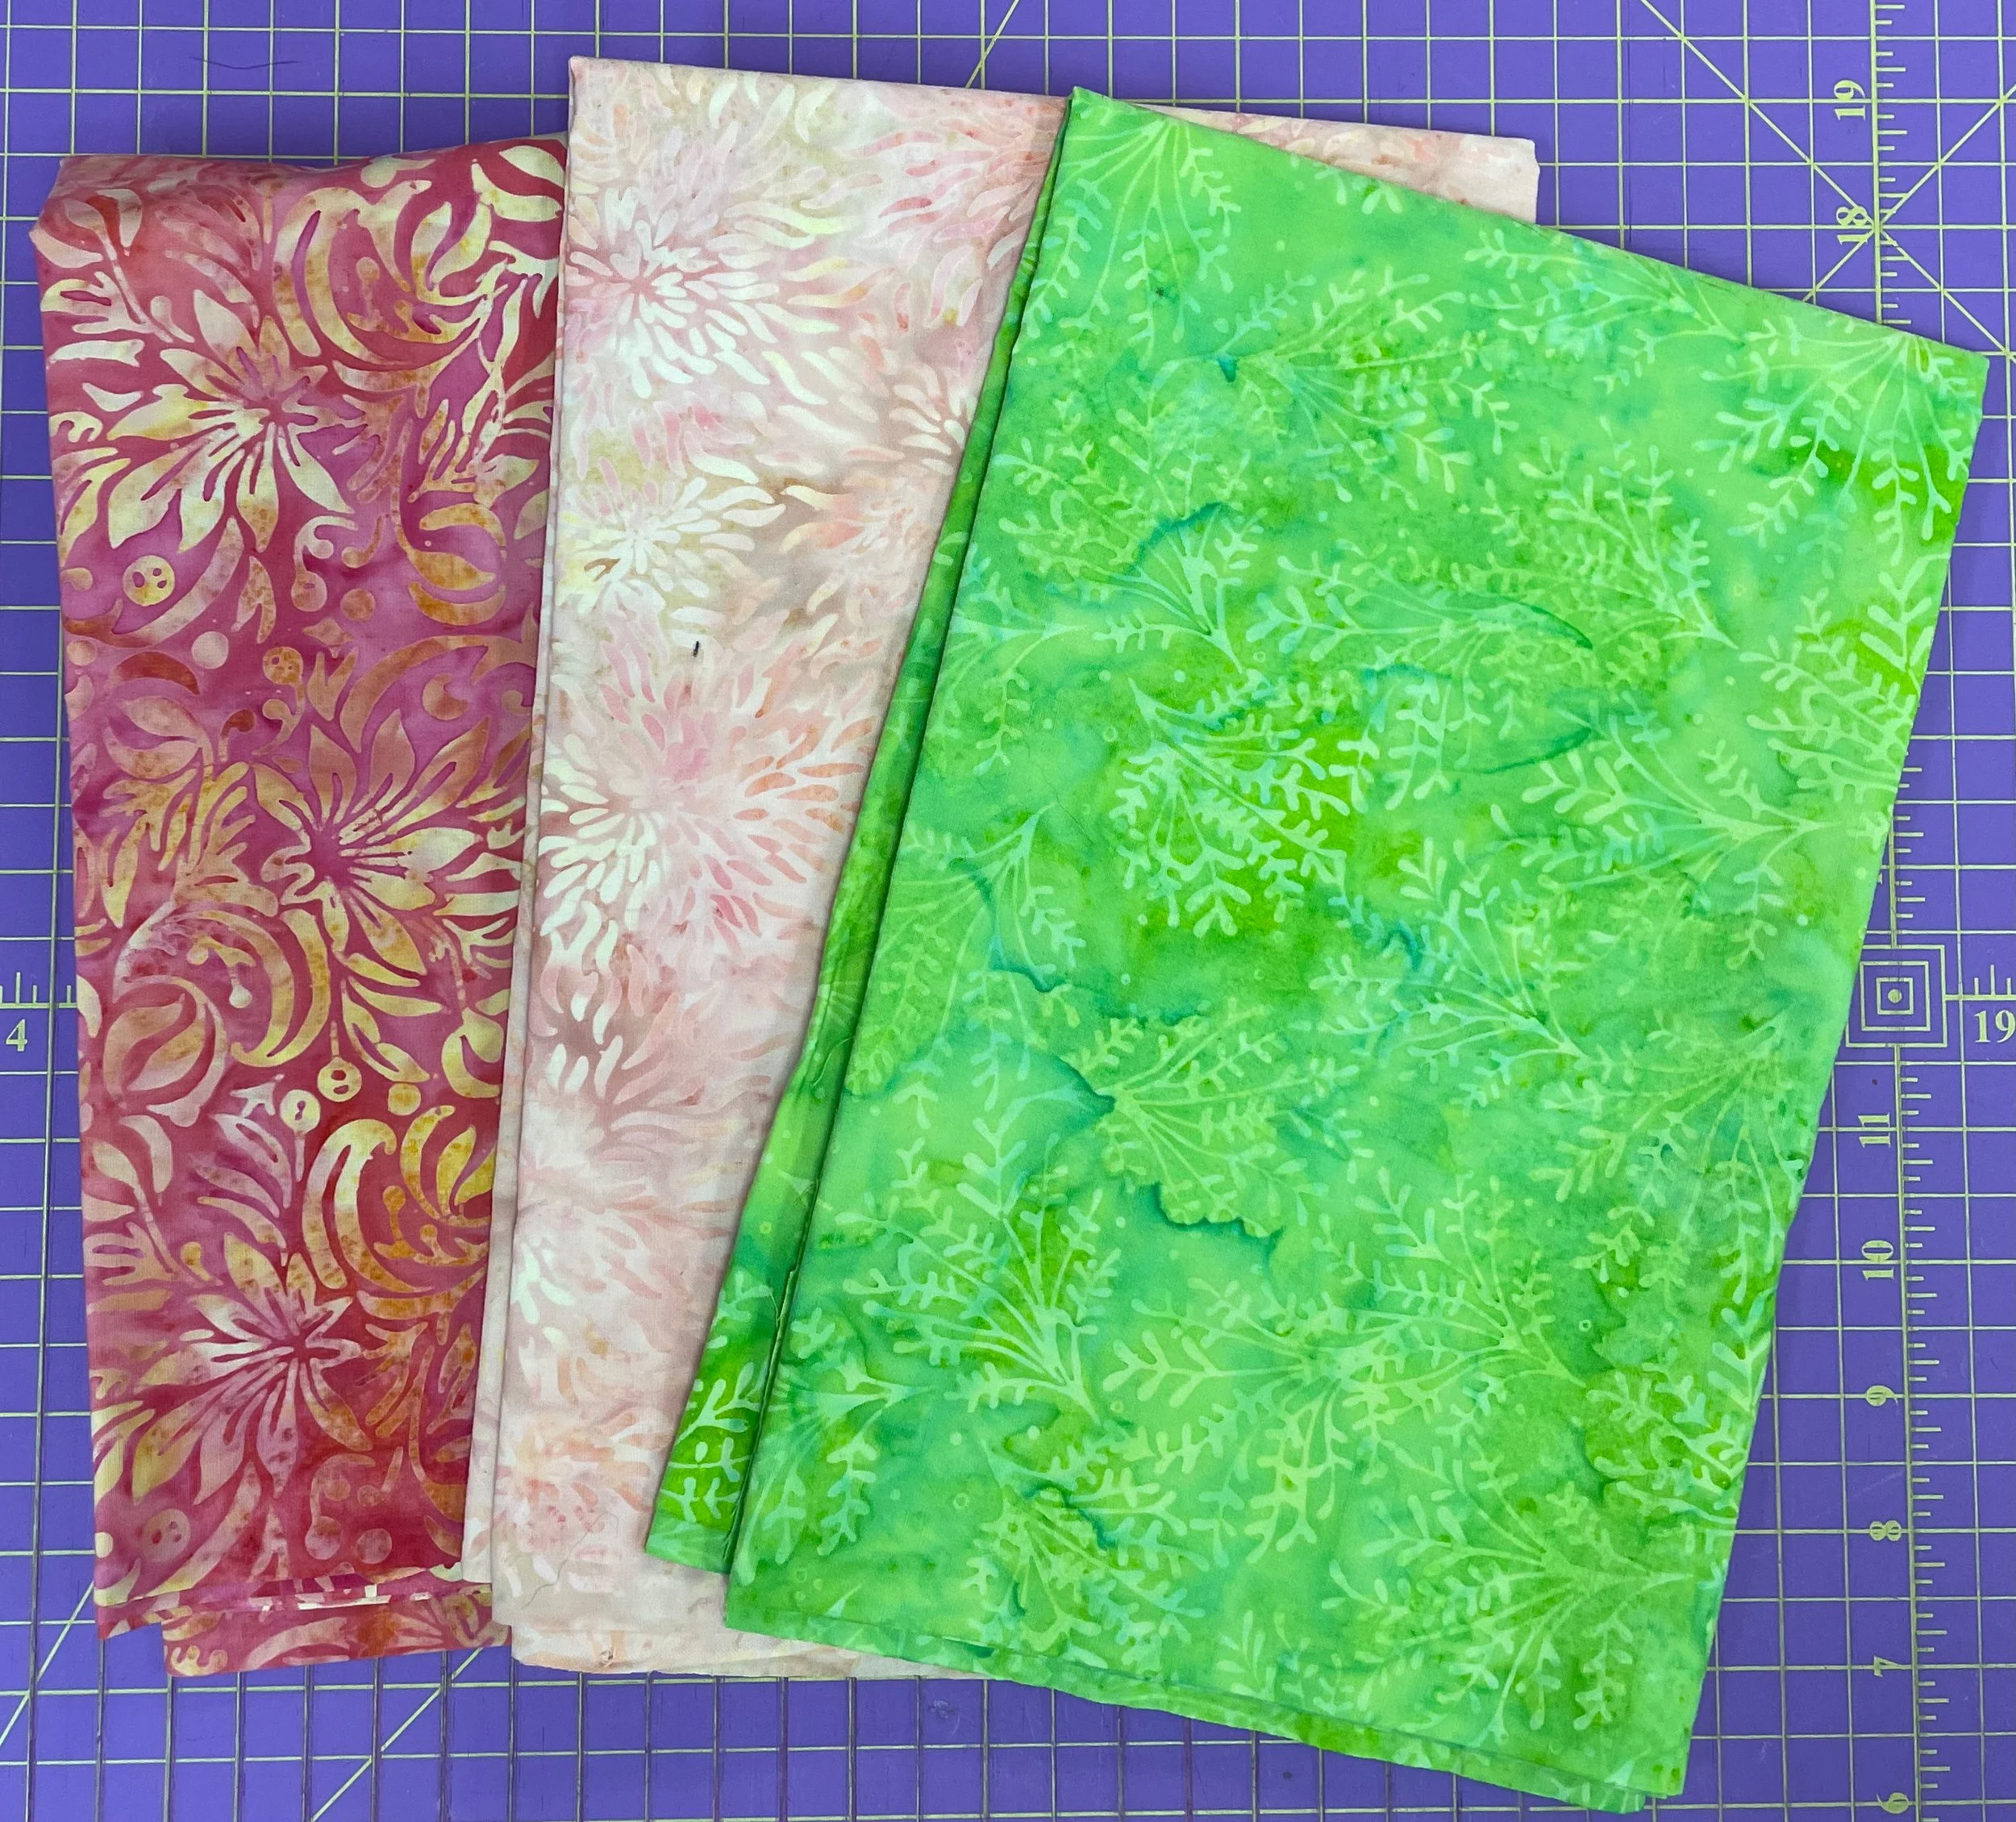
One of the hardest decisions I had to make for Sidekick was the fabric. It required only three fabrics and I chose these from the new Everlasting collection by Jerry Khiev for Island Batik of Lumin Fabrics.
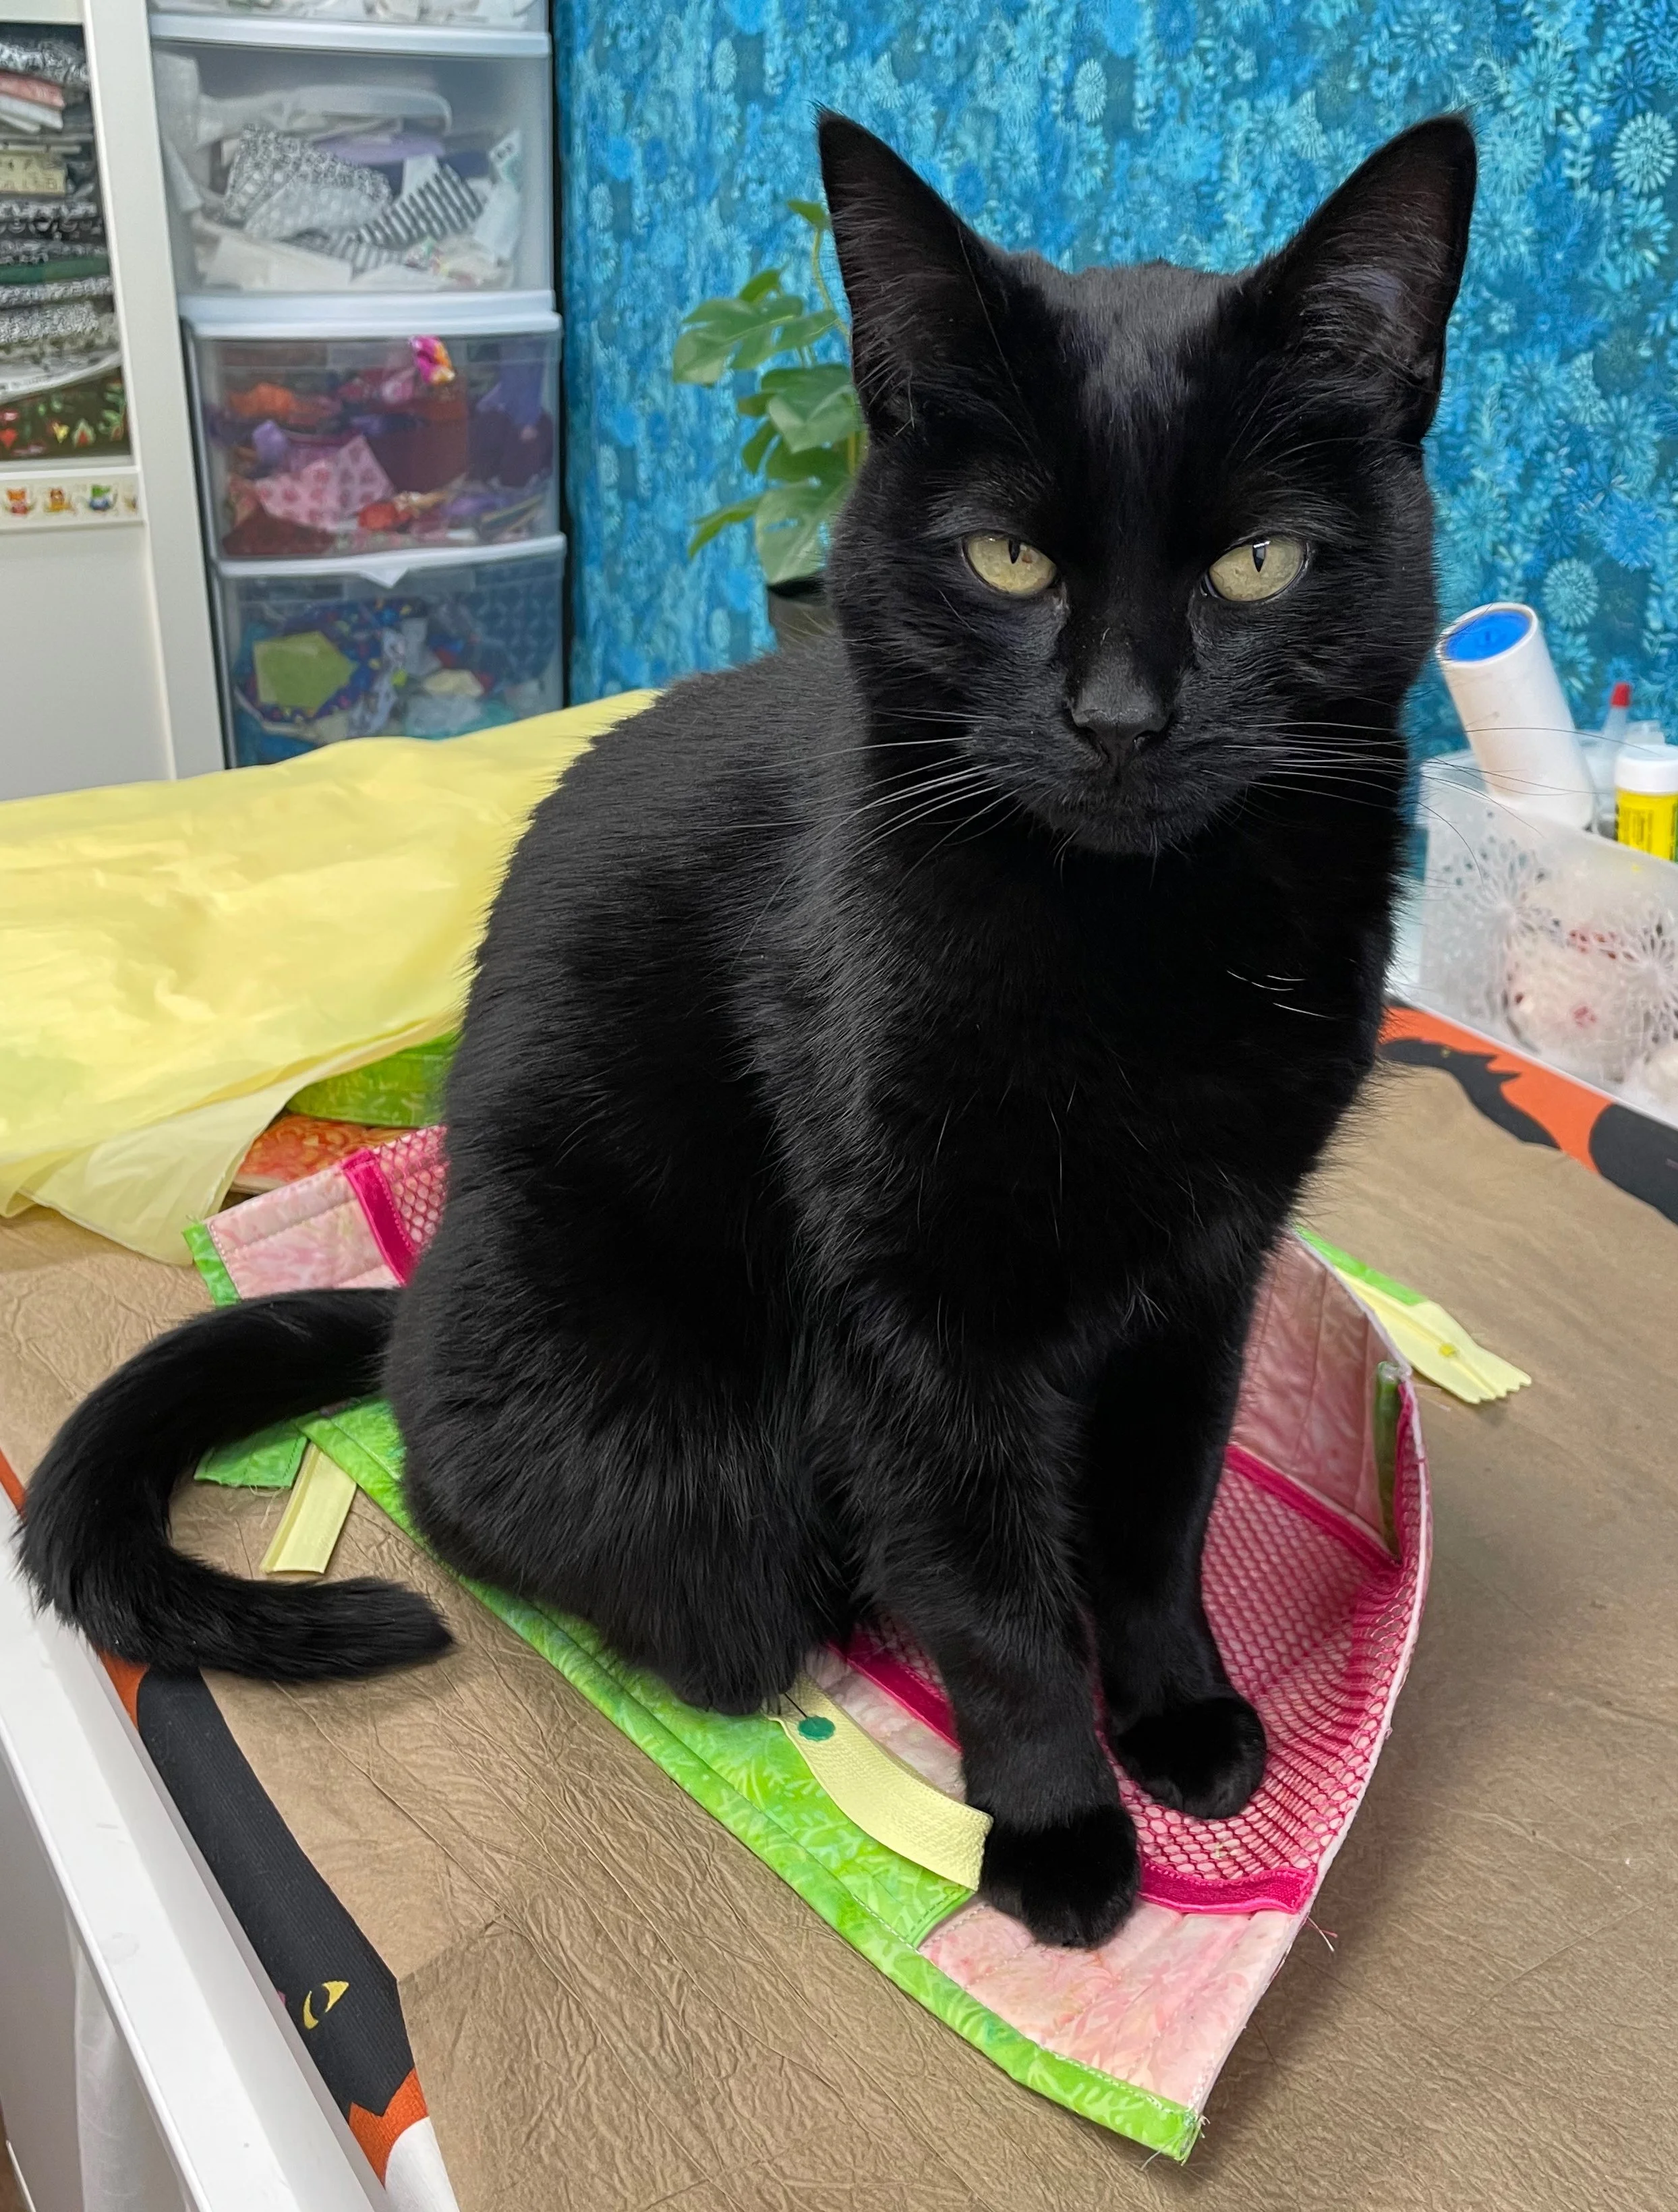
As I worked along, I had some help from one of my purry assistants, Salem. She made sure that I was on track and progressing well but she didn’t get to use part of Sidekick for a cat bed even though she tried to stake her claim! 🤣🐈⬛
When making Sidekick I used my Oliso M3 Pro Project iron. This small craft iron was perfect for getting into small areas to keep everything pressed well. I also used Schmetz needles when quilting and stitching the project. For stitching I used polyester thread for its strength and also because I had lots of different polyester thread colours which I needed as I frequently switched thread to match the various fabrics in this project.
Here are a few images of my progress in making Sidekick.
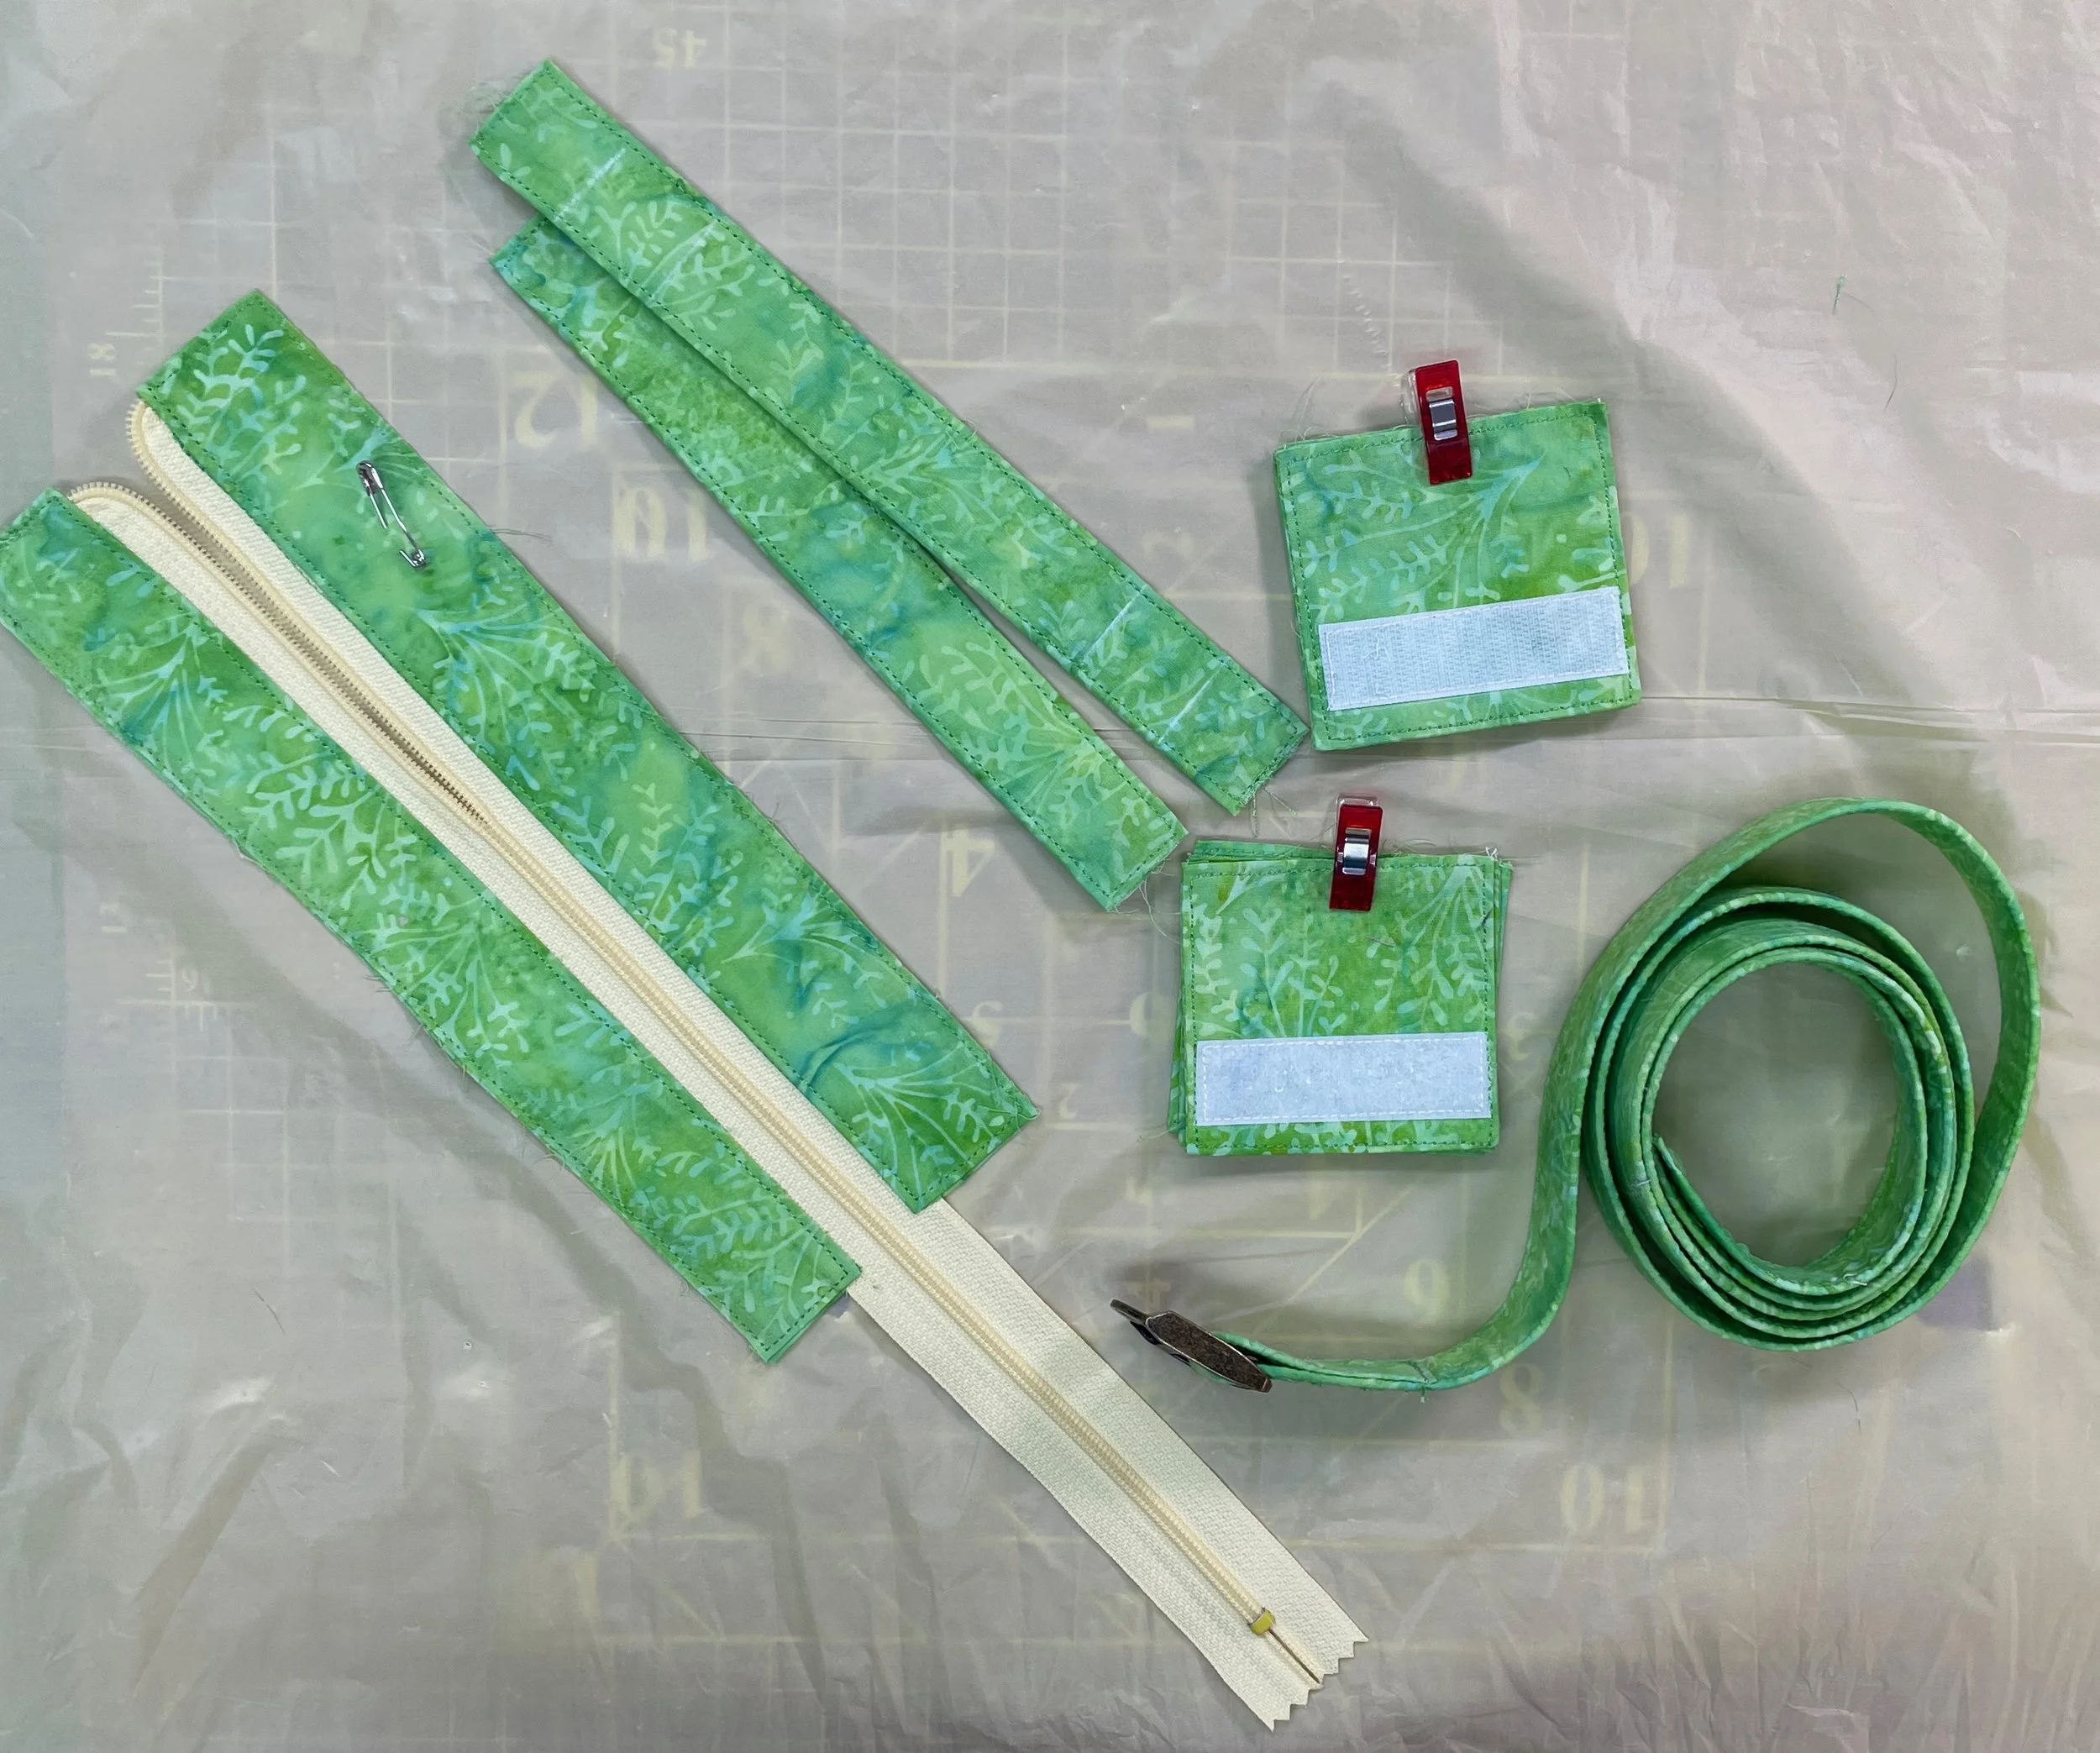
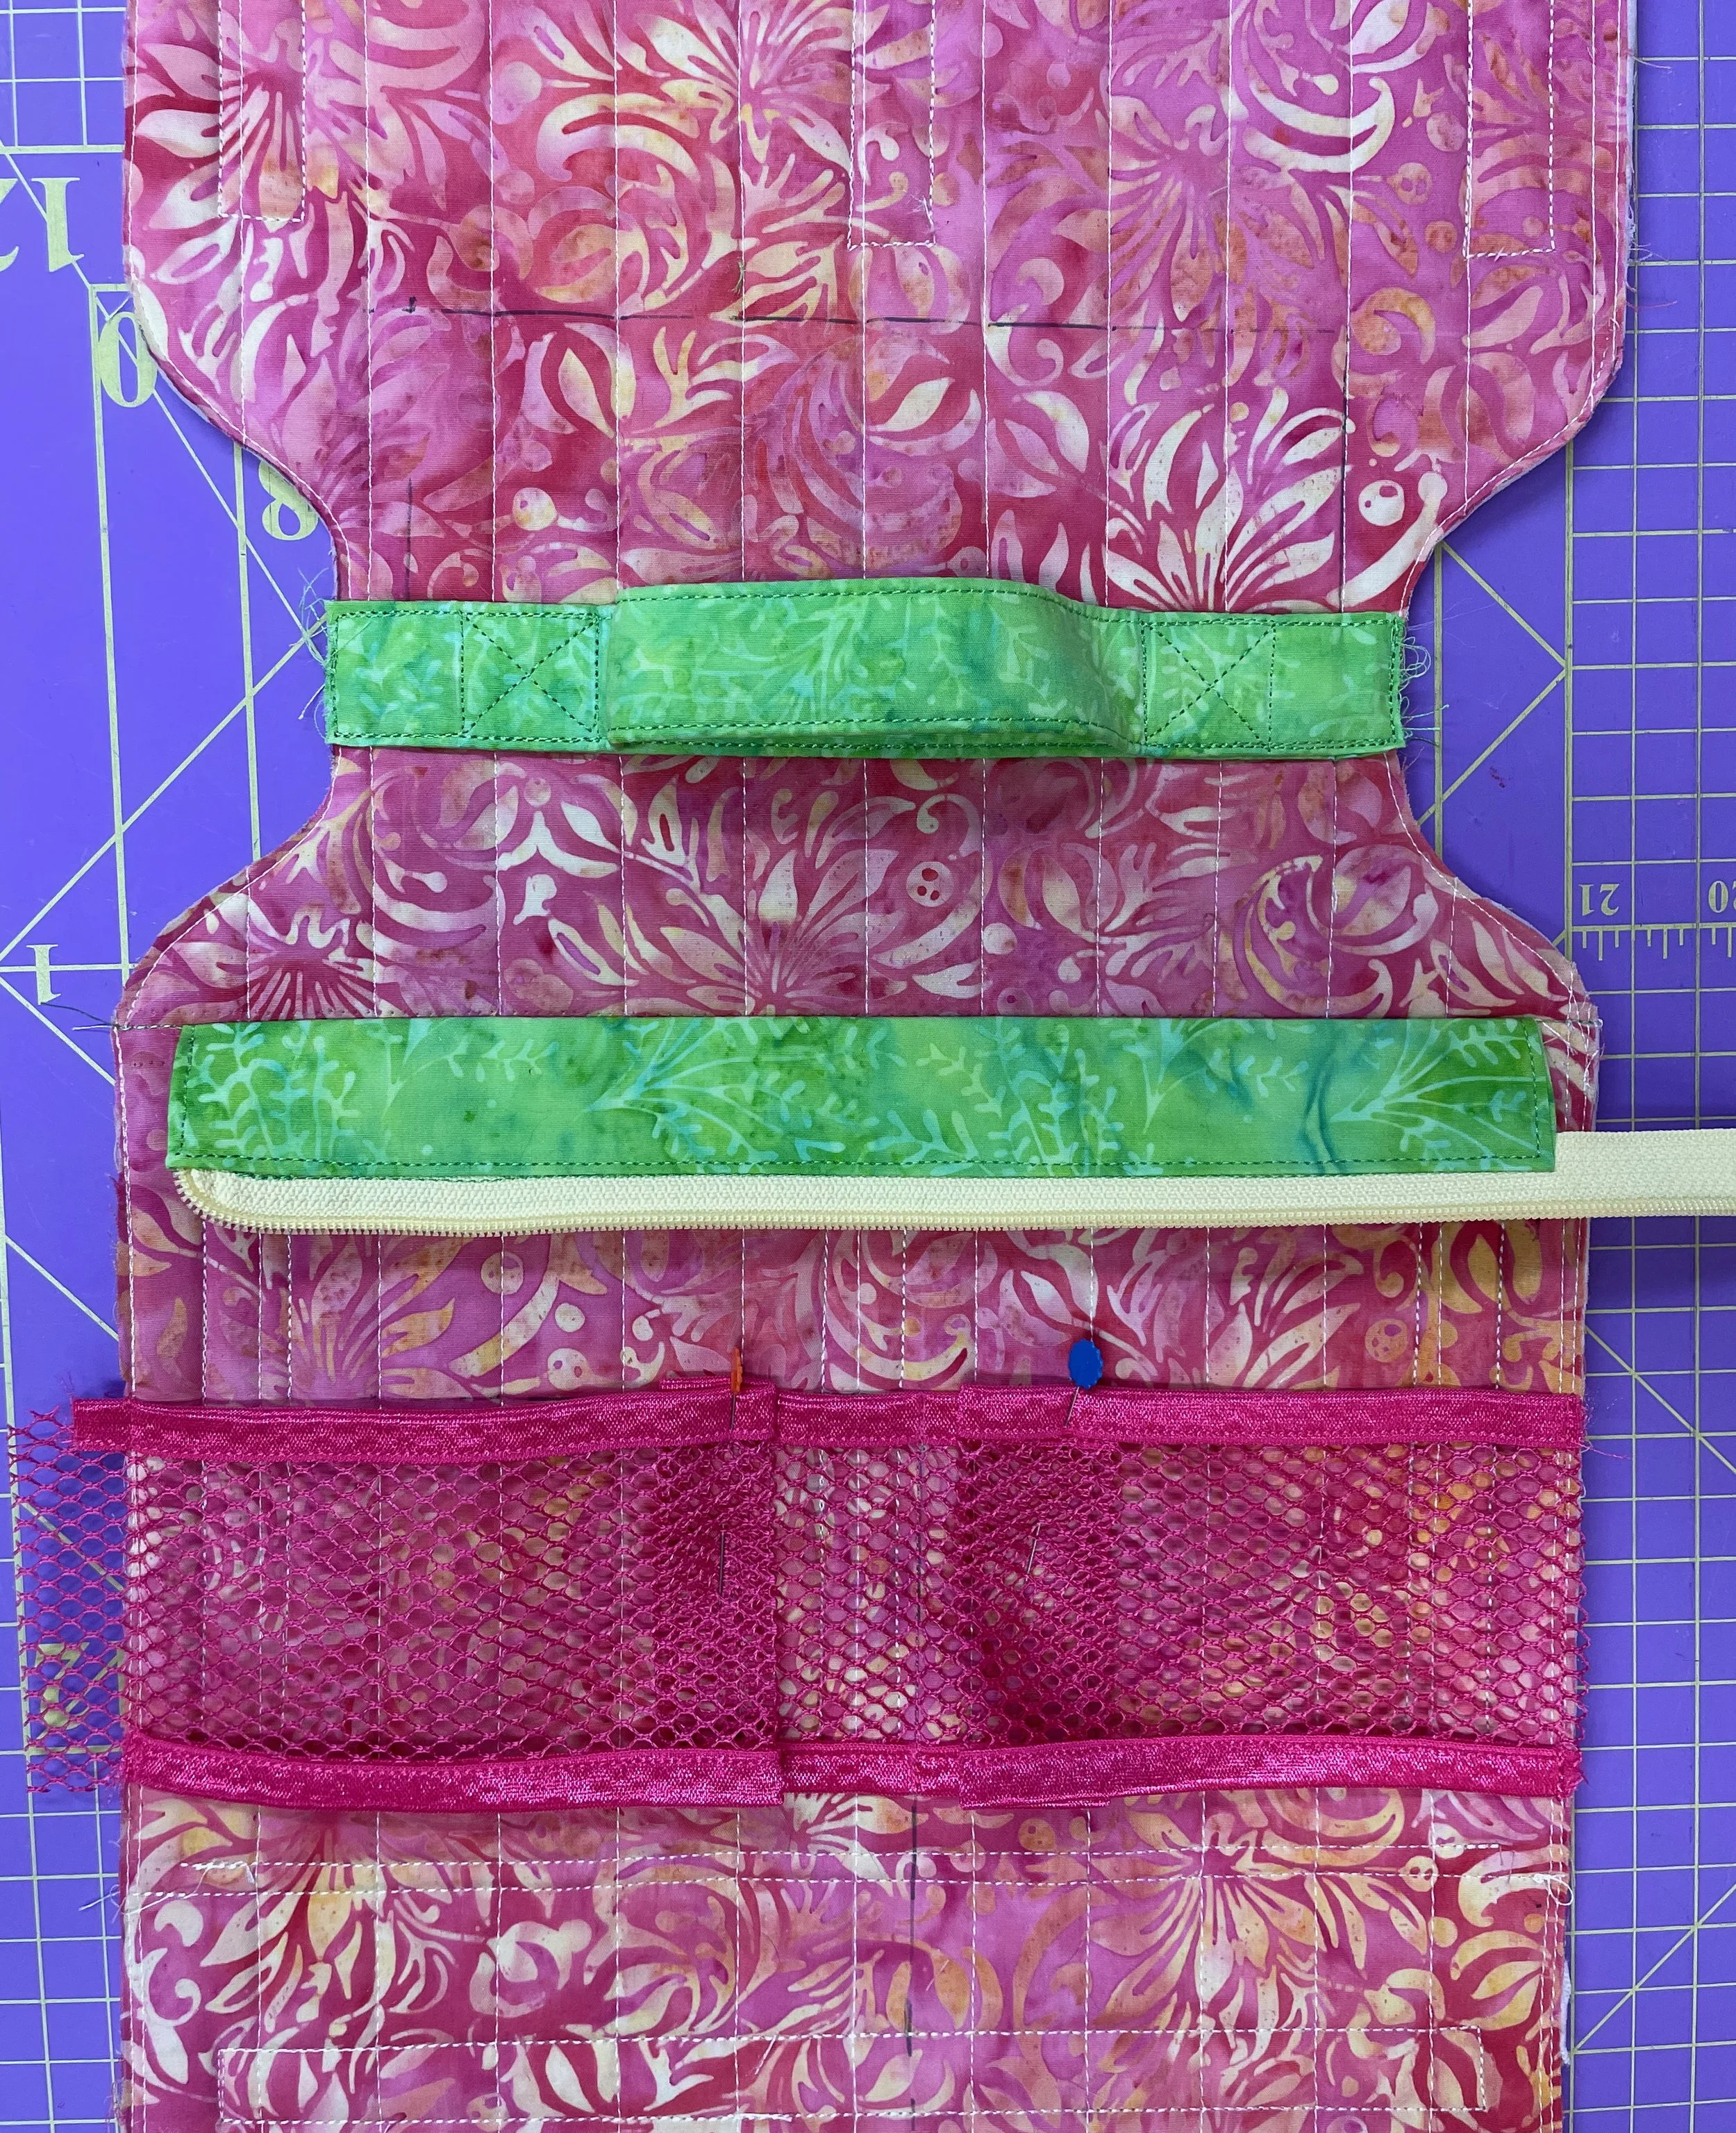
I learned a lot making this project: how to make two zippers from one zipper; how to attach fold-over elastic, how to work with mesh, and more. I know that I’ll be able to use these new skills when making future bag projects.
And, if I wasn’t sure that my Sidekick project was successful, I only had to ask Salem. I think she approves!
For more details on Sidekick and tips for working with this type of pattern, watch my video.

Thanks to Oliso, ByAnnie.com, Schmetz, and Island Batik of Lumin Fabrics for the items that they sent me that allowed me to create this month’s project.
There will be many more projects coming from the other Island Batik Ambassadors this month. I’ll be adding the other Ambassador projects to my Pinterest board so be sure to check that out so you won’t miss out on their fabulous creations.
You can find out more about the 2025 Island Batik Ambassadors and the projects that they will be working on this year on their websites below.
Brenda Alburl ~ Songbird Designs
Renee Atkinson ~ Pink Tulip Quilting
Susan Deshensky ~ Lady Blue Quilts Studio
Tina Dillard - Quilting Affection Designs
Brittany Fisher ~ Bobbin with Brittany
Kimberly Flannagan - Kimberlys Quilts
Preeti Harris ~ Sew Preeti Quilts
Mania Hatziioannidi ~ Mania for quilts
Connie Kauffman ~ Kauffman Designs
Connie Kresin Campbell ~ Freemotion by the River
Emily Leachman ~ The Darling Dogwood
Denise Looney ~ A Quiltery
Leah Malasky ~ Quilted Delights
Lisa Pickering ~ Lisa’s Quilting Passion
Sarah Pitcher ~ Pitcher’s Boutique
Gail Sheppard ~ Quilting Gail
Carol Stanek ~ Stitch with Color
Solomae Stoycoff - Cuddle Cat Quiltworks
Jennifer Thomas ~ Curlicue Creations
Suzy Webster ~ Websterquilt
Be sure you’re following me on Facebook so you won’t miss out on what I’ll be creating next with Island Batik fabrics!
Note: The products featured in this blogpost were given to me by Island Batik and their sponsors. Thank you!
#islandbatik #islandbatikambassador #loveislandbatik #olisoconnects #createwitholiso #sewstylish #schmetzneedles #byannie #patternsbyannie #luminfabrics
Island Batik Ambassador Threaded Chaos Blog Hop for September 2025
Welcome to September and another Island Batik Ambassador blog hop! This month the theme was “Threaded Chaos” and Ambassadors were challenged to create a crazy quilt project using Aurifil thread. Thanks to Aurifil for sponsoring this blog hop!
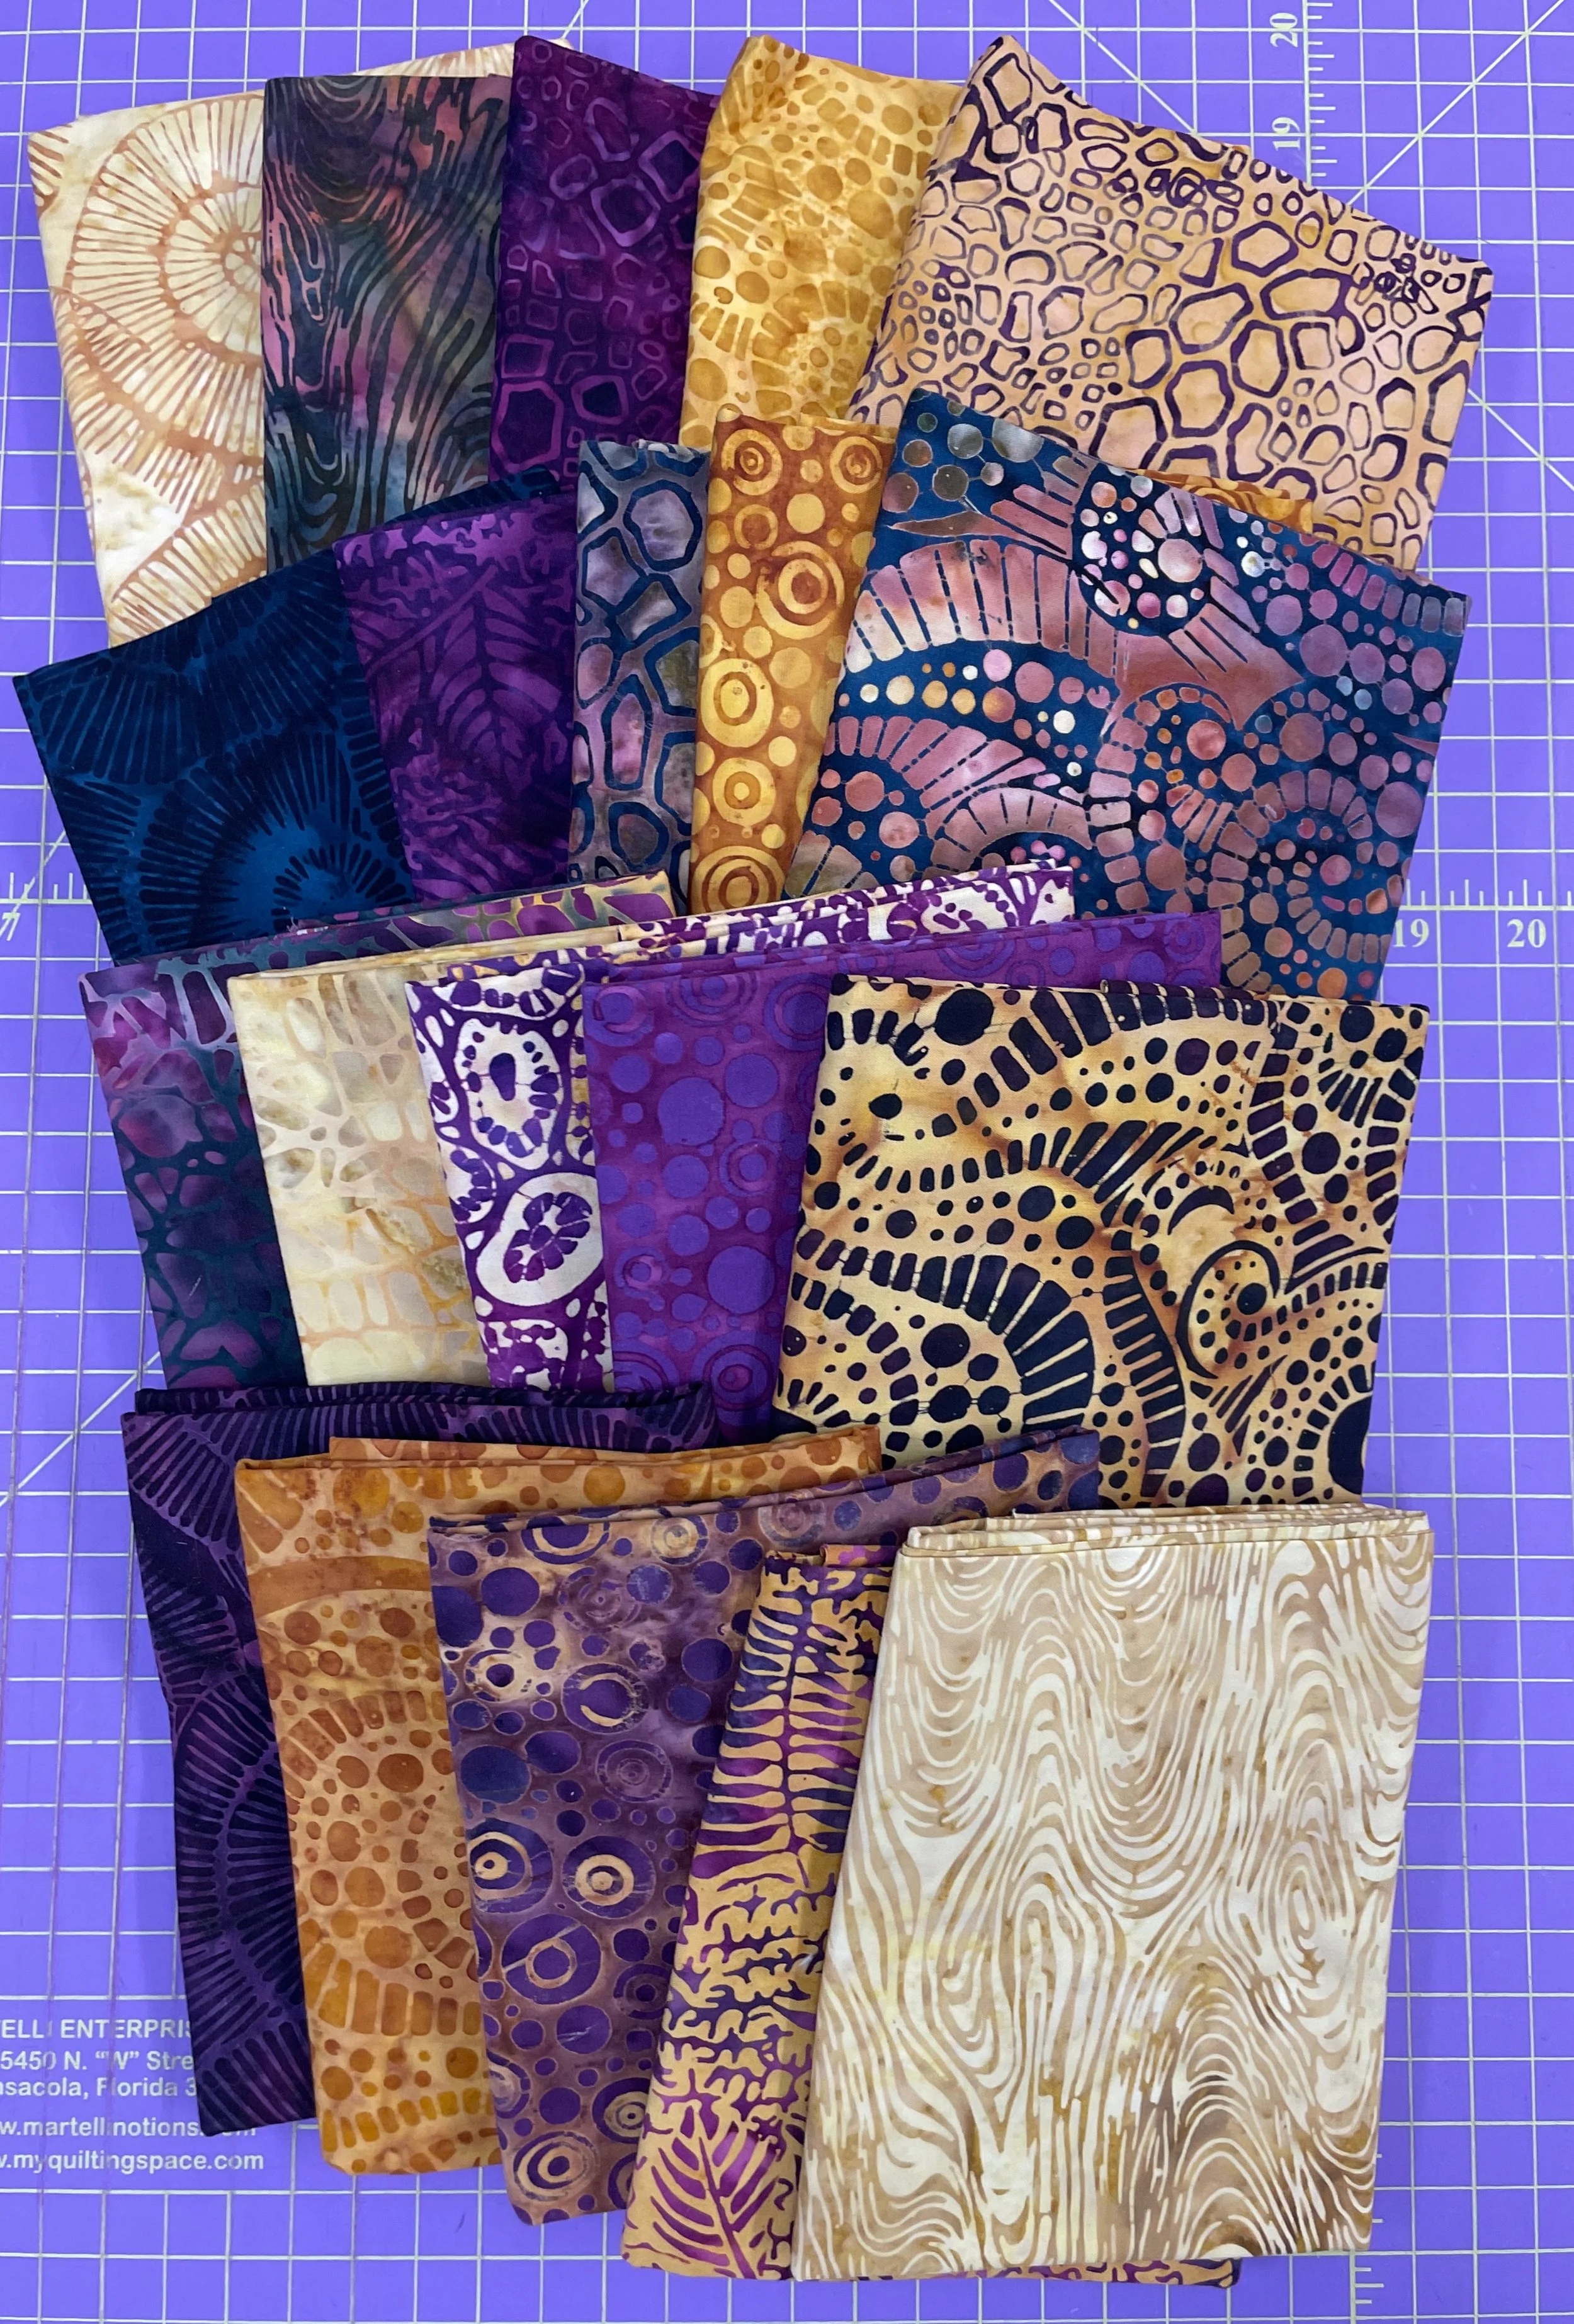
Ambassadors received new fabric collections to use in this challenge. I used Geode Glow a Signature collection by Kathy Engle for Kari Nichols of Quilting Renditions of Island Batik of Lumin Fabrics for my crazy quilt project.
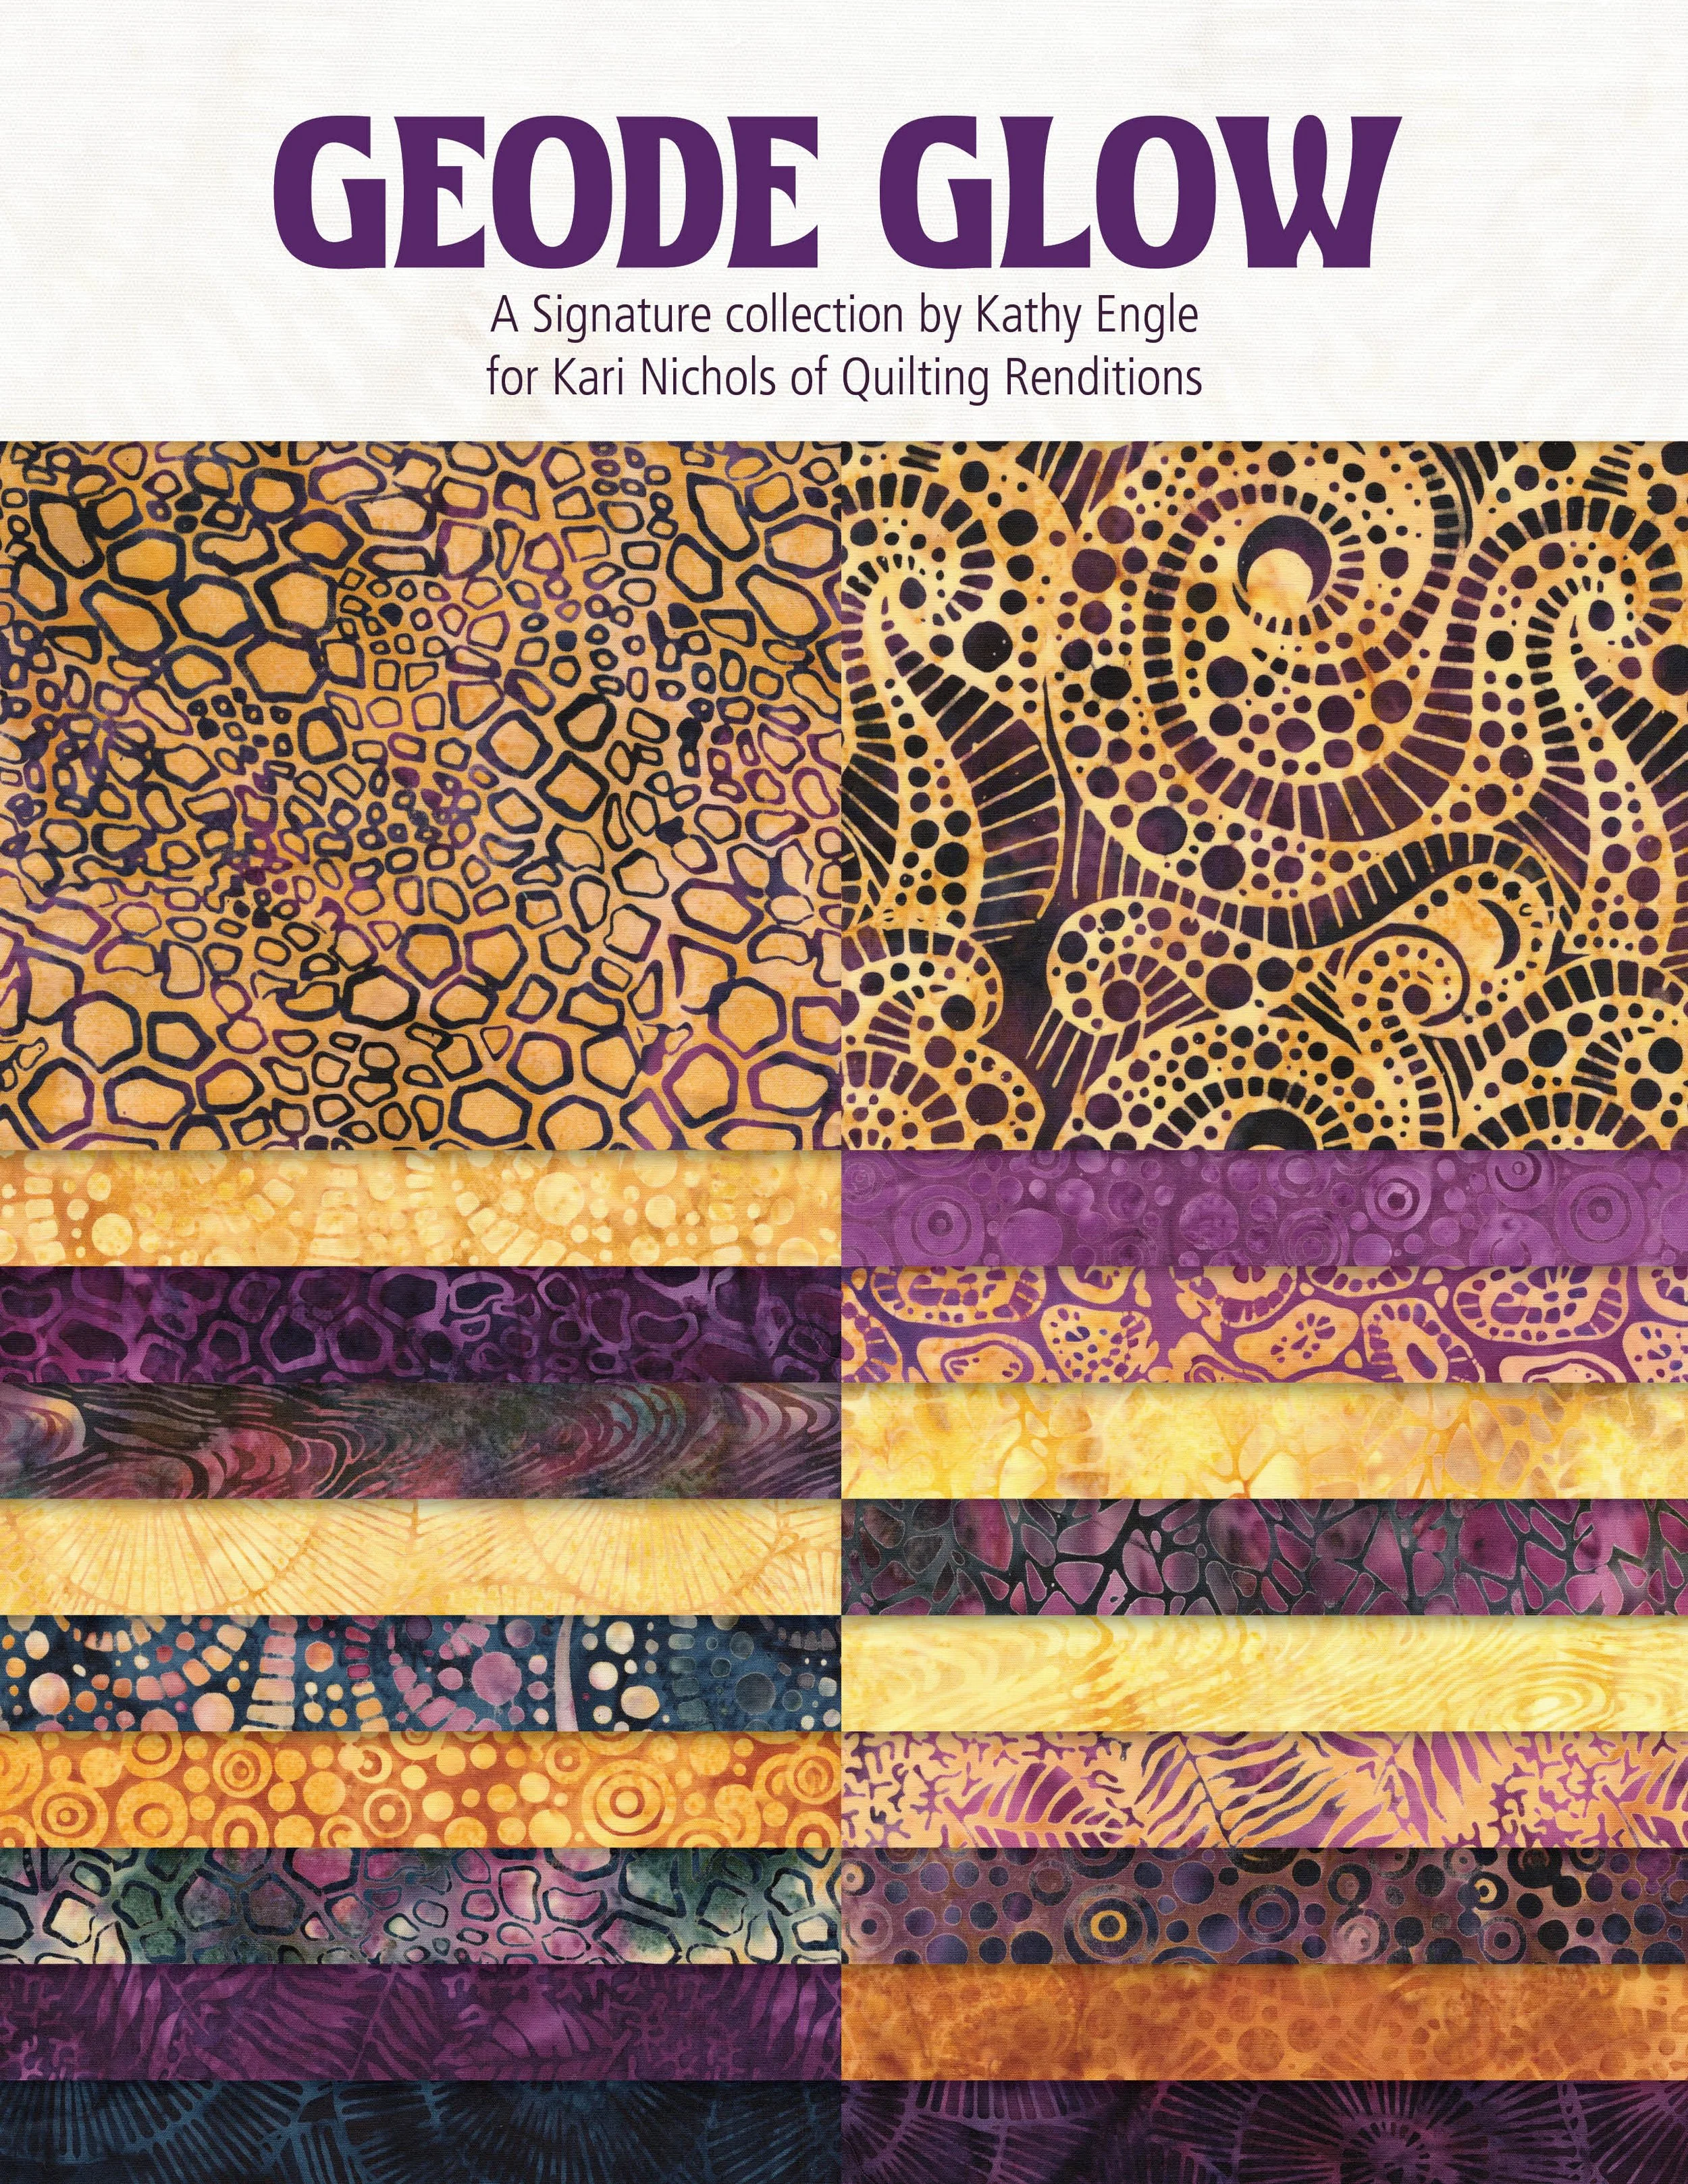
I just loved the gorgeous purples and warm golds in this new fabric collection.
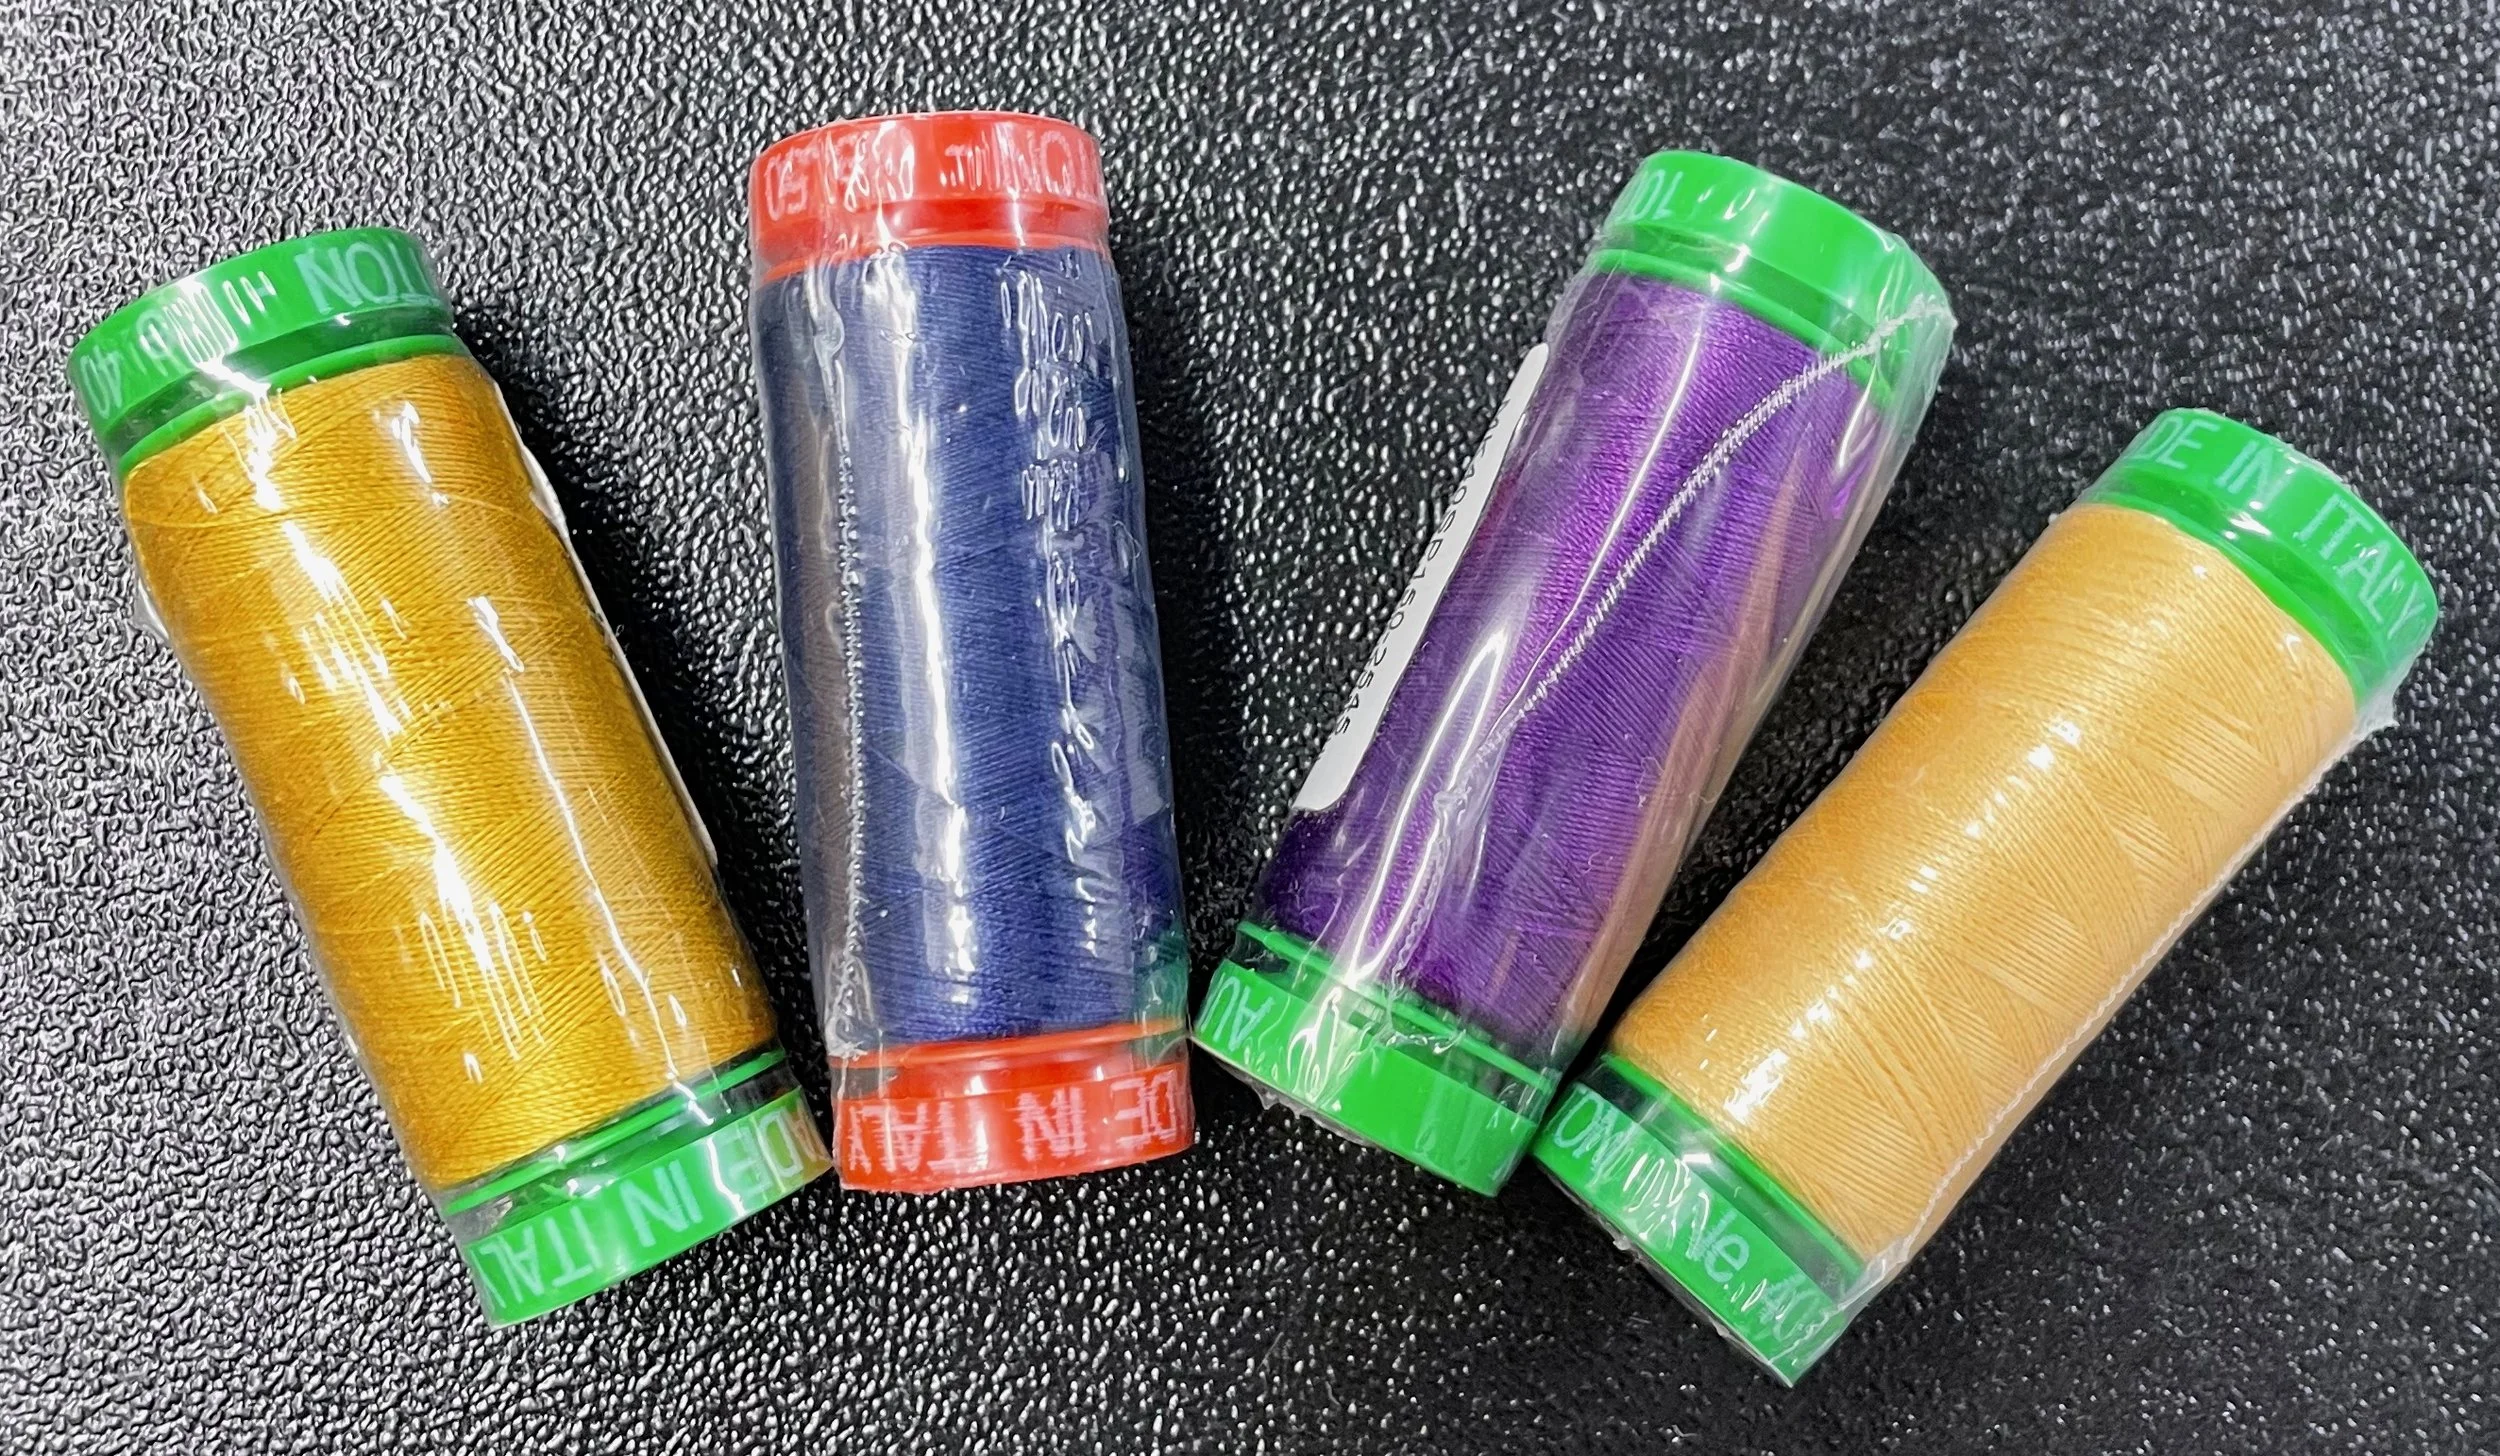
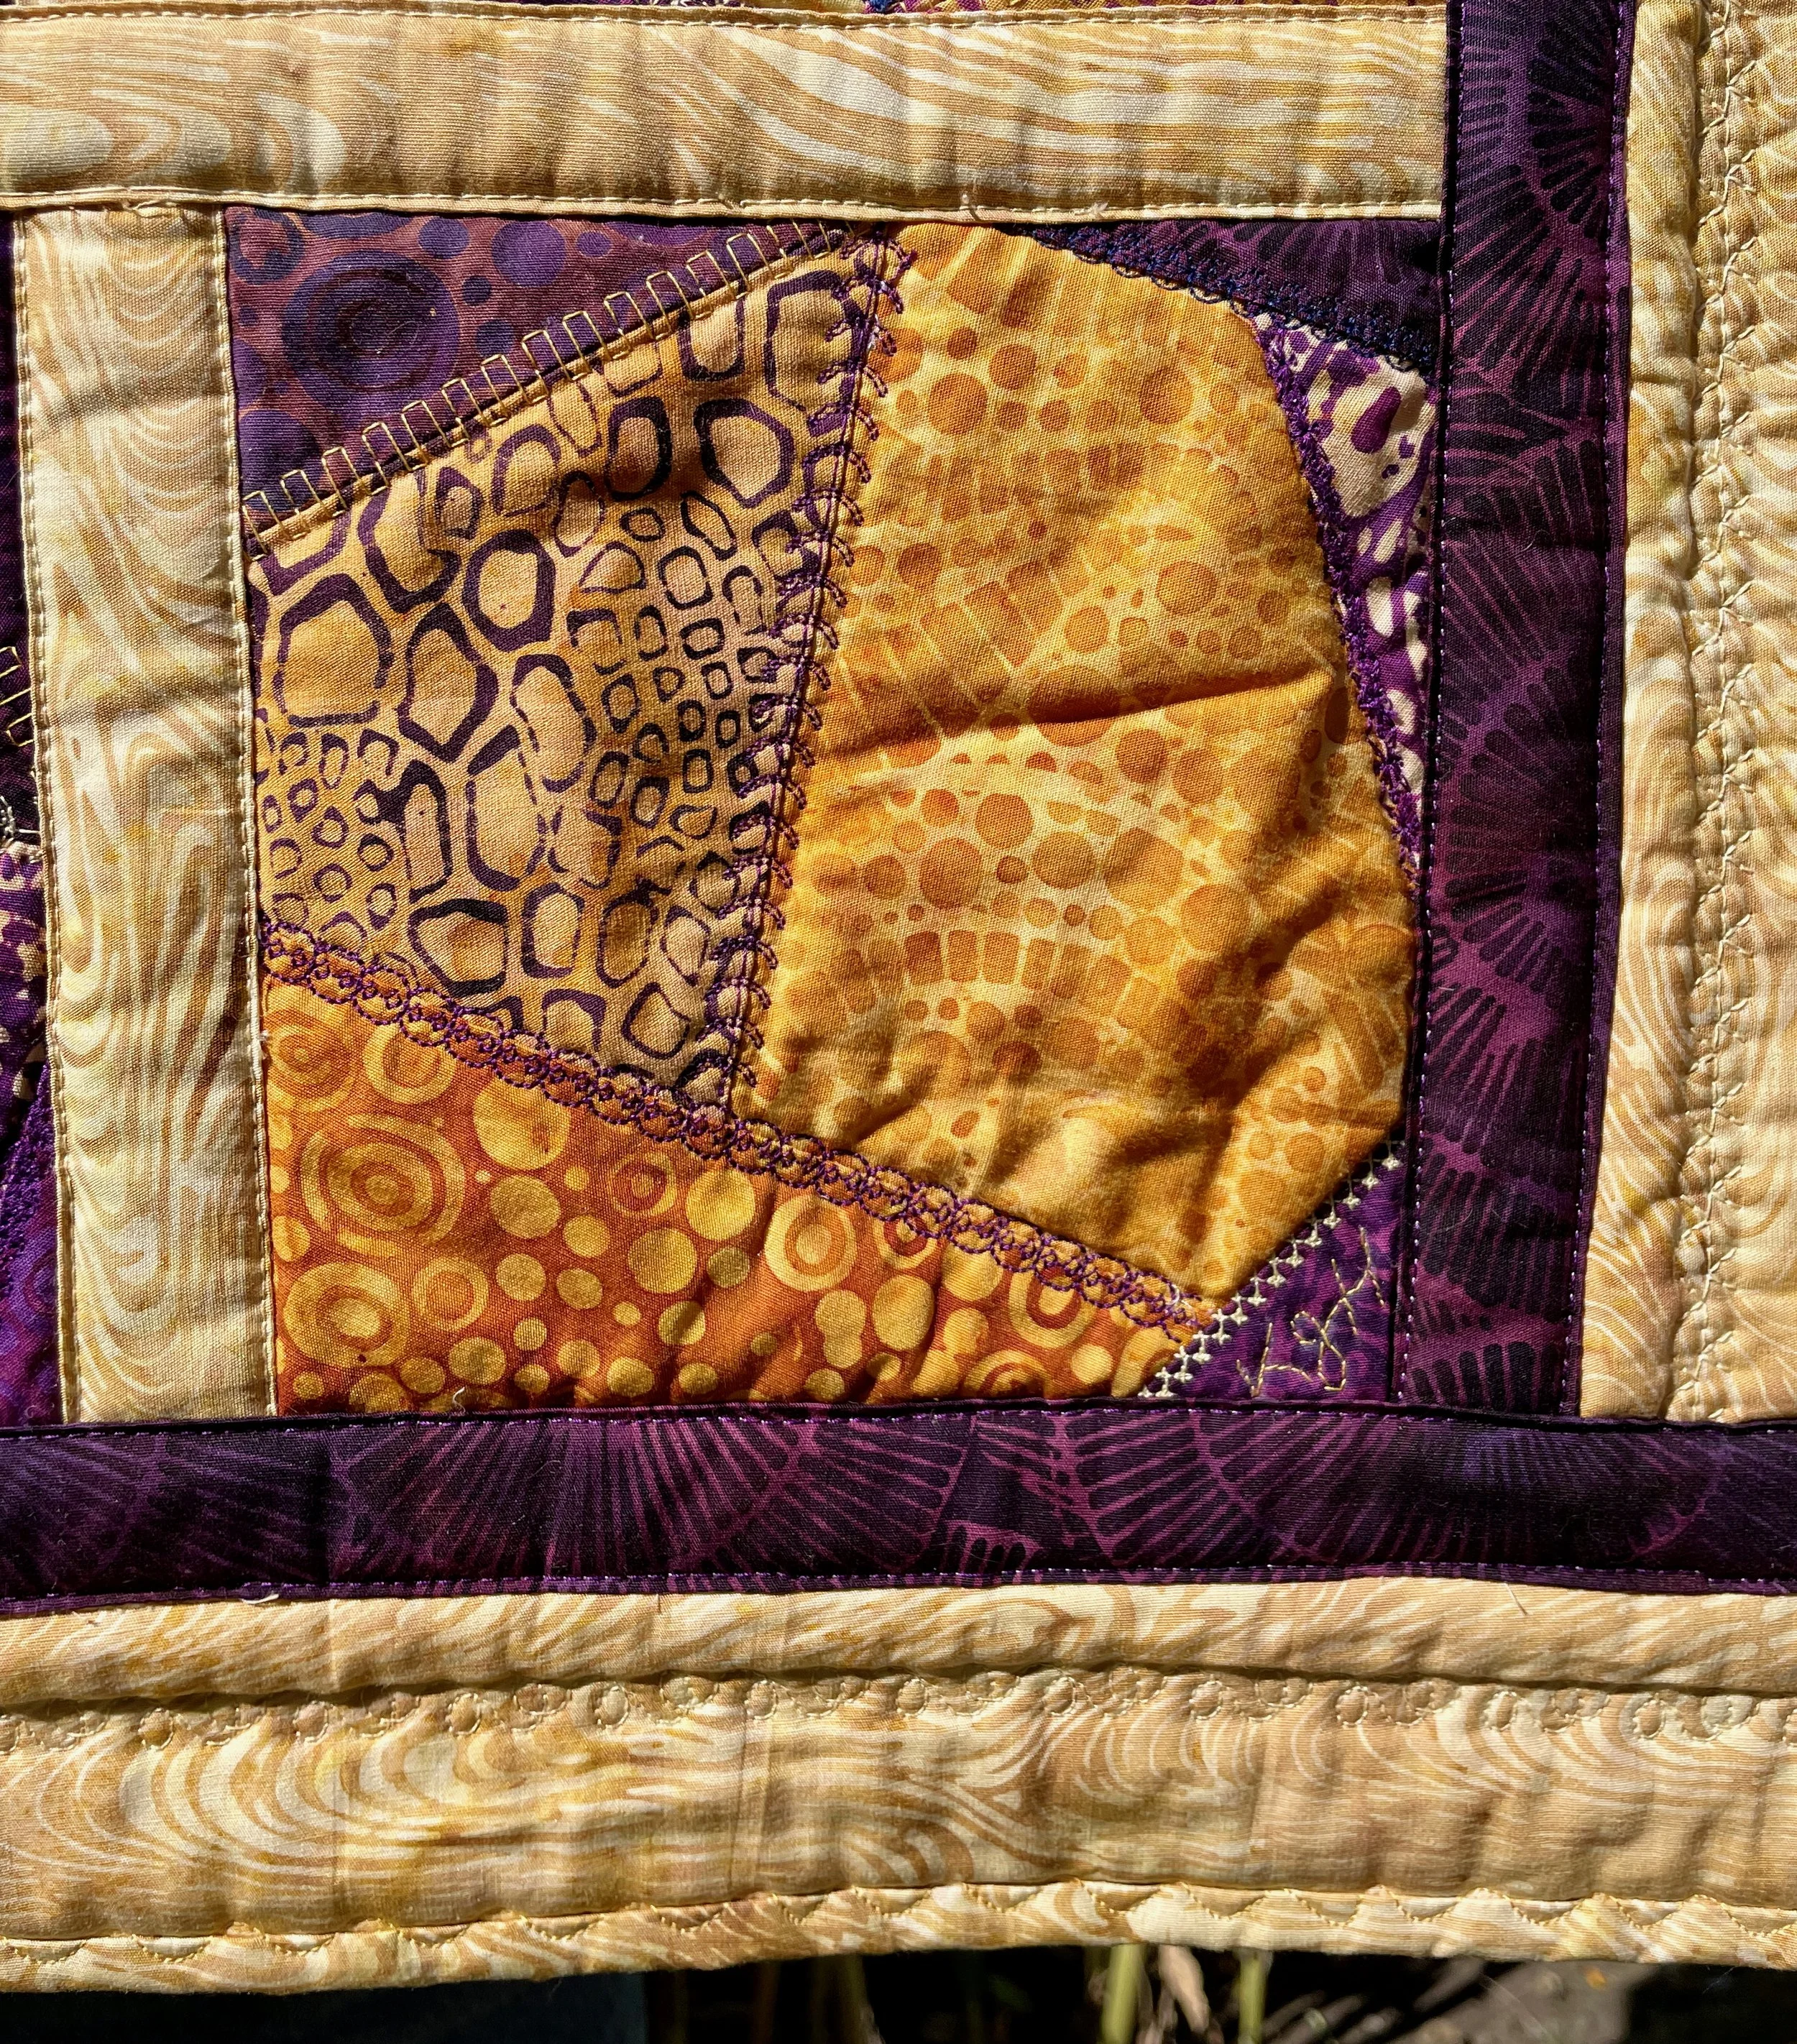
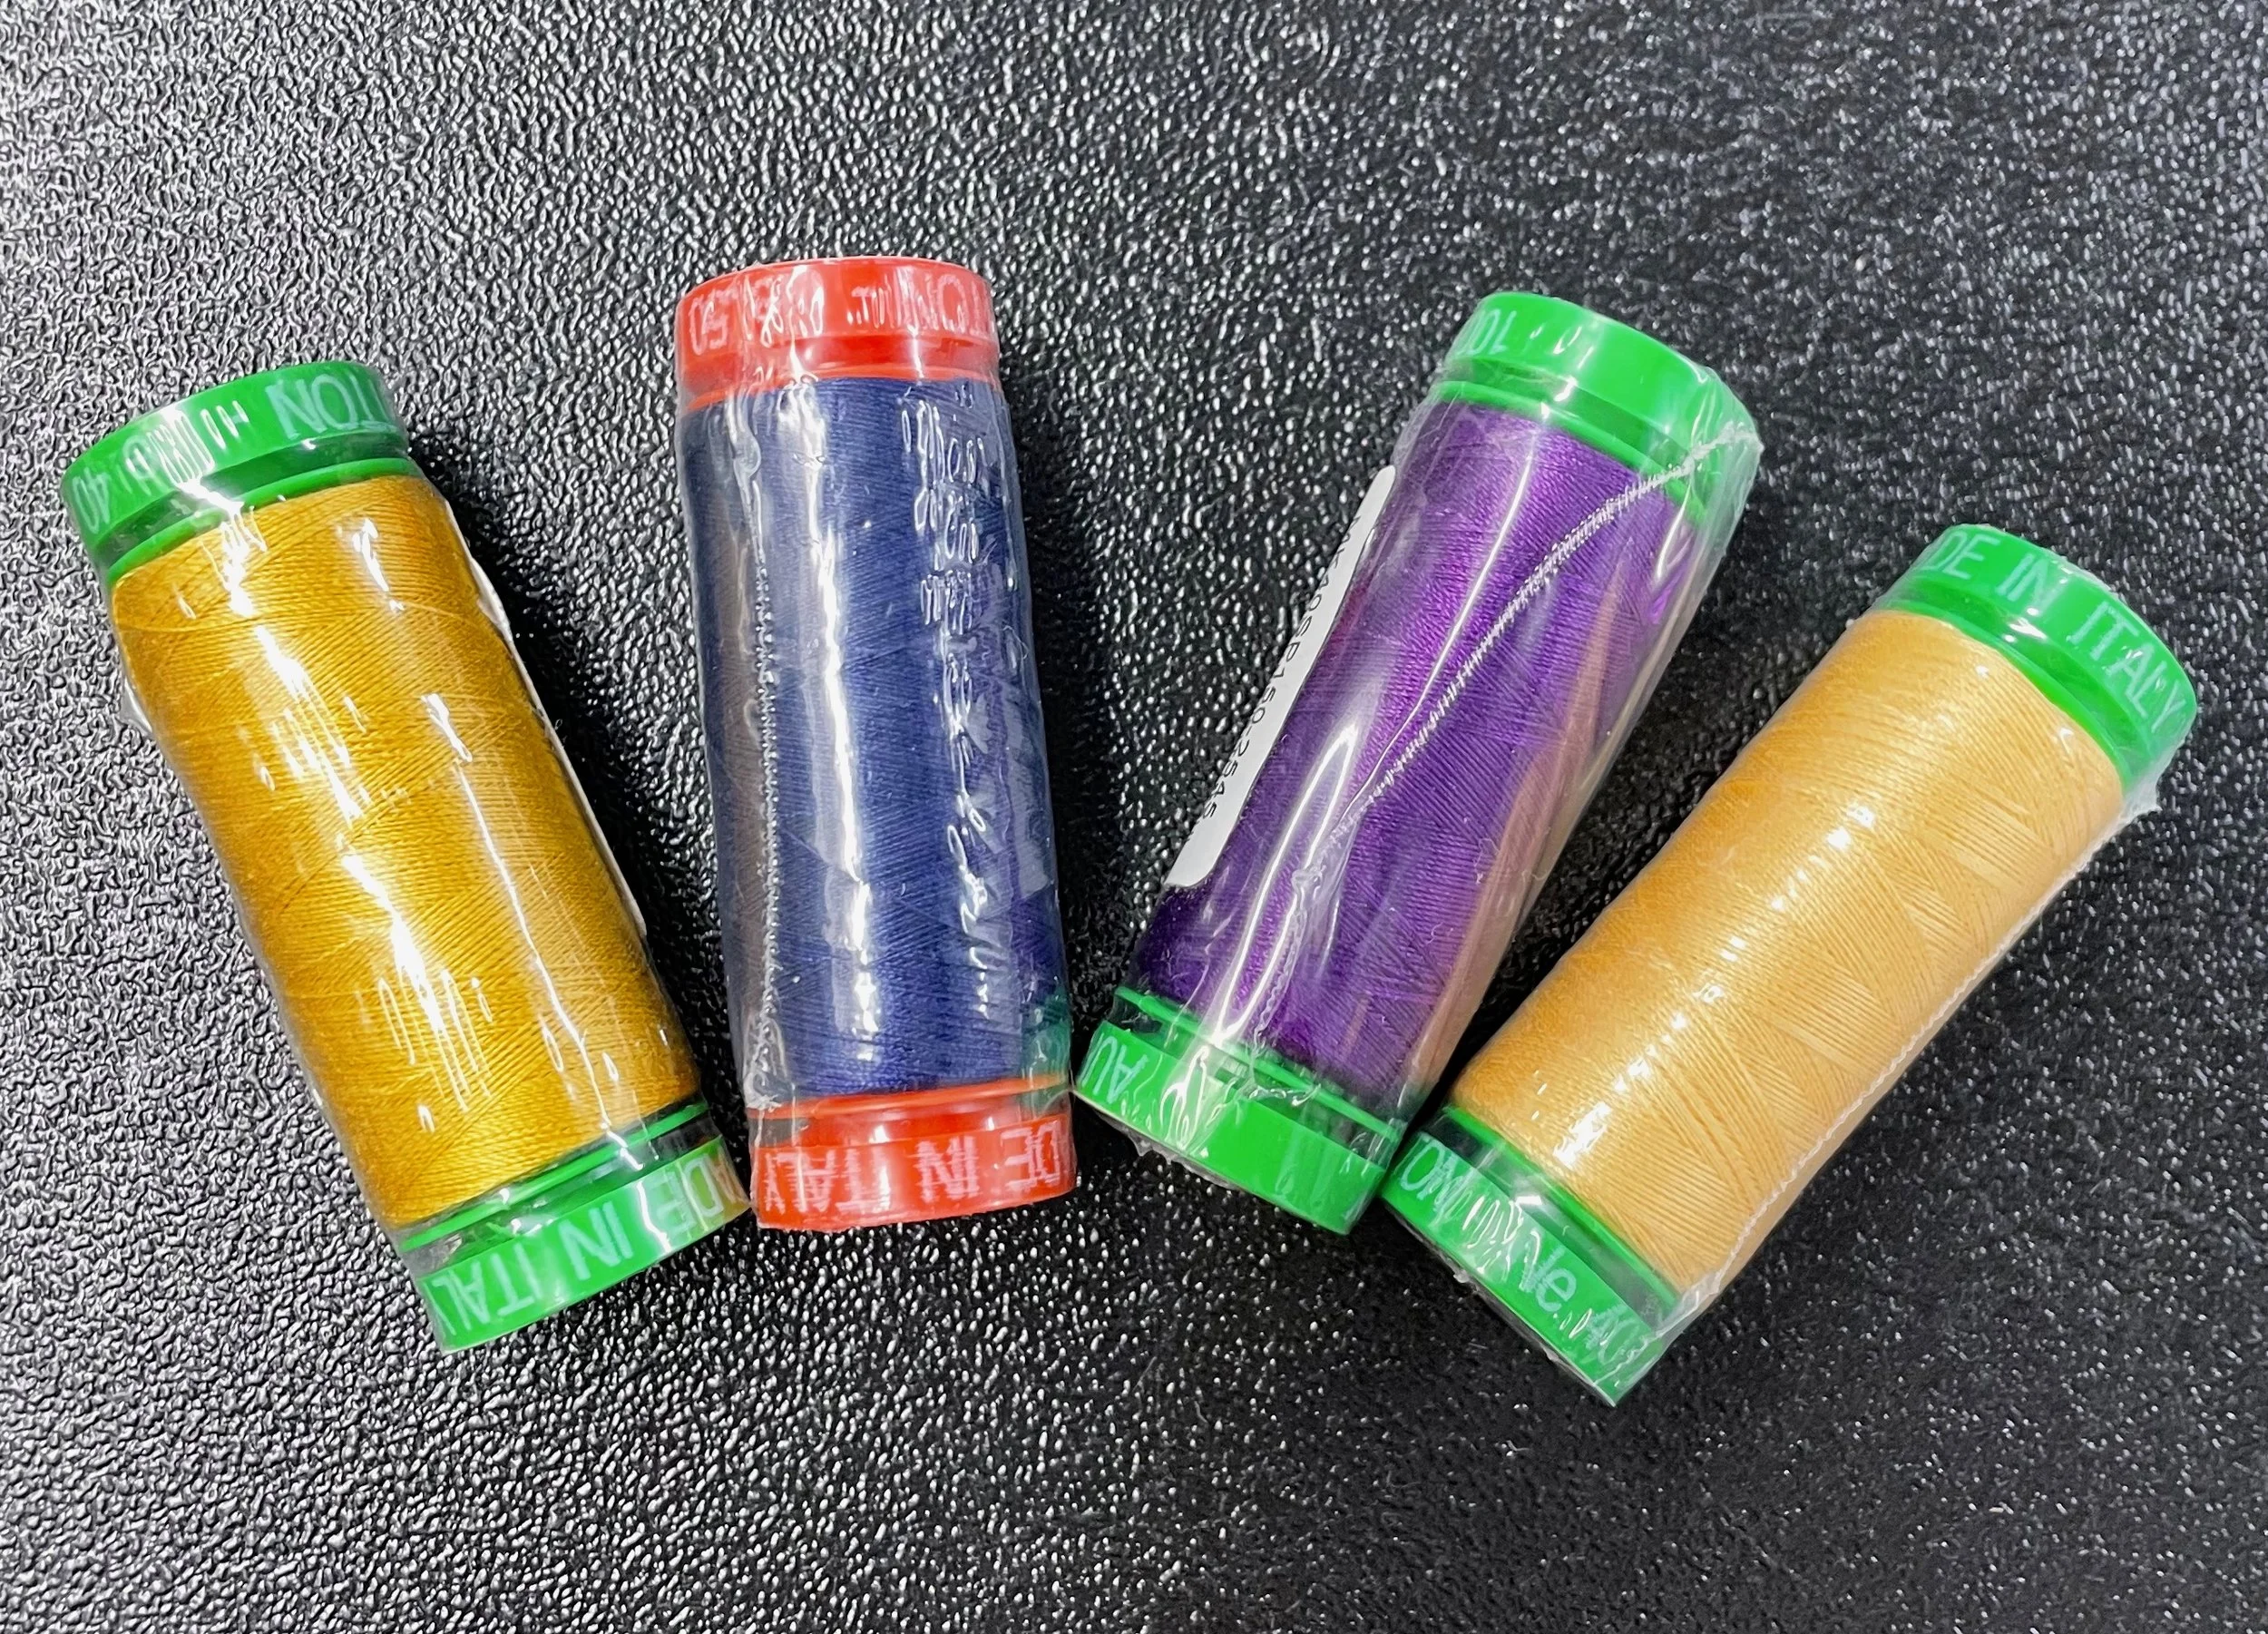
As this blog hop was sponsored by Aurifil, we could choose thread in coordinating colours for our specific fabric collection. I chose shades of gold, yellow, dark blue, and purple for my quilt and used these to create the decorative stitches that I added to the pieced quilt blocks.
Okay, I didn’t really add them…my Janome 500E embroidery machine did. Yes, I machine embroidered all of the blocks in my quilt and was able to easily choose specific stitches and thread colours for all of the seams.
I also used the quilt as you go method, although I only stitched the top and batting together. I later added individual backings for each of the blocks with sashing in between all of them.
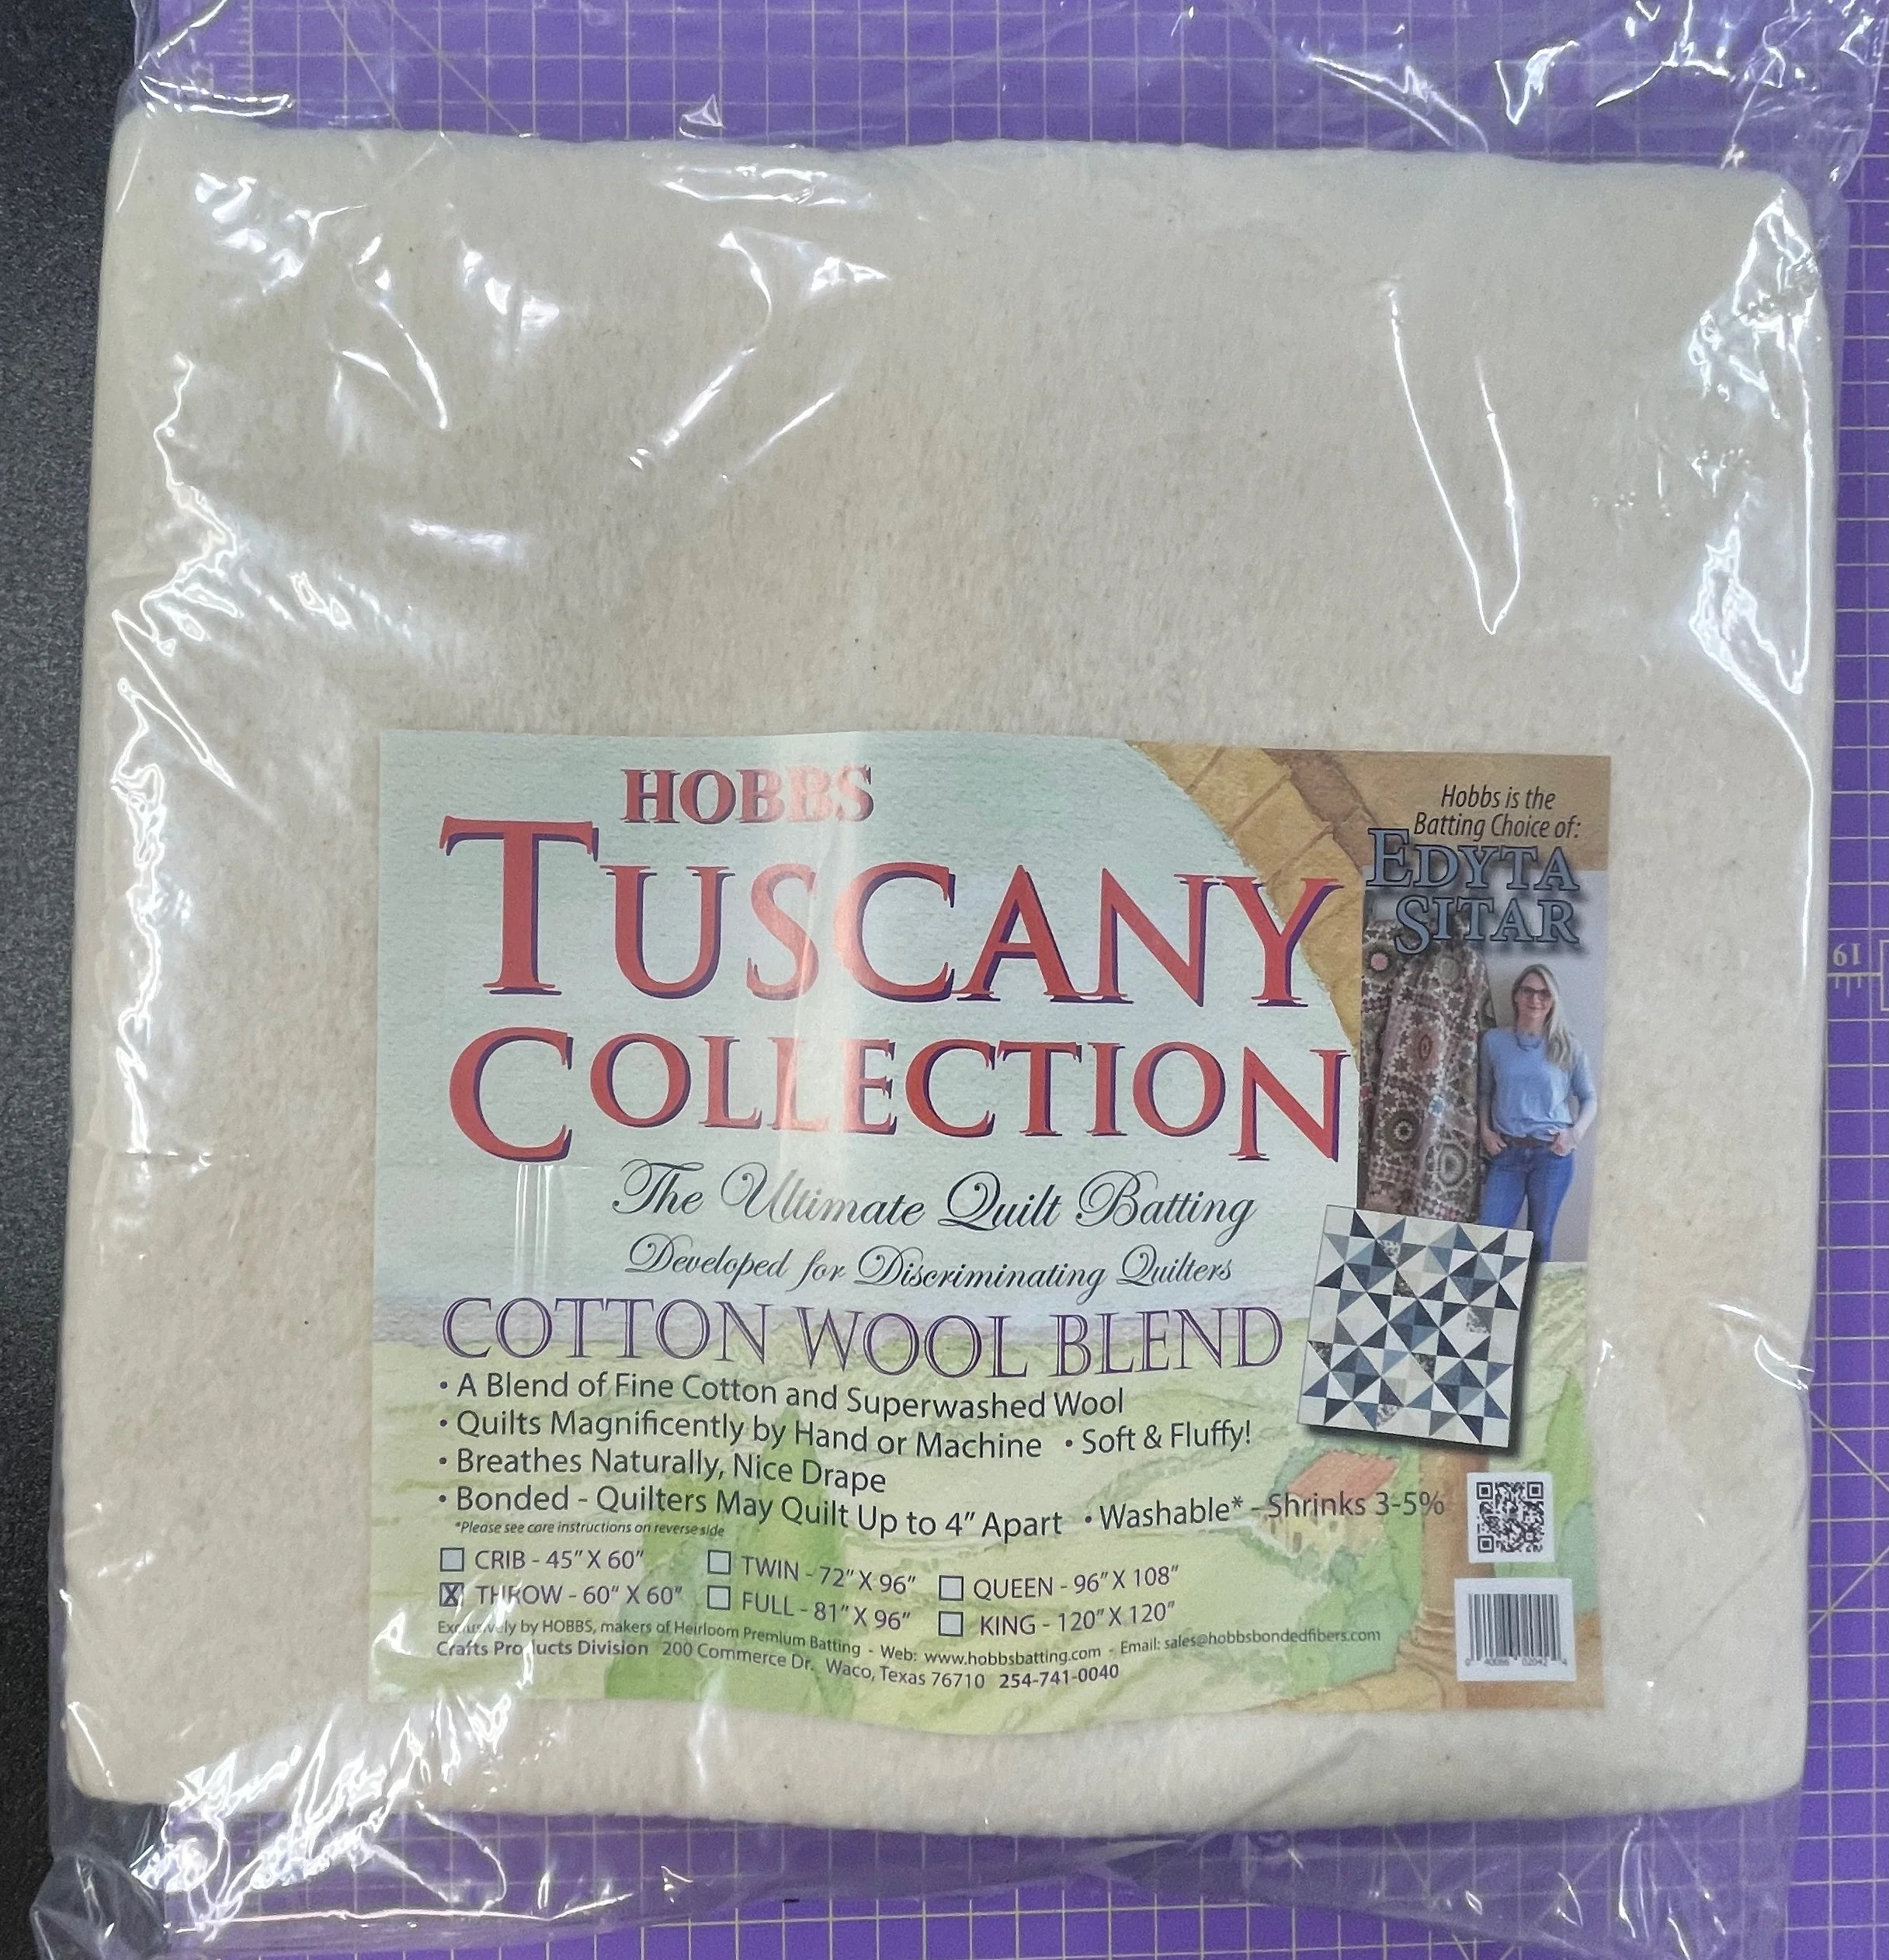
When making this quilt I used Schmetz needles as well as a cotton and wool batting from Hobbs Quilt Batting. Of course my Oliso M3 Pro Project iron helped in pressing all of my fabrics before I added them to the machine embroidered blocks.
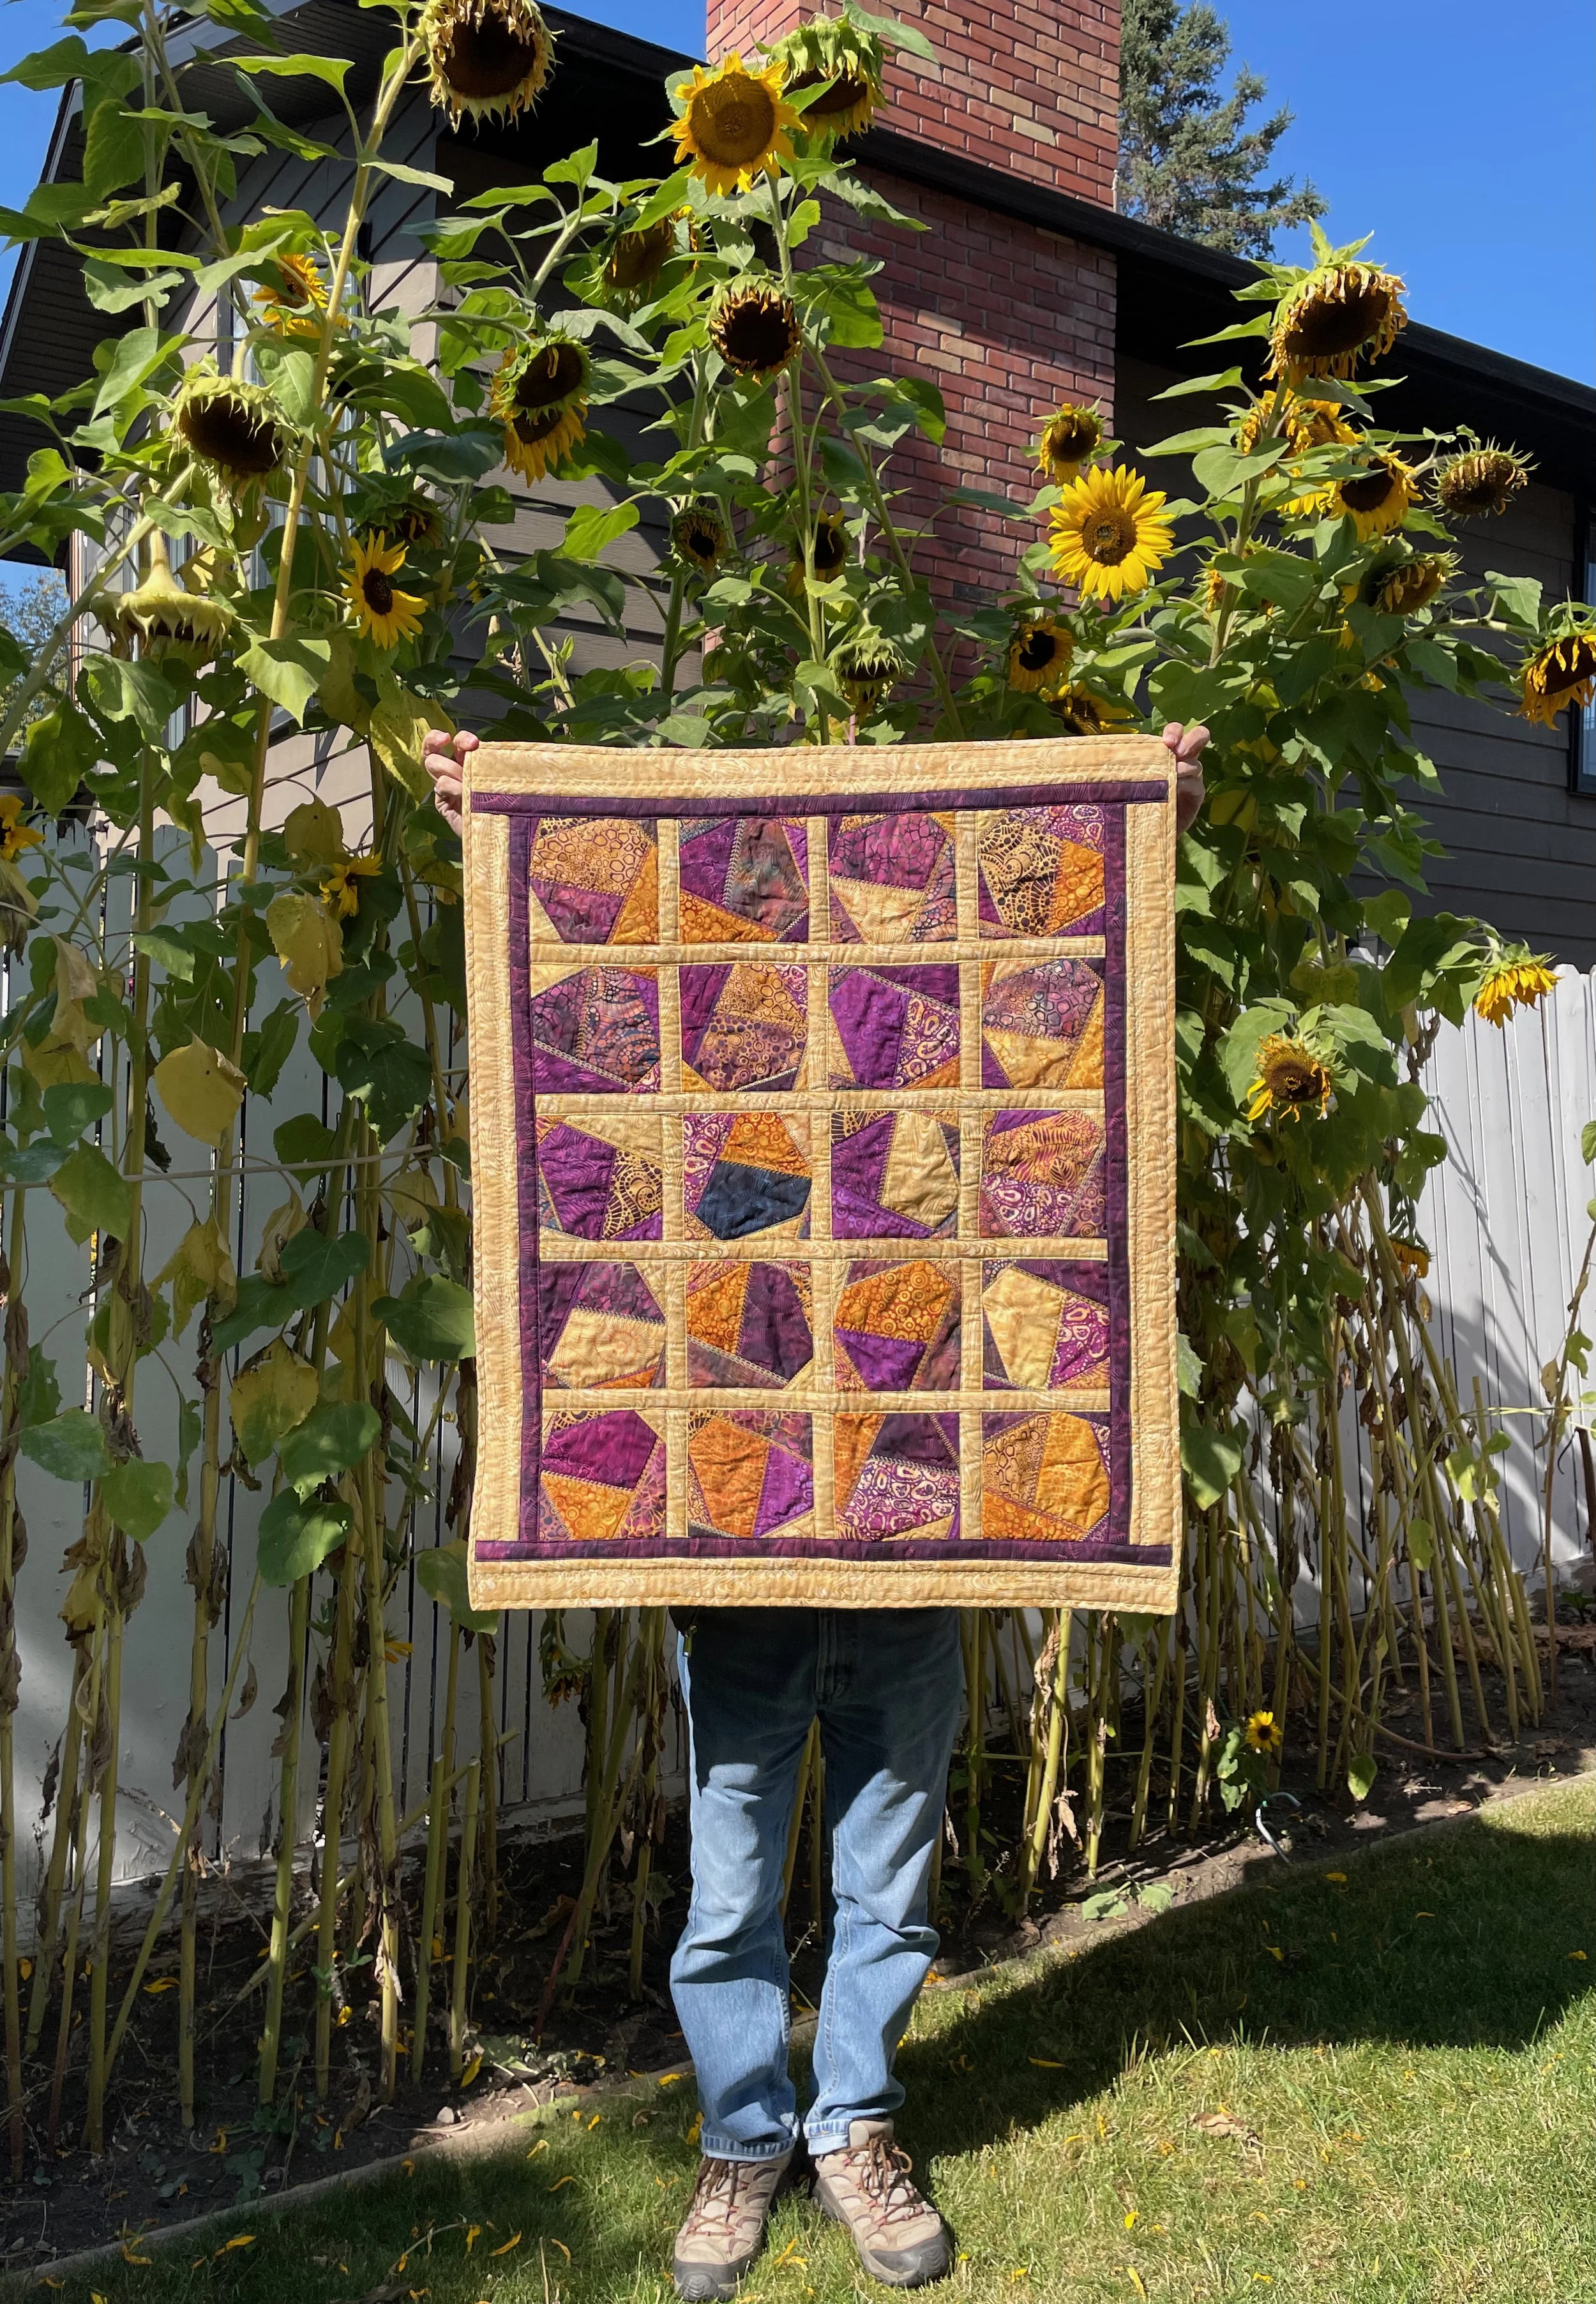
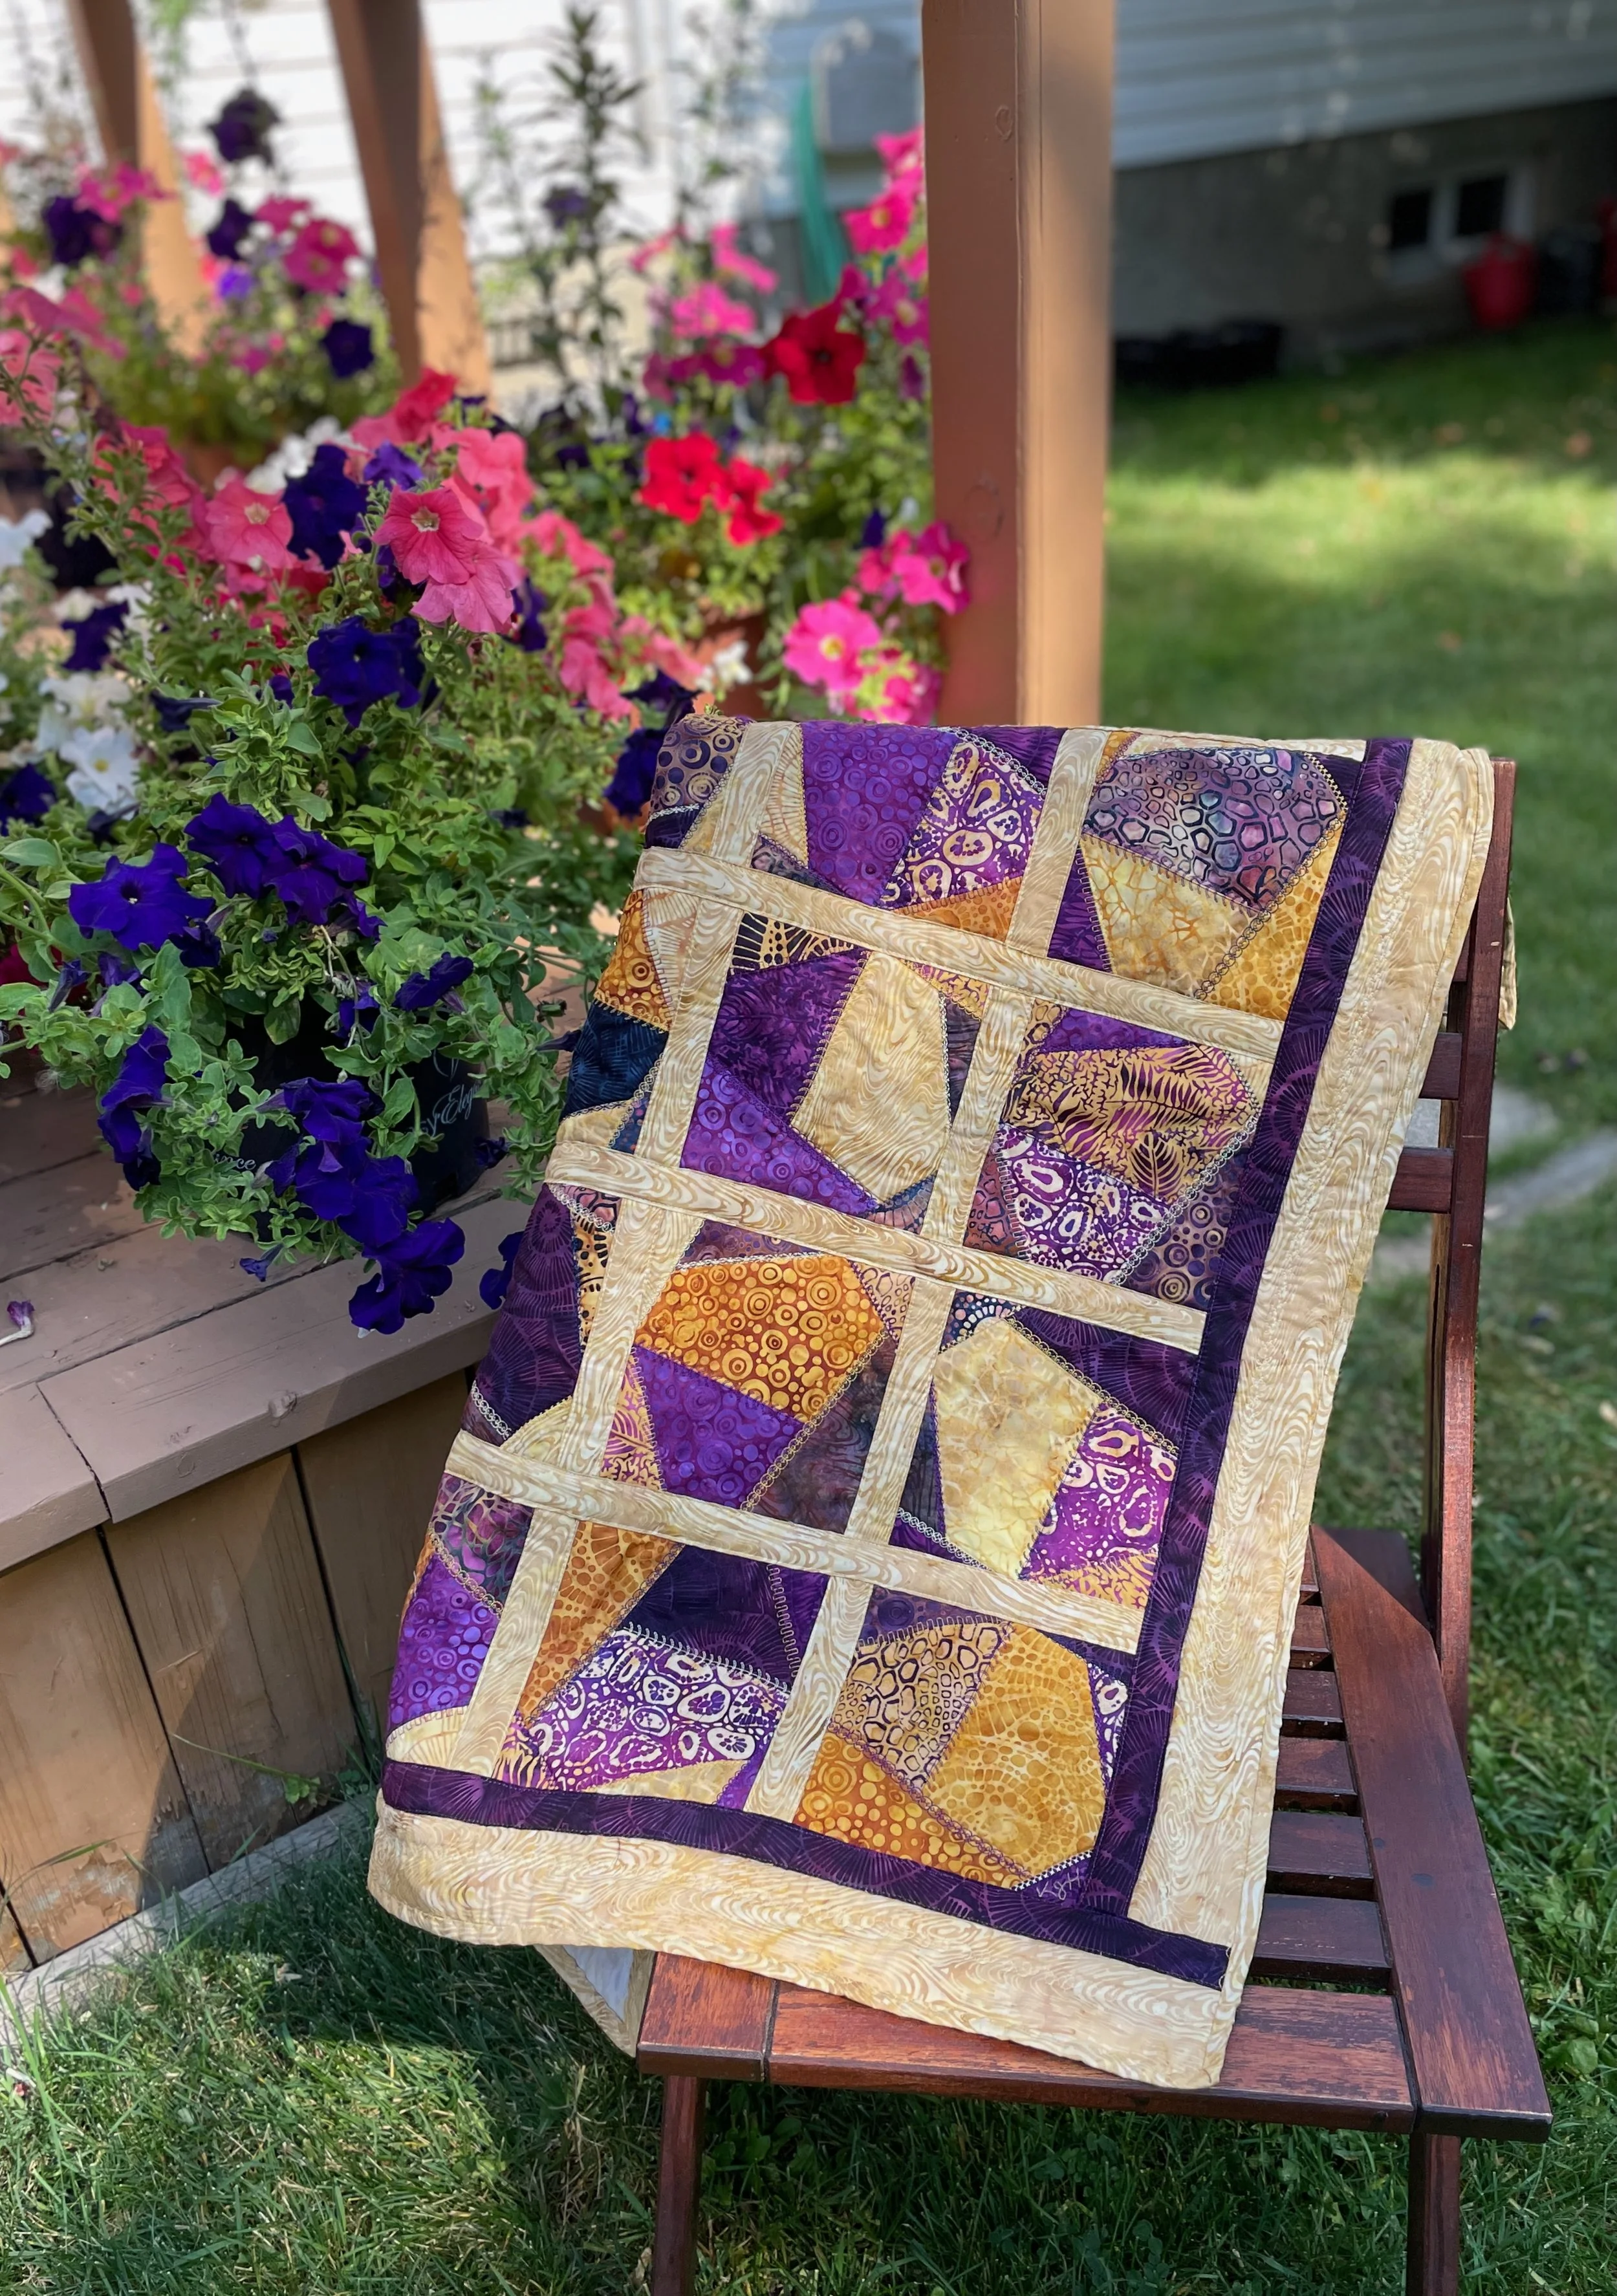
And here’s Glowing Jewels!
Thanks to my hubby for playing quilt stand. 😉
With 20 different fabrics in Geode Glow, I decided to make 20 blocks so I could include each of the fabrics in the same place in each block. All of the blocks are the same however I rotated them when stitching them into the quilt top. I also used the same decorative stitches in each block but varied which Aurifil thread I used.
Can you find the 20 different fabrics in the individual blocks in Glowing Jewels? (Hint: they are all in the same piece as the dark blue fabric in the third row).
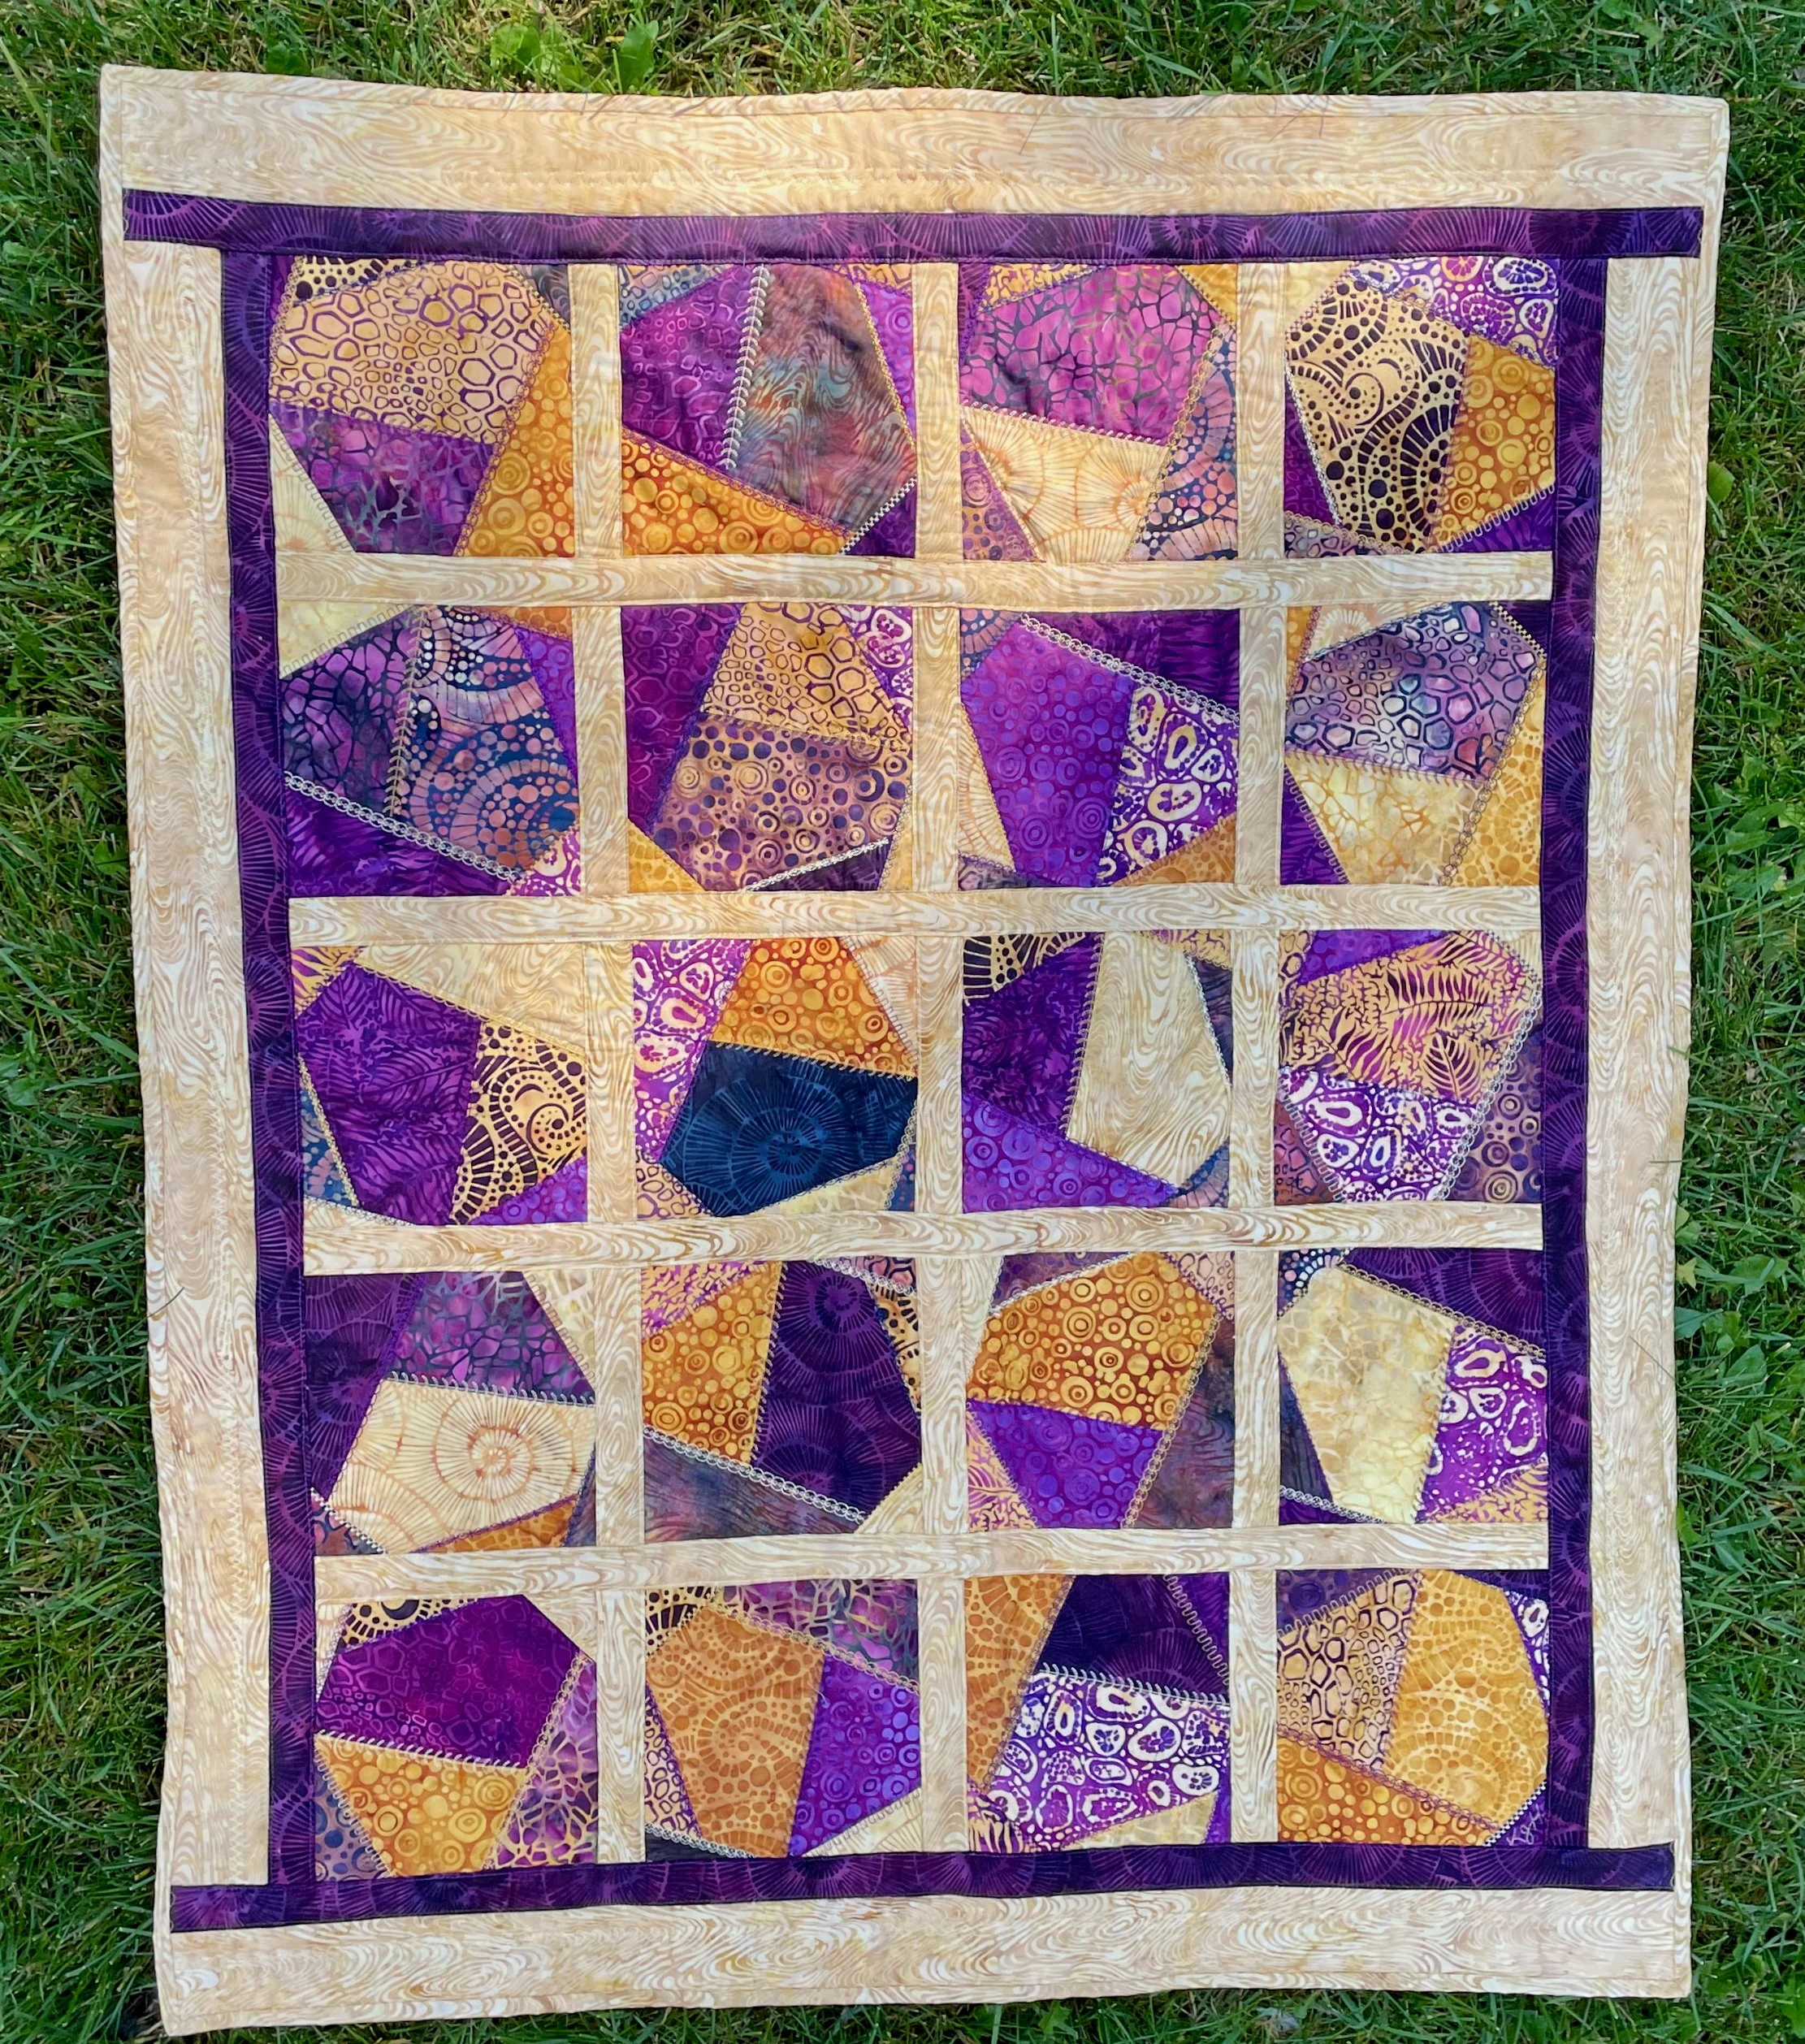
Glowing Jewels featuring Geode Glow fabric collection
While they look like a dark blue, the petunias are actually purple like some of the fabrics in Geode Glow.
One thing I added that wasn’t machine stitched in Glowing Jewels was my initials. Traditionally crazy quilts have additional embellishments and hand embroidery in them. While I considered hand stitching all of the decorative stitches (I love to do hand embroidery!), time didn’t permit so instead I simply used one of the Aurifil threads to embroider my initials “KJH” to one of the blocks.
Check out my video for more details on how I created Glowing Jewels here.

Be sure to check at your local quilt shop for Geode Glow.
Thanks to Hobbs Quilt Batting, Oliso, Aurifil, Schmetz Needles, and Island Batik of Lumin Fabrics for the items that they sent me that allowed me to create this month’s project.
There will be many more projects coming from the other Island Batik Ambassadors this month so be sure to check out their blog posts to see what they’ve created for the Threaded Chaos Blog Hop.
You can find out more about the 2025 Island Batik Ambassadors and the projects that they will be working on this year on their websites below.
Brenda Alburl ~ Songbird Designs
Renee Atkinson ~ Pink Tulip Quilting
Susan Deshensky ~ Lady Blue Quilts Studio
Tina Dillard - Quilting Affection Designs
Brittany Fisher ~ Bobbin with Brittany
Kimberly Flannagan - Kimberlys Quilts
Preeti Harris ~ Sew Preeti Quilts
Mania Hatziioannidi ~ Mania for quilts
Connie Kauffman ~ Kauffman Designs
Connie Kresin Campbell ~ Freemotion by the River
Emily Leachman ~ The Darling Dogwood
Denise Looney ~ A Quiltery
Leah Malasky ~ Quilted Delights
Lisa Pickering ~ Lisa’s Quilting Passion
Sarah Pitcher ~ Pitcher’s Boutique
Gail Sheppard ~ Quilting Gail
Carol Stanek ~ Stitch with Color
Solomae Stoycoff - Cuddle Cat Quiltworks
Jennifer Thomas ~ Curlicue Creations
Suzy Webster ~ Websterquilt
Be sure you’re following me on Facebook and Instagram so you won’t miss out on what I’ll be creating next with Island Batik fabrics!
Note: The products featured in this blogpost were given to me by Island Batik of Lumin Fabrics and their sponsors. Thank you!
#islandbatik #islandbatikambassador #loveislandbatik #hobbsbatting, #hobbsinside, #aurifil #aurifilthreads #olisoconnects #createwitholiso #threadedchaos #schmetzneedles #schmetz #luminfabrics
Island Batik Ambassador Second Unboxing for July 2025
Welcome to July! I recently received my second shipment from Island Batik of Lumin Fabrics as an Island Batik Ambassador and it was chockful of lots of goodies from Island Batik and their sponsors.
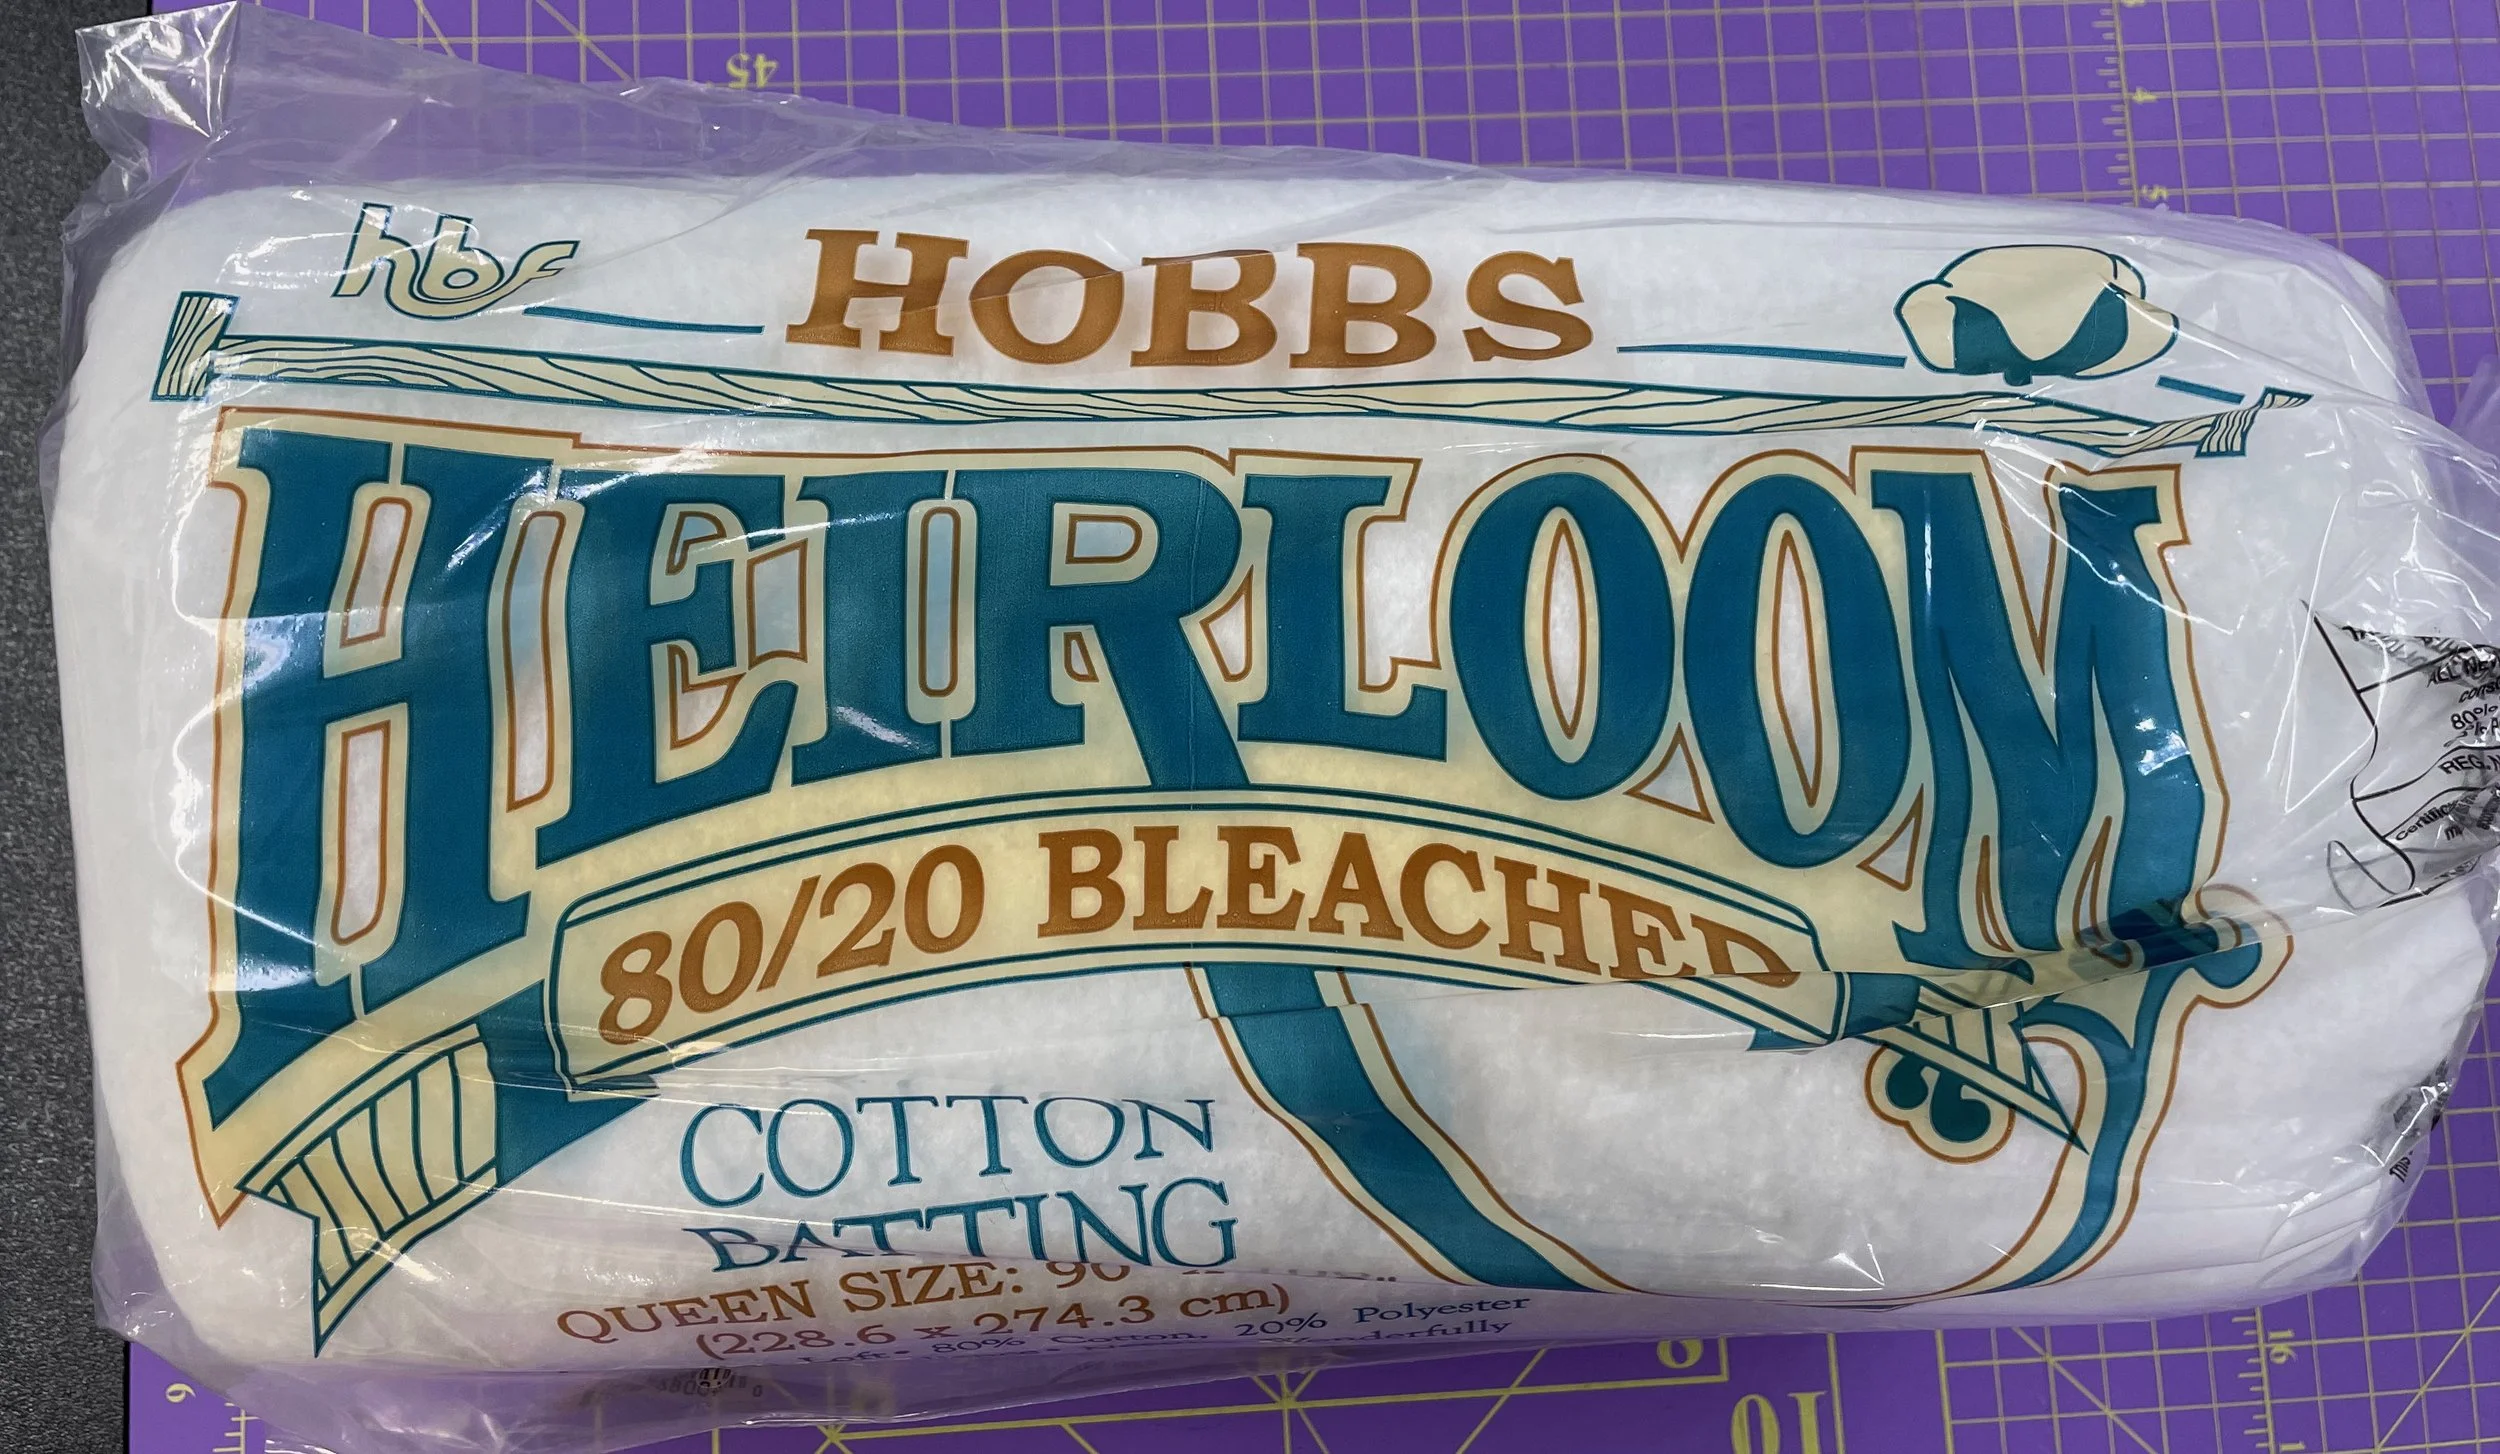
I received two boxes: one full of lots of Island Batik fabrics - yardage, half yard cuts and precuts - as well as some thread from Aurifil. The second box was stuffed with batting from Hobbs Quilt Batting.
Let’s check out what I received in the first box!
When I opened it up, this is what I saw.
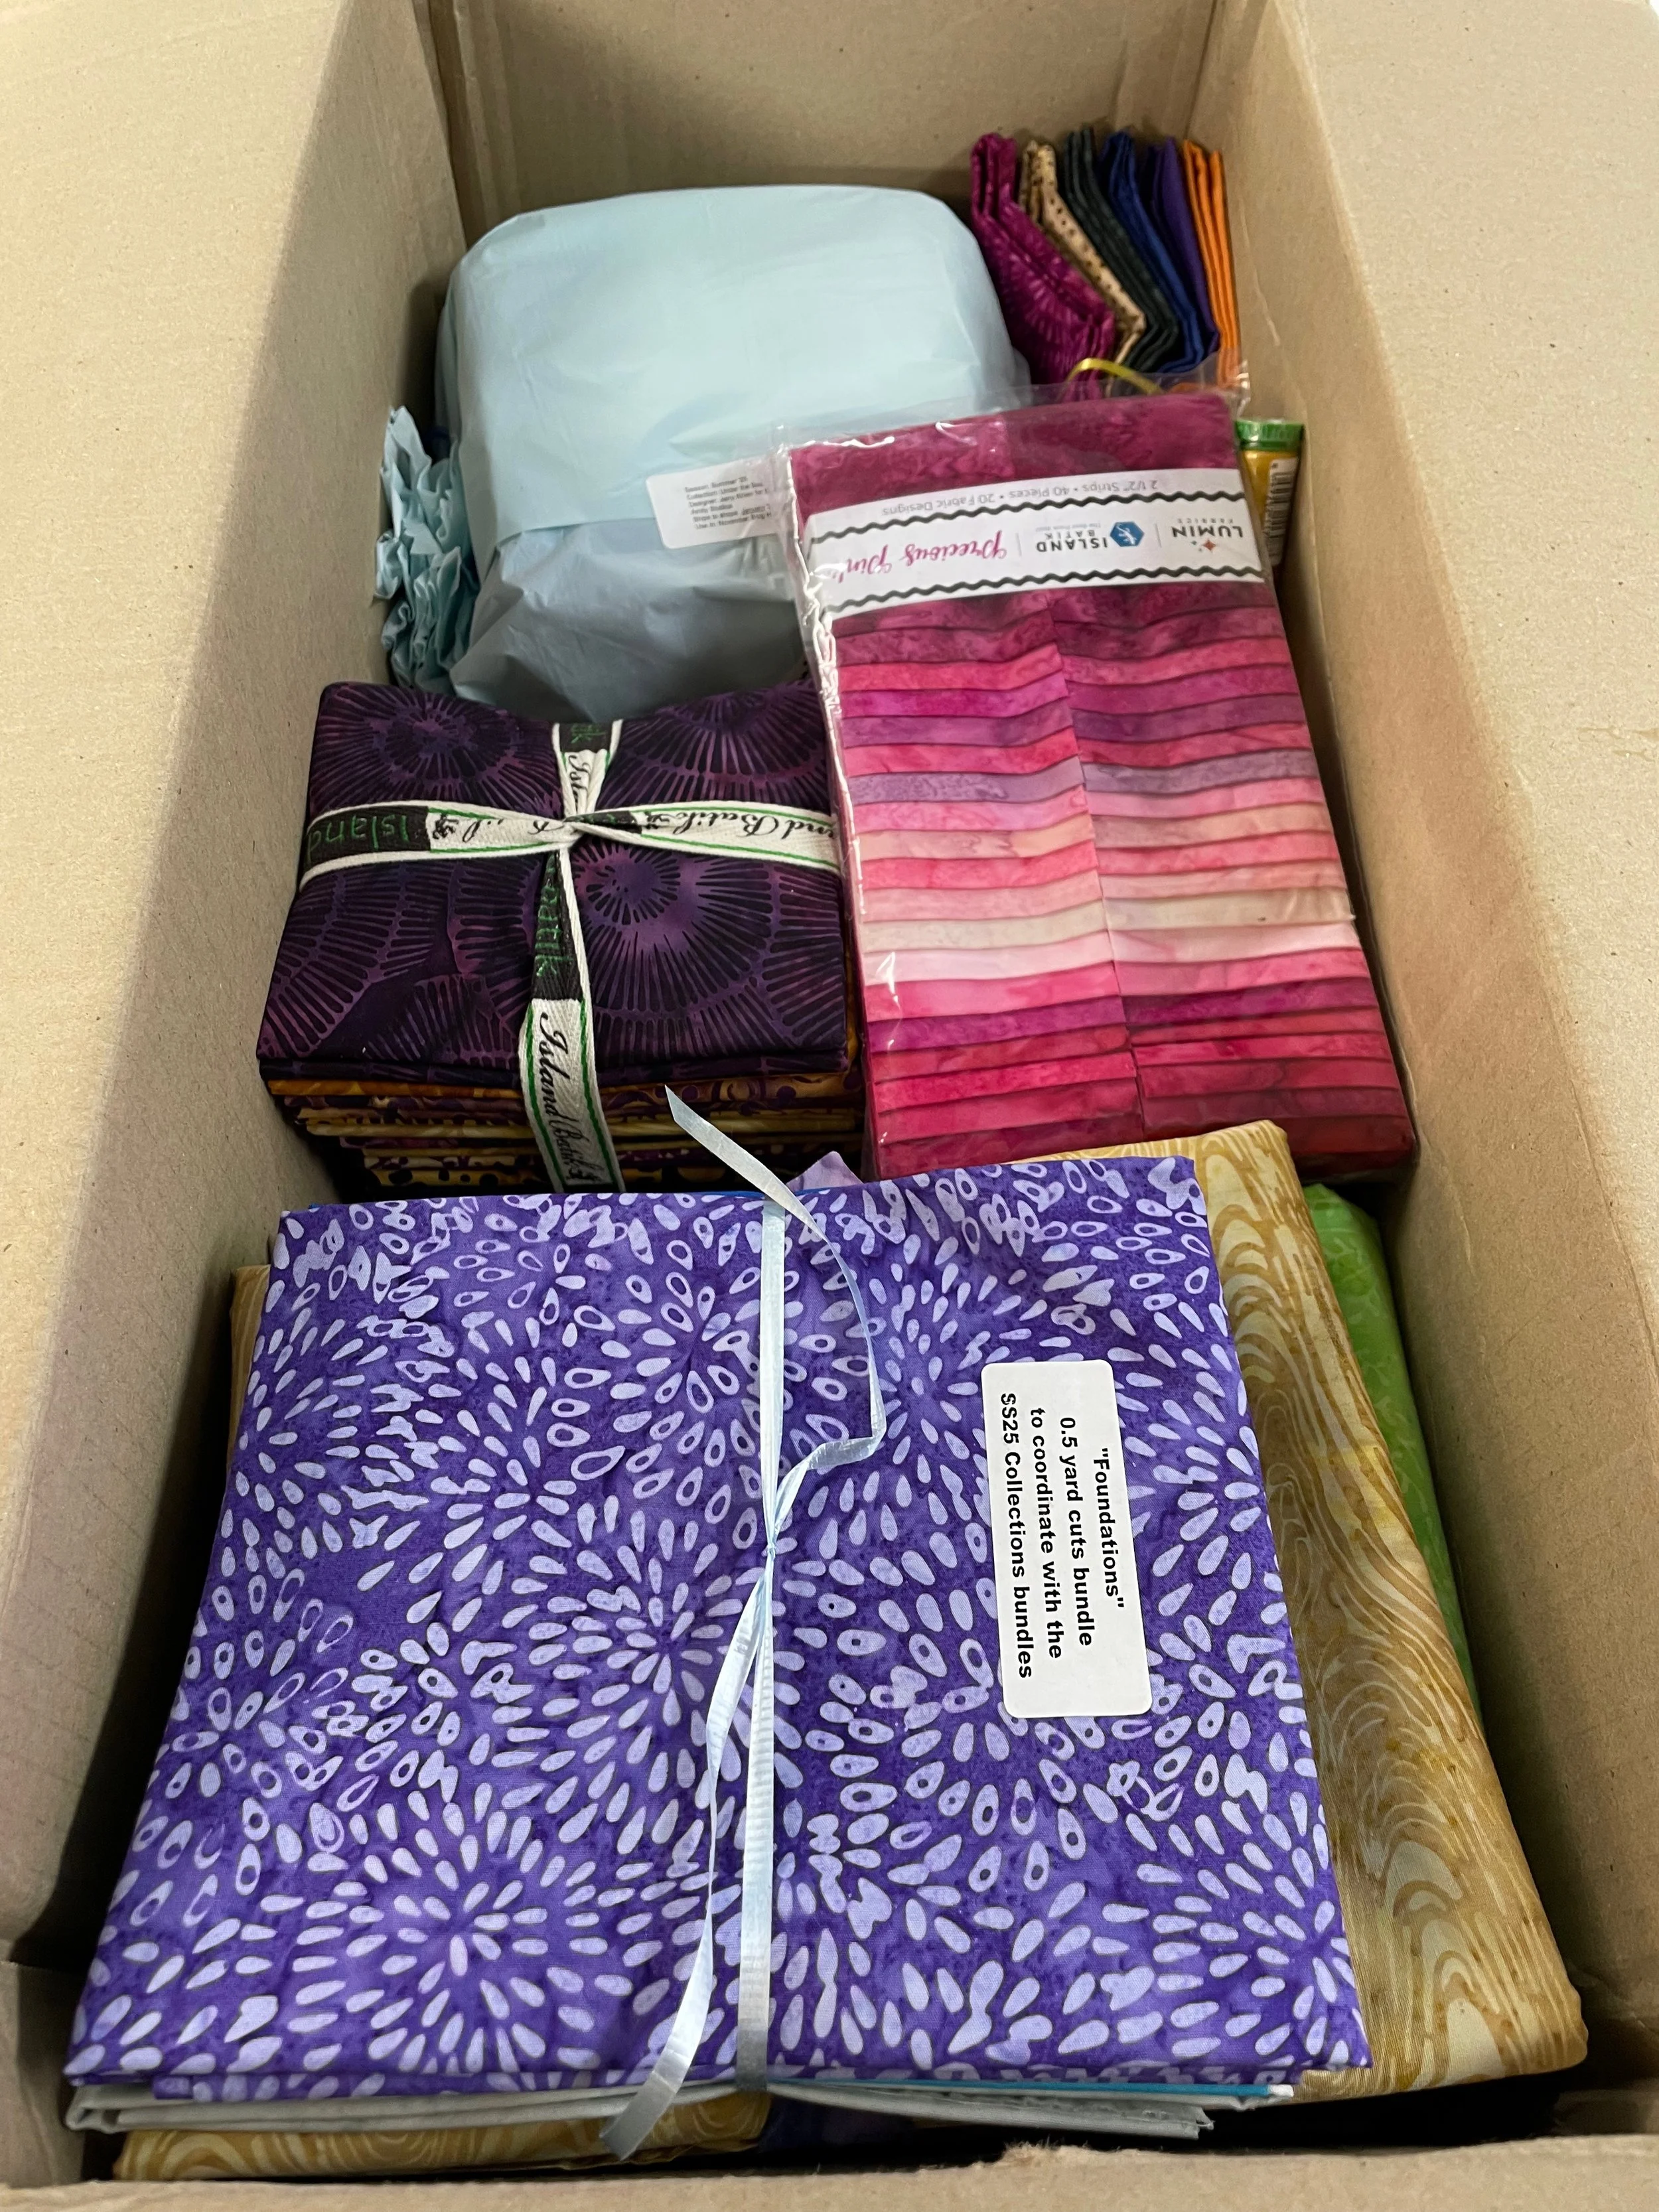
Box 1 full of Island Batik and Aurifil goodies
I pulled everything out and this is what was in that box! So much gorgeous fabric and thread! I can hardly wait to start creating with these fabrics which include new collections, such as Earth Essence from Kathy Engle for Quilting Renditions (Kari Nichols) and Geode Glow by Kathy Engle.
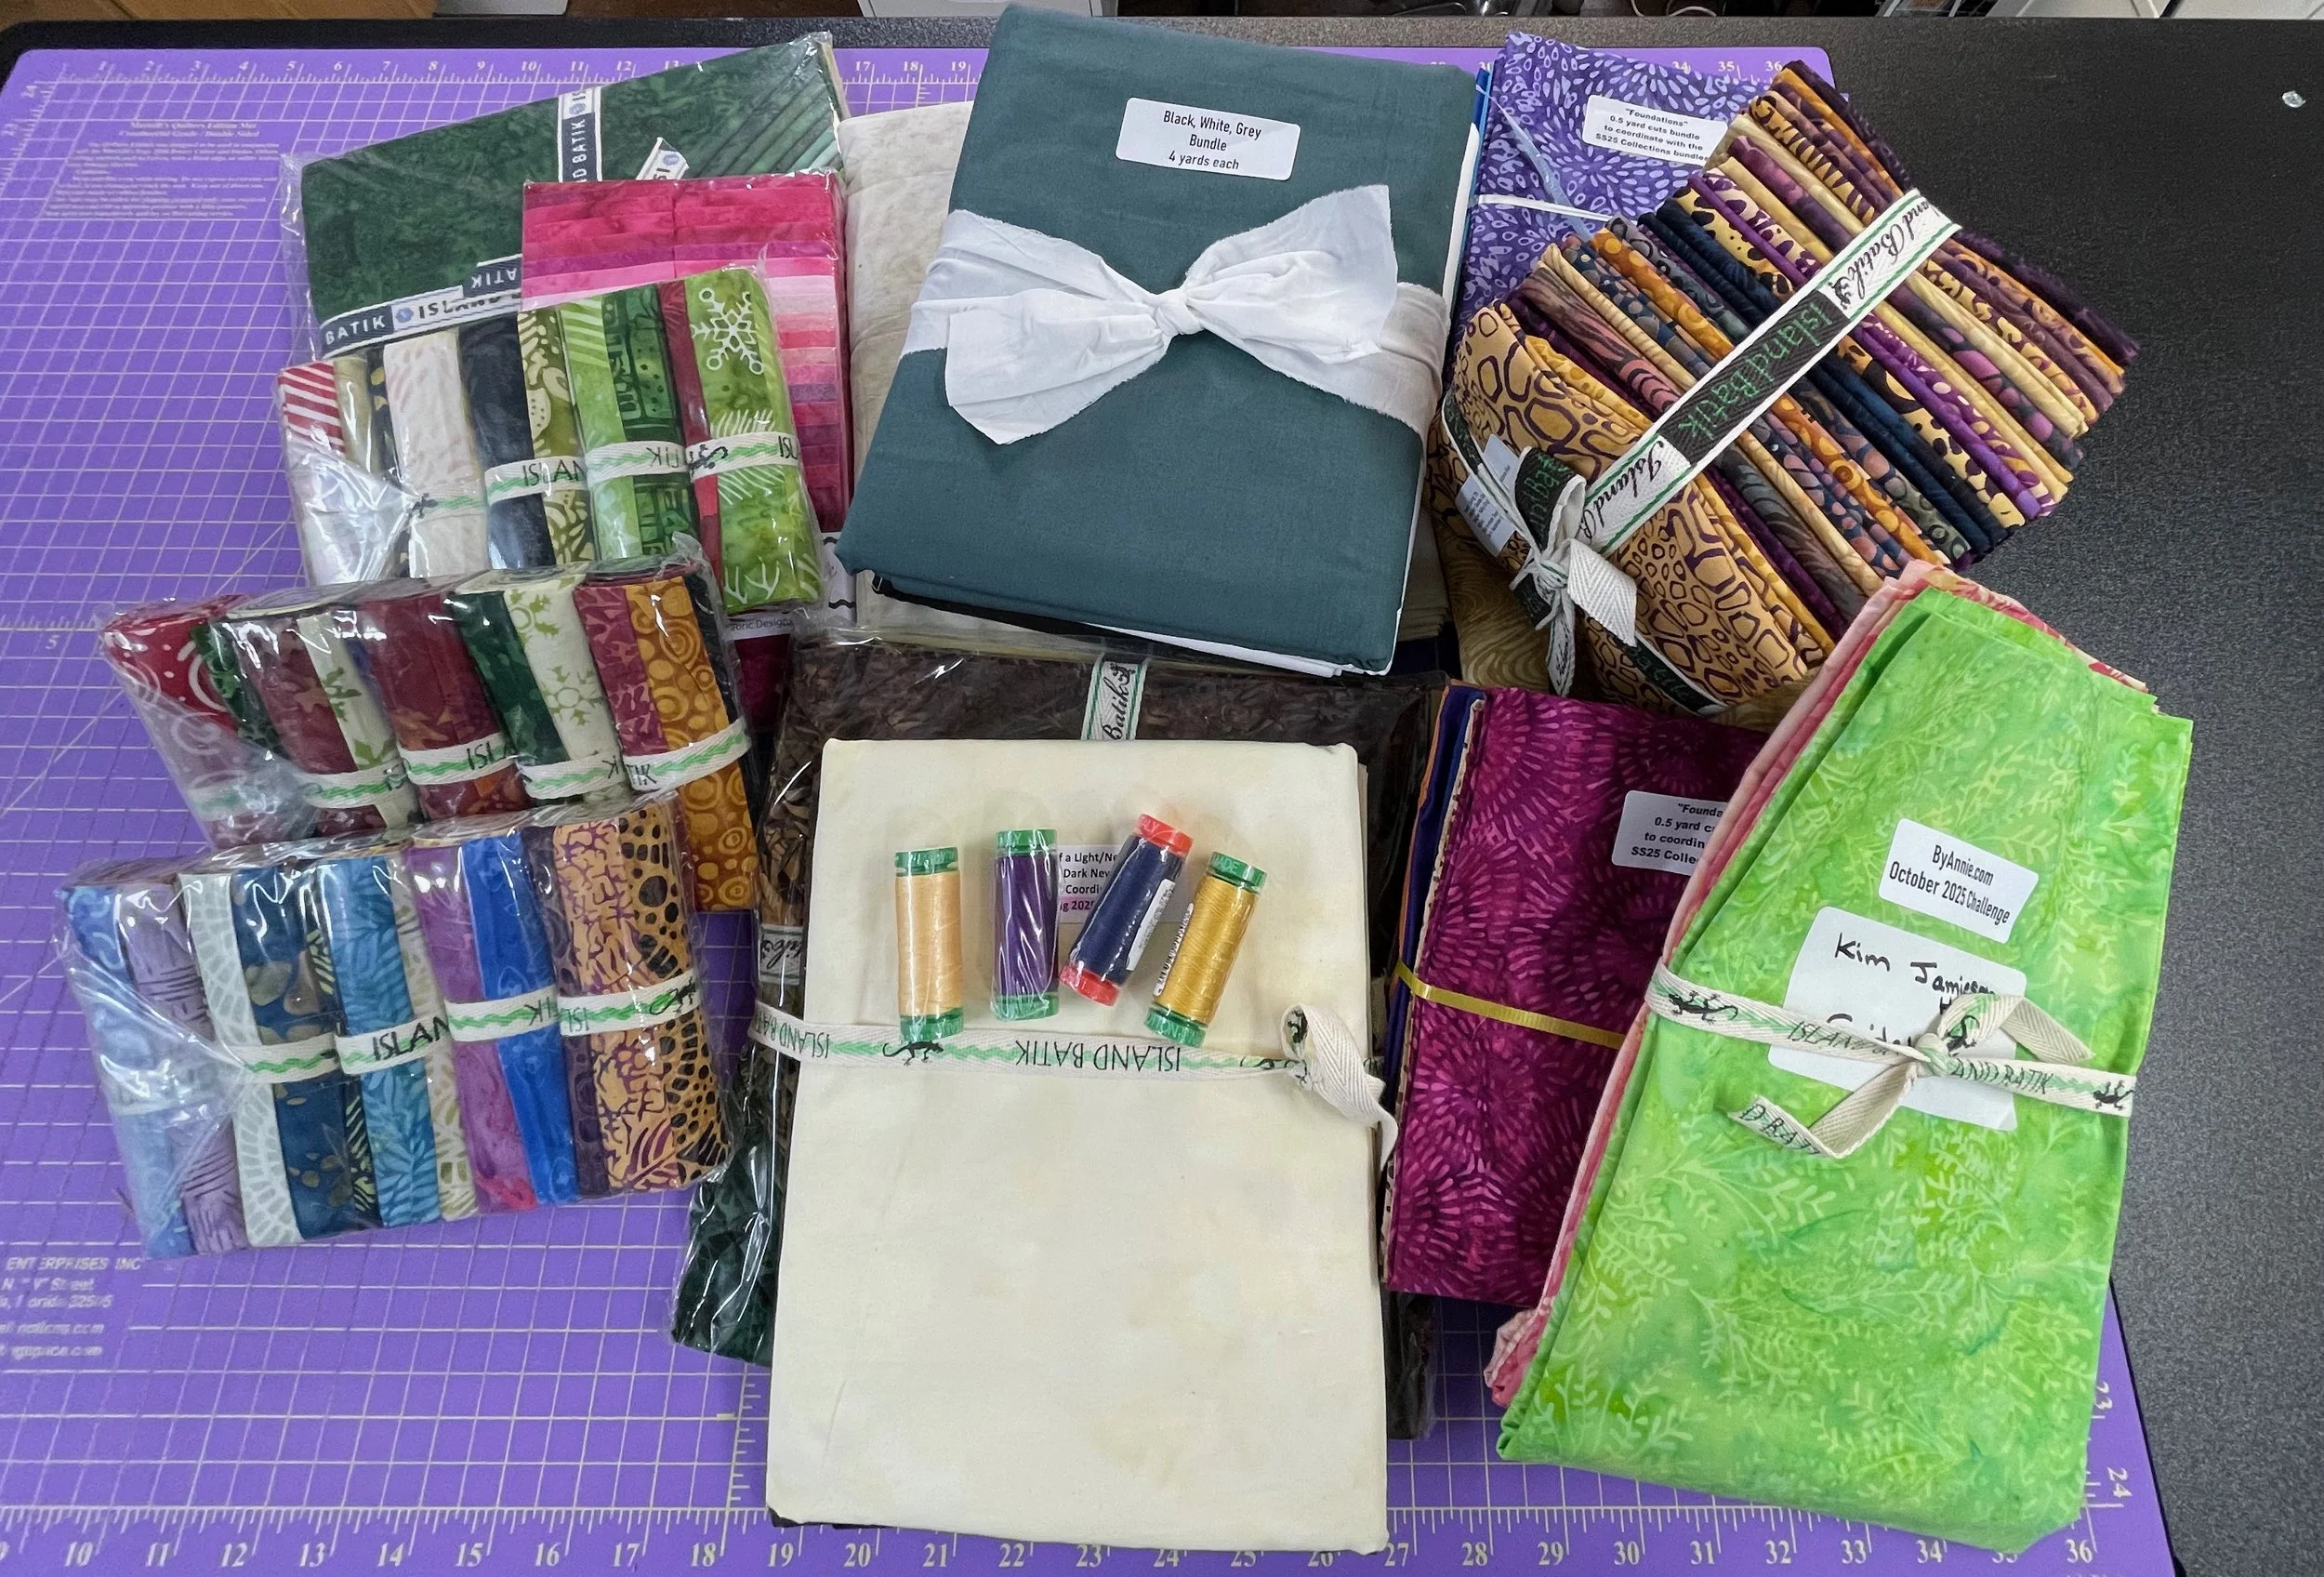
Everything in box 1
Let’s take a closer look at the various items that I received in the first box I opened. I’ve included them in a gallery below so just click the arrows to toggle between the images.
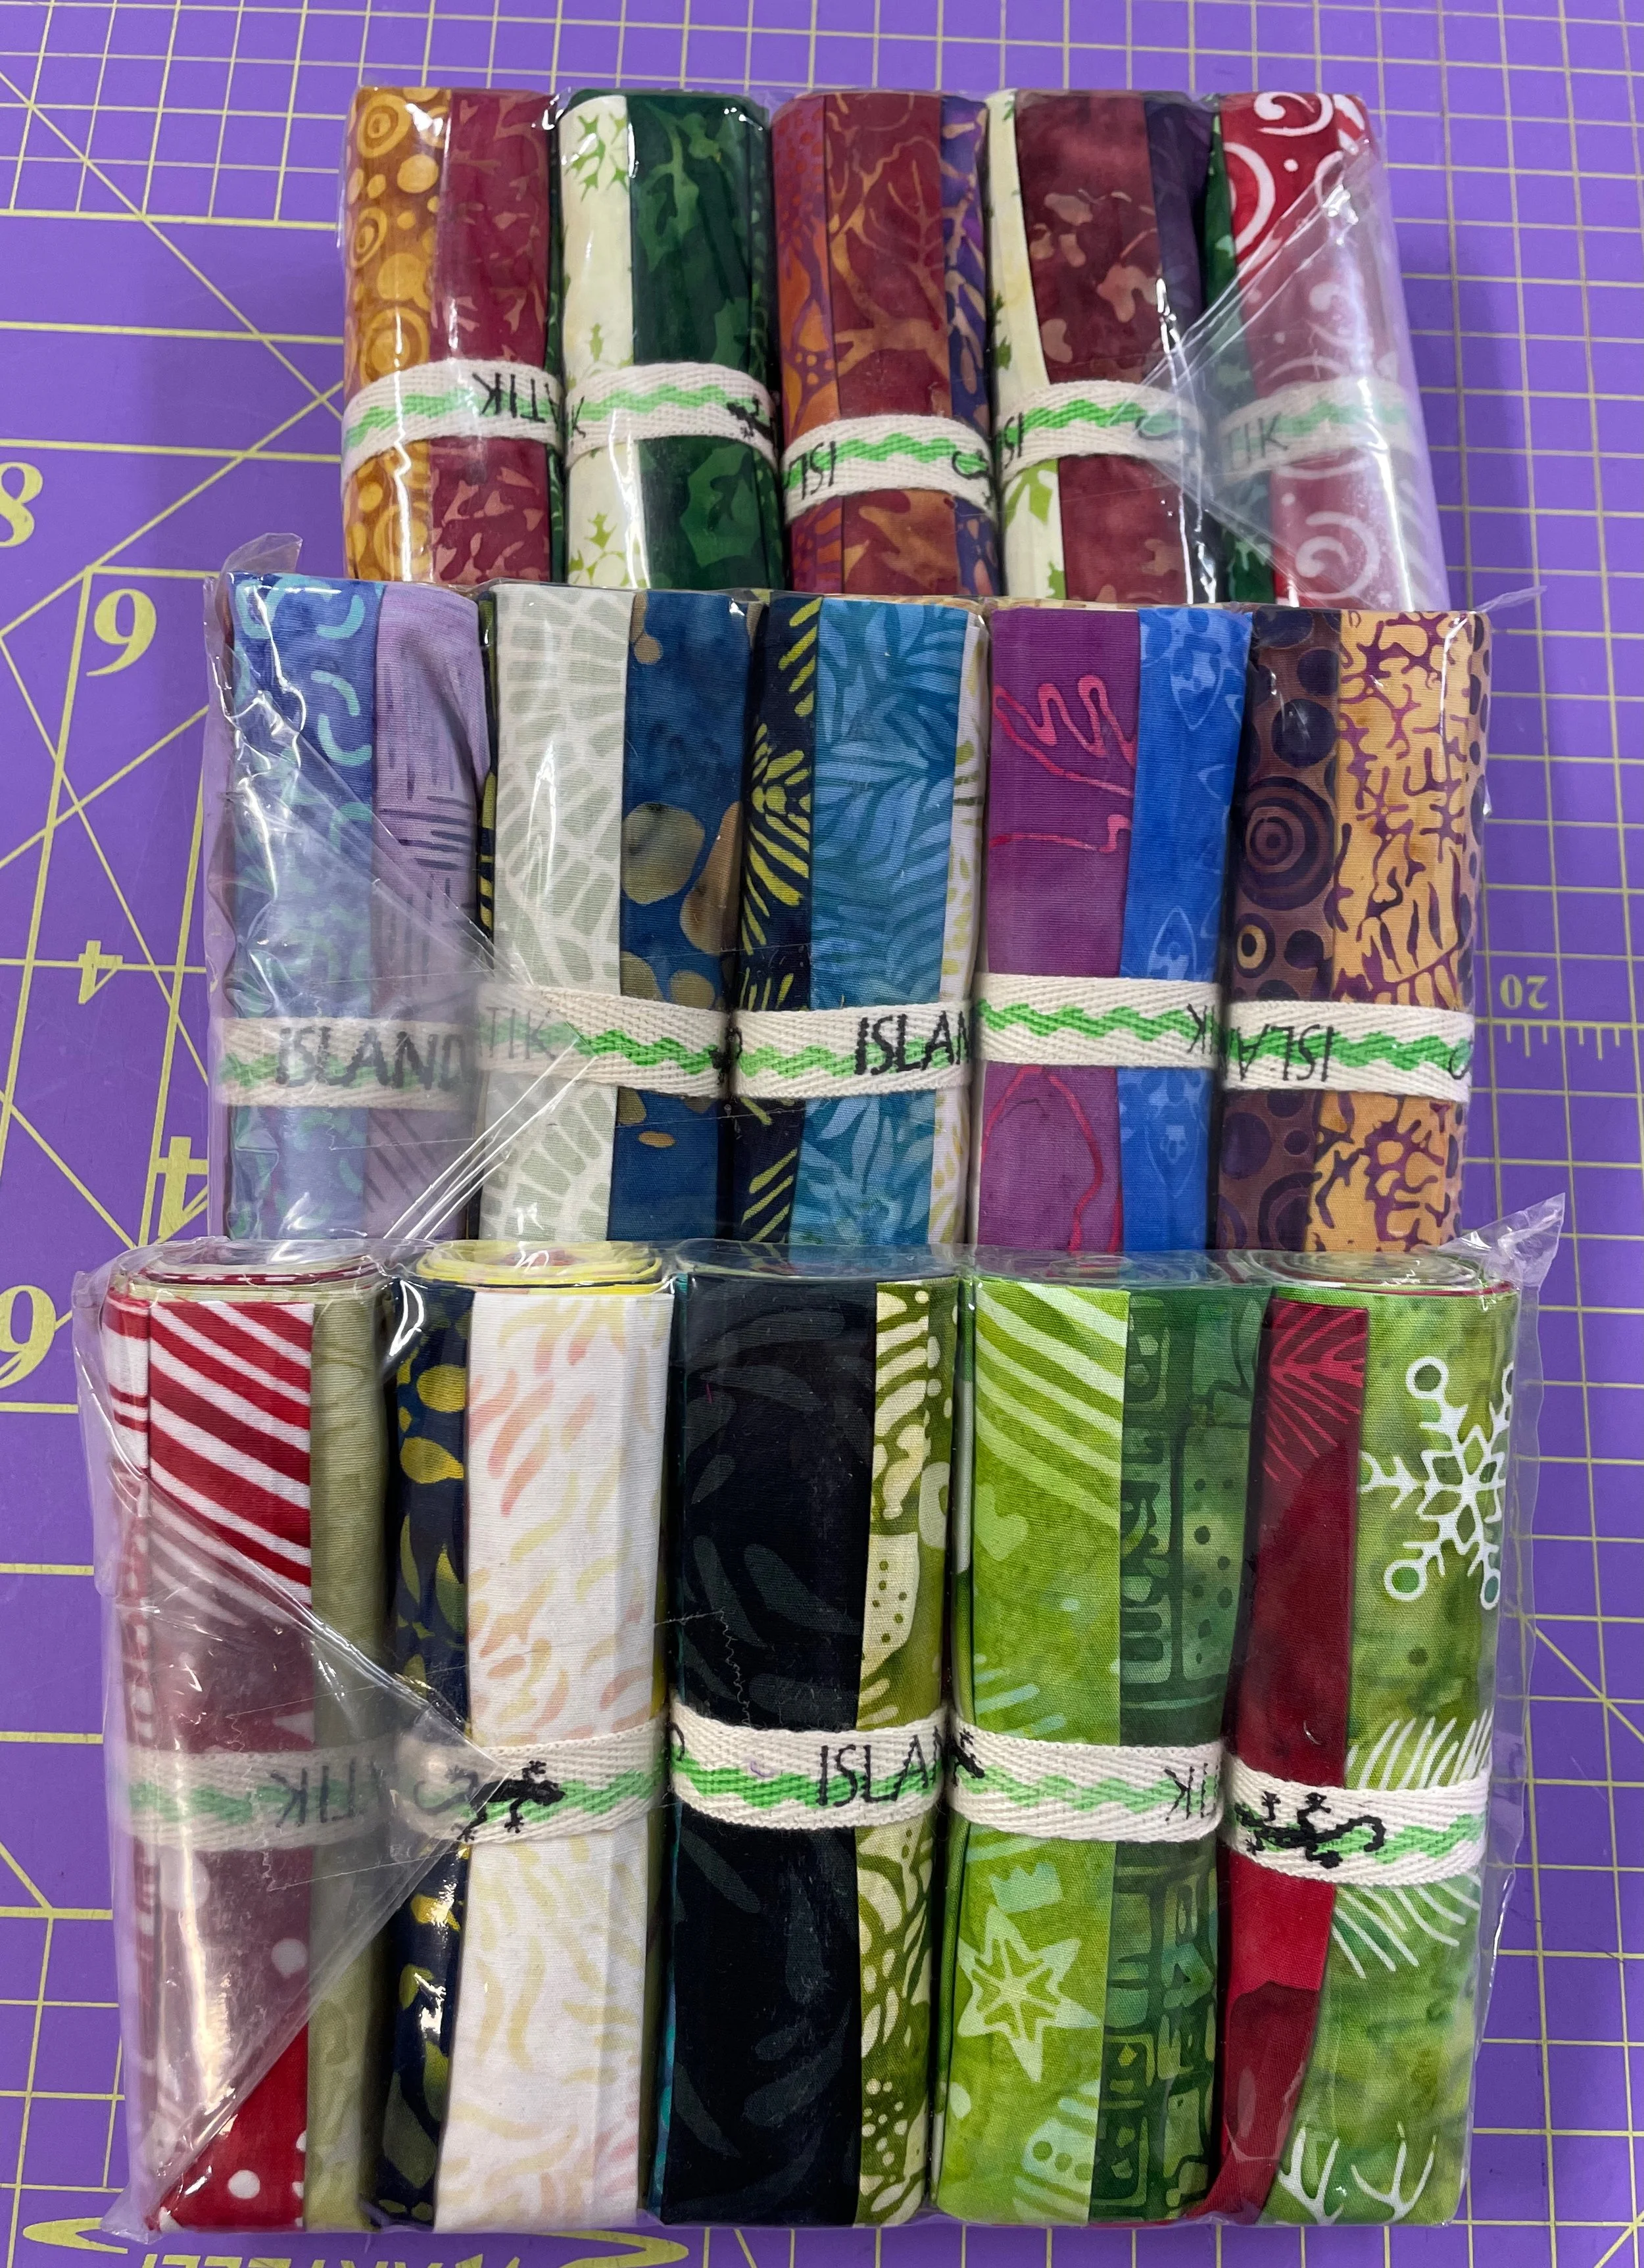
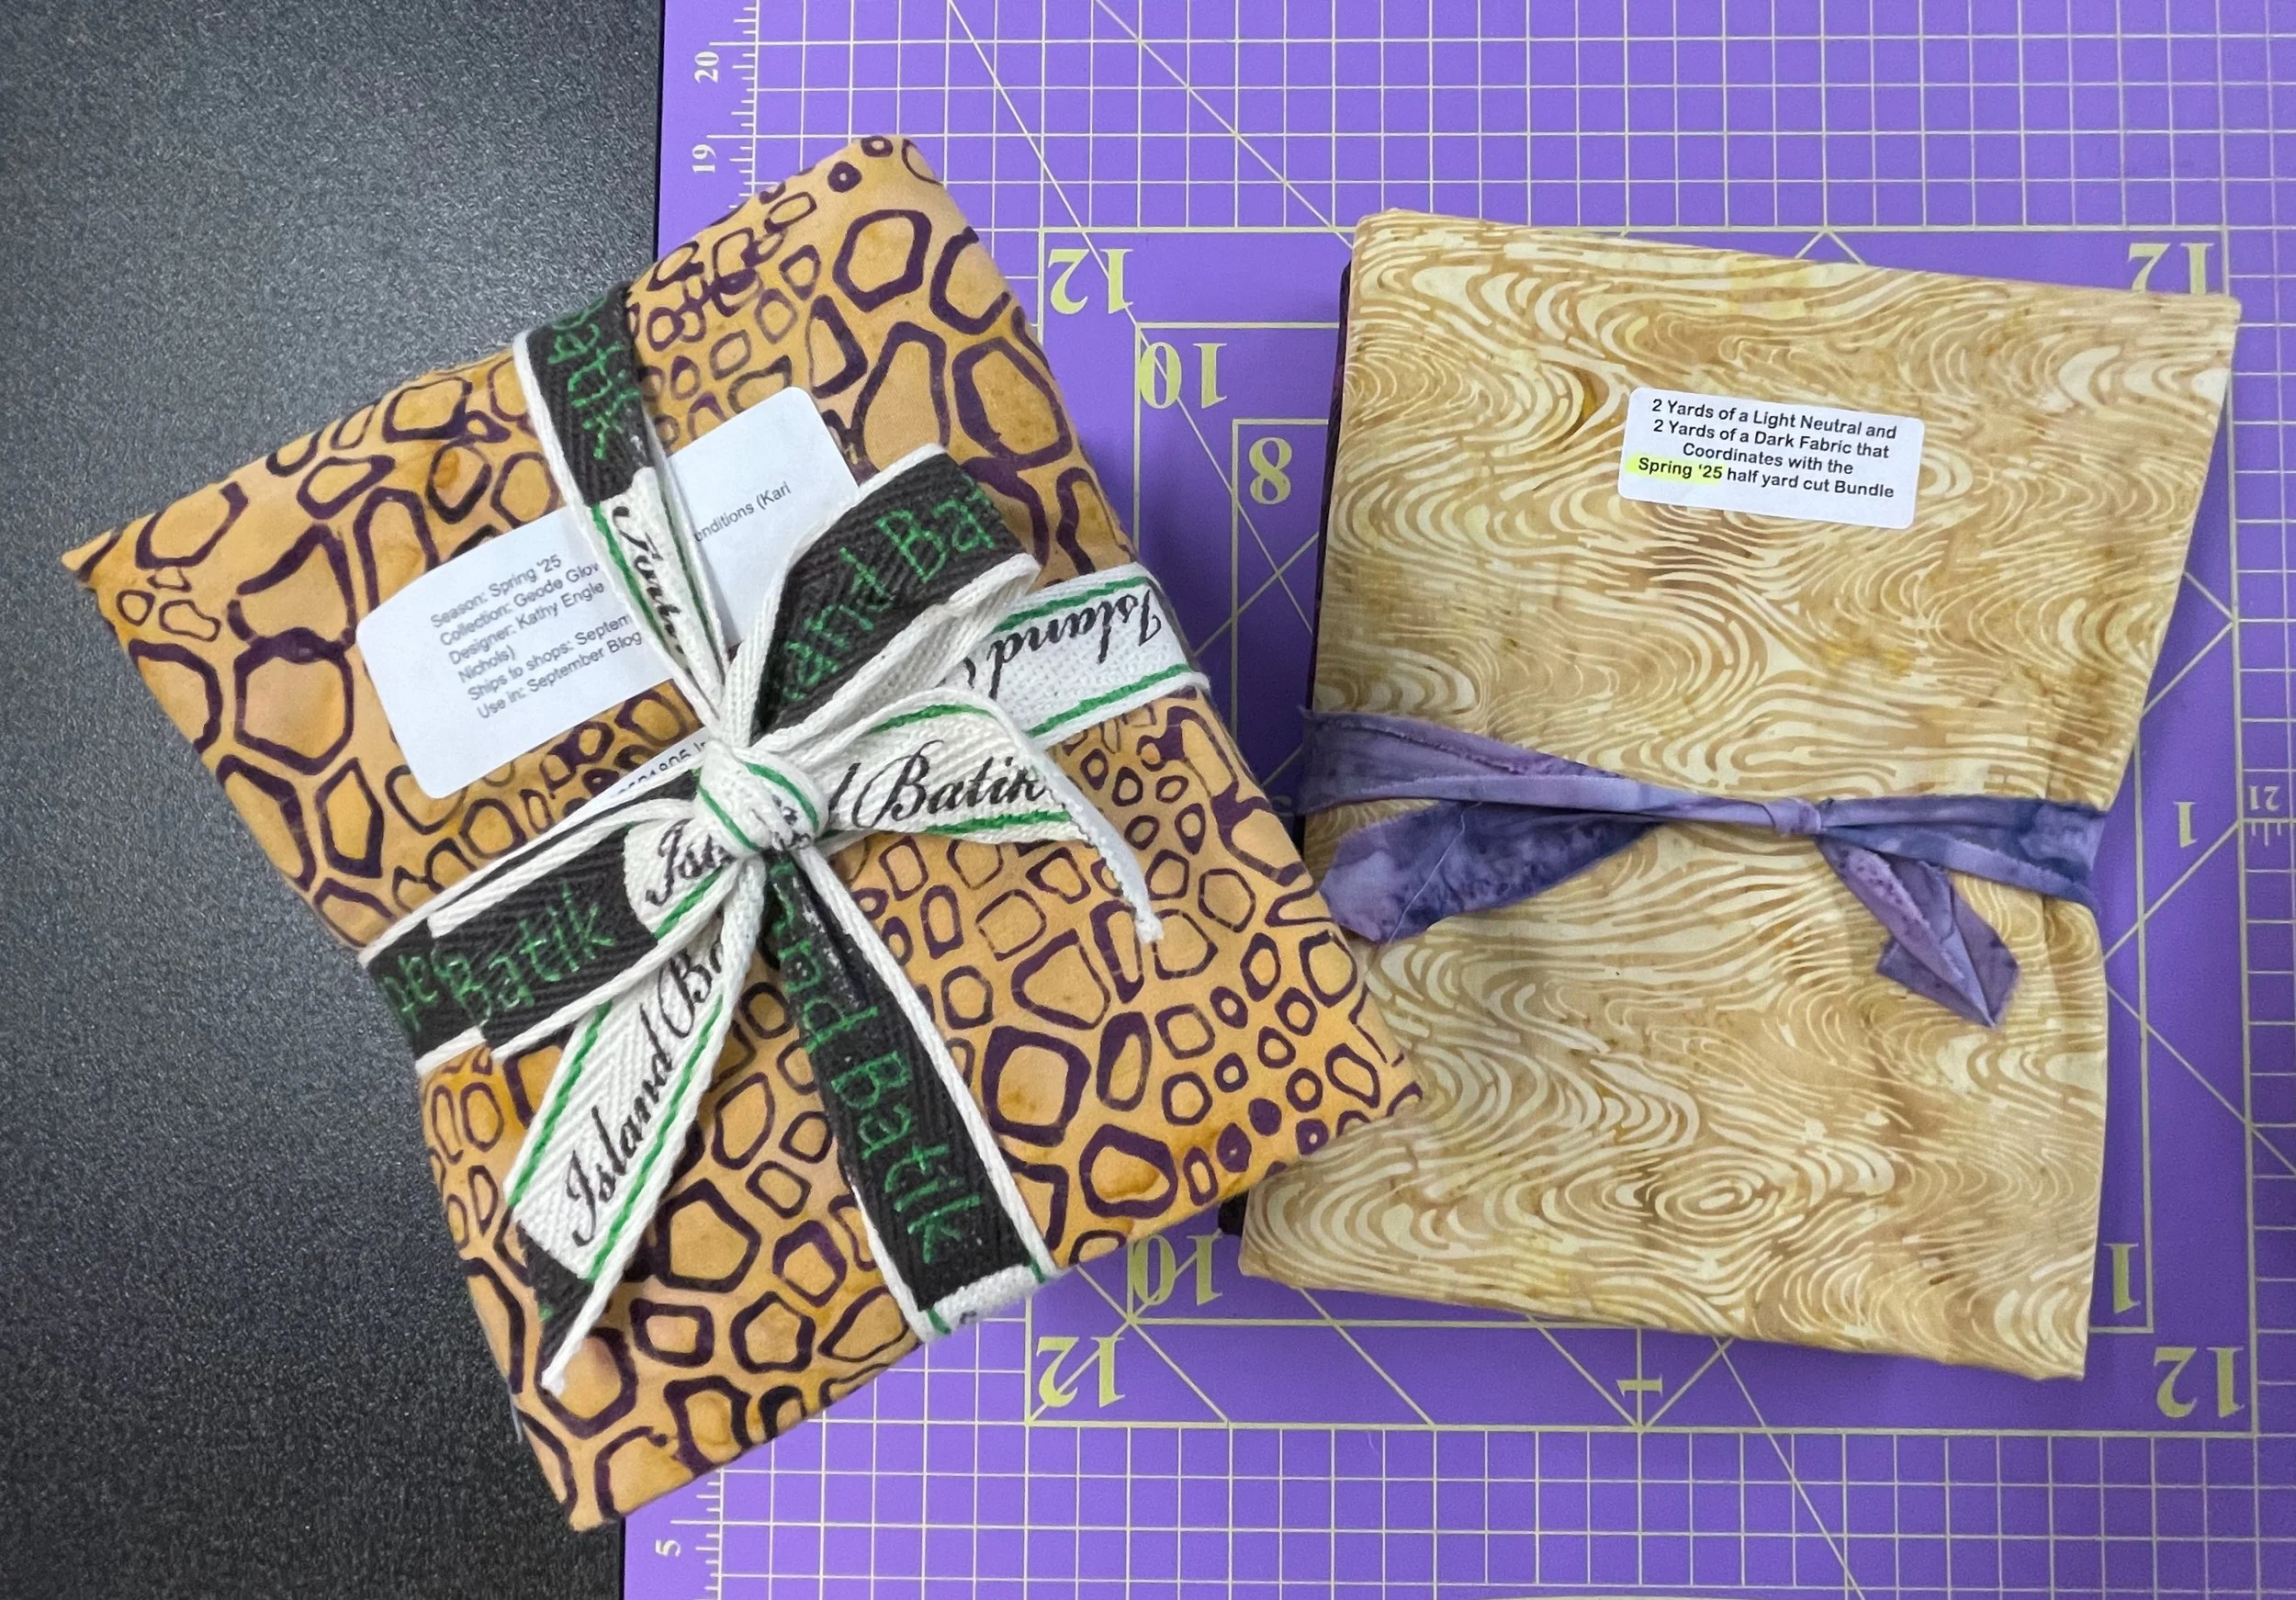
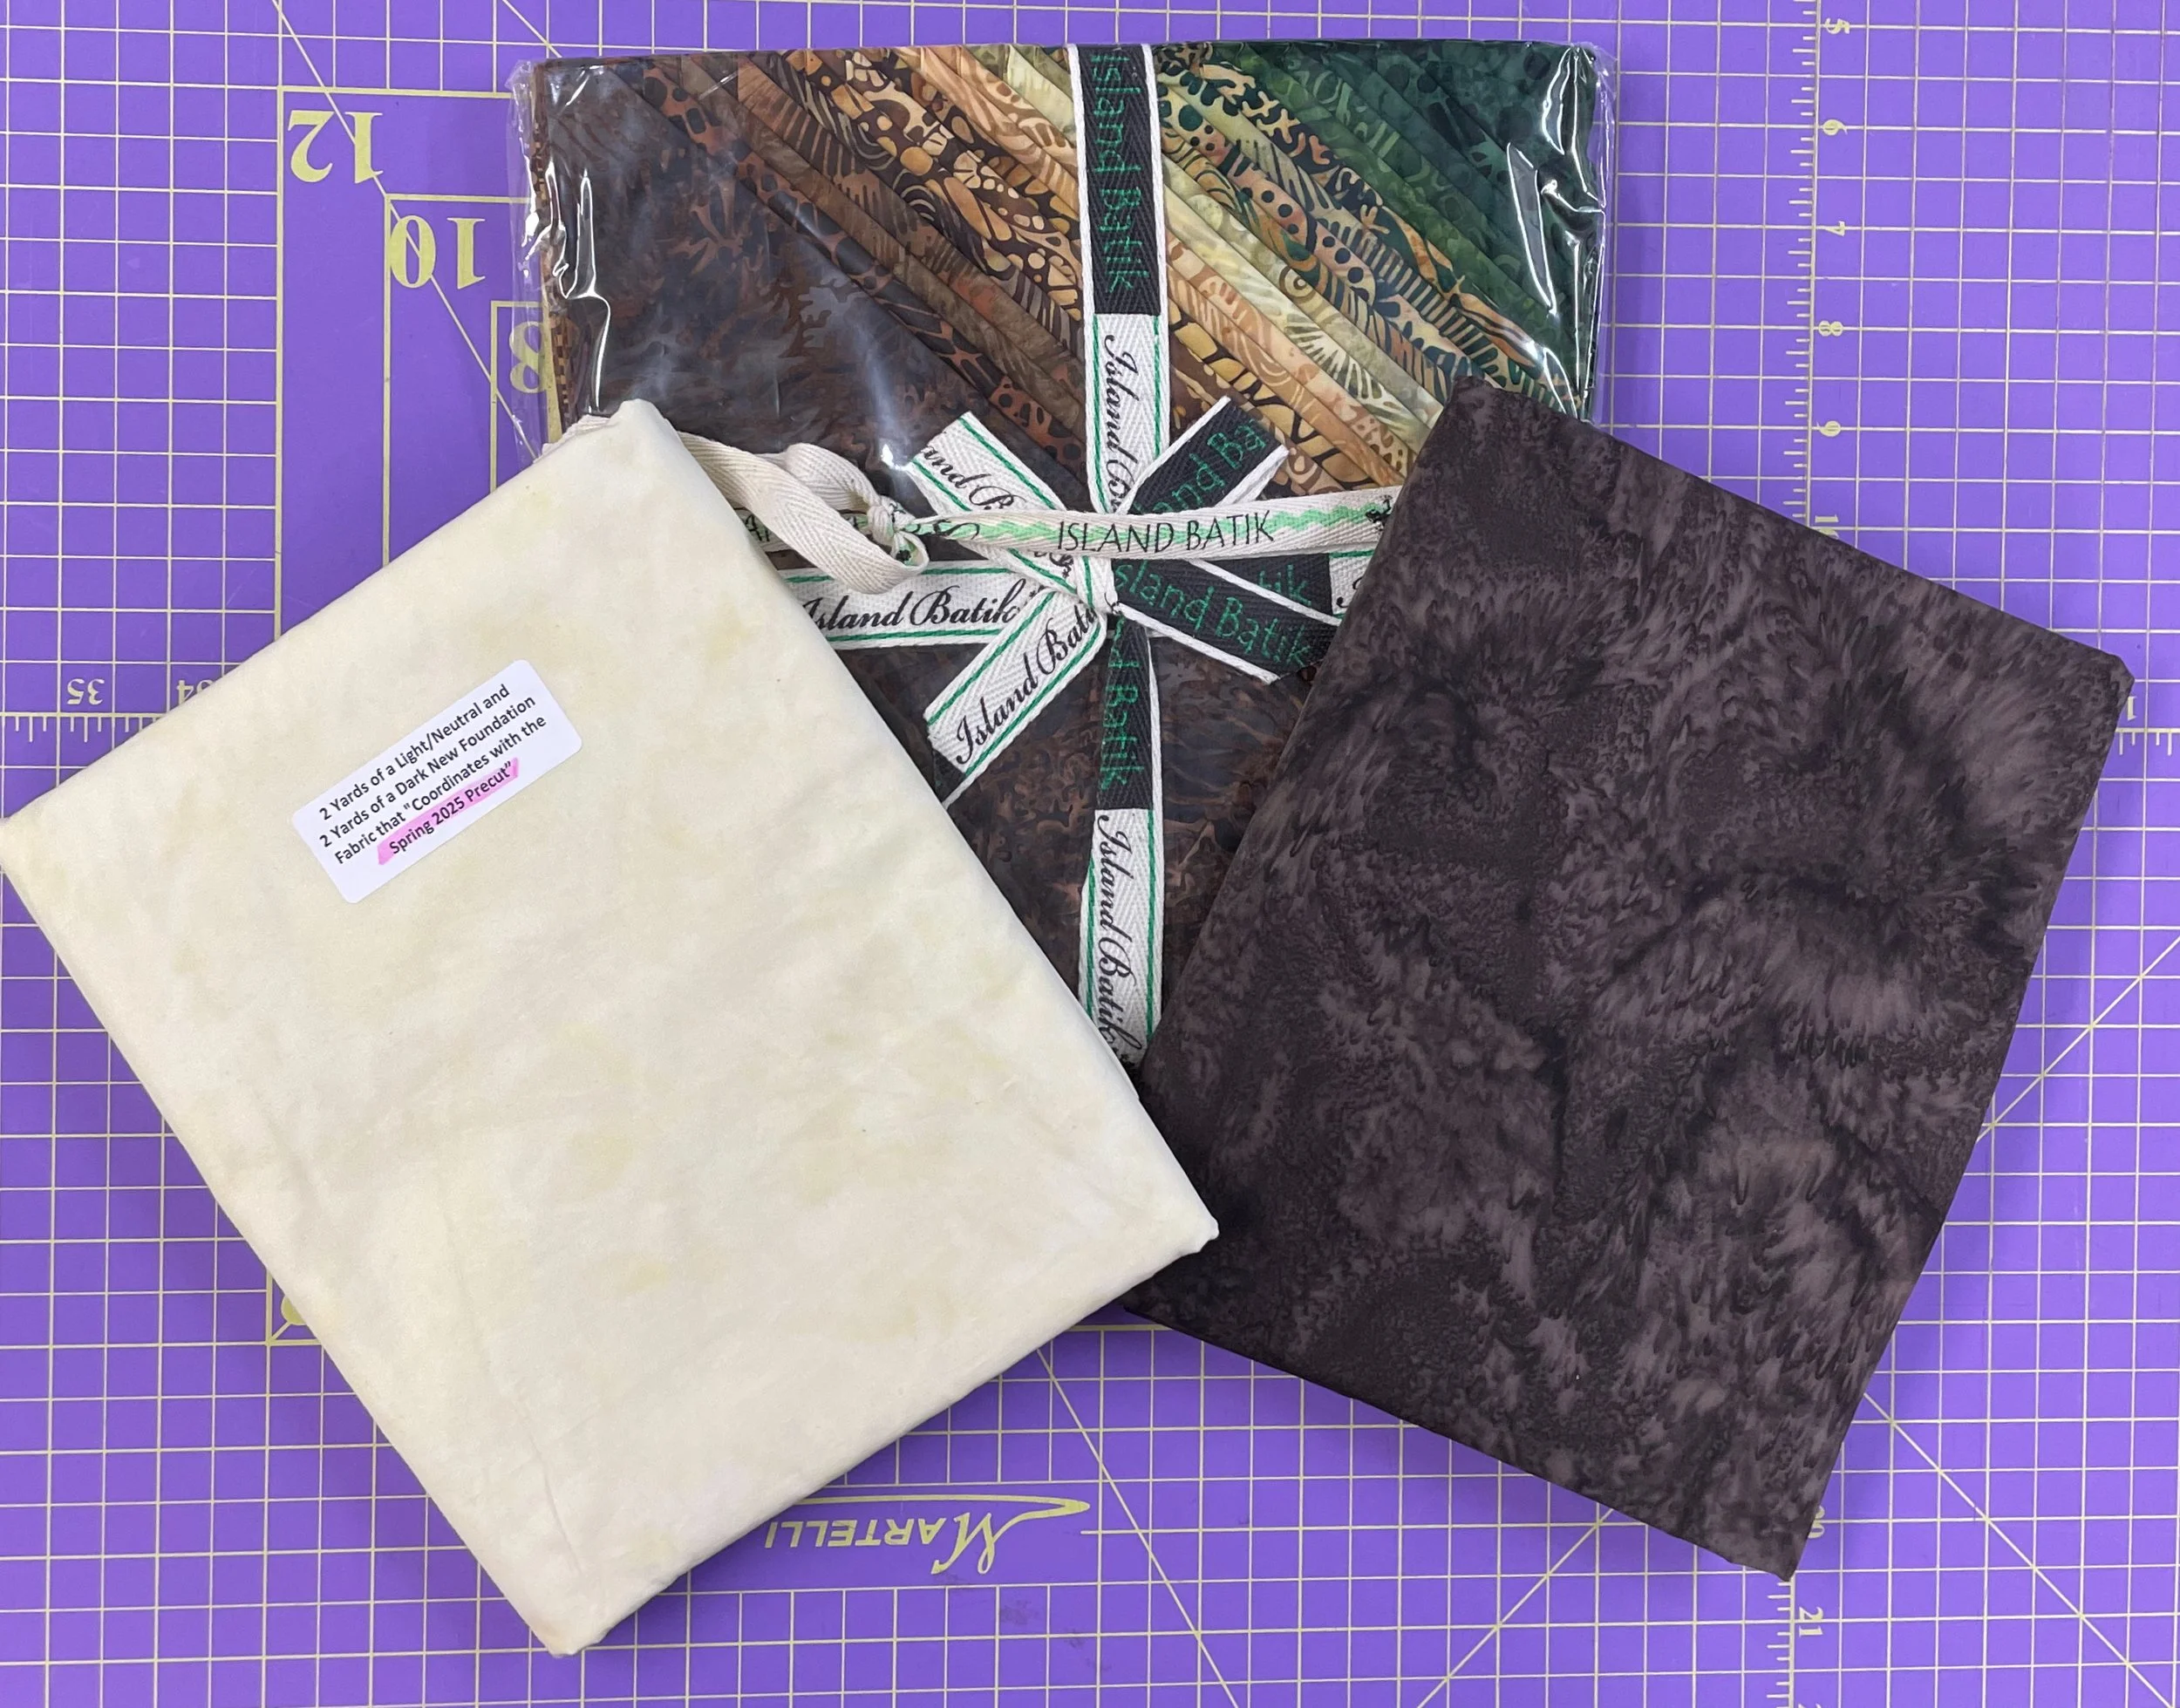
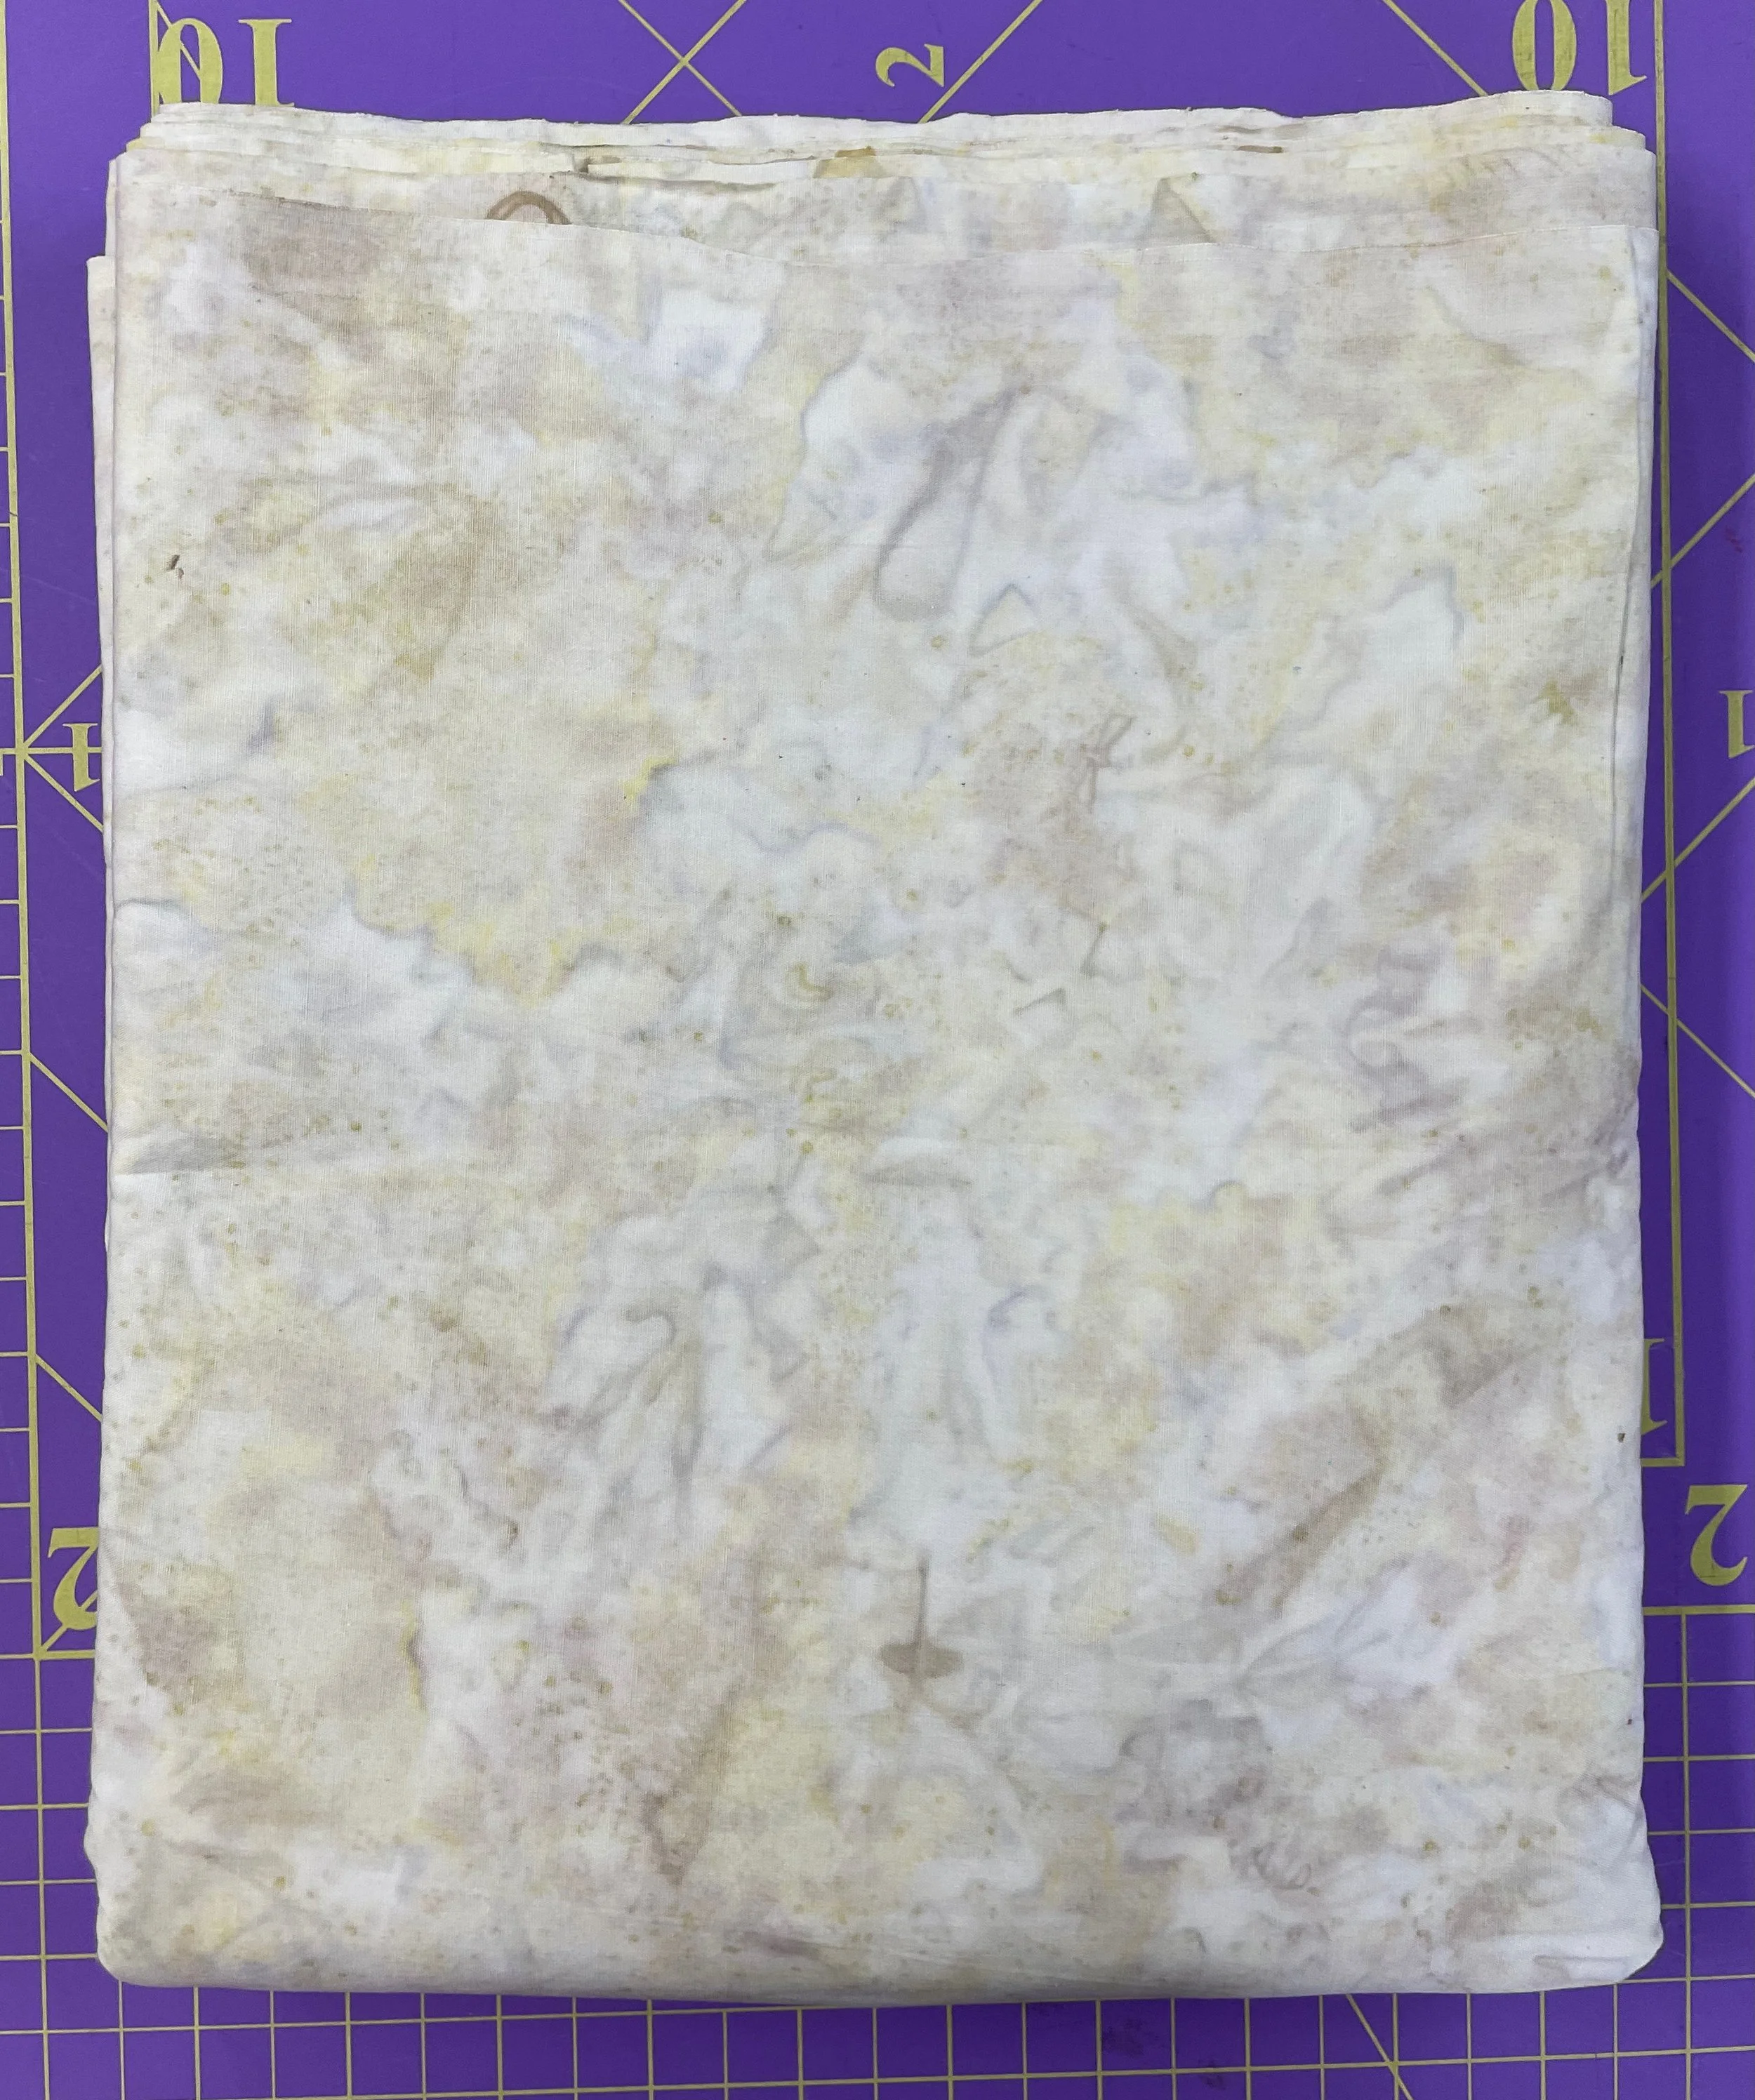
You’ll see that there are several different precuts as well as half yard bundles that will coordinate with the half yard cuts of new fabric collections that I received. I also received 4 yard bundles of black, grey and white solids that work perfectly for background fabric.
The threads that I received from Aurifil were ones that I selected to coordinate with the Geode Glow fabric collection as I’ll be using them in an upcoming Ambassador challenge.


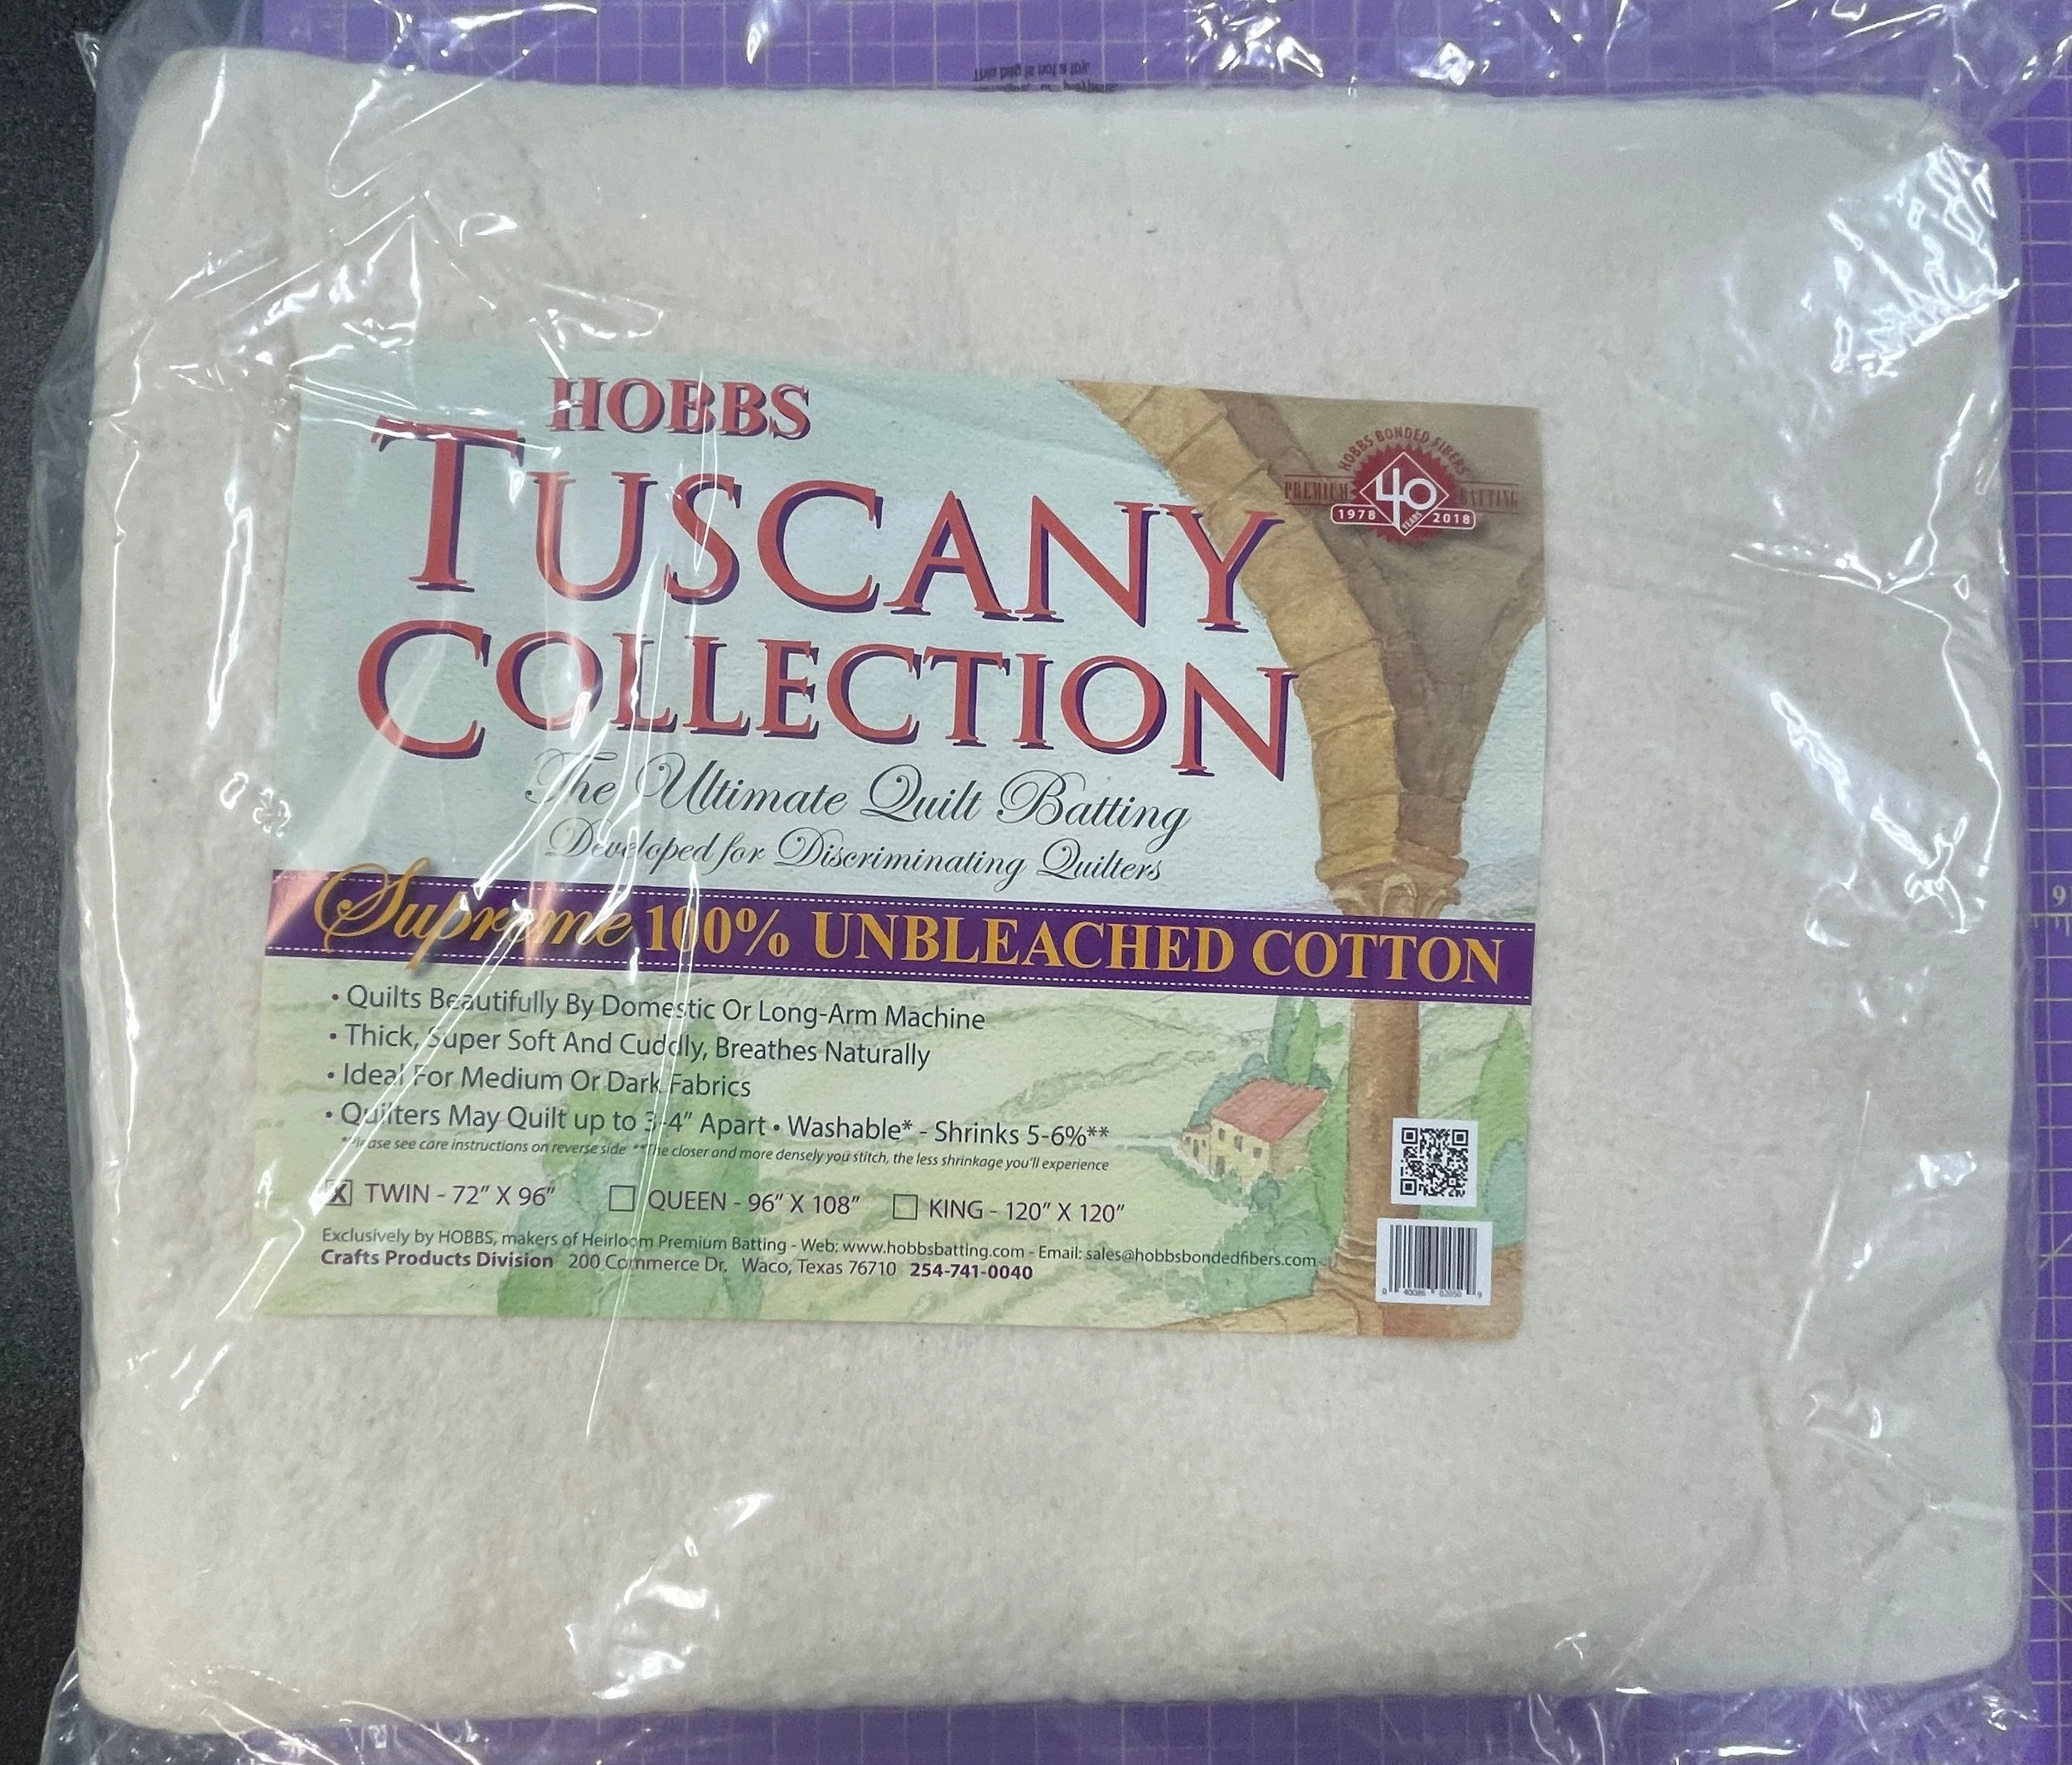
In addition to the first box, I also received a second box which contained lots of different battings from Hobbs Quilt Batting. I love using their products and enjoy experimenting with battings which I haven’t previously used. Check out the battings that were in box 2 below

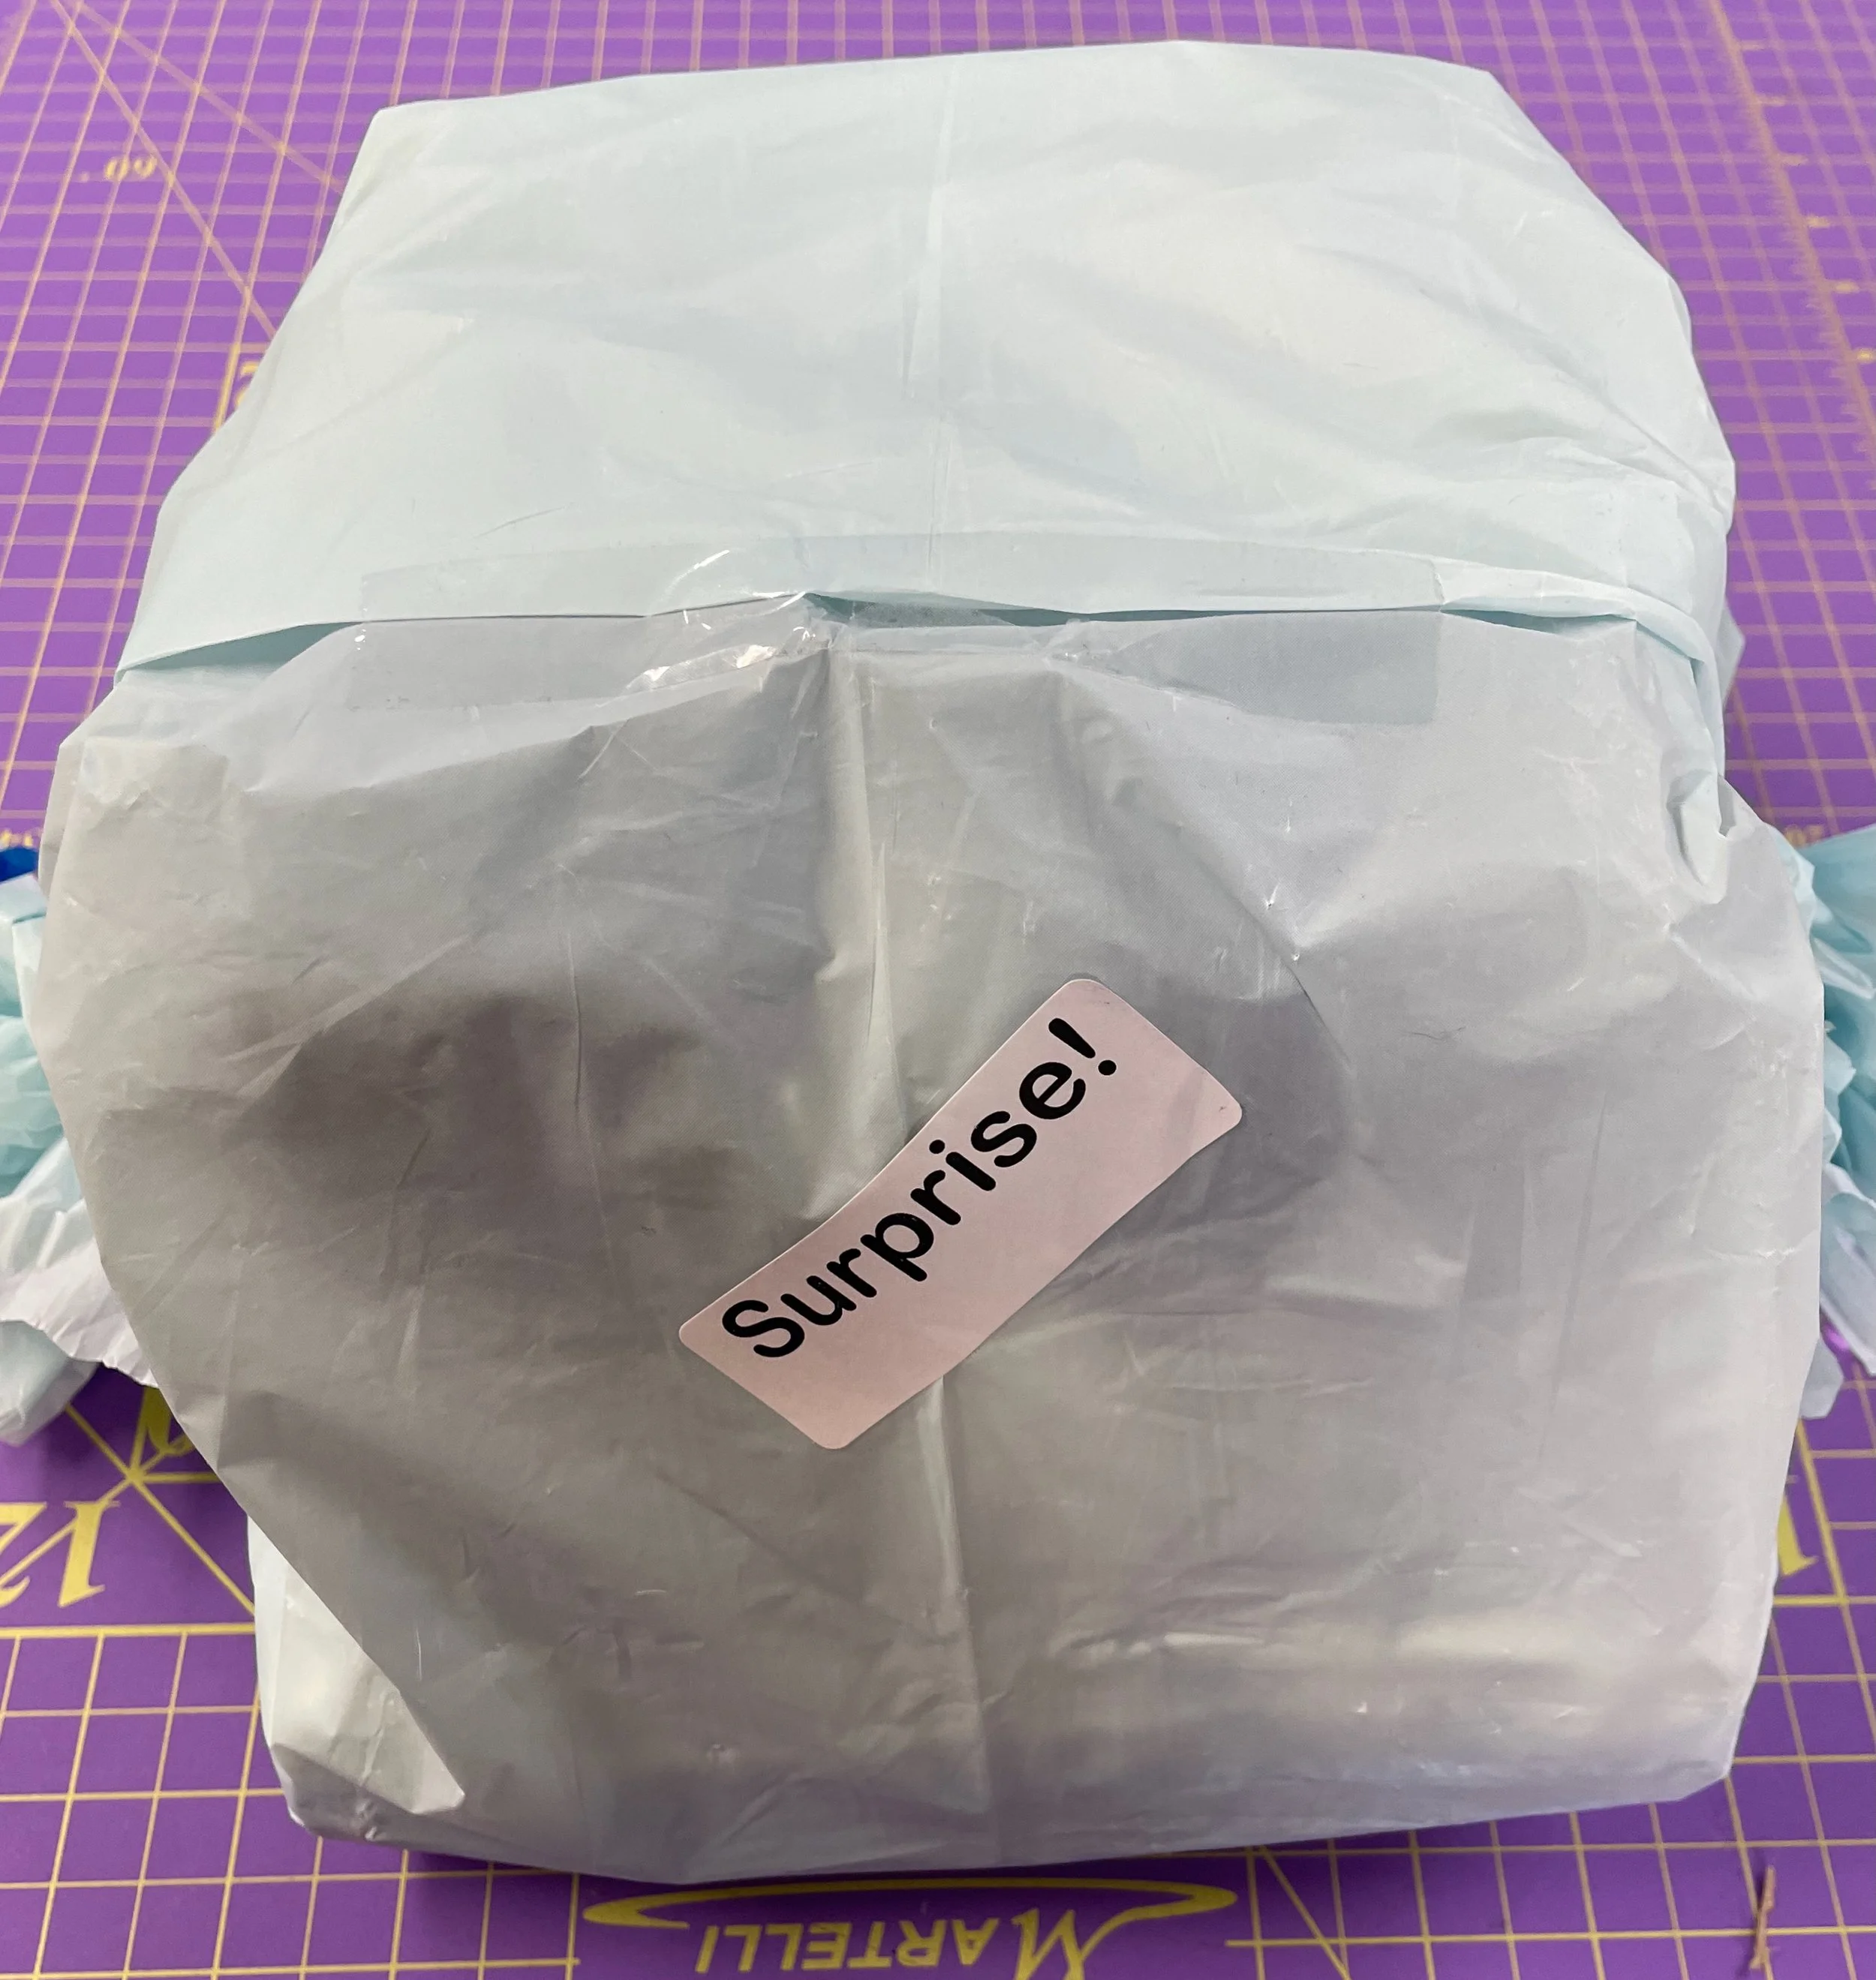
There was one additional item that was in the first box that is always fun to receive and that is the Surprise bundle. It always contains a new fabric collection and I’ll be sharing what was in that package in the future.
You can see more details on these items in the video below.
Next month I’ll be working on a new Island Batik Ambassador challenge so be sure to check back to see what I’ll be creating using some of the fabrics that I just received.
Thanks to Island Batik of Lumin Fabrics, Aurifil, and Hobbs Quilt Batting for the items that they sent me in this second shipment.
My fellow Island Batik Ambassadors will be sharing their unboxing videos this month as well so be sure to check out their blogposts below.
You can find out more about the 2025 Island Batik Ambassadors and the projects that they will be working on this year on their websites below.
Brenda Alburl ~ Songbird Designs
Renee Atkinson ~ Pink Tulip Quilting
Susan Deshensky ~ Lady Blue Quilts Studio
Tina Dillard - Quilting Affection Designs
Brittany Fisher ~ Bobbin with Brittany
Kimberly Flannagan - Kimberlys Quilts
Preeti Harris ~ Sew Preeti Quilts
Mania Hatziioannidi ~ Mania for quilts
Connie Kauffman ~ Kauffman Designs
Connie Kresin Campbell ~ Freemotion by the River
Emily Leachman ~ The Darling Dogwood
Denise Looney ~ A Quiltery
Leah Malasky ~ Quilted Delights
Susan Michaels - Dragonfly Fibertart Pattern Company
Lisa Pickering ~ Lisa’s Quilting Passion
Sarah Pitcher ~ Pitcher’s Boutique
Gail Sheppard ~ Quilting Gail
Carol Stanek ~ Stitch with Color
Solomae Stoycoff - Cuddle Cat Quiltworks
Jennifer Thomas ~ Curlicue Creations
Suzy Webster ~ Websterquilt
Be sure you’re following me on Facebook and Instagram so you won’t miss out on what I’ll be creating next with Island Batik fabrics!
Note: The products featured in this blogpost were given to me by Island Batik and their sponsors. Thank you!
#islandbatik #islandbatikambassador #loveislandbatik #hobbsbatting, #hobbsinside, #aurifil #aurifilthreads

Welcome! I’m Kim Jamieson-Hirst of Chatterbox Quilts, a YouTube creator and host of The Quilter’s Way. I believe that quilting is more than just a 1/4” seam and that practice makes improvement and you are improving every day!
Contact me at kjh@chatterboxquilts.com.


Want to improve your quilting and have fun doing it? Join The Quilter's Way, a private online membership site that creates successful quilters.

Check out my favourite books and tools.
As an Amazon Associate I earn from qualifying purchases from links that you may find on the Chatterbox Quilts’ website.