
CHATTERBOX QUILTS’ BLOG
Helping Quilters Learn and Improve

How to Sell A Vintage Sewing Machine Successfully
Most people who are looking to buy a vintage sewing machine are doing it out of the love of these unique and attractive machines. Do a little homework, apply some elbow grease, and display your machine effectively and you will sell your machine for the best price.
Most people that are selling a vintage sewing machine will sell for a price that is too low because they don’t know much about their machine. It is worth getting to know your machine a little bit so that you can make it as attractive as possible to prospective customers.
Assessing your vintage sewing machine will not only help you determine the price that you can sell it for but will also provide information about whether the effort to sell will be worth it. You don’t want to spend lot of time and money preparing a machine for sale if the likely selling price is very low.
The amount of money you can sell your machine will be dependent on the demand for the specific model of your machine. Getting the best price for your specific vintage sewing machine is dependent on three main factors:
Inherent Value
Understanding the inherent value of your machine is necessary for setting a selling price but it is also important for determining how much effort you want to put into selling the machine. Singer made many models over the decades and each has its own value to prospective customers. Determining the value of your machine will require that you know its model, that you assess its condition and determine if it still works properly.
Attractiveness
Although purchasers are interested in machines that work, many people purchase vintage sewing machines for their appearance. Making sure that your machine looks as attractive as possible and operates smoothly is extremely important if you wish to get the best price. Most purchasers will be “turned off” by pictures of dirty or neglected machines because it suggests that the previous owners have not taken care of them.
Selling
The actual sale of a vintage sewing machine can be simple, painless process if you have prepared properly. Your success will be determined by how you set your price, how and where you list the machine, and how prepared you are once a prospective customer visits to see the machine. The selling process does not have to be a lot of work, a few simple actions will pay big dividends when the sale actually takes place.
Most people who are looking to buy a vintage sewing machine are doing it out of the love of these unique and attractive machines. They will want the machine to work because part of the attraction is being able to use the machine to create quilts or garments, however they could get the same functions from a modern used machine. It is the look and style of the vintage sewing machine that is what attracts the buyer so, as the seller, it is important that you respect that love and present your machine in the best possible way. Do a little homework, apply some elbow grease, and display your machine effectively and you will sell your machine for the best price.
If you would like to learn more about how to sell your vintage sewing machine you may be interested in my eBook “How to Sell A Singer Vintage Sewing Machine – A 3 Step Process for Successful Selling”. In this eBook I provide a simple 3 step process to help you sell your vintage sewing machine. The process contains details on how to set the appropriate price, how to make your machine as attractive as possible and what actions to take to ensure that your selling efforts are successful. Click here if you would like more information on my eBook.
Creatively,


Singer 15-97 with RAF Decals and a Special Badge
"This is the last vintage sewing machine that I'm going to buy". I know I have said it before, but I always mean it... until I see that vintage sewing machine that I just have to have!
What did I add to my collection this time? A Singer 15-97 with RAF decals and a special badge.
"This is the last vintage sewing machine that I'm going to buy". I know I have said it before, but I always mean it... until I see that vintage sewing machine that I just have to have!
What did I add to my collection this time? A Singer 15-97 with RAF decals and a special badge.
I originally thought that this was a Singer 15-90 or perhaps a 91, but when I checked it out, I found out that it was a 15-97 model. I'd never heard of this model, so luckily for me, the instruction booklet was with the machine.
The badge was also something I'd never seen before. It is a Canadian National Exhibition badge which indicates that this is a limited edition model that was purchased at the CNE. (If you are interested in information about the CNE, click here).
I also managed to get a few other items with this machine, that I was excited about too.
Watch the video below to see my latest acquisition and the extra goodies that came with it.
If you have information about the Singer 15-97 model, please leave me a Comment below. I'd love to learn more about this model.
If you are thinking of buying a vintage sewing machine you may be interested in my eBooks for buyers (click here). If you are thinking of selling your machine you may be interested in my How To Sell a Vintage Sewing Machine eBook.
Creatively,

P.S. Did you know that Chatterbox Quilts provides FREE content to those on our mailing list? Yes, we do! Sign up here to receive FREE content directly in your email inbox every few weeks from Chatterbox Quilts. You'll be glad you did :)

The Forgotten Featherweight: How an assessment kit helps you buy a working machine.
Once I confirmed that the sewing machine was still available, I jumped in the car with my cash in hand. I have an evaluation kit that I take with me when I’m looking at purchasing a “new” vintage sewing machine. It helps me make sure that a "great deal" is also a working machine. I was in such a hurry, that I almost forgot to take it with me, but remembered and grabbed it just before I jumped in the car. I was so glad I did! I have a link in the blog to a free Evaluation Kit List so that you can put together your own kit for your next vintage sewing machine shopping excursion.
You’ll never guess what I just tripped across while rearranging furniture in my quilting studio: a SINGER® Featherweight sewing machine! Okay, I know I have two of these machines already: a 221 and a 222K, but I didn’t remember that I have three of them. I guess I do!
My hubby was just as surprised as I was. When I took a closer look at the machine I remembered when and where we got it – and hubby was with me when I picked it up. It seems that I wasn’t the only one who had forgotten about this purchase!
This “forgotten” Featherweight was acquired several months ago in north Calgary. This was an impulse purchase – okay, most of my vintage sewing machine purchases are – but I really jumped on this one quickly as the price was so good. I found it on kijiji – I read kijiji ads every day like other people read the morning newspaper – and when I saw the price I immediately sent an email to the seller. Once I confirmed that the sewing machine was still available, I jumped in the car with my cash in hand.

I have an evaluation kit that I take with me when I’m looking at purchasing a “new” vintage sewing machine. I was in such a hurry, that I almost forgot to take it with me, but remembered and grabbed it just before I jumped in the car. I was so glad I did!
When we got to the seller’s home, the machine was in his garage and the lighting was dim. I immediately grabbed my flashlight from my evaluation kit so I could check it out thoroughly. After determining that it did indeed stitch – again thanks to the machine needle and thread spool that I carry in my kit – I took a closer look at the case and attachments that were included with the machine. The attachment bin that is attached on the left side of the case was missing a screw, but I knew that I could fix this pretty easily, so this wasn’t a deal breaker. The sewing machine oil that I carry in my evaluation kit wasn’t needed to get this machine running as the machine was very clean and had been recently oiled, but this isn’t usually the case. I didn’t need some of the other items in my evaluation kit, again due to the cleanliness of the machine.
While I was tempted to just grab the Featherweight and go, I was glad that I had my evaluation kit with me so I could really check it out before making the purchase.
Watch the video below to see more about the FeatherWeight I purchased and the items in my assessment kit I took with me to make sure that it really was a “good deal”..
To help you set up your own evaluation kit I’ve created a FREE printable Vintage Sewing Machine Evaluation Kit download. Print it out now so you can start setting up your own evaluation kit to take with you when evaluating a potential vintage sewing machine purchase.
With your own evaluation kit, you’ll always be ready to check out a vintage sewing machine for purchase.
If you are thinking of buying a vintage sewing machine you may be interested in my eBooks for buyers (click here). If you are thinking of selling your machine you may be interested in my How To Sell a Vintage Sewing Machine eBook.
Please share this information with your friends by clicking on the "Share" button below.
Creatively,

P.S. Join the private Chatterbox Quilts Facebook group for quilting and vintage sewing machine information.
Top 10 Tips for Rejuvenating Your Vintage Sewing Machine
The best thing about owning a vintage sewing machine is… no, not stitching with it, which is pretty amazing, but repairing and maintaining it. Unlike modern machines, vintage sewing machines need a bit more TLC, but I love this part of working with my machines.
I feel a deep connection with my machine and love learning all its little quirks. This connection is deepened when I clean it, make simple repairs, and oil it. I get a real feeling for how to get the best from my vintage sewing machine and learn when it needs a little maintenance or oiling. (I’m thirsty, feed me).
The best thing about owning a vintage sewing machine is… no, not stitching with it, which is pretty amazing, but repairing and maintaining it. Unlike modern machines, vintage sewing machines need a bit more TLC, but I love this part of working with my machines.
I feel a deep connection with my machine and love learning all its little quirks. This connection is deepened when I clean it, make simple repairs, and oil it. I get a real feeling for how to get the best from my vintage sewing machine and learn when it needs a little maintenance or oiling. (I’m thirsty, feed me). I find the modern machines to be so self-sufficient and it doesn’t feel as much of a partnership when I work with them. I also love the fact that I can do most of the repairs and maintenance on my vintage sewing machines myself: I wouldn’t dare touch the electronics on my modern machine!

Don't forget to oil underneath your vintage sewing machine
There are a few tips that I’d like to pass onto you about working with your vintage sewing machine:
The first tip is to “be safe” when doing maintenance or repairs on your vintage sewing machine. You always want to unplug your machine when doing any type of maintenance. I have heard of cases where machines can start up even though the foot pedal of knee controller has not been touched. You don’t want this happening and accidentally stitch yourself – ouch! So, be safe, and unplug your vintage sewing machine.
You always want to use the proper equipment, materials and tools. Using the wrong size of screwdriver can damage a screw head making it very difficult, if not impossible, to take out screws when you need to clean or oil inside the machine. You don’t want to do that. You want to use oil and not grease in some areas and vice versa in others. Don’t mix these up or you’ll regret it. Get the right tools and materials and your maintenance and repairs will run smoothly for you.
If you have a “new” vintage sewing machine, you want to clean it first before stitching with it. You want to clean it before you oil it. No point in oiling a dirty machine, you’ll just compound the problem. Clean the machine first and then you can continue with your maintenance.
While there are lots of simple repairs that can be done on vintage sewing machines, there are others that might be beyond your abilities. If you know how to do wiring, by all means go ahead and repair any wiring issues with your machine. If wiring is beyond your ability, take your machine to an expert for repair. You want to ensure that some things, especially when they involve carrying an electrical current, are done properly.
Once your machine is cleaned and repaired, you will want to polish it. I like to remove and clean the metal parts first and then clean the machine itself before replacing the metal pieces on it. This avoids getting metal polish all over the machine. There are some parts that may be difficult to remove, so just clean those as best you can and be sure to wipe off the machine body of any metal polish when you are done. Cleaning the machine’s body can be done with sewing machine oil and will need to be reapplied every so often. My favourite part of working with my machines is polishing them: they look so gorgeous afterwards.
Your vintage sewing machine will need periodic oiling. Refer to the machine’s manual to determine the oiling points and remember, a little is enough. Don’t drown your poor machine in oil as it will only form a gummy mess inside. Just a small drop is sufficient.
When winding a bobbin, you’ll need to unscrew the stop motion screw on the hand wheel and engage the bobbin winder. Remember to tighten the stop motion screw again once you are done winding the bobbin so the machine will stitch again. Having problems with the machine not stitching (needle not going up and down)? Check the stop motion screw and I can almost guarantee you that it hasn’t been tightened. Everyone does this at least once…or twiceJ.
This one is really important to remember: don’t run the machine without fabric between the presser foot and the feed dogs. Just not a good thing to do. If you’re putting down the presser foot, there should be fabric underneath it. Enough said.
Always, always, unplug your vintage sewing machine when you are not using it. Most of these machines don’t have on/off switches on them, so if they are plugged in, they are “on”. An accidental touch on the foot pedal and your machine can be off and running, without you to guide it. Avoid accidents and unplug your machine once you’ve finished stitching.
The most important tip I have for you is to use your vintage sewing machine. After all, that’s why you bought it, right? There’s nothing better than creating with your vintage sewing machine after you’ve cleaned it, repaired it and shined it up. Enjoy!

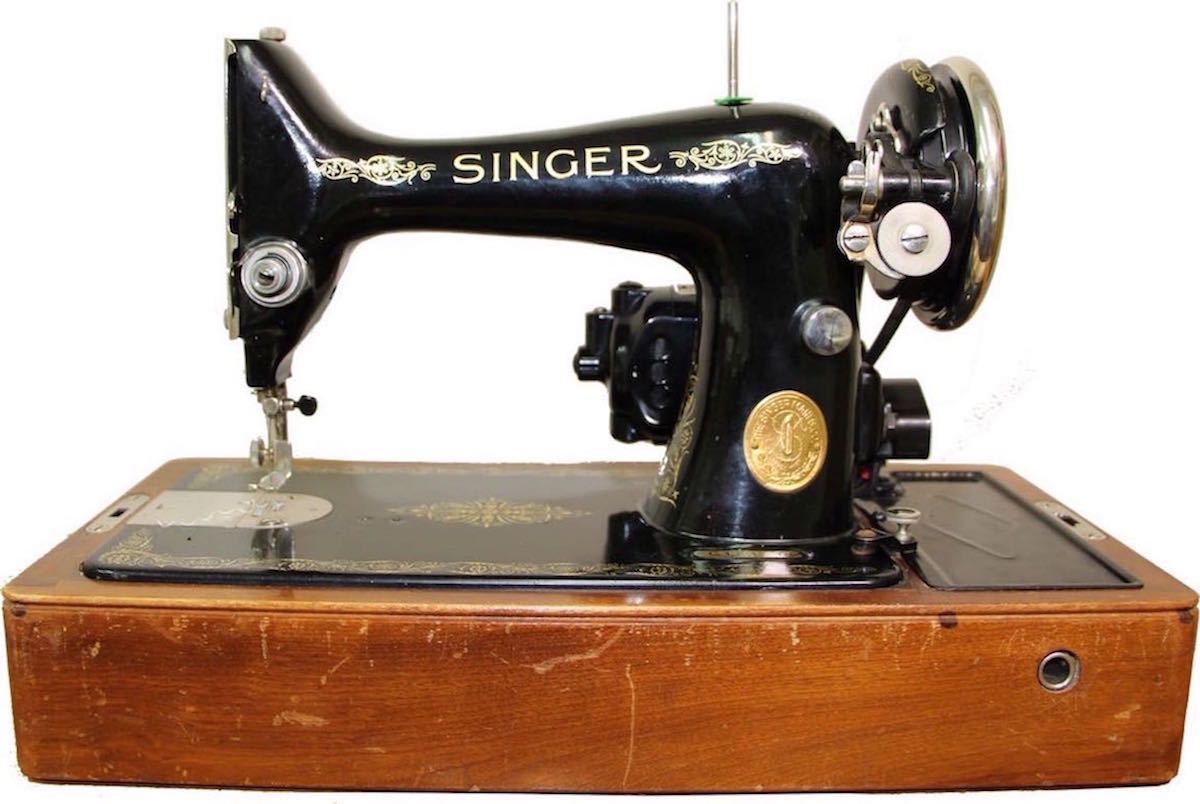
My first vintage sewing machine purchases, a SINGER® 99K
I’ve created a FREE printable guide, The Top 10 Tips for Rejuvenating Your Vintage Sewing Machine, with all of this valuable information that I know you’ll find helpful. Download and print out The Top 10 Tips for Rejuvenating Your Vintage Sewing Machine to use when you are working with your vintage sewing machine.
If you are thinking of buying a vintage sewing machine you may be interested in my eBooks for buyers (click here). If you are thinking of selling your machine you may be interested in my How To Sell a Vintage Sewing Machine eBook.
Please share this blog post with your friends by clicking on the "Share" icon below.
Do you have any tips for working with your vintage sewing machine? Leave your tips in the Comments below.
Creatively,

P.S. Join the private Chatterbox Quilts Facebook group for quilting and vintage sewing machine information.
How to Assess a Vintage Sewing Machine
One of the most important things I learned from my early experiences was that you need to be able to assess a machine knowledgeably when considering a purchase to ensure that you pay a fair price for it. The best deals are when someone is selling a machine privately and you usually do not have a lot of time to look the machine over. You really need to know about the model you are considering and ensure all the important parts are functional, and, if they aren’t, that you will be able to fix them. You don’t want to miss out on a good deal, but you also want to ensure that you are getting a functional machine.
I have LOTS of vintage SINGER® sewing machines. I guess you could say that I’m obsessed with them! My husband thinks I have enough of them – yeah, that’s like saying you can ever have enough chocolate! Hah! There is always another elusive machine – a turquoise (white) SINGER® 221 Featherweight, for sure – that is somewhere out there just waiting for me to find it and bring it home. If you are a fan of vintage sewing machines you know what I mean when I talk about my collection, and I’ll bet you have more than one vintage sewing machine too.
I wasn’t always a vintage sewing machine collector/addict. There was a time when I wouldn’t have taken a second glance at a SINGER® 66 Red Eye machine. Yes, it’s true: I didn’t notice them at all, but one day that all changed. One of my quilting guild members brought a SINGER® 221 Featherweight to a week-end retreat and I had to see what this little machine was all about. It piqued my curiosity and I started to look into vintage sewing machines, SINGER® models in particular (loved those shiny black beauties with the fancy gold decals). One machine caught my eye… and the rest is history!
The first machine I purchased was a SINGER® 99K. The machine had been in storage for a while, but the paint and decals were in beautiful shape, as was the cabinet. I tested it out to be sure that it would actually stitch and, after a bit of negotiation, I ended up with in the back of my van heading home. I wasn’t very knowledgeable about these machines at the time or I would’ve noticed the crumbling and bare wiring on it. If I knew then what I know now, I would never have plugged this machine in. I was just lucky that I didn’t get a nasty shock from my first machine! That might’ve been the end of my vintage sewing machine adventure!

SINGER® 99K wiring when I bought it
The poor condition of the wiring could have been a real problem. The wiring had deteriorated so badly that it was crumbling in my hands so I had to do something if I was ever going to be able to use the machine. I considered taking it to a sewing machine repairman but their assessment fee of $100 with the possibility of a much higher cost to actually fix it didn’t impress me. My only alternative was, of course, to try to fix it myself. The machine was in great shape as was the cabinet, but if I didn’t learn how to re-wire it, it would become a nice door stop.
While I was investigating what to do with my newly acquired 99K, an opportunity to purchase another machine, a SINGER® Featherweight, presented itself. This time however, I had a bit more knowledge than I had had with my SINGER® 99K purchase. In researching a solution to my wiring problem with my SINGER® 99K, I had acquired considerable knowledge about different SINGER® models, particularly the SINGER® Featherweights. Who says going down internet rabbit holes isn’t helpful?!
When I contacted the seller, I found out that they wanted $350 for the machine which seemed really expensive considering I had paid $50 for my 99K. I knew that Featherweight models tended to be more expensive because they are so popular so I decided to take a look at it anyway. This is where my newly acquired knowledge really paid off. I had learned enough about Featherweights to know that this particular machine was in good shape and was fully functional. What was even better was that this particular model wasn’t a 221, but a 222K, the rarer Featherweight model. These models sell for much more than $350! I quickly closed the deal and took my new acquisition home. It was in such great shape that I didn’t even have to oil it. If I hadn’t taken the time to pour over vintage sewing machine websites, I wouldn’t have known how collectible and expensive this particular machine usually is and might’ve walked away from the deal.
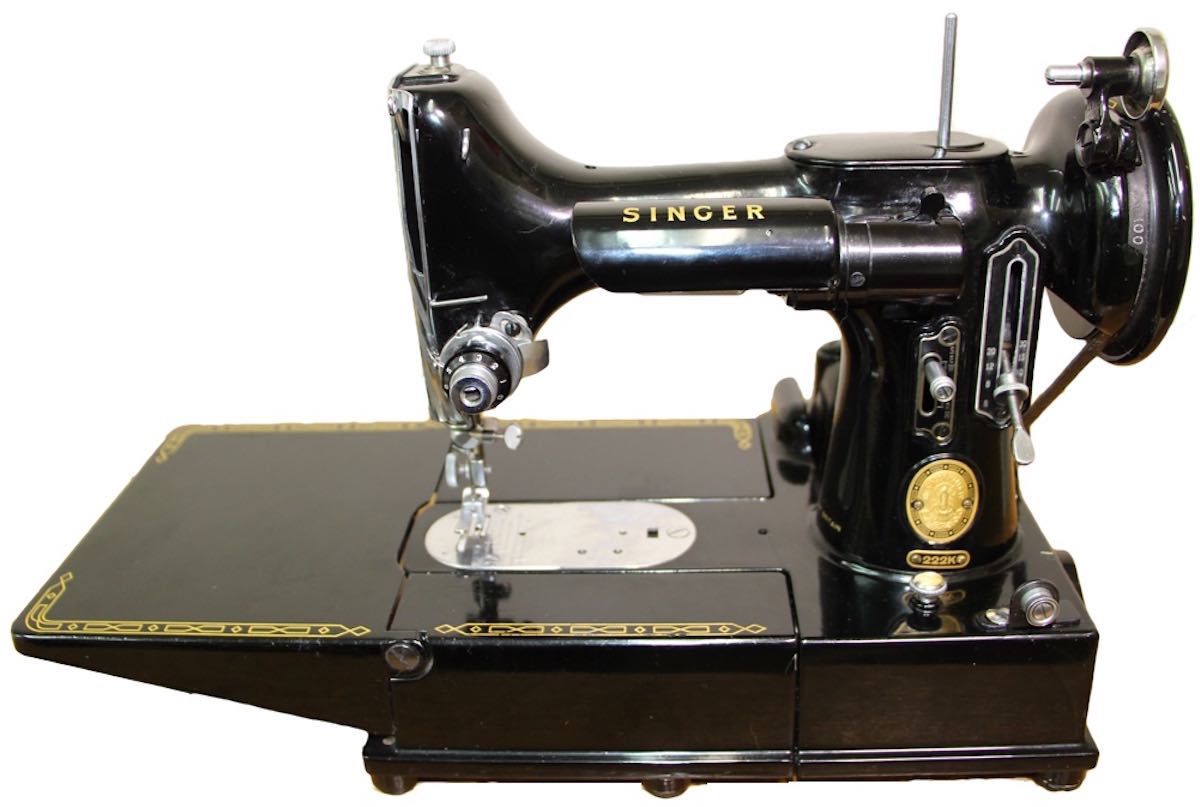
SINGER® 222K
This experience really illustrated how valuable it is to be prepared so that you can grab an opportunity when it presents itself. I have seen machines of this type for sale for over $1000, although I have a feeling that a price that high is the seller’s “wishful thinking”. I knew “just enough” to be confident in making this purchase ($350 is a lot of money) and got a machine of great value.
After these first two “quick purchases” I got “the bug” and started actively looking for vintage sewing machines to add to my collection. I knew that I had to learn a lot more about acquiring and repairing these machines before I considered purchasing any more. I started looking for information but there was no “one place” I could go for that information. It was very frustrating because many of the more comprehensive sites were targeted at serious collectors and were not suited for someone like me who just wanted to restore the machine to working condition. I did not have any intention of stripping and repainting the machine or reapplying the decals. I wanted machines that looked good but, more importantly, they had to stitch. I spent many hours scrolling through websites and writing down the information that I needed so I could have it for future reference.
One of the most important things I learned from my early experiences was that you need to be able to assess a machine knowledgeably when considering a purchase to ensure that you pay a fair price for it. The best deals are when someone is selling a machine privately and you usually do not have a lot of time to look the machine over. You really need to know about the model you are considering and ensure all the important parts are functional, and, if they aren’t, that you will be able to fix them. You don’t want to miss out on a good deal, but you also want to ensure that you are getting a functional machine.
Being able to get all the information you need to assess and restore a vintage sewing machine in one package would be the perfect solution. You won’t need to “learn-as-you-go” as I did, so you can be confident in your purchase even if you only ever buy one machine.
Over the years I’ve developed a checklist that I use to assess potential vintage sewing machine purchases. This has helped me to determine if I want to buy a particular machine and has saved me from buying one that would've required too much work to return it to a functional machine.
Watch the video below for more information on assessing a vintage sewing machine.
I would love to share this “hard-won” knowledge with you so that you can experience the joy of owning a vintage sewing machine without having to spend hours of time researching. I have put together some valuable FREE content that can get you started on thinking about purchasing a vintage sewing machine.
I’ve created a FREE printable download, Vintage Sewing Machine Assessment Checklist, to share this valuable information with you. Be sure to download and print it out now so you’ll have it available to take with you when you are evaluating a vintage sewing machine.
You always have to do your research to determine what the average price for a certain machine model is in your area, but with the Vintage Sewing Machine Assessment Checklist, you’ll have a methodical approach with a list of items that you should be looking at when evaluating a vintage sewing machine for purchase.
If you are thinking of buying a vintage sewing machine you may be interested in my eBooks for buyers (click here). If you are thinking of selling your machine you may be interested in my How To Sell a Vintage Sewing Machine eBook.
Please share this information with your friends by clicking on the "Share" icon below.
Download your FREE Vintage Sewing Machine Assessment Checklist now so you'll be ready to evaluate your first, or next, vintage sewing machine.
I hope you find this the Vintage Sewing Machine Assessment Checklist helpful and look forward to hearing about your latest – and next – vintage sewing machine purchase.
Creatively,


Welcome! I’m Kim Jamieson-Hirst of Chatterbox Quilts, a YouTube creator and host of The Quilter’s Way. I believe that quilting is more than just a 1/4” seam and that practice makes improvement and you are improving every day!
Contact me at kjh@chatterboxquilts.com.


Want to improve your quilting and have fun doing it? Join The Quilter's Way, a private online membership site that creates successful quilters.

Check out my favourite books and tools.
As an Amazon Associate I earn from qualifying purchases from links that you may find on the Chatterbox Quilts’ website.