Quilting

Create New Fabric with Decorative Stitches

If you have a Janome MC9400 or other type of modern sewing machine, you probably have a lot of decorative stitches on it. As quilters we don’t often get to take advantage of these decorative stitches, which is a shame. There are so many decorative stitches to choose from on most machines, and, on some machines, you can also change the orientation of the stitch and adjust the width and length of it. This makes for an almost limitless number of decorative stitches and, if you want to design your own stitches on the Janome MC9400, you can use the included Stitch Composer to do that. Not sure what the Stitch Composer is and how to use it? Not to worry, I’m working on a course to show you all about it and you’ll be the first to be notified when it’s released if you belong to my Chatterbox Quilts’ Facebook group (click here to join if you aren’t already a member). 

I really wanted to be able to use some of the decorative stitches on the Janome MC9400 in my quilting and I’ve found a way to do so by creating my own fabric with them.

You can make your own personalized fabric too using the decorative stitches on your sewing machine. You’ll need a few things:

Fabric – a solid colour fabric works best

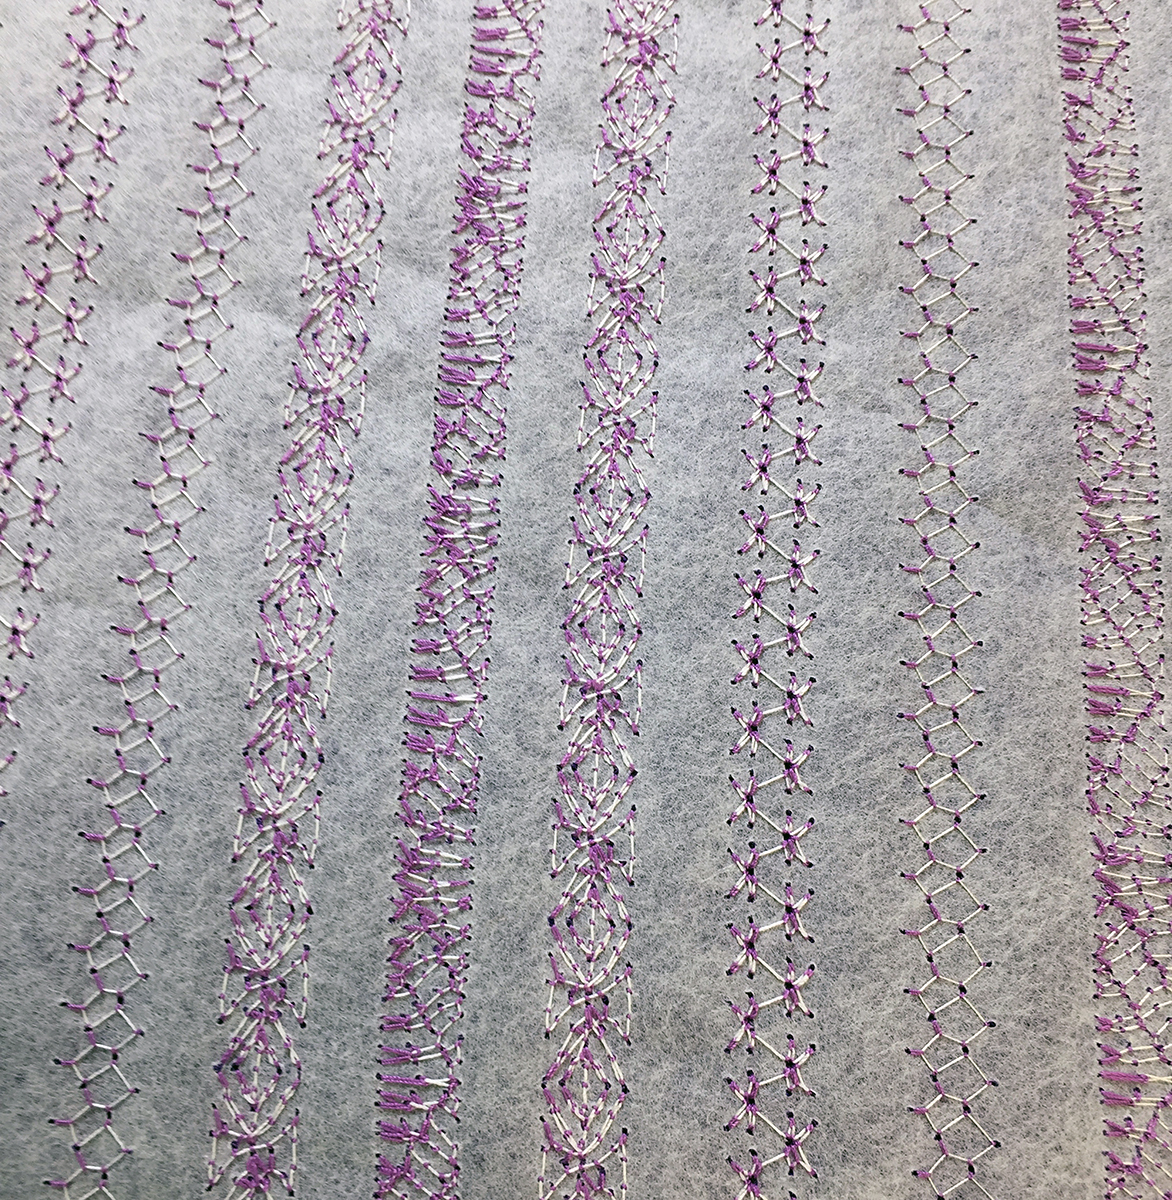
Fabric Stabilizer – you’ll need one or two sheets of lightweight tearaway or other type of fabric stabilizer

Thread – I used Aurifil Mako 50/2 cotton thread in a colour close to my fabric colour

Sewing machine with decorative stitches, of course 

The first thing you need to do is to choose which decorative stitches you want to use on your fabric. I chose ones that were similar in that they stitched out in bars. I didn’t choose any wavy or long stitches, but you can choose any that you like.

Next, you should always stitch out a sample of your chosen stitches on the same fabric, ensuring that you have a fabric stabilizer behind your fabric. This is when you can decide if you want to use the stitch’s default settings or want to make some changes. Be sure to write down the stitch number and any changes that you have made to it on your sample fabric so you’ll easily find these stitches on your sewing machine when you want to create your fabric.

 
Decorative Stitches with samples 2.jpg
 

Now comes the fun part! You’re going to make your own fabric! I like to use my walking foot when I stitch, ensuring that the zigzag needle plate is on the sewing machine. With my Janome MC9400, I can either use the standard walking foot (AD Dual Feed foot) that came with the machine or I can use the optional narrow walking foot [VD or AcuFeed Foot with Foot Holder (Single)]. I like to use my walking or even feed foot because it keeps everything stitching along nicely and I can use the edge of my walking foot when I want to stitch the next row. I move my fabric over and align the edge of my walking foot with the line of previous stitches. This gives me the same distance between each row of stitching.


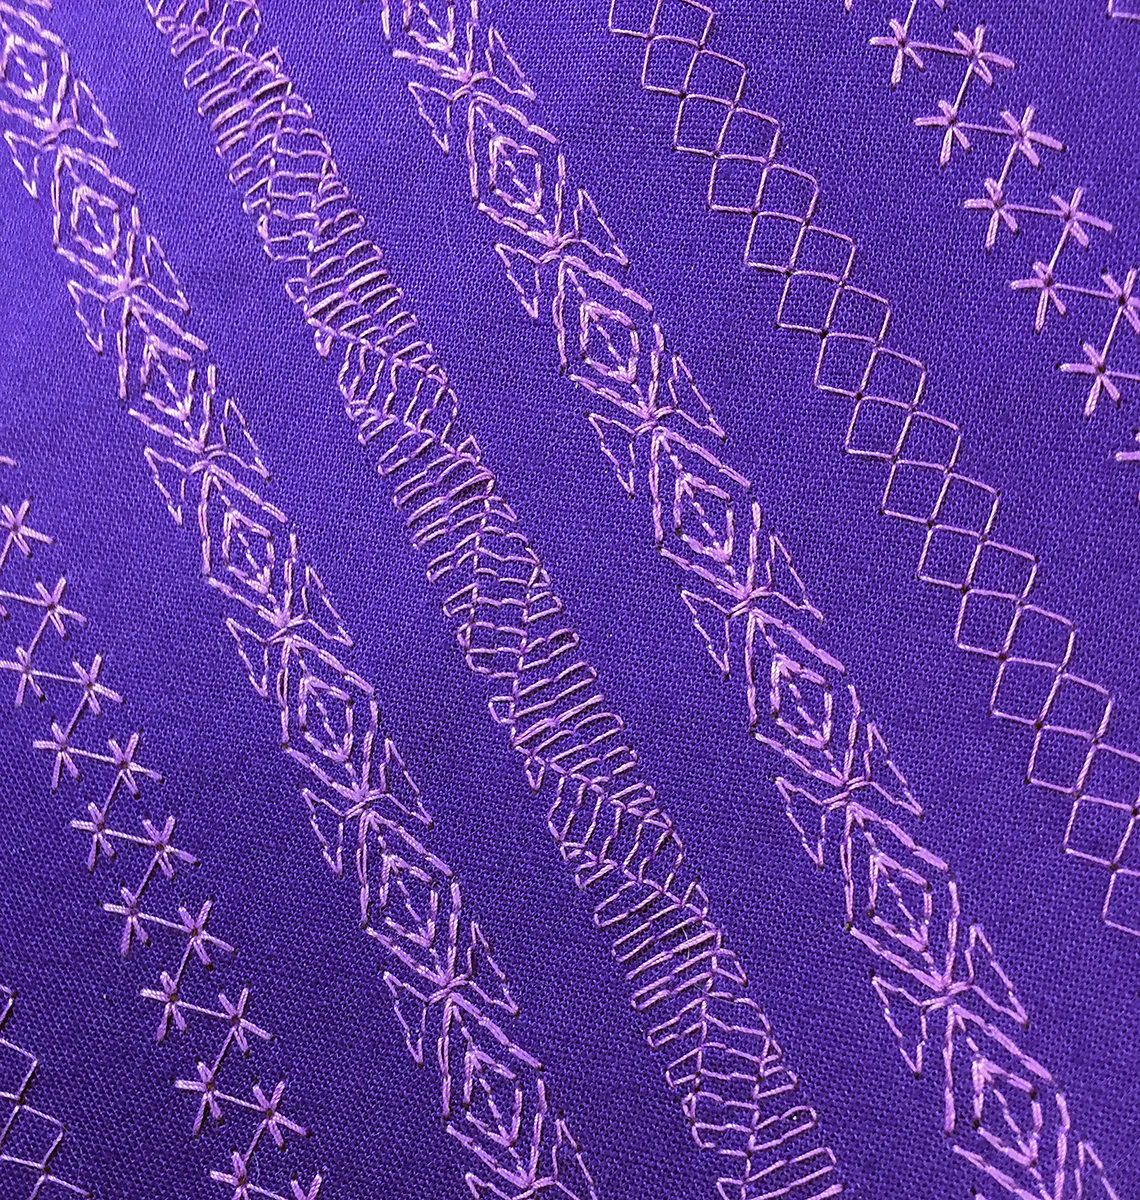
I stitched my decorative stitches on a diagonal for an interesting effect, but you could certainly stitch them in straight rows if you’d like.


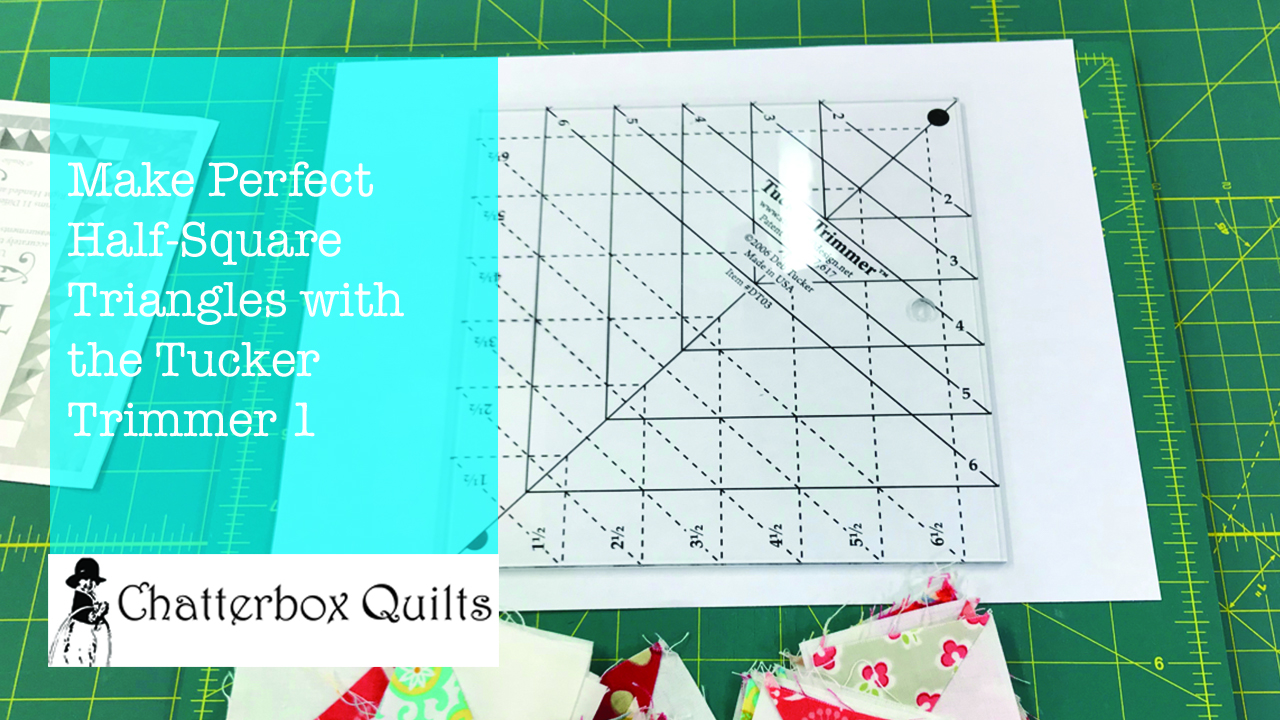
For more information on how to use decorative stitches on the Janome MC9400 to create your own fabric, click on the image below.

Wondering when you’d use this created fabric? Why not try it as fabric in your pieced quilt blocks or in tote bags, purses or pouches? The fact that you can personalize this fabric makes it so versatile and so you.


Do you have any ideas on how you might use this fabric created using the decorative stitches on your sewing machine? Post them in the Comments below.

Creatively,

Kim's signature small aqua.jpg
 

P.S. Do you want to enhance your quilting and become the best quilter you can be?  If you answered “yes” to this question, you need to join The Quilter’s Way. The Quilter’s Way is the only quilting membership site that includes both training and an active, supportive online community. Don’t wait another day! Join now.

P.P.S. Did you know that you can sign up to receive emails full of FREE quilting goodness? Click here to receive FREE content directly in your email inbox every few weeks from Chatterbox Quilts. I know you'll be glad you did!

How to Get Accurate Half-Square Triangles

Do you have problems getting accurate half-square triangles? I’ve found a tool that really helps me to get precise half-square triangles. Let me tell you about it.

There are various methods to make a half-square triangle and I’ve tried just about every one – and still wasn’t pleased with the results. I love the look of half-square triangle designs, but didn’t like my results when I used them in my projects. I’ve finally found the perfect tool to give me accurate half-square triangles every time: the Tucker Trimmer.

 
HST's Tucker Trimmer - 1.jpg
 

The Tucker Trimmer by Studio 180 Design is an acrylic tool that comes in several sizes but the one I use the most is the Tucker Trimmer 1. You can make half-square triangles from 1” to 6” with this particular size of the Tucker Trimmer. Since I usually make small half-square triangles, this size works well for me.

The Tucker Trimmers can be used by right and left handed quilters and instructions are given for both. You can make half-square triangles in whole number sizes (1”, 2”, etc.) or in fractions (1½”, 2½”, etc.). I like it when a tool can be used for a variety of sizes as this makes it very practical and eliminates the need for purchasing a tool for every size.

The idea behind the Tucker Trimmers is that you make a half-square triangle a little bit bigger than you want the actual size to be and then you trim it down to the desired size. For example, if I want a 2½” half-square triangle, I might be starting out with one that is 2¾”. Yes, you will be cutting a little bit off each side, but this is how you get that super precise half-square triangle that will make such a difference in your project.

To see exactly how to use the Tucker Trimmer 1, click on the image below.


Have you ever used one of the Tucker Trimmers to make your half-square triangles? Let me know your perfect method for creating half-square triangles in the Comments below.

Creatively,

Kim's signature small aqua.jpg
 

Do you want to enhance your quilting and become the best quilter you can be? If you answered “yes” to this question, you need to join The Quilter’s Way. The Quilter’s Way is the only quilting membership site that includes both training and an active, supportive online community. Don’t wait another day! Join now.

P.S. Did you know that you can sign up to receive emails full of FREE quilting goodness? Click here to receive FREE content directly in your email inbox every few weeks from Chatterbox Quilts. I know you'll be glad you did! 

5 Quick Quilt Tips to Save Time and Frustration

Here are 5 quick quilt tips that can save you time and frustration:

1. Having problems threading your sewing machine? First, check your manual to be sure that you are following the exact threading path - it's easy to miss out on one and it makes a HUGE difference! Pay special attention to whether your presser foot should be up or down when threading the machine - machines do vary on this, so again, refer to your manual. If your sewing machine doesn't have an automatic needle threader, it can be hard to see the hole in the needle. To make it easier to see the needle hole, hold a coloured piece of paper behind the needle. This should make it just a bit easier.

 
Janome 8900 manual cover.jpeg
 

2. While your walking foot is great for walking foot quilting, I like to use it when stitching on borders or other long strips of fabric. It helps to prevent that "fabric slide" that can happen when the top fabric is getting pushed along at a quicker rate than the bottom fabric resulting in an overlap at the end. 

 
Janome walking foot close up.jpg
 

3. Do you ever make mistakes and cut the wrong width when cutting fabric strips? When you are cutting multiple strips, put painter's tape or washi tape on the back of your ruler at the desired measurement. It's much easier to cut the right width of strips when there is a mark to show you where to cut!

 
Image courtesy of craftsy.com

Image courtesy of craftsy.com


4. Your mobile phone can be one of your best quilting tools! If you are trying out different block arrangements in a quilt, it can be hard to remember which variation you preferred. To help with this, I take photos with my phone and can then later compare the various layouts to choose the one I like the most. This method also makes it easy to share these photos in the Chatterbox Quilts' Facebook group to ask for other members' opinions - always helpful! I also use my phone to determine which fabric is darker or to tell if there is enough contrast between fabrics by taking black and white photos of the fabrics with my iPhone. 


5. Do you want to save time and avoid hurt fingers? Use the Multi-Purpose Quilt Spray to sandwich your quilts. Not yet using this method? Click here to get the FREE recipe and instructions. You'll love it - and your fingers will thank you :)


You may be interested in the guide “Time Saving Tips for Quilters” where I have compiled a list of time saving tips. Click here is you want more information.

Creatively,

Kim's signature small aqua.jpg


What a Beginner Quilter Really Needs

When you first start quilting, you can quickly be overwhelmed by the notions and accessories that you "need" to quilt. Kim shows you what essentials you actually need to have in your tool kit when you first start quilting.

While you may add more items to your quilt studio as you progress in your quilting journey, you really need the following items to start:

A rotary cutter
A cutting mat (or self-healing mat)
A quilting ruler
An iron
A pressing surface (tutorial on making a pressing surface is below)
Pins
Seam ripper (yes, you will use this a time or two!)
Fabric
Batting
Multi-Purpose Quilt Spray (recipe and information below)
Sewing Machine with 1/4" foot, walking foot and free motion or darning foot

To learn more, click on the image below.

What are the essentials that you think a beginning quilter needs? Let me know in the comments below.

Creatively,

Kim's signature small aqua.jpg
 

P.S. Did you know that you can sign up to receive emails full of FREE quilting goodness? Click here to receive FREE content directly in your email inbox every few weeks from Chatterbox Quilts. I know you'll be glad you did!