
CHATTERBOX QUILTS’ BLOG
Helping Quilters Learn and Improve
Free Valentine's Project with the Brother Scan N Cut
Looking for a quick Valentine's Day project to create with your Brother Scan N Cut? I have just the one for you!

Charlie helped in the fabric selection for this project
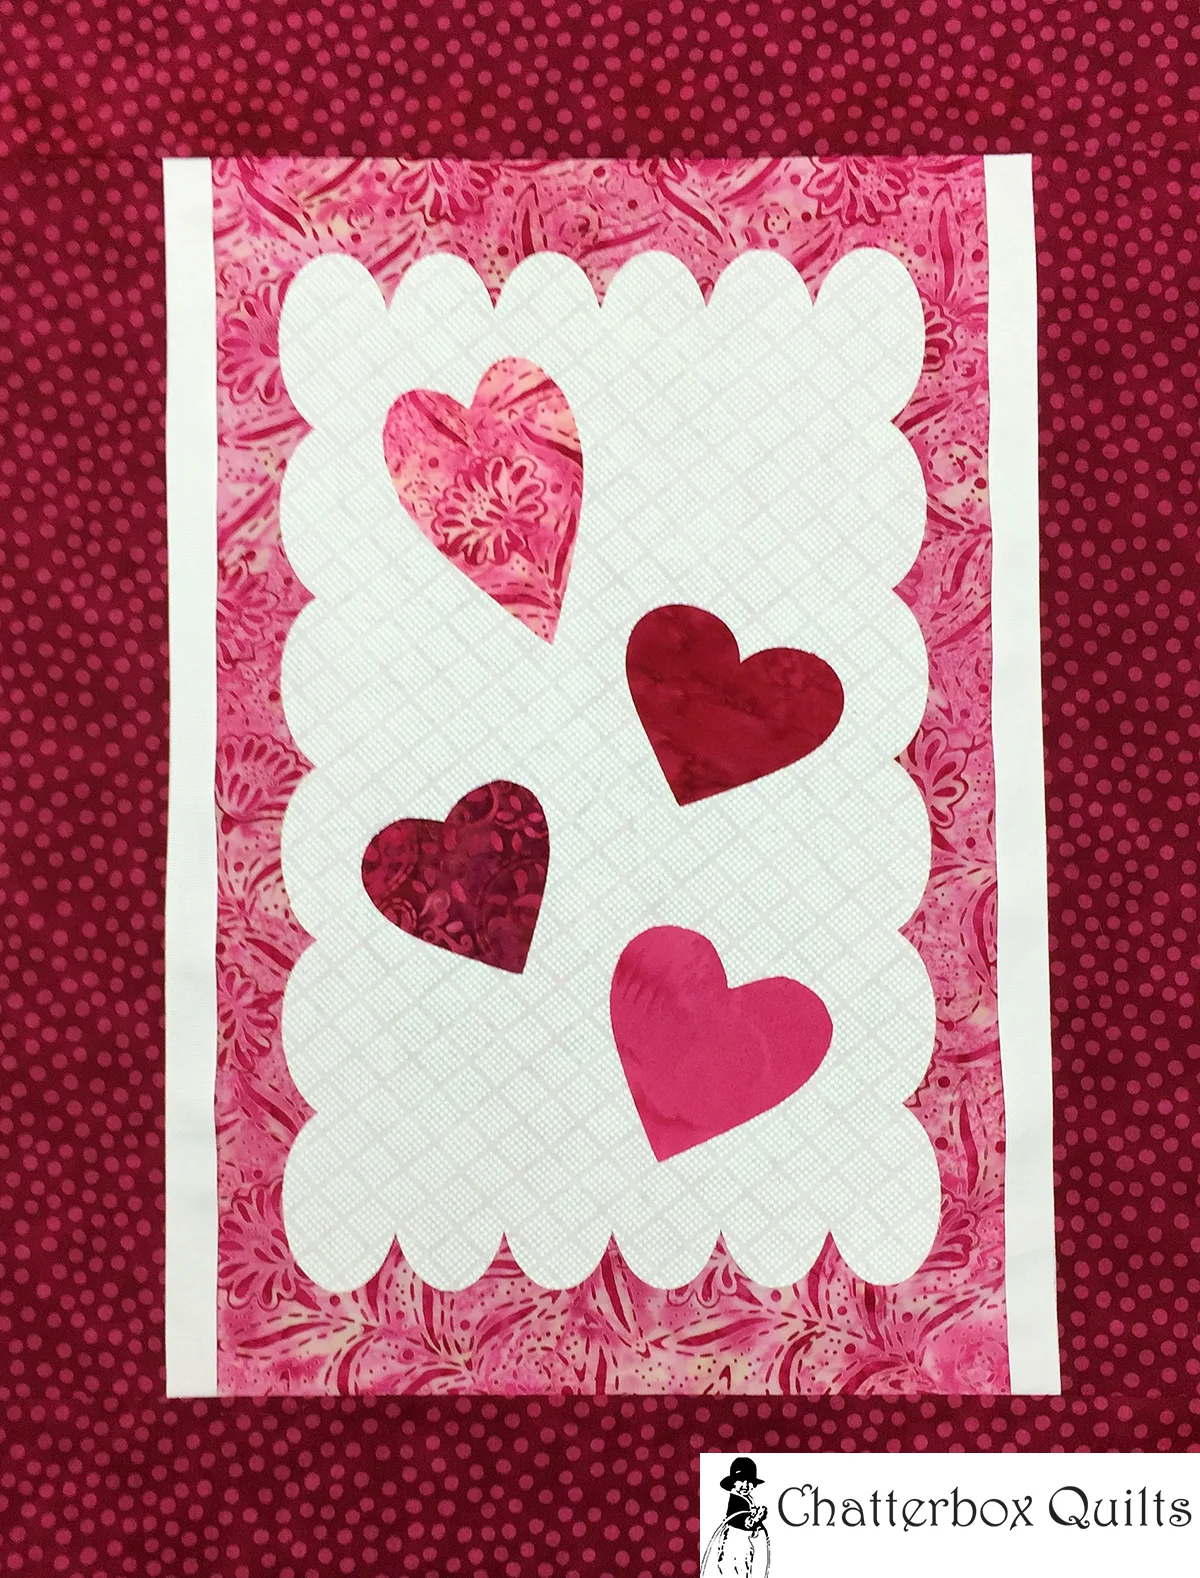
I decided to whip up a quick wall hanging for Valentine's Day using some of the pre-loaded designs in my Scan N Cut. Here's the tutorial, so you can create your own wall hanging.
I wanted to create a vintage-y look with some scallops and hearts, so I decided to have a sprinkling of hearts on a scalloped background. This was so easy as these designs are already included in the Scan N Cut library.

Background layer was design BA-A010 in the designs already in the Scan N Cut
I chose a scalloped design for the appliqué background layer and enlarged it to be 10" x 16" (okay, it was really 10.01 x 16", but that's just a smidge off). I saved this to my library so I could use it again. Then I selected the heart motif and created four hearts; making each one a slightly different width and height.

Heart #1

Heart #2

Heart #3

Heart #4
Then the fun part began: choosing the fabrics! I decided to go with batiks for the hearts and managed to find 4 different reds/pinks for them. I decide to stick with a white fabric for the scalloped appliqué background so the hearts would really contrast with it. I also chose the patterned pink batik for the layer under the scalloped background
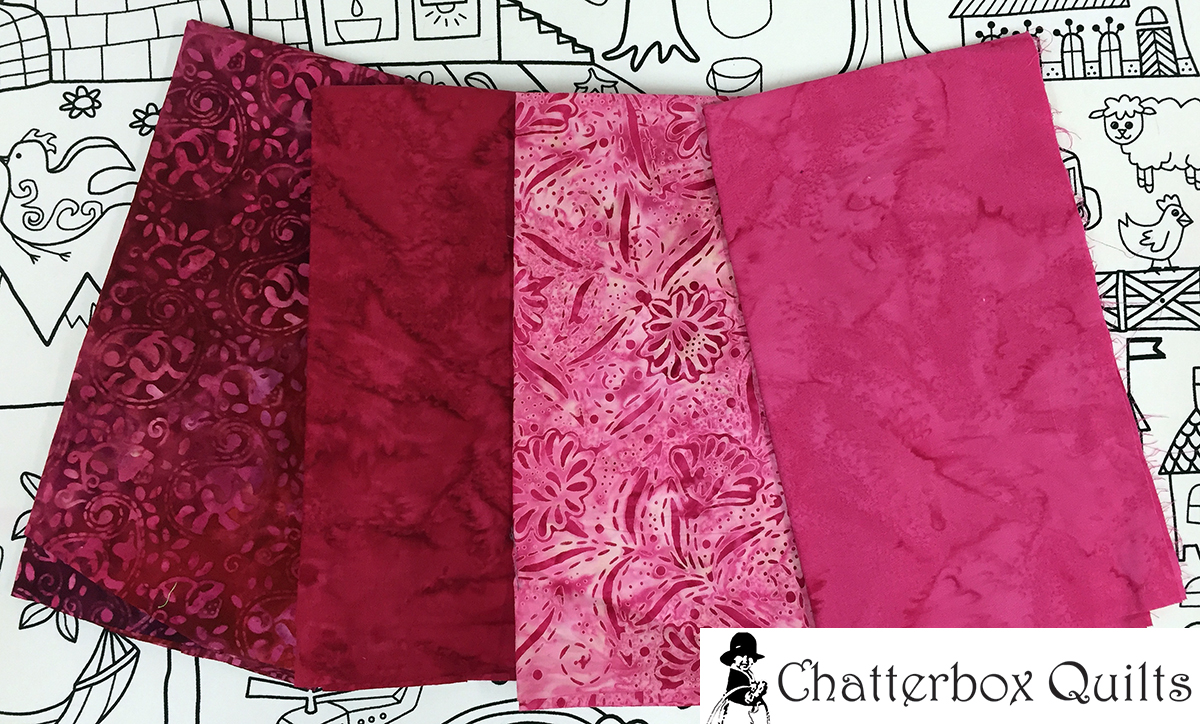
Lovely shades of red and pink batiks for the heart appliqués
I applied fusible web to the back of the heart fabrics, loaded them onto my Scan N Cut sheet and cut out the hearts. Easy!
Next, I fused fusible web to the back of the fabric that was going to scalloped and cut out the layer that would be underneath the hearts. Note, that I used the 12" x 24" mat to cut this part.
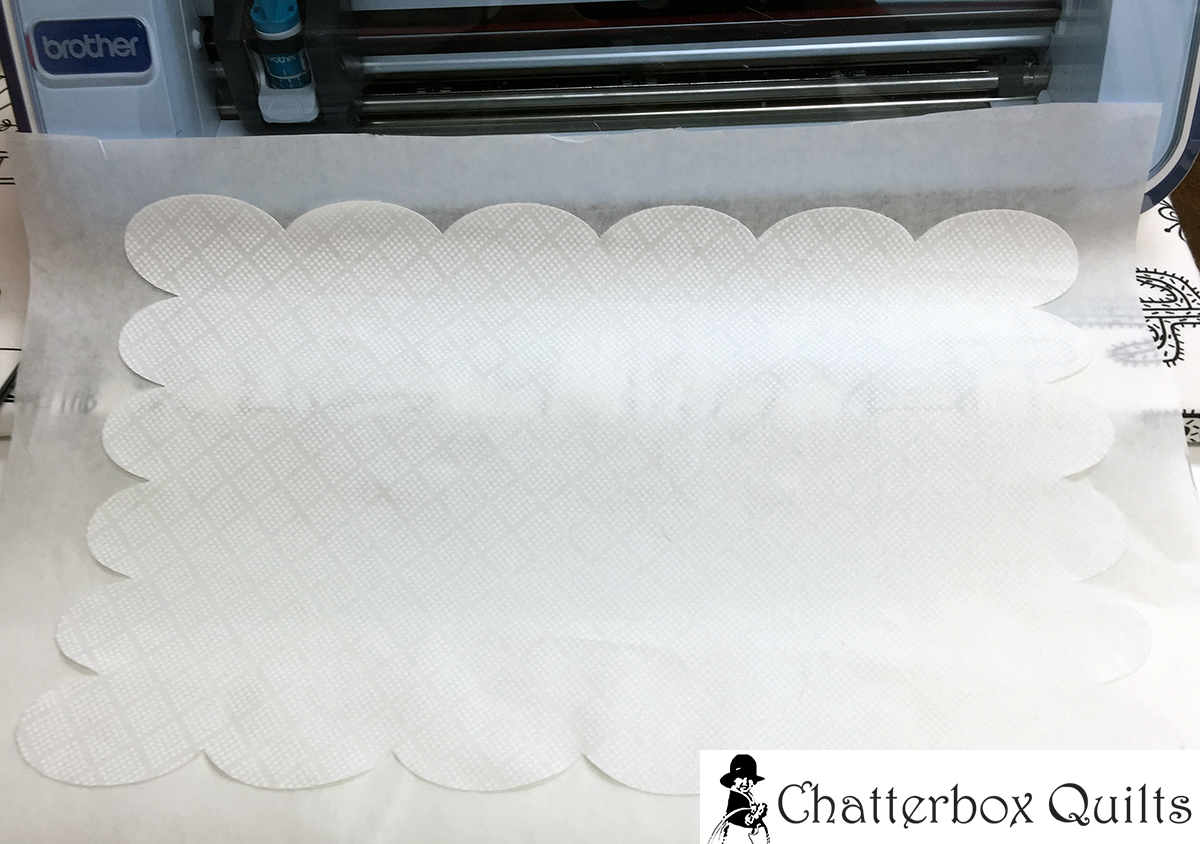
Lovely scalloped background all cut out!
I arranged and fused the hearts to the scalloped background and then fused it all to a large piece (14" X 18") of pink batik. It was looking really great! I wanted to add a border around it all, so I selected a pink and red polka dot fabric and cut out 3" borders.
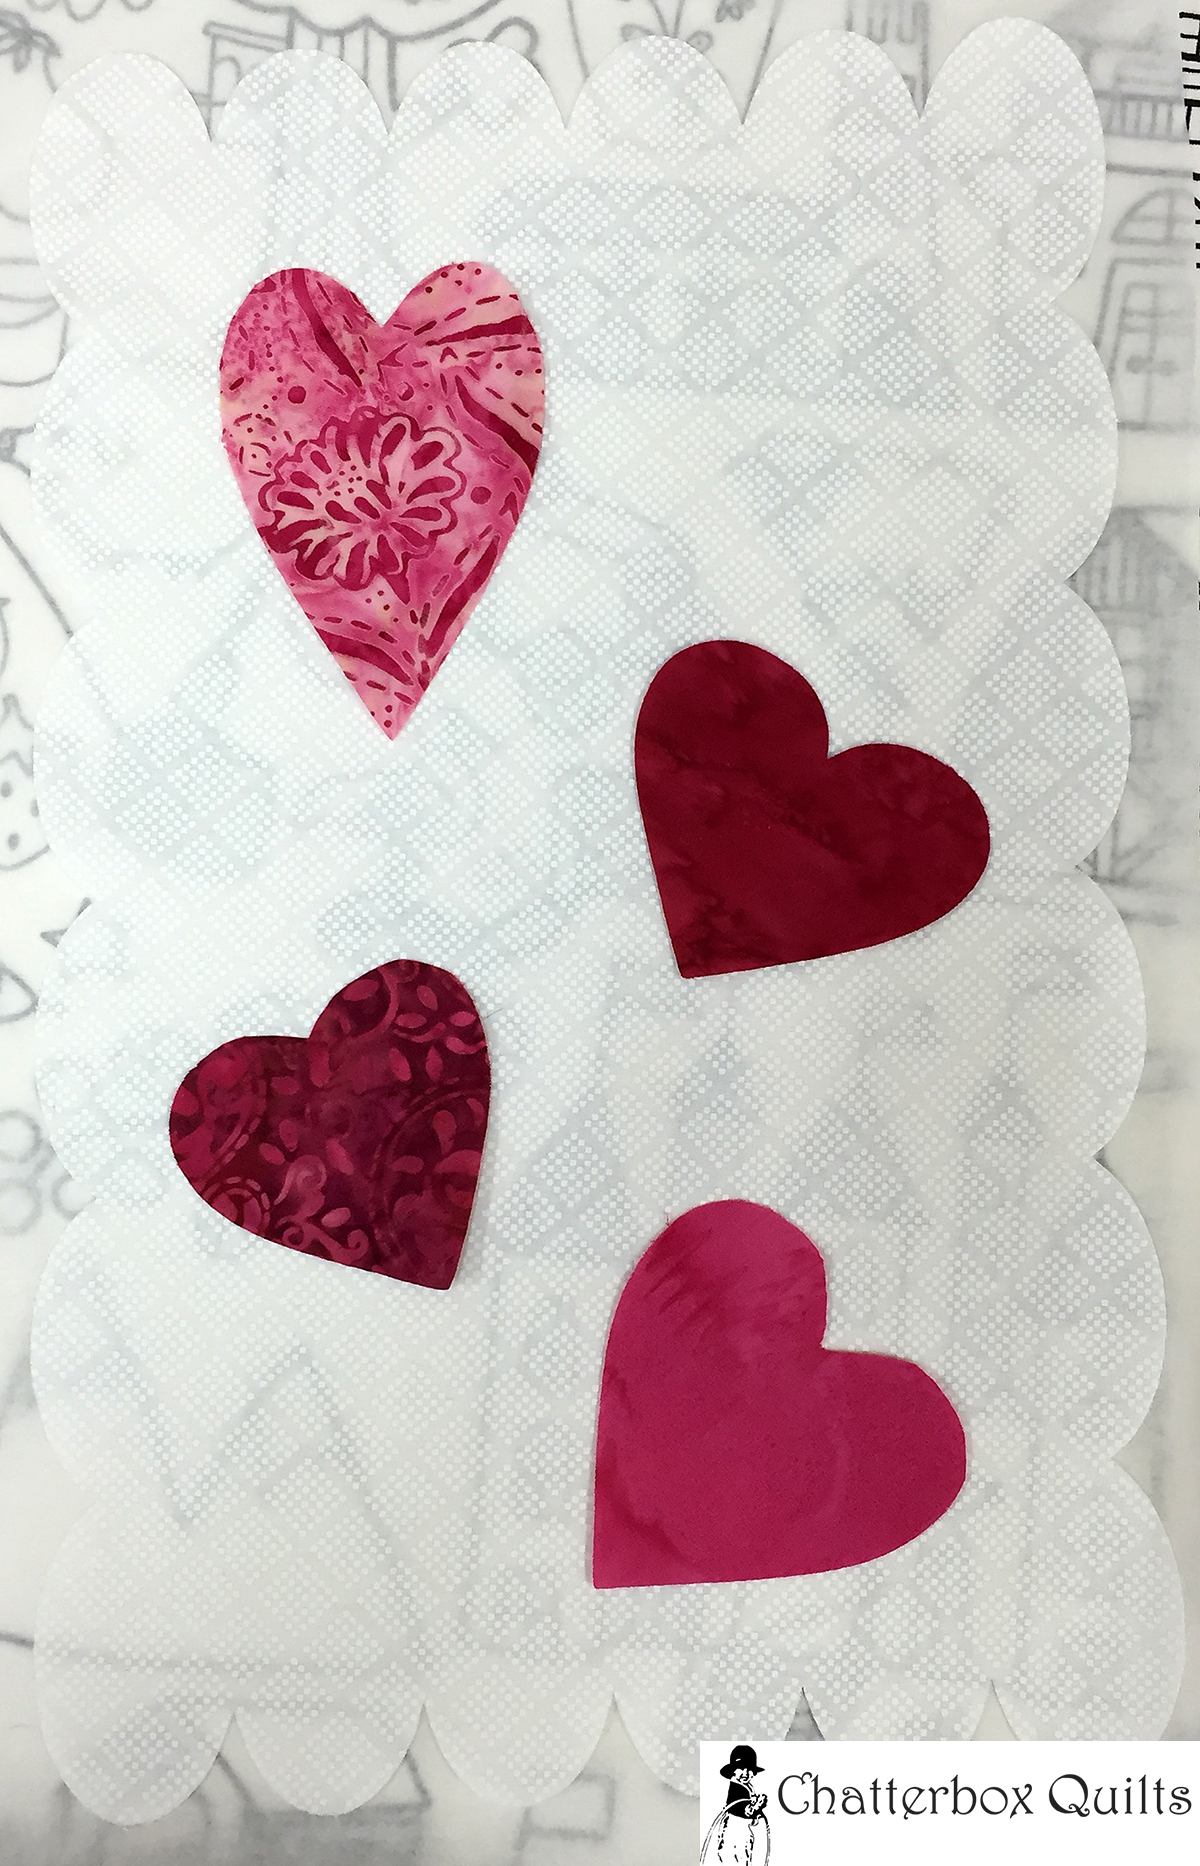
Hearts fused to the scalloped appliqué background
I thought it needed a bit more pizazz, so I inserted some 1" white ribbon between the background and the border – sort of like a flange. (I always save ribbons from gifts, candy boxes, etc. just for this purpose). I did this only on the sides so it created a nice linear frame before the outer border.

Next I added the top and bottom borders. Here's what the wall hanging looked like at this point.
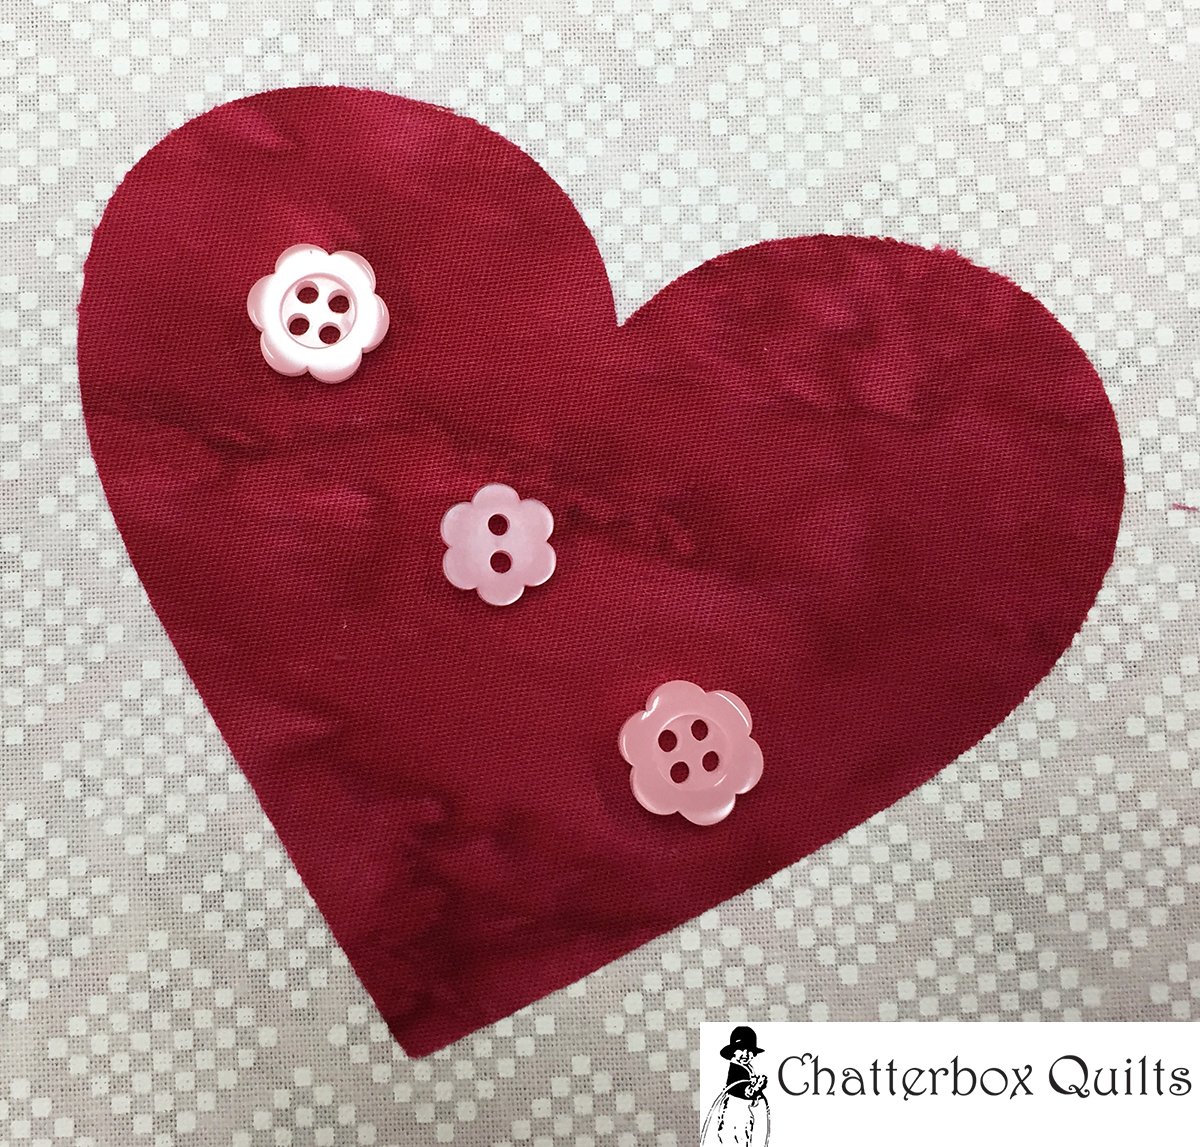
I was pleased with it but thought it needed a little something – how about some buttons? I just happen to have a few of these in my stash… so it was easy to find several different colours and types to jazz up the hearts.

Heart #1 all buttoned up!
Heart #2 looks great with floral buttons in pink

I used tiny buttons on Heart #3

I decided to add four buttons on the last heart - just because ;}
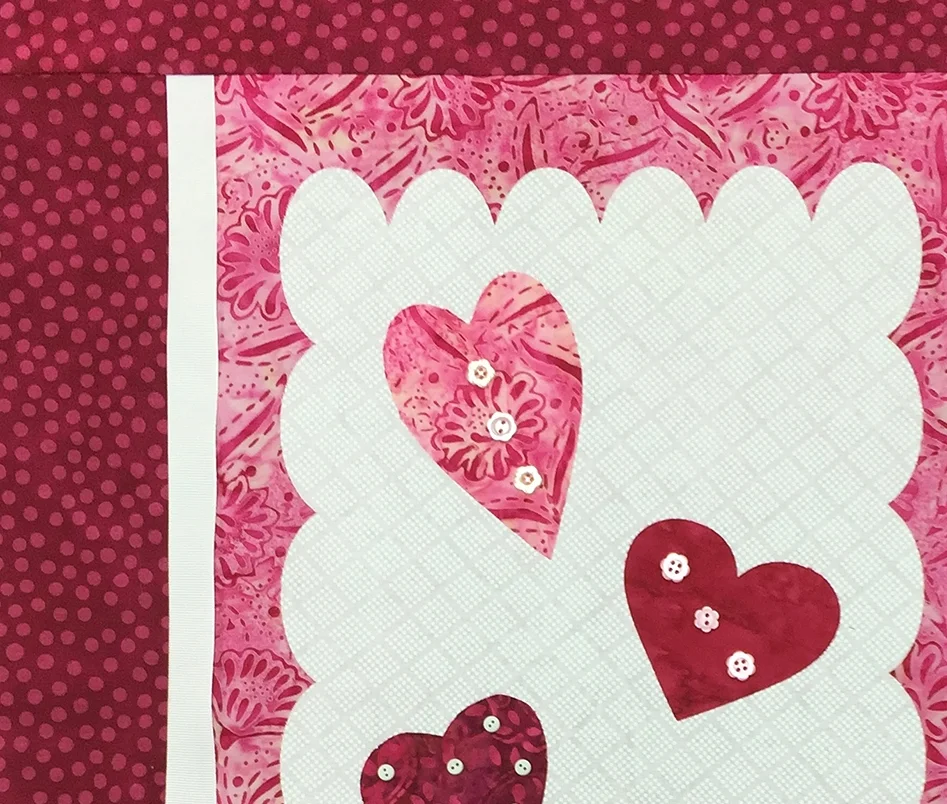
Here's a look at the final wall hanging top.

Yes, I know that there are only 3 buttons on the last heart - which one do you like better?
Since this is a wall hanging, I've decided to leave the edges of the appliqués unfinished (I know, daring, right?!). I just have to quilt this wall hanging and then stitch on the buttons (I may get lazy and just glue them on) and I'll have the perfect Valentine's Day decoration.
There's still time to create this Valentine's Day project with your own Scan N Cut machine, so I hope you'll give it a try.
Creatively,

Alex in the Long Arm Studio
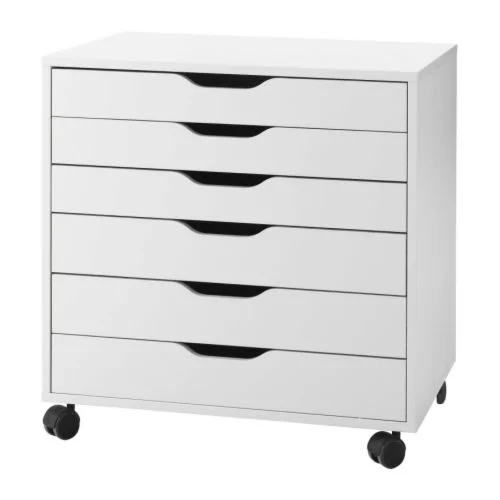
Now that I have a new long arm machine I also have more accessories that need to be stored in my quilt studio, or should I say long arm studio, situated in the quilt studio annex - commonly called the basement.
Surprisingly I haven't gone hog wild and bought every long arm accessory on the market. I did get a ruler base and one ruler: Handi Quilter's VersaTool. I bought extra bobbins and needles and the channel locks too. To save my fingers I bought some Leader Grips and love working with these - so much quicker and pain free! I think I have enough tools for now, but I do need to store them somewhere convenient so I can access them when long arming. Where could I find a storage unit for them? Ikea, of course!

Photo courtesy of handiquilter.com
I already have one Alex in which I store my threads, now I could get the wider, lower one to fit under my Handi Quilter Infinity. A quick jaunt to Ikea - really, I didn't look at anything else and went straight to the aisle to get it - and home I came with a new long arm accessory storage unit.

Photo courtesy of ikea.com
Thanks to hubby, it was quickly assembled and now I have all I need to long arm, including my pantographs, easily accessible under my Infinity.
Gotta love Ikea for their practical pieces and great price point.
Have you Ikea'd your studio yet? Leave a comment below letting me know what Ikea pieces you have in your studio.
Creatively,

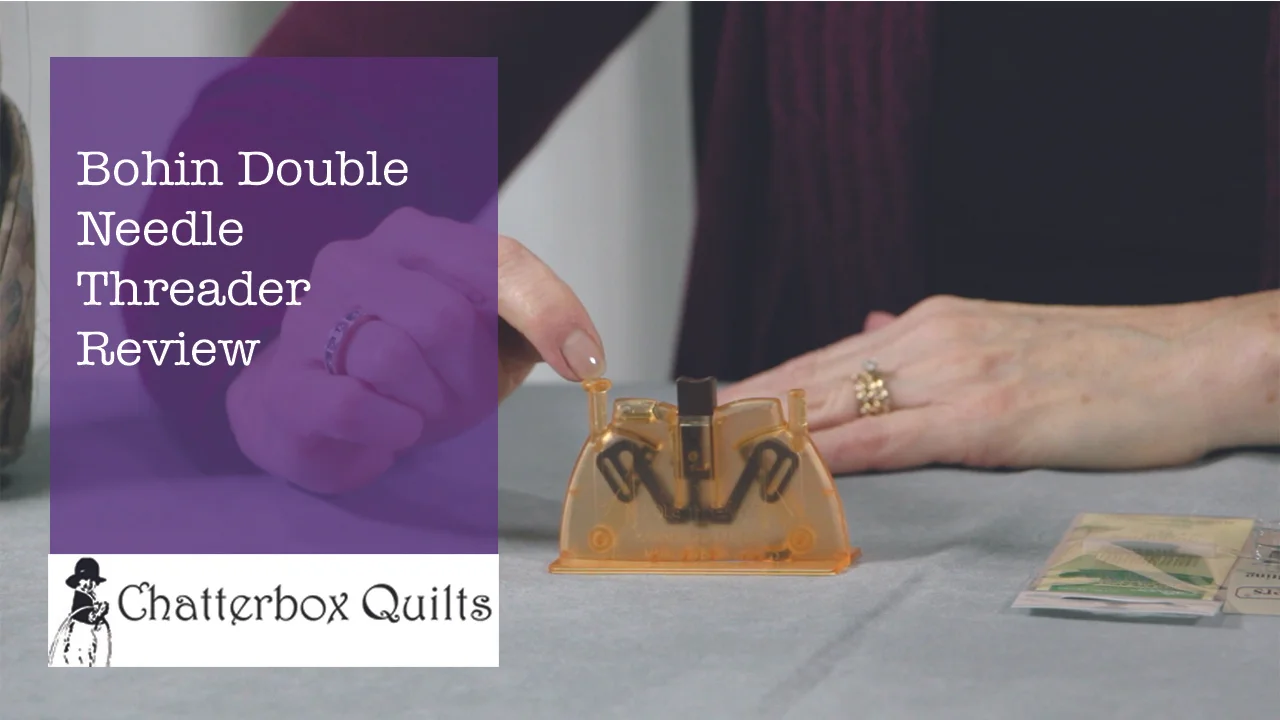
Telecast Thursday - Bohin Double Needle Threader Review
Do you have problems threading small eyed needles?
I like to use size 10 sharps when hand stitching on my binding and struggle to get the thread through the small eye on this size needle.

I've been using the Clover Double Needle Threader and it works okay, but I find that the metal part that you use to thread the needle becomes distorted over time and eventually breaks, so I have to buy a new one.

I also need to have my reading glasses on to use this product - so I can get the thread into the metal part - but I've found a wonderful alternative that I'm loving: the Bohin Double Needle Threader.

This product threads my needles easily and best of all I don't need my reading glasses to use it!
Watch the video below or on my Youtube channel to see how easy it is to use the Bohin Double Needle Threader.
If you're having trouble threading your small eyed needles, give the Bohin Double Needle Threader a try - you'll find it a snap!
Creatively,

P.S. I'm an Amazon affiliate and will receive a small compensation if you purchase an item using the links in this blogpost. This helps me continue to provide you with videos and tutorials. Thanks!
Easy Felted Soap Project
If you're looking for an easy beginner felting project and you don't mind getting wet, I have just the one for you!
I have a large bag of multiple colours of wool roving (just couldn't resist all the yummy colours!) and was looking for a quick and easy felting project. I found one in the Quilting Arts June/July 2015 edition. Jane LaFazio has an article on felting soap and it's perfect for beginner felters. This is a wet felting project so be prepared to get lathered up – in a good way!
You don't need much for this project:
2 - 3 colours of wool roving
Small bar of soap (I used one of those soaps you get from hotels)
Hot water
Patience - this process takes about 20 minutes

Felting materials
An extra pair of hands doesn't hurt either in case yours get tired.
To start, choose some wool roving – I chose two different colours, but you could use more colours than that. You don't need much: just tear off about a two inch swatch of it and place it over the soap. Don't cut your roving – it should tear easily. If you need some help in choosing colours, enlist your purry assistant for some advice.

Charlie is thrilled with these colour selections
Layer the roving over the soap and then turn it to the other side of the soap and add more roving.

First piece of wool roving applied to one side of the soap
Keep adding layers of wool roving, alternating the colours of wool roving and the direction so you have a sort of weave of wool roving across the soap on both sides. Four layers of wool roving should be enough.
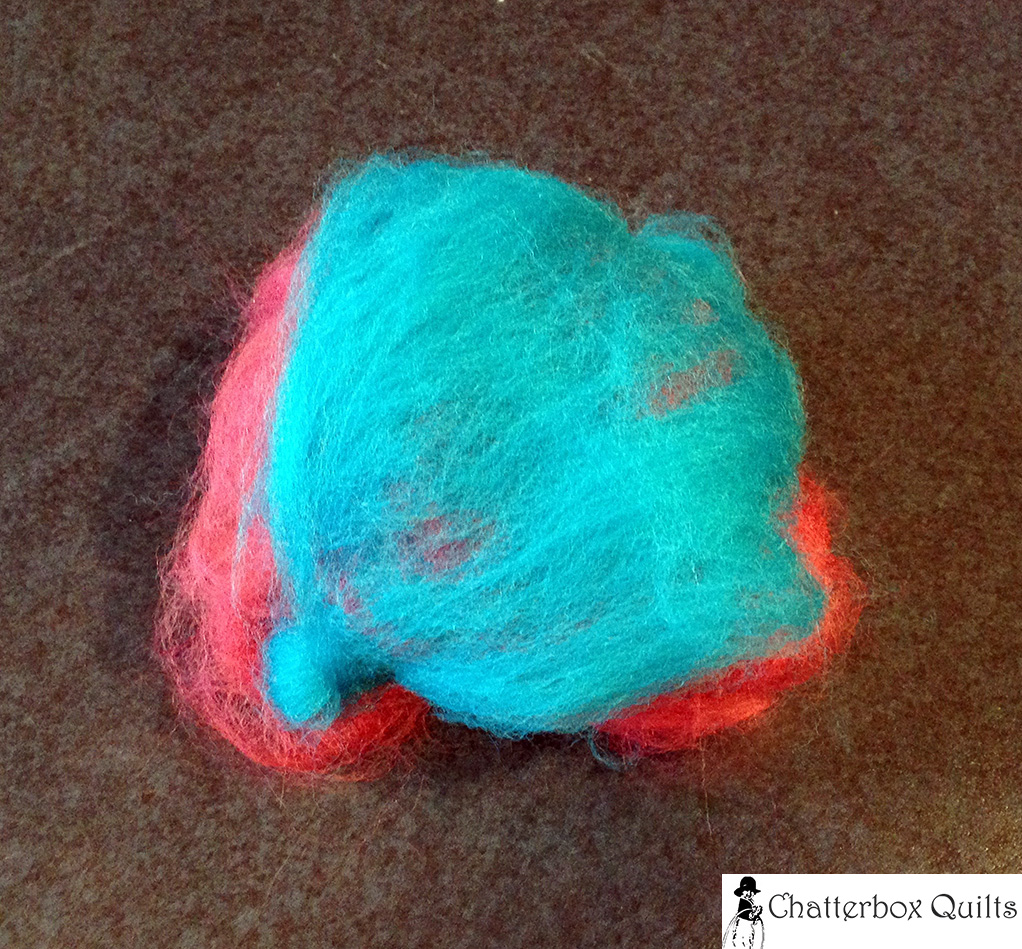
Layers of wool roving ready for felting
Next, you'll need that hot water. I did this in my kitchen sink. Get the soap and roving thoroughly wet in hot water, being careful not to disturb the layers of wool.

Getting the roving completely saturated is the first wet step
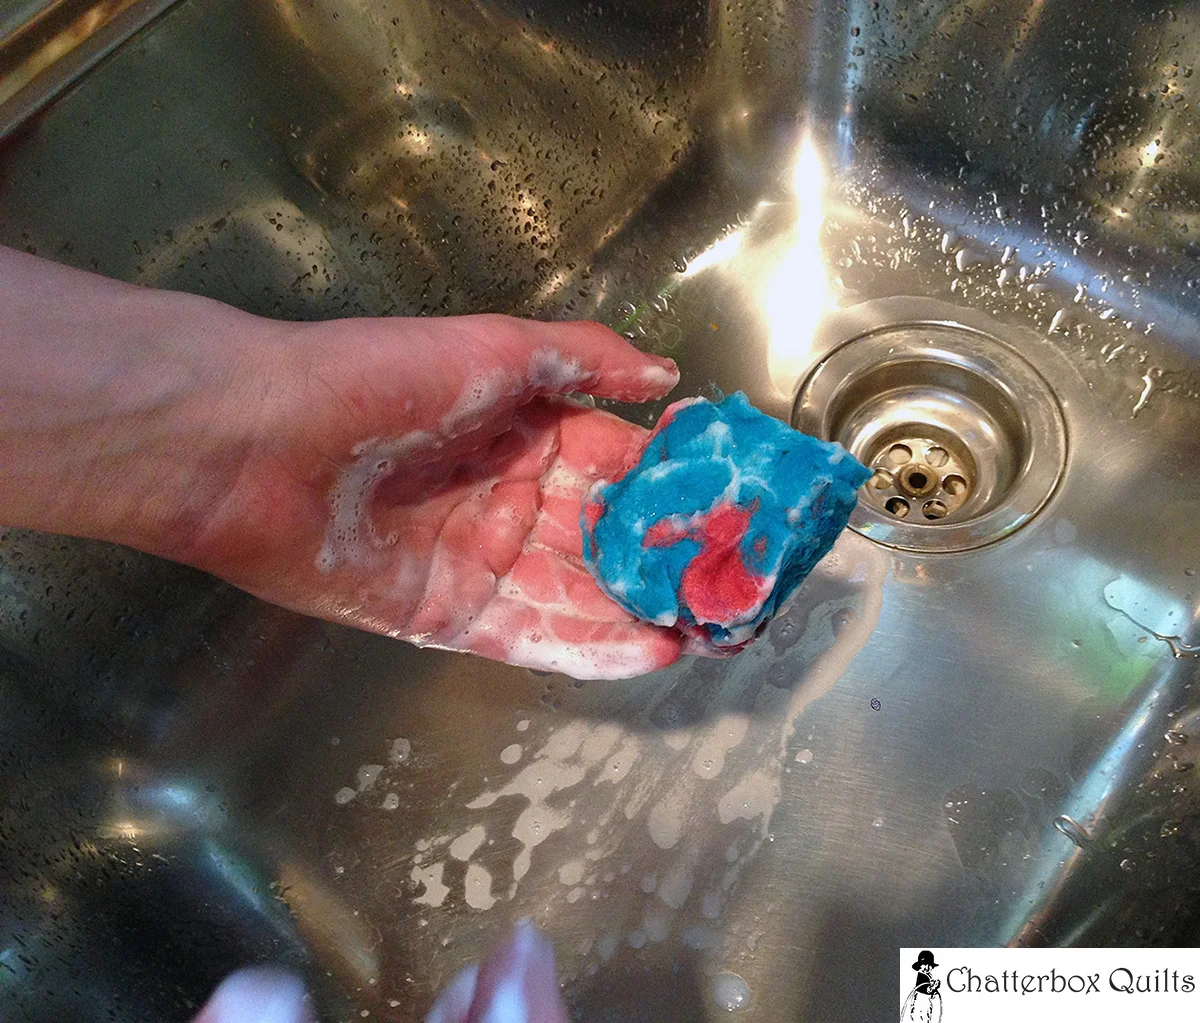
Once it is completed saturated, squeeze out the excess water. This helps to stick the wool roving to the soap. Once it feels – yes, this is a touchy feely project – that the wool is stuck to the soap and the felting has begun, you can start creating that lather. Rub the bar back and forth in your hands – just like you do when washing your hands. This will start the felting process.

Wool roving is completely wet and ready to start the lathering process
After about five minutes of lathering, rewet the bar under the hot water. Don't be concerned about the large amount of lather this process creates – there will still be soap inside the wool roving.

First round of lathering - are my hands clean yet?
Continue rubbing the bar on all sides for another five minutes and then rewet the bar in the hot water. You may have to repeat this rubbing and rewetting sequence this one or two more times.

Round two or three - time for another pair of younger hands to take over
Once the wool roving is firmly bound to the soap (completely felted), rinse the soap in cold water and set it aside to dry. This may take some time, so you now have the opportunity to do some quilting or get a chocolate snack.

Final cold rinse and it's done!
Now you've got a pretty scented gift to give a friend or to display in a lovely container along with the other bars that I'm sure you'll be making for yourself. Make several at one time so you'll always have a scented gift on hand.
Try this quick felting project yourself and let me know how it went in the comments below.
Creatively,
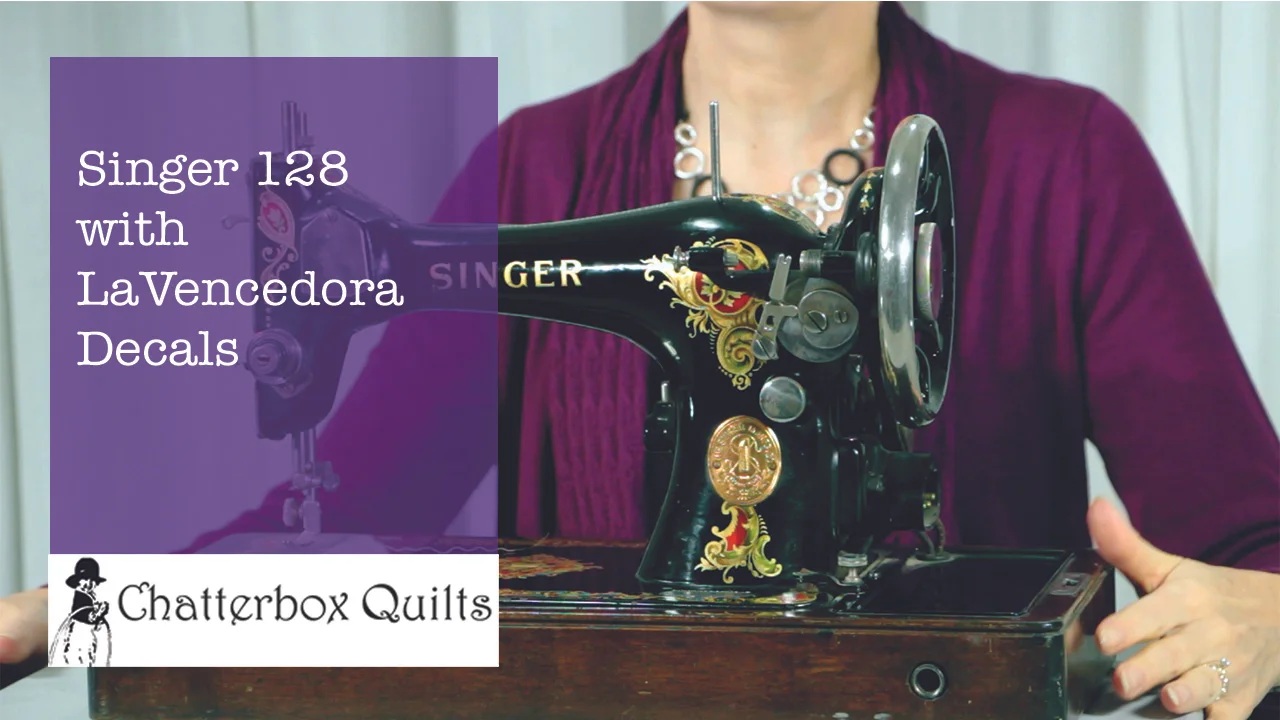
Singer 128 with La Vencedora Decals
I almost forgot to tell you about my other machine acquisition: a Singer 128 with La Vencedora decals. While I already have a Singer 128, I was drawn to this machine due to its beautiful intricate decals. I've seen other models of this machine before in other venues, but never have I seen one in such good condition and at such a great price!
While I already have a Singer 128, I was drawn to this machine due to its beautiful intricate decals. I've seen other models of this machine before in other venues, but never have I seen one in such good condition and at such a great price!

This machine reminds me of my Singer 66 Red Eye, but it is a bit different. First, the Singer 128 is smaller than the Singer 66 – something you instantly notice when you see both machines together. The Singer 128 is about ¾ the size of the Singer 66 model.

Can you tell the difference? The Singer 128 with the La Vencedora decals in in front of the Singer 66 Redeye model
The decals are also similar: they're both intricate and in gold, red and green colours, but on closer inspection you can definitely see the difference.

Although the decals on my Singer 66 Redeye model aren't in the best shape, this gives you an idea of what they look like.
My Singer 66 has a drop-in bobbin, whereas the Singer 128 is a long bobbin or shuttle machine. The Red Eye model is non-electric and is in a treadle stand. The new (to me) Singer 128 is an electric model and is in a wooden base. So really these machines aren't that alike – other than they are both made by Singer and look gorgeous!
I haven't yet had time to clean the Singer 128, but am looking forward to seeing how this machine shines with a little TLC.
To see more of my latest vintage sewing machine, watch the video below.
Creatively,


Welcome! I’m Kim Jamieson-Hirst of Chatterbox Quilts, a YouTube creator and host of The Quilter’s Way. I believe that quilting is more than just a 1/4” seam and that practice makes improvement and you are improving every day!
Contact me at kjh@chatterboxquilts.com.


Want to improve your quilting and have fun doing it? Join The Quilter's Way, a private online membership site that creates successful quilters.

Check out my favourite books and tools.
As an Amazon Associate I earn from qualifying purchases from links that you may find on the Chatterbox Quilts’ website.