If you're looking for an easy beginner felting project and you don't mind getting wet, I have just the one for you!
I have a large bag of multiple colours of wool roving (just couldn't resist all the yummy colours!) and was looking for a quick and easy felting project. I found one in the Quilting Arts June/July 2015 edition. Jane LaFazio has an article on felting soap and it's perfect for beginner felters. This is a wet felting project so be prepared to get lathered up – in a good way!
You don't need much for this project:
2 - 3 colours of wool roving
Small bar of soap (I used one of those soaps you get from hotels)
Hot water
Patience - this process takes about 20 minutes

Felting materials
An extra pair of hands doesn't hurt either in case yours get tired.
To start, choose some wool roving – I chose two different colours, but you could use more colours than that. You don't need much: just tear off about a two inch swatch of it and place it over the soap. Don't cut your roving – it should tear easily. If you need some help in choosing colours, enlist your purry assistant for some advice.

Charlie is thrilled with these colour selections
Layer the roving over the soap and then turn it to the other side of the soap and add more roving.

First piece of wool roving applied to one side of the soap
Keep adding layers of wool roving, alternating the colours of wool roving and the direction so you have a sort of weave of wool roving across the soap on both sides. Four layers of wool roving should be enough.
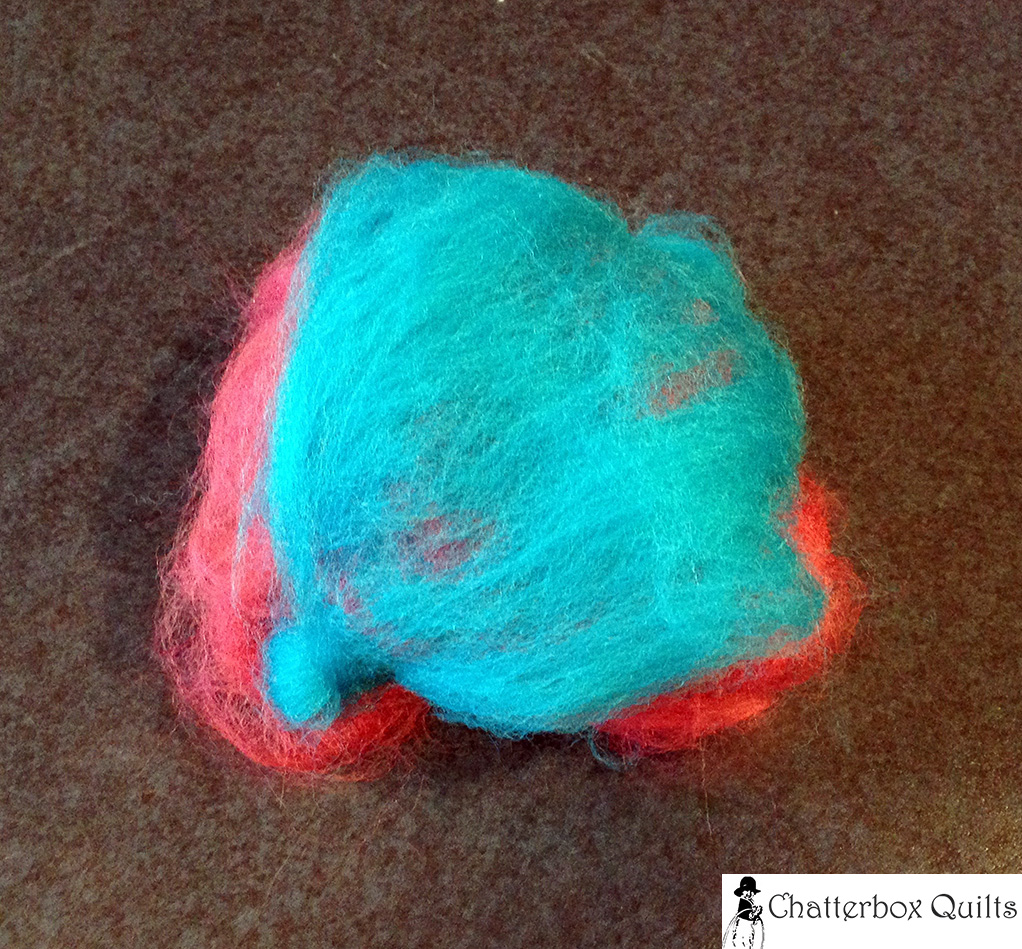
Layers of wool roving ready for felting
Next, you'll need that hot water. I did this in my kitchen sink. Get the soap and roving thoroughly wet in hot water, being careful not to disturb the layers of wool.

Getting the roving completely saturated is the first wet step
Once it is completed saturated, squeeze out the excess water. This helps to stick the wool roving to the soap. Once it feels – yes, this is a touchy feely project – that the wool is stuck to the soap and the felting has begun, you can start creating that lather. Rub the bar back and forth in your hands – just like you do when washing your hands. This will start the felting process.

Wool roving is completely wet and ready to start the lathering process
After about five minutes of lathering, rewet the bar under the hot water. Don't be concerned about the large amount of lather this process creates – there will still be soap inside the wool roving.

First round of lathering - are my hands clean yet?
Continue rubbing the bar on all sides for another five minutes and then rewet the bar in the hot water. You may have to repeat this rubbing and rewetting sequence this one or two more times.

Round two or three - time for another pair of younger hands to take over
Once the wool roving is firmly bound to the soap (completely felted), rinse the soap in cold water and set it aside to dry. This may take some time, so you now have the opportunity to do some quilting or get a chocolate snack.

Final cold rinse and it's done!
Now you've got a pretty scented gift to give a friend or to display in a lovely container along with the other bars that I'm sure you'll be making for yourself. Make several at one time so you'll always have a scented gift on hand.
Try this quick felting project yourself and let me know how it went in the comments below.
Creatively,