
CHATTERBOX QUILTS’ BLOG
Helping Quilters Learn and Improve
Book Review: You and Your Sewing Machine
You might think that You and Your Sewing Machine wouldn’t be for you because you don’t get down and dirty with your sewing machine, but you’d be wrong. This isn’t a manual on how to repair your sewing machine, but more of an informational guide to your sewing machine. It will help you better understand how it works and help you solve issues when it isn’t performing as it should.

Image courtesy of amazon.com
There is a lot of helpful information in this book and before you again start thinking that this will be a boring, technical manual, I think you’ll find that You and Your Sewing Machine is a really interesting read.
First of all, I love it that Bernie uses the word “sewist” rather than “sewer” in the title. Just sounds so much more inclusive and elegant.
As Bernie explains in the Introduction, he has been a technician for over 40 years and has noticed that there is a very personal relationship between a sewist and his/her sewing machine. In the book he is trying to:
“help you gain a better understanding of your sewing machine – its needs and what it is trying to communicate to you.”
If you’ve been sewing on a particular machine for a long time, you’ll become attuned to its “everything is great and I’m loving stitching with you” noises and its “something doesn’t feel quite right and I need help” noises. This book will help you to notice when things aren’t right with your machine and explain how you can ensure that it is kept running smoothly and what to do when it isn’t.
The book is divided into 3 sections: Getting to Know Your Sewing Machine, Maintaining Your Good Relationship, and Problems and How to Fix Them.

Image courtesy of amazon.com
In the first section, Bernie explains the differences between Manual, Electronic and Computerized sewing machines. I think many of us think of electronic and computerized sewing machines as being the same thing, but, as you’ll find out in You and Your Sewing Machine, there is a big difference. Bernie explains additional features on sewing machines and has a section on Questions to ask when buying a sewing machine at the end of this section, which I love! So handy!
In the second section, Bernie goes into extensive detail on sewing machine feet and when and when not to use them. I’m sure that many of us have never had anyone explain this to us before. I found this section very informative and know that I’ll be referring to it in the future.

Image courtesy of amazon.com
He continues on to explain about maintaining your machine so you can avoid expensive repairs. There are lots of photos showing you exactly how to clean various areas on your machine and when and where you should apply oil.
I know that most readers will find the last section on solving problems to be a lifesaver – or machine saver. Let’s face it, our machines don’t run perfectly all the time and this book is great reference for when things don’t go as we hoped. Even if this was the only section in the book that you ever looked at, it would be well worth buying this book! From tension issues to poorly wound bobbins, Bernie covers it all.
The last part of the You and Your Sewing Machine is a list of problems and possible causes and solutions. This guide will be something that you will constantly refer to when you encounter an issue with your sewing machine.
The book is full of detailed photos and up-close shots so you can easily see the various parts and problems to which Bernie is referring.
What I really liked about this book was how the material was presented logically and in an easy to understand format. I like how Bernie explains how various parts on the sewing machine work so that you understand first and are then better able to determine what might cause a problem and how to fix it. I believe that understanding a sewing machine first is the best way to start off your relationship with it. If you don’t understand how tension works, you won’t know why it’s important to thread your machine with the presser foot up (in most cases).
Once you understand how your sewing machine operates, you’ll be better set up to keep it running smoothly.
For a closer look at You and Your Sewing Machine, click on the image below.

If you are a true sewist, you’ll definitely want to have You and Your Sewing Machine in your library.
Creatively,

P.S. Are you serious about improving your quilting? Do you want to connect with other committed quilters in a supportive, safe environment? If you answered “yes” to these questions, you need to join The Quilter’s Way. The Quilter’s Way is the only quilting membership site that includes both training and an active, supportive online community. Don’t wait another day! Join now.
P.P.S. Did you know that you can sign up to receive emails full of FREE quilting goodness? Click here to receive FREE content directly in your email inbox every few weeks from Chatterbox Quilts. I know you'll be glad you did!
P.S. I am an Amazon affiliate and, if you purchase items by clicking through the links in this post ,I will receive a small amount of commission. This doesn’t cost you any more $$$, but helps me to continue creating free content for you. Thanks!

New Janome MC9450 Overview
I’m thrilled to introduce you to my newest sewing machine: the Janome MC9450. Maybe I should say that Victor would like to introduce you to the new machine!

This wonderful new machine has so many wonderful features that it’s difficult to say which is my favourite. You can expect to see more videos and blogposts about the Janome MC9450 in the future, but today I just want to give you an overview of some of its helpful features.

The first thing I noticed is the excellent lighting on the Janome MC9450. There are LED lights in the throat space and with the pull out High Light, there won’t be any dark areas when you are sewing or quilting with this machine. I definitely need lots of light when I’m quilting and the Janome MC9450 certainly delivers in this area! No additional clip on or set-up-next-to-the-machine lights required.
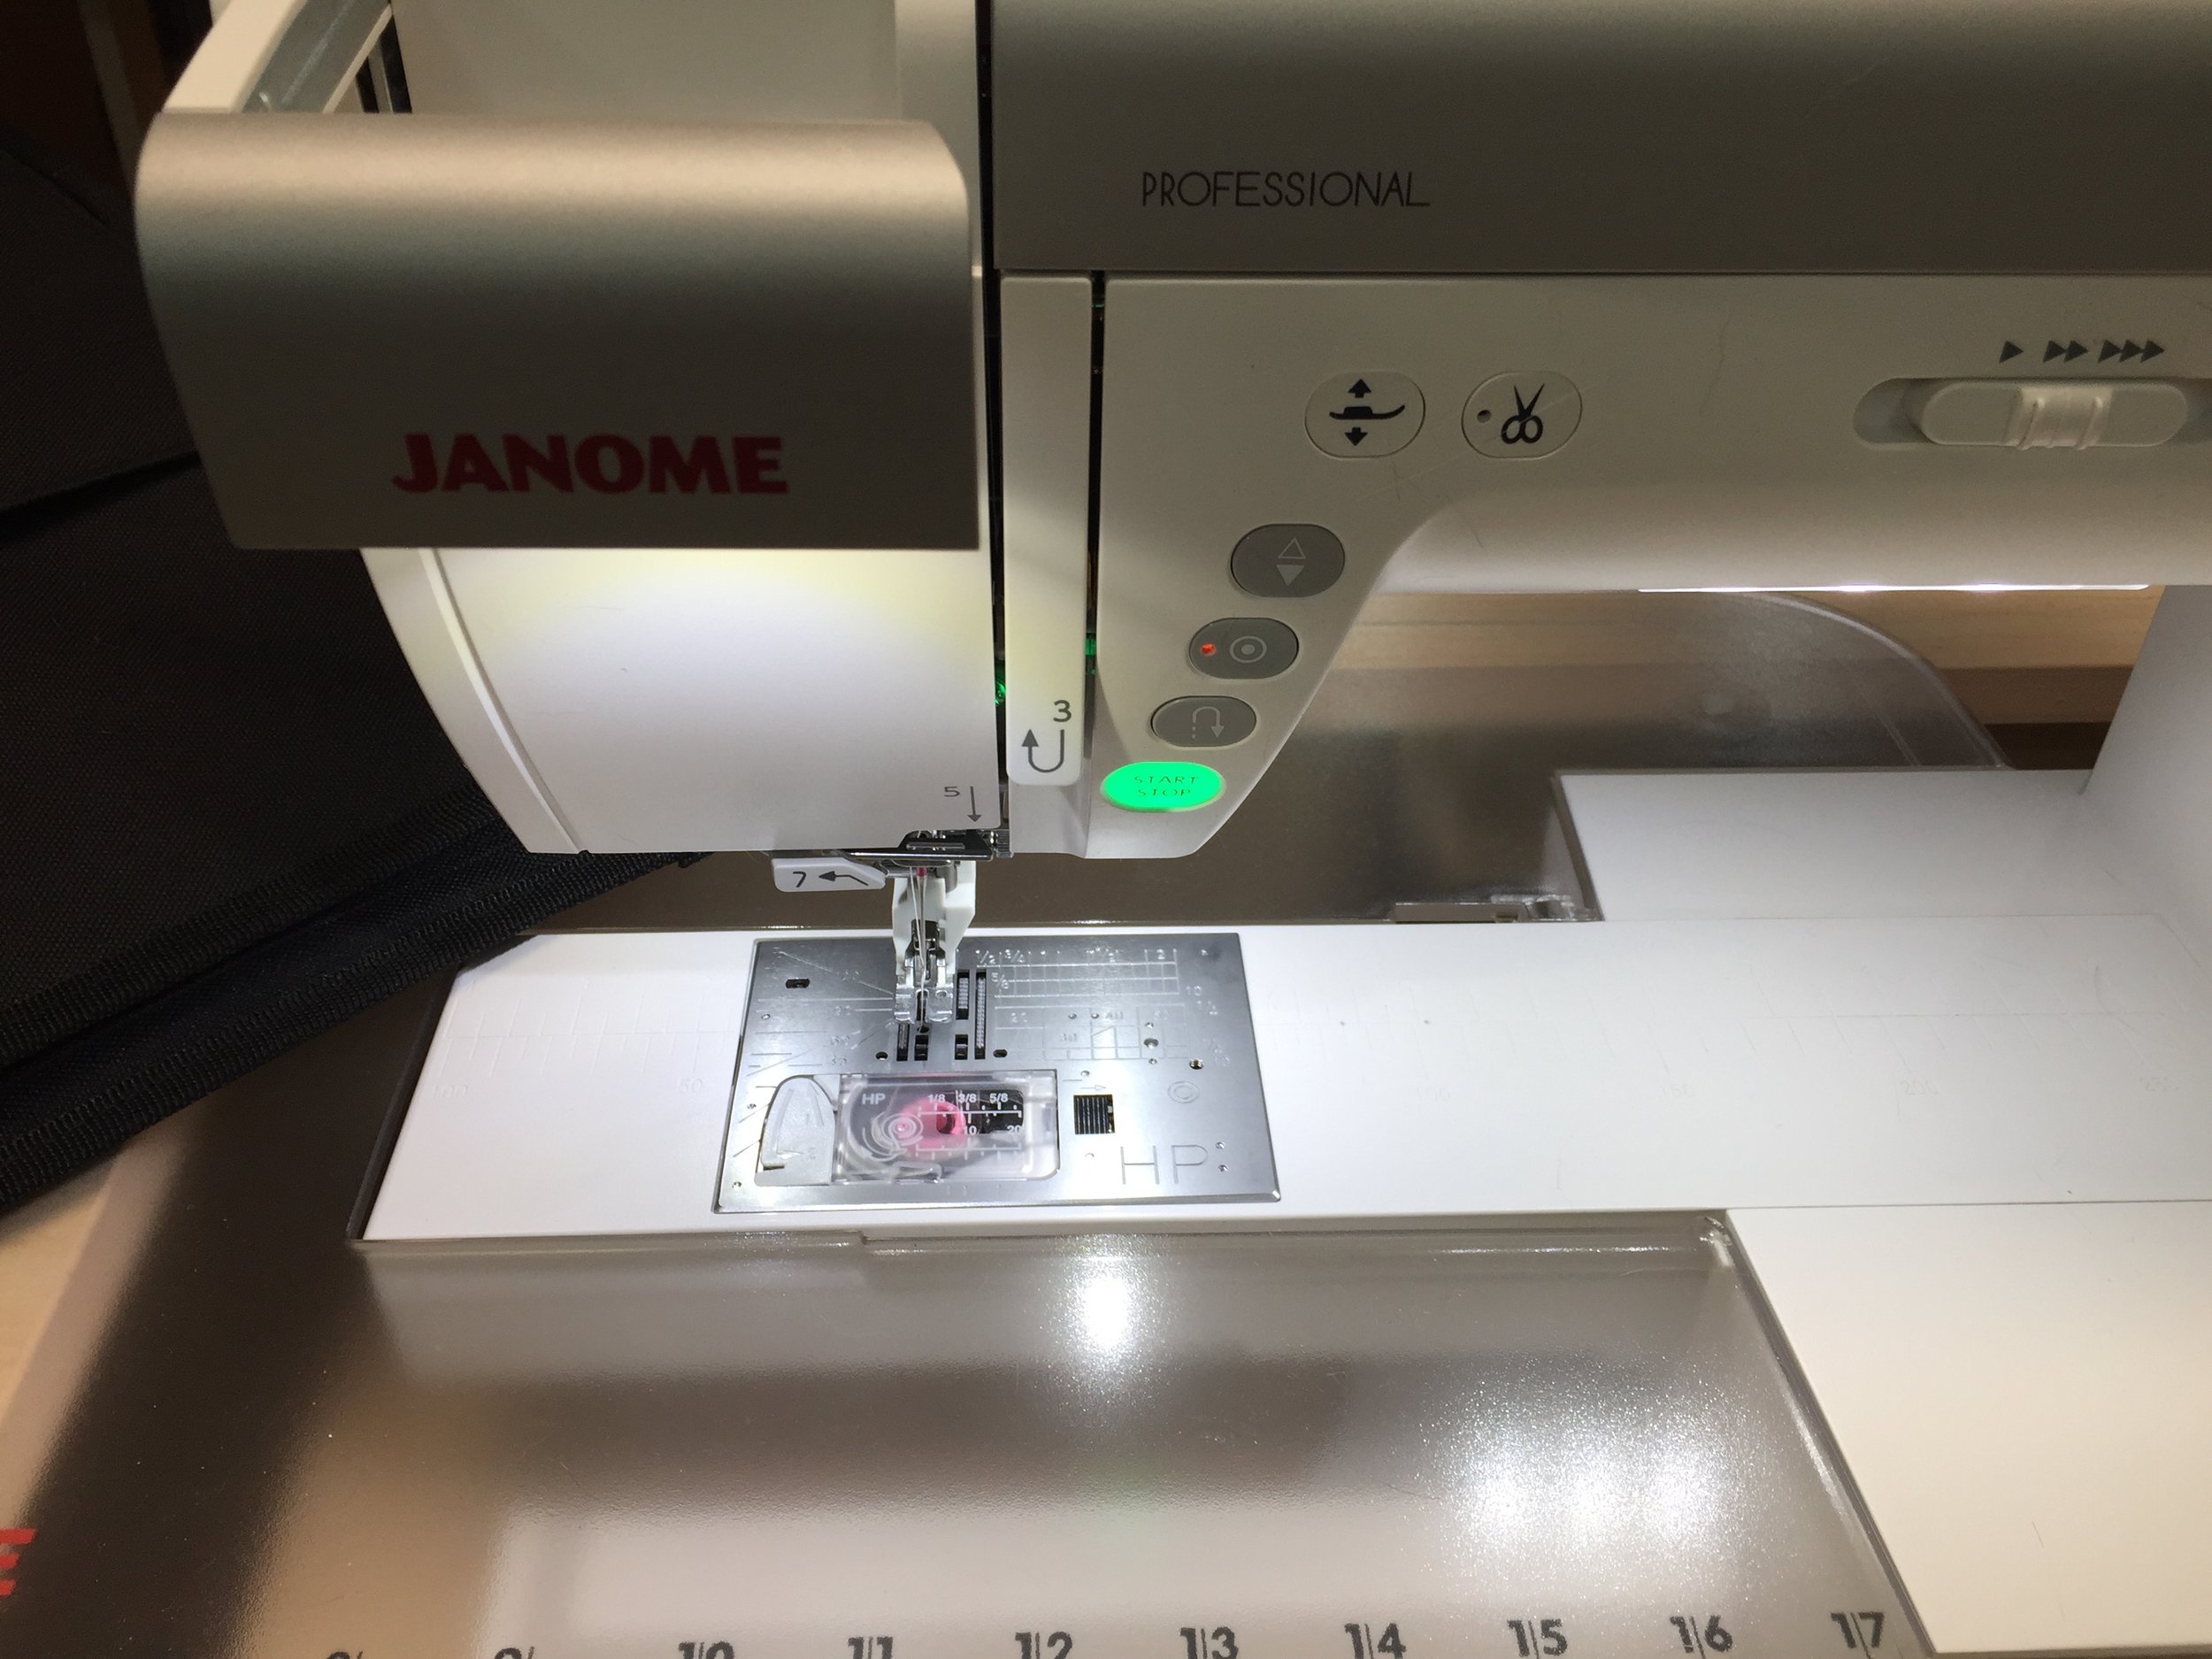
In addition to good lighting, I need a sewing machine that threads itself. Okay, there aren’t really any of those (yet) on the market, but the Janome MC9450 comes close with its superior needle threader. This machine has an upgraded thread guide that feeds the thread right into the needle threader and it works every time. I consider a good needle threader an essential feature on a sewing machine due to my monovision which makes threading a sewing machine needle quite difficult for me. This may be my most favourite feature on the Janome MC9450.
As a quilter, I need a good ¼” foot, a walking foot and a ruler foot and the Janome MC9450 comes standard with all of these feet and many more. There are several choices for the ¼” foot from the O foot with a guide to the O foot without a guide, as well as the HP foot and needle plate. The Janome MC9450 comes with the AD AcuFeed Flex foot – what I call a walking foot – and an additional narrower AcuFeed Flex HP2 foot which combines the technology of the AcuFeed Flex system as well as a ¼” foot. The perfect combination when I’m sewing on borders or binding strips.

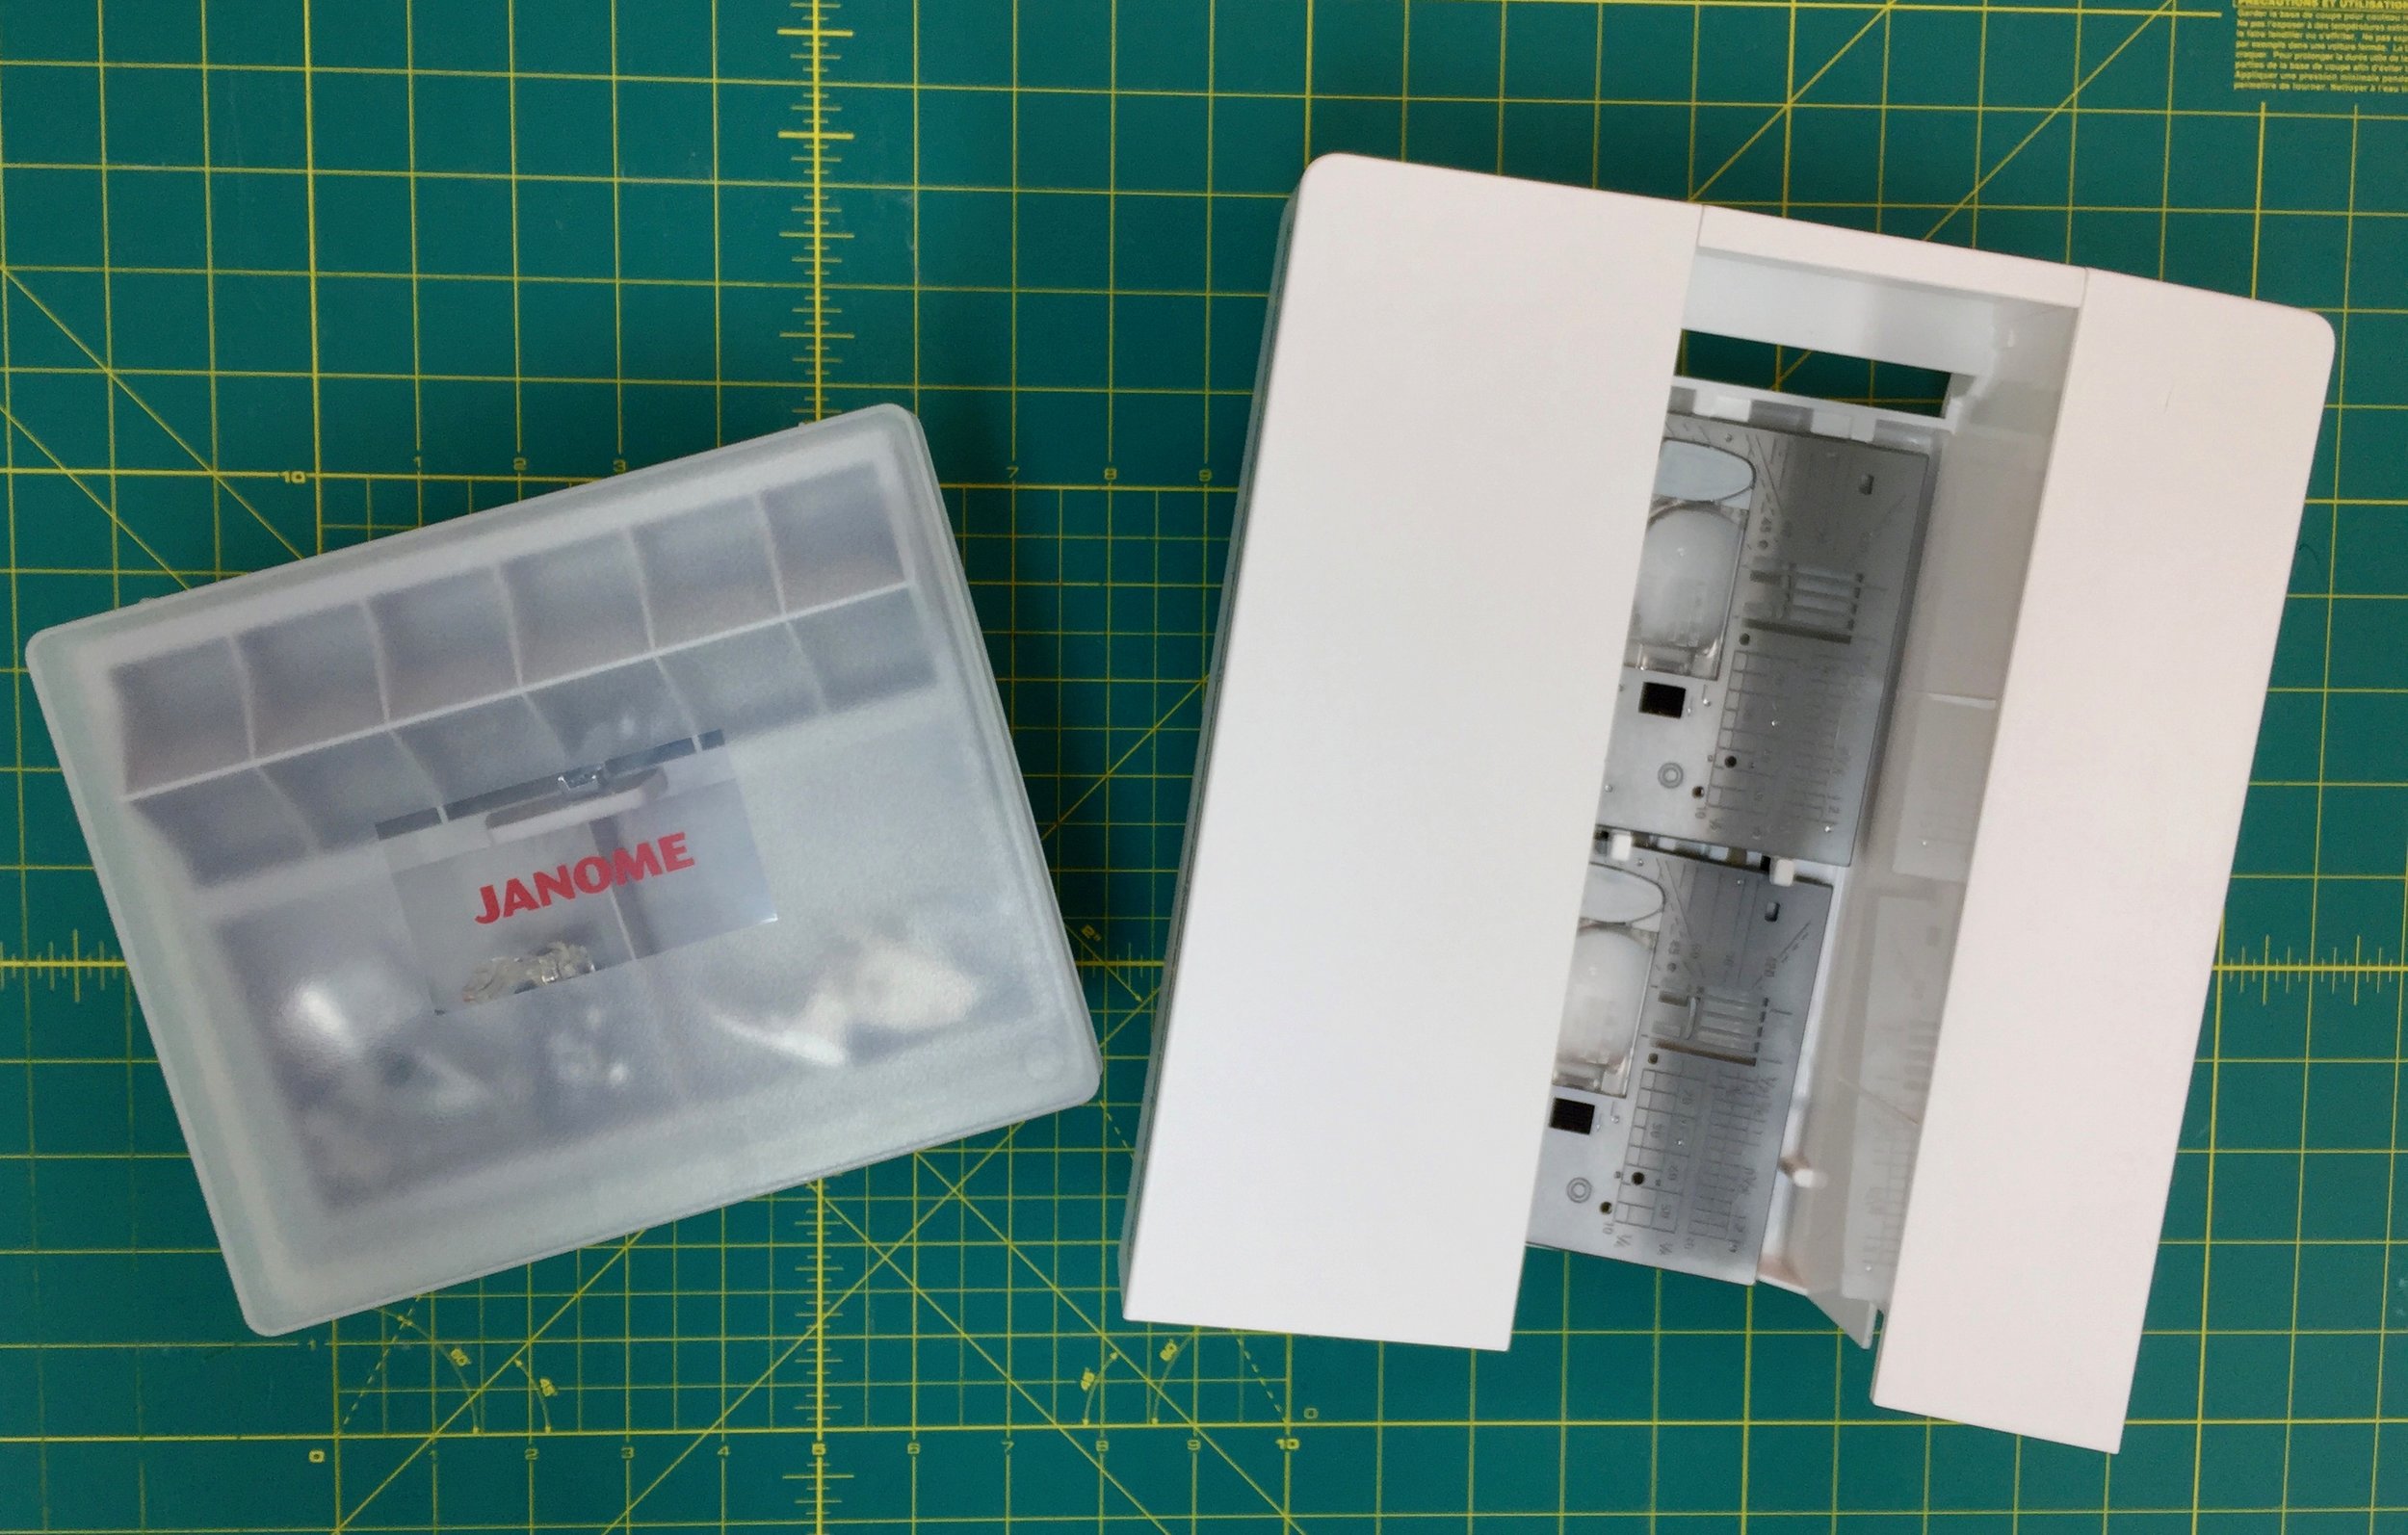
The Janome MC9450 comes with so many feet and accessories that I was worried about storage, but I shouldn’t have been as this machine comes with 3 storage areas. There is the storage container that fits around the machine bed and opens up with 2 storage areas. In addition, the Janome MC9450 comes with a separate box that holds all of the remaining accessories and has room for those additional ones that you might want to purchase.
One of the new features that I haven’t yet had a chance to try is the Tapering function. I know that this is going to be so handy for garment sewists and quilters too. I love doing fusible web appliqué and can see how helpful the Tapering function will be in reducing the width of my stitches when I am coming to a point on an appliqué. I’m looking forward to exploring this function and will let you know all about it in next month’s Janomelife blogpost.
Click on the image below to watch a video highlighting these, and more, features on the Janome MC9450.

More videos on the Janome MC9450 will be on my blog and YouTube channel, so be sure to subscribe so you’ll be notified when new blogposts are available.
Creatively,
P.S. Are you serious about improving your quilting? Do you want to connect with other committed quilters in a supportive, safe and fun environment? If you answered “yes” to these questions, you need to join The Quilter’s Way. The Quilter’s Way is the only quilting membership site that includes both training and an active, supportive online community. Don’t wait another day! Join now.
P.P.S. Did you know that you can sign up to receive emails full of FREE quilting goodness? Click here to receive FREE content directly in your email inbox every few weeks from Chatterbox Quilts. I know you'll be glad you did!
P.S. I am an Amazon affiliate and, if you purchase items by clicking through the links in this post ,I will receive a small amount of commission. This doesn’t cost you any more $$$, but helps me to continue creating free content for you. Thanks!

Best Tips for Buying a Sewing Machine
One of the most frequent questions that I get asked is: “What sewing machine should I buy?”
Here is what you should keep in mind when shopping for a new or “new-to-you” sewing machine.
1. Determine the type of stitching you want your new machine to do.
Whether you’re looking for a new sewing machine or a “new-to-you” sewing machine, you’ll need to consider the use to which you will put your machine. You may be a seamstress who creates clothing, a home dec stitcher who makes drapes and furniture covers or you may be a quilter, like me. Consider what type of stitching you are currently doing and might be doing in the next year. I don’t look further ahead then that as there will be new sewing machine models available to consider at that time.
2. Create a “must have” list of features and options that your perfect sewing machine needs to have.
If you’re a quilter, you will want to ensure that the sewing machine is able to form a good straight stitch. This is the most important consideration when you are quilting as this is the stitch that is used the most. There are other options available that will make quilting easier and more enjoyable, such as a needle up/down feature, speed control, and knee lifter, to name a few. If you’re a seamstress, you will want to have decorative stitches, a good buttonhole feature, and a free arm for handling small stitching pieces. If you create pillows and drapes, you’ll want decorative stitches and attachments, such as a ruffler. Determine what your “must haves” are and make a list. This will help to keep you on track when you are actually shopping for your machine.

Photo courtesy of janome.com
Be sure that your “must have” list is your list, not the list of one of your fellow stitchers. Every stitcher will have different items that are “must haves” when they are shopping for a sewing machine. You need to determine what yours are. Don’t be swayed by one of your stitching friends who “must have” a certain feature that you know you won’t really use: stick to what you absolutely have to have in a sewing machine.
3. Decide on your budget.
This is a big one! You must decide how much money you can realistically spend on a sewing machine. You can spend thousands of dollars on a sewing machine, but you don’t need to to get a good machine. Only you will know what is feasible when it comes to what you can afford to spend, so determine what this is and stick to it! You want to be sure that you’ll still be able to buy fabric and notions to use with your sewing machine.
4. Decide if you need to get a brand new sewing machine.
If this is your first sewing machine or if you have a very limited budget, buying a used sewing machine might be ideal for you. Some stitchers buy a new sewing machine when a new model comes out and they have to sell their current machine to afford the new one. This is an opportunity for you to purchase a gently used sewing machine at a very good discount.
5. Do your research.
Before you start going to the sewing machine shop to try out a potential purchase (and yes, you always want to try them out before buying), do some research about the machine online. You can check in groups to see if other sewists have this machine and how they like it and read the machine manual to see its capabilities and features.
6. Narrow your selection.
You may’ve looked at lots of sewing machines online, but now you need to narrow your selection down to about 3 machines. This will save you time when you actually try them out in the store (who has time to test out 15 sewing machines?). Your final potential selections will all have the “must haves” on your list. They will have additional features, of course, but they will all have the “must haves”. These are the machines that you will want to try out at the sewing machine shop.
7. Stitch test drive.
Now you’re ready to actually try stitching with the three models you selected. Be sure to take the type of fabric or material that you will be stitching with your ideal machine. Try out the various features. Determine what attachments come with it and if you’ll have to buy additional ones to do the type of stitching you do. If you do have to buy optional attachments, what is the price range? Don’t be swayed in trying other models that don’t have your “must haves” on them. Refer to your list and make notes about each model. While you might be able to make a decision on that same visit, you can certainly come back another time once you’ve had a chance to review your notes.
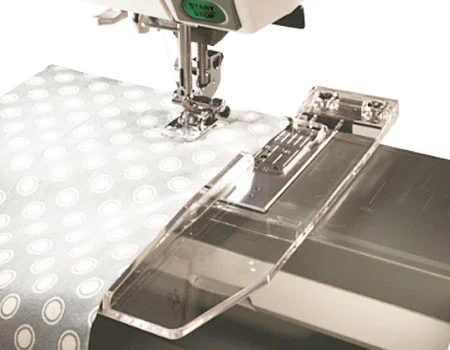
Photo courtesy of janome.com
For more information on shopping for a sewing machine, click on the image below.

Remember: The perfect sewing machine for you is one that fits your needs and falls within your budget.
Do you have any tips on shopping for a new or new-to-you sewing machine? Post them in the Comments below.
Creatively,
P.S. Are you serious about improving your quilting? Do you want to connect with other committed quilters in a supportive, safe environment? If you answered “yes” to these questions, you need to join The Quilter’s Way. The Quilter’s Way is the only quilting membership site that includes both training and an active, supportive online community. Don’t wait another day! Join now. The Quilter’s Way is the only quilting membership site that includes both training and an active, supportive online community. Don’t wait another day! Join now.
P.P.S. Did you know that you can sign up to receive emails full of FREE quilting goodness? Click here to receive FREE content directly in your email inbox every few weeks from Chatterbox Quilts. I know you'll be glad you did!
P.S. I am an Amazon affiliate and, if you purchase items by clicking through the links in this post ,I will receive a small amount of commission. This doesn’t cost you any more $$$, but helps me to continue creating free content for you. Thanks!

Best Thread for Piecing Quilt Tops
One of the most frequent question I get asked is: “What thread do you use for piecing your quilts?”

Some quilters want to know if they have to match their thread colour to their fabric. Others want to know what weight of thread is best for piecing a quilt. There are certainly lots of choices available and it can be confusing to pick the “right” thread for this job.
Here are the answers to all of these questions:
1. Do I have to match my thread colour to my fabric colour?
No! You should be able to use two colours of piecing thread: a cream or neutral colour and a light grey. I use the cream thread for light fabrics and the grey for darker ones. I don’t switch between the light and dark threads in a project: I decide if the quilt top is predominantly composed of light fabrics or dark ones and then choose my thread colour accordingly. As you won’t be seeing your thread (hopefully!), you don’t need to worry about matching it to your fabric.
2. What thread fibre and weight do you use to piece your quilt top?
I like to use a lighter weight cotton thread – either a 50 or 60 weight – as thread does add some bulk to your project, even though it is quite thin. Choose a 50 or 60 weight cotton thread to keep the thread bulk to a minimum.
3. What thread brand do you like to use?

Photo courtesy of www.aurifil.com
I like to use either an Aurifil Mako 50/2 or Mettler silk-finish cotton. I use cones for my piecing thread as I go through it quite quickly and it is more economical to buy it this way. Whatever thread you use for piecing be sure that it is a quality thread. You wouldn’t put cheap fabrics in your quilt, so don’t cheap out on your piecing thread!
For more information on thread choices for piecing, click on the image below.

What is your preferred thread to use in your quilt tops? Leave me a comment below to let me know.
Creatively,
Download the free Get Out of the Ditch! guide to learn how to start free motion quilting by clicking here.
P.S. Are you serious about improving your quilting? Do you want to connect with other committed quilters in a supportive, safe environment? If you answered “yes” to these questions, you need to join The Quilter’s Way. The Quilter’s Way is the only quilting membership site that includes both training and an active, supportive online community. Don’t wait another day! Join now.
P.P.S. Did you know that you can sign up to receive emails full of FREE quilting goodness? Click here to receive FREE content directly in your email inbox every few weeks from Chatterbox Quilts. I know you'll be glad you did!

DIY Studio Storage Ideas
There are lots of “made for quilting” storage items, but you don’t need to spend money for specialty storage solutions for your quilt studio. Look for alternative storage solutions that you may already have in your home to use in your quilt studio.

If you’re like me you probably have a few UFO’s (WIP’s as I optimistically like to call them) in your studio and you need a way to keep all the fabrics and notions together until you are ready to work on that particular project. Pizza boxes or similar flat boxes work well for storing WIP’s.
In my studio, I use clock boxes that I brought home from the school I work at. These were going to be recycled, but I recognized their potential and rescued them. They fit perfectly in the Billy bookcases that I use to store my fabric. I use a Frixion pen to write the project name and information on the box so I can erase this and reuse the box for another WIP.

Keeping my WIP’s in boxes like these allows me to stack them on a shelf and they are then organized. This allows me to pull out a box when I want to work on that project.

As I do hand embroidery, I like to have my needles, threads, thimbles, and other hand sewing items in a small container. I’ve found the perfect box for this purpose: a Purdy’s chocolate tin! Not only do I get to enjoy the delicious chocolates, but the tin is the perfect size to hold all my stitching items. A double win!

If you don’t have a Purdy’s near you (they are a Canadian company), you might be able to recycle other similar tins or boxes. Another example is the peanut brittle box that I saved. It’s larger and has a magnetic closure that I really like. This works well for small project pieces, such as half-square triangles or EPP (English Paper Piecing). Makes you look at food containers in a whole new light!
Consider other furniture pieces that you might have in your home for storage or cutting or pressing stations. In my studio, my cutting table is actually old kitchen cabinets that we repurposed into a cutting table and storage area. My pressing station is an Ikea table top with storage cubbies underneath and the pressing mat itself was custom made to the size I needed.
If you’d like to make your own pressing mat, click here for a step-by-step tutorial.
For more information on storage containers that I use in my quilt studio, click on the image below.

The money you save by recycling alternative items to use in your studio can be used to buy fabric, notions or those specialty items that you actually need - and that’s a win too!
Creatively,
P.S. Are you serious about improving your quilting? Do you want to connect with other committed quilters in a supportive, safe environment? If you answered “yes” to these questions, you need to join The Quilter’s Way. The Quilter’s Way is the only quilting membership site that includes both training and an active, supportive online community. Don’t wait another day! Join now. The Quilter’s Way is the only quilting membership site that includes both training and an active, supportive online community. Don’t wait another day! Join now.
P.P.S. Did you know that you can sign up to receive emails full of FREE quilting goodness? Click here to receive FREE content directly in your email inbox every few weeks from Chatterbox Quilts. I know you'll be glad you did!
Note: I am an Amazon affiliate and, if you purchase items by clicking through the links in this post ,I will receive a small amount of commission. You won’t pay any more $$ for these items, but it will help me to continue creating free content for you. Thanks!

Welcome! I’m Kim Jamieson-Hirst of Chatterbox Quilts, a YouTube creator and host of The Quilter’s Way. I believe that quilting is more than just a 1/4” seam and that practice makes improvement and you are improving every day!
Contact me at kjh@chatterboxquilts.com.


Want to improve your quilting and have fun doing it? Join The Quilter's Way, a private online membership site that creates successful quilters.

Check out my favourite books and tools.
As an Amazon Associate I earn from qualifying purchases from links that you may find on the Chatterbox Quilts’ website.