
CHATTERBOX QUILTS’ BLOG
Helping Quilters Learn and Improve

Quick Snowball Block Variation #2
This block is similar to the Snowball Block Variation #1 that I showed you last week. The big difference is in the size of the corner squares with which you start.Here's what you'll need:
- 1 background square
- 4 corner squares
I'm back with another quick Snowball block. And you thought there was only one version of this!
This block is similar to the Snowball Block Variation #1 that I showed you last week. The big difference is in the size of the corner squares with which you start.
Here's what you'll need:
- 1 background square
- 4 corner squares
In my example, I used a 6" background square and 4 - 3" corner squares. These are bigger than the corner squares I used in my Variation #1 example.
You construct this block in the same way that you made the Variation #1 block. If you haven't watched this video, no worries: you can see the entire process by clicking on the image below.

I really like to use the Snowball block in either of these variations to frame fussy cut motifs. You have probably seen the Snowball block used in "I Spy" quilts, where they work perfectly due to the ease and quickness of their construction. Consider using them with specialty fabrics as I have in this tutorial.
If you've made a project using Snowball blocks, email me the photo at kim@chatterboxquilts.com so I can share it with my private Chatterbox Quilts Facebook group. If you're not already a member, I'd love to have you join us in the group to talk all things quilting. Hope to see you there.
Creatively,


Quick No Sew Project for Canada's Sesquicentennial
Hi everyone:
Still haven't finished that project to celebrate Canada's 150th birthday (or sesquicentennial, if you are able to pronounce it!)? I've got you covered!
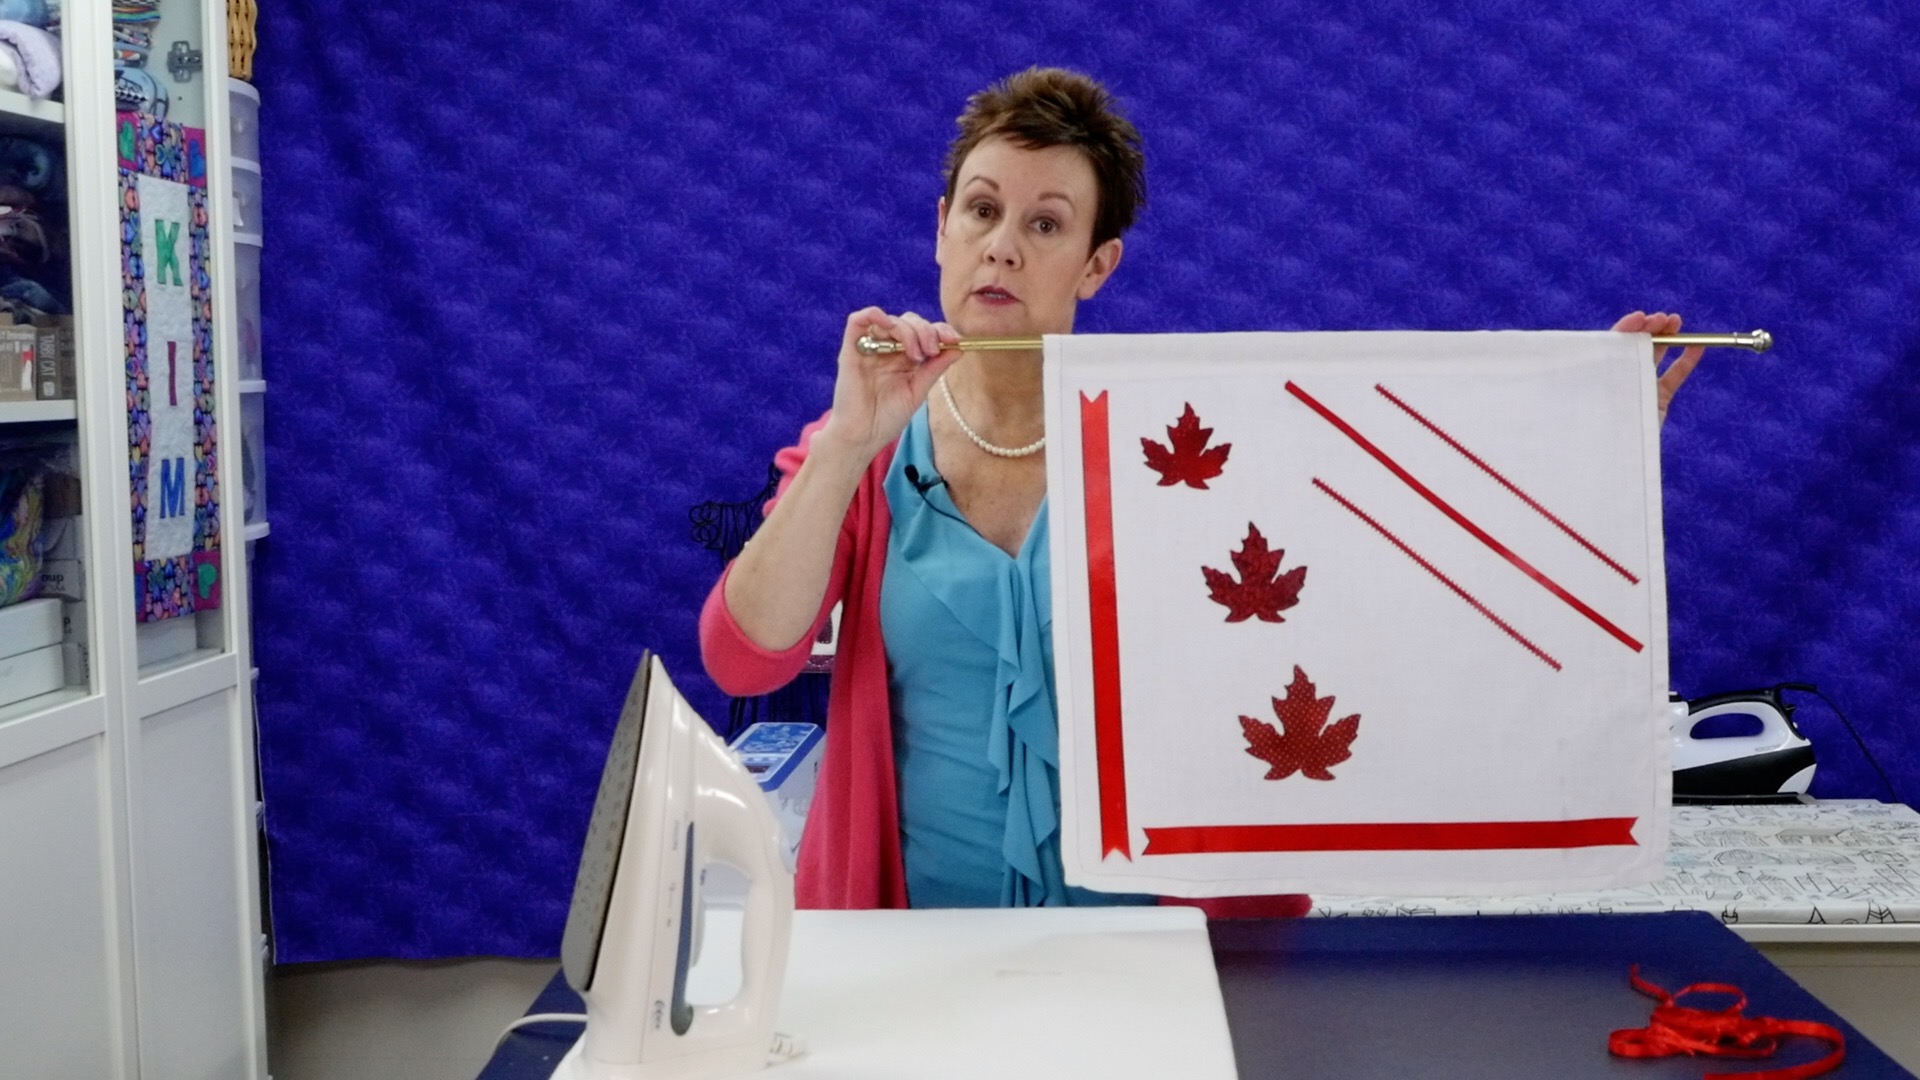
Use some background fabric, a few fabric scraps and embellishments with the Multi-Purpose Quilt Spray to create a no sew wall hanging. This is such a simple and easy project, that you may want to make several of them. The best part is how fast it is to whip up.
Here's what you'll need:
a piece of background fabric - you choose the size
some Canadian appliqués - I chose to cut out some maple leaves with my Artistic Edge digital cuter, but you can choose any motif that says "Canada" to you
some embellishments, such as ribbons or other trims
a piece of dowel or curtain rod to use to hang your new project
Once you've assembled your materials, decide on your design by arranging your items on the background fabric. Once you have determined your design, affix the items to the background fabric using the Multi-Purpose Quilt Spray. If you don't already have the recipe for this amazing, easy to make spray, you can get it here.
To see how this all comes together, you can watch the video below or on my YouTube channel.
I'd love to see your creations, so post your photos in the Comments below or send them to kim@chatterboxquilts.com
I hope you enjoy a fantastic Canada Day!
Creatively,

P.S. Join my private Chatterbox Quilts' Facebook group to learn more about quilting and other related topics. It's easy, just go to www.chatterboxquilts.com/fbgroup.

Placemats for Canada's 150th Birthday
Hi everyone:
This is a post especially for my Canadian subscribers, although anyone will enjoy making this project, I'm sure.
There is still time to create a project to celebrate Canada's Sesquicentennial. While many quilters are making large quilts to commemorate this once in a lifetime occasion, I decided to keep it a little smaller and made some Canada 150 placemats. Quick to make and practical to use!

This project will be in Janome Canada's Look Book in the future, but I wanted you to have this pattern while there is still time to make it before the big day (July 1).
These placemats use a quilt-as-you-go technique for quick constructions. You'll just need a background fabric, a few additional fabric strips and a small piece of fabric for the maple leaf appliqué. Click here to get the FREE instructions to make the Canada 150 placemats. Make 1, make 4 or make as many as you need!

I hope you'll share your version of these placemats by posting a photo in the Comments below or by sending them to kim@chatterboxquilts.com
Creatively,

Have you joined my private Chatterbox Quilts' Facebook group yet? Go to www.chatterboxquilts.com/fbgroup to join us.

Quick Snowball Block Variation #1
This might be the simplest quick quilt block that there is and it makes for a really quick and easy quilt project. Some people call this flipped corners block, but I know it as the Snowball block. To make this block you will need:
- 1 background square
- 4 smaller corner squares
Welcome to another Telecast Thursday! This week you'll learn how to make another really simple block. This might be the simplest quick quilt block that there is and it makes for a really quick and easy quilt project.
Some people call this flipped corners block, but I know it as the Snowball block. I prefer to create it when the weather is warmer as it just makes me feel cold when I think I'm making a Snowball block:)
To make this block you will need:
- 1 background square
- 4 smaller corner squares
In my example, I'm using a 6" background square and 4 - 2½" squares for the corners.
Be sure to use contrasting fabrics for the corner squares to get the desired effect.
Using a removable marker (Frixion pen in my case), draw a diagonal line on the back of the 4 - 2½" squares. You'll be placing these on each of the 4 corners of the background square and stitching along the drawn diagonal lines.
After stitching on all the diagonal lines, trim off the excess fabric that is underneath and press the corner squares out to the corner of the background square.
Congrats! You've made one Snowball block.
To see how I make a Snowball block and get extra half-square triangle units, click on the image below.

Have you made Snowball blocks before? What is your favourite way to use these easy-to-make blocks? Leave me a comment below or on my YouTube channel to let me know.
Creatively,

P.S. Join me in the private Chatterbox Quilts Facebook group. It's where we discuss quilting topics and drool over vintage sewing machines :)

Book Review - Free-Motion Machine Quilting 1-2-3
I love free motion quilting and am always looking for a good book to add to my quilting library all about this topic. I've found one in Free-Motion Machine Quilting 1-2-3 by Lori Kennedy.
You may already follow Lori's blog, The Inbox Jaunt, where she shares information and free motion quilting designs. (If you aren't familiar with her blog, you should check it out). In Free-Motion Machine Quilting 1-2-3 Lori shares many of her free motion designs and provides lots of information on free motion quilting.
One of my favourite things about this book, other than the amazing content, is that the book is ring bound. This allows you to lay the book out next to your sewing machine and use it as reference as you stitch out one of the over 60 designs in the book. Very handy!
The book is divided into sections based on the shapes of the designs, making it easy to find a swirl-type design or one that uses another shape, such as a leaf. Due to the type of information in the book, you would expect, and hope for, lots of reference photos - and this book has those. Lori stitches out her designs on solid colour fabrics so it is easy to see the design details.
Watch the video below or on my YouTube channel to see more about Free-Motion Machine Quilting 1-2-3.

If you want a good reference book on free motion quilting, you will want to get your own copy of Free-Motion Machine Quilting 1-2-3.
Do you love to do free motion quilting too? Leave me a comment below as to your favourite type of free motion design.
Creatively,

P.S. Join me in my private Chatterbox Quilts Facebook group for discussions on vintage sewing machines and quilting information. I'd love to chat with you there.
Disclaimer: I am an Amazon affiliate and will receive a small amount of compensation if you purchase by clicking through a link in this blog post. Thank you for allowing me to continue to create free content for you.

Welcome! I’m Kim Jamieson-Hirst of Chatterbox Quilts, a YouTube creator and host of The Quilter’s Way. I believe that quilting is more than just a 1/4” seam and that practice makes improvement and you are improving every day!
Contact me at kjh@chatterboxquilts.com.


Want to improve your quilting and have fun doing it? Join The Quilter's Way, a private online membership site that creates successful quilters.

Check out my favourite books and tools.
As an Amazon Associate I earn from qualifying purchases from links that you may find on the Chatterbox Quilts’ website.