Create a Cute Ornament with the Circular Sewing Attachment on the Janome MC9450

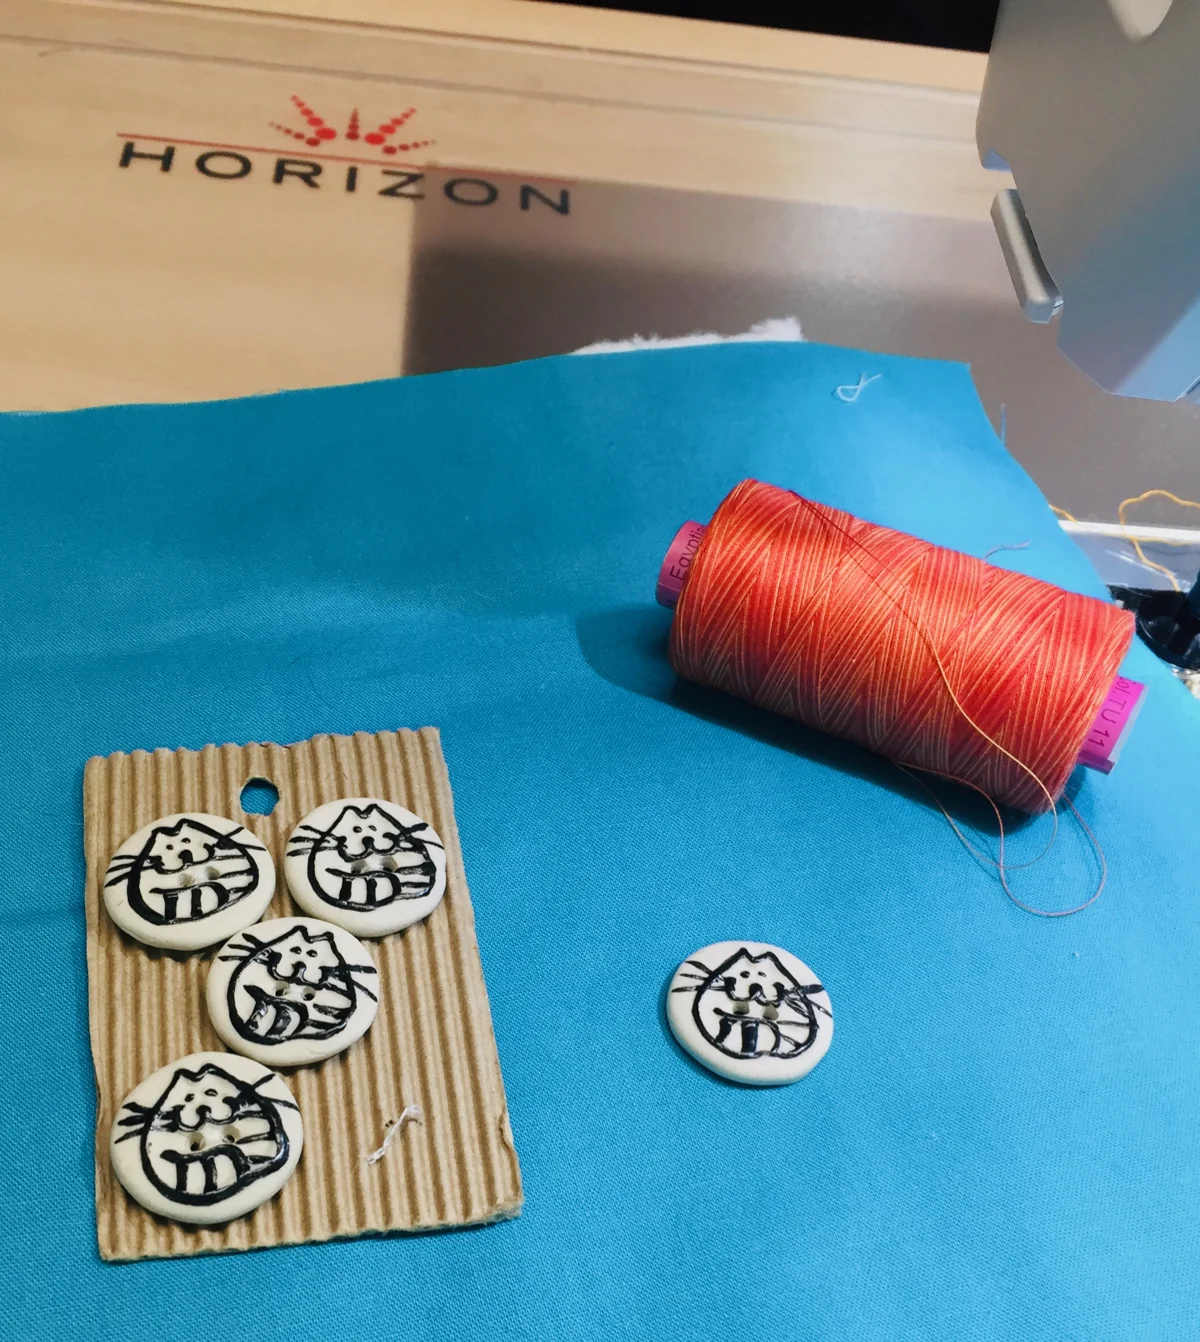
I love to collect buttons, but then never seem to quite know what to do with them. I want to have them displayed so I can enjoy them, so I decided to create a little hanging ornament to do just that. I used the Circular Sewing Attachment on the Janome MC9450 to stitch several circles around the button to showcase it, added a hanging loop and it was done!

 
Circular Sewing Attachment 9450 YT.jpg
 

If you’d like to use your Circular Sewing Attachment to create a similar ornament, here’s what you’ll need:
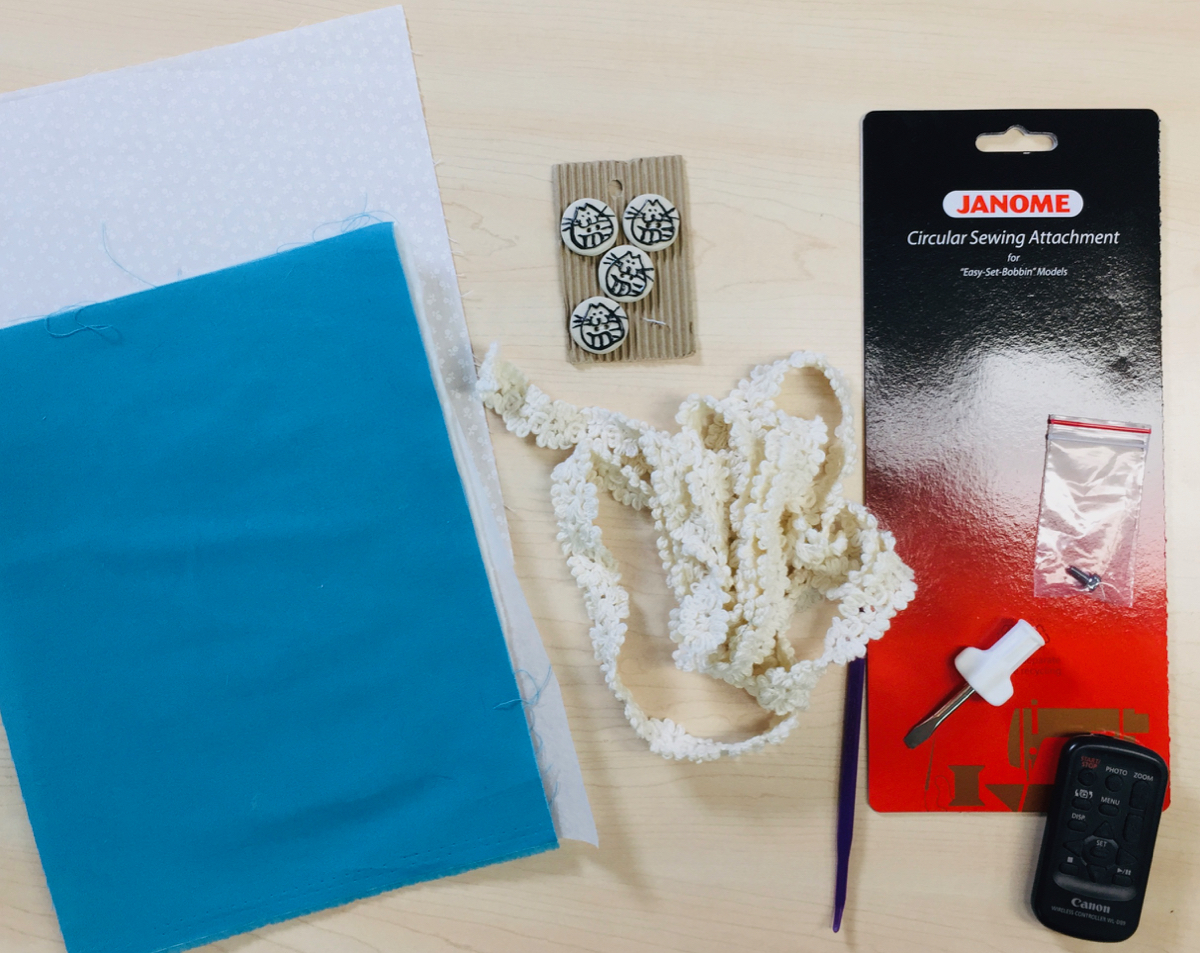
Fabric for the top

Batting

Fabric for the backing

Ribbon or trim for the hanging loop

Fabric stabilizer (Click here for information on using this with decorative stitches)

Decorative button(s)

Circular Sewing Attachment and Janome MC9450 sewing machine

 
Remote control not required for project ;)

Remote control not required for project ;)


The Circular Sewing Attachment that fits the Janome MC9450 installs with a set screw that is included with this optional accessory. You just need to remove the bobbin cover, pop in the Circular Sewing Attachment and screw it down. Very quick and easy to do! The packaging for this accessory includes information on how to attach it and stitch with it, so be sure to keep it somewhere safe!

You’ll notice a black cap that is attached to the Circular Sewing Attachment. It covers the pin that you will use to attach your fabric to the accessory. Be sure to always replace this black cap as that pin is very sharp and you don’t want to injure yourself on it!

There is a locking mechanism on the Circular Sewing Attachment: you unlock this part, slide it along and then lock it before stitching your circle. The closer to the needle this part is, the smaller the stitched circle. I like to unlock the attachment and slide it away from the needle to attach the fabric with the pin. I can then move the attachment to the specific spot I want that will give me the stitch I want before locking it up.

I like to use an open toe foot (F2) when stitching with the Circular Sewing Attachment so I can see that everything is stitching along as it should.

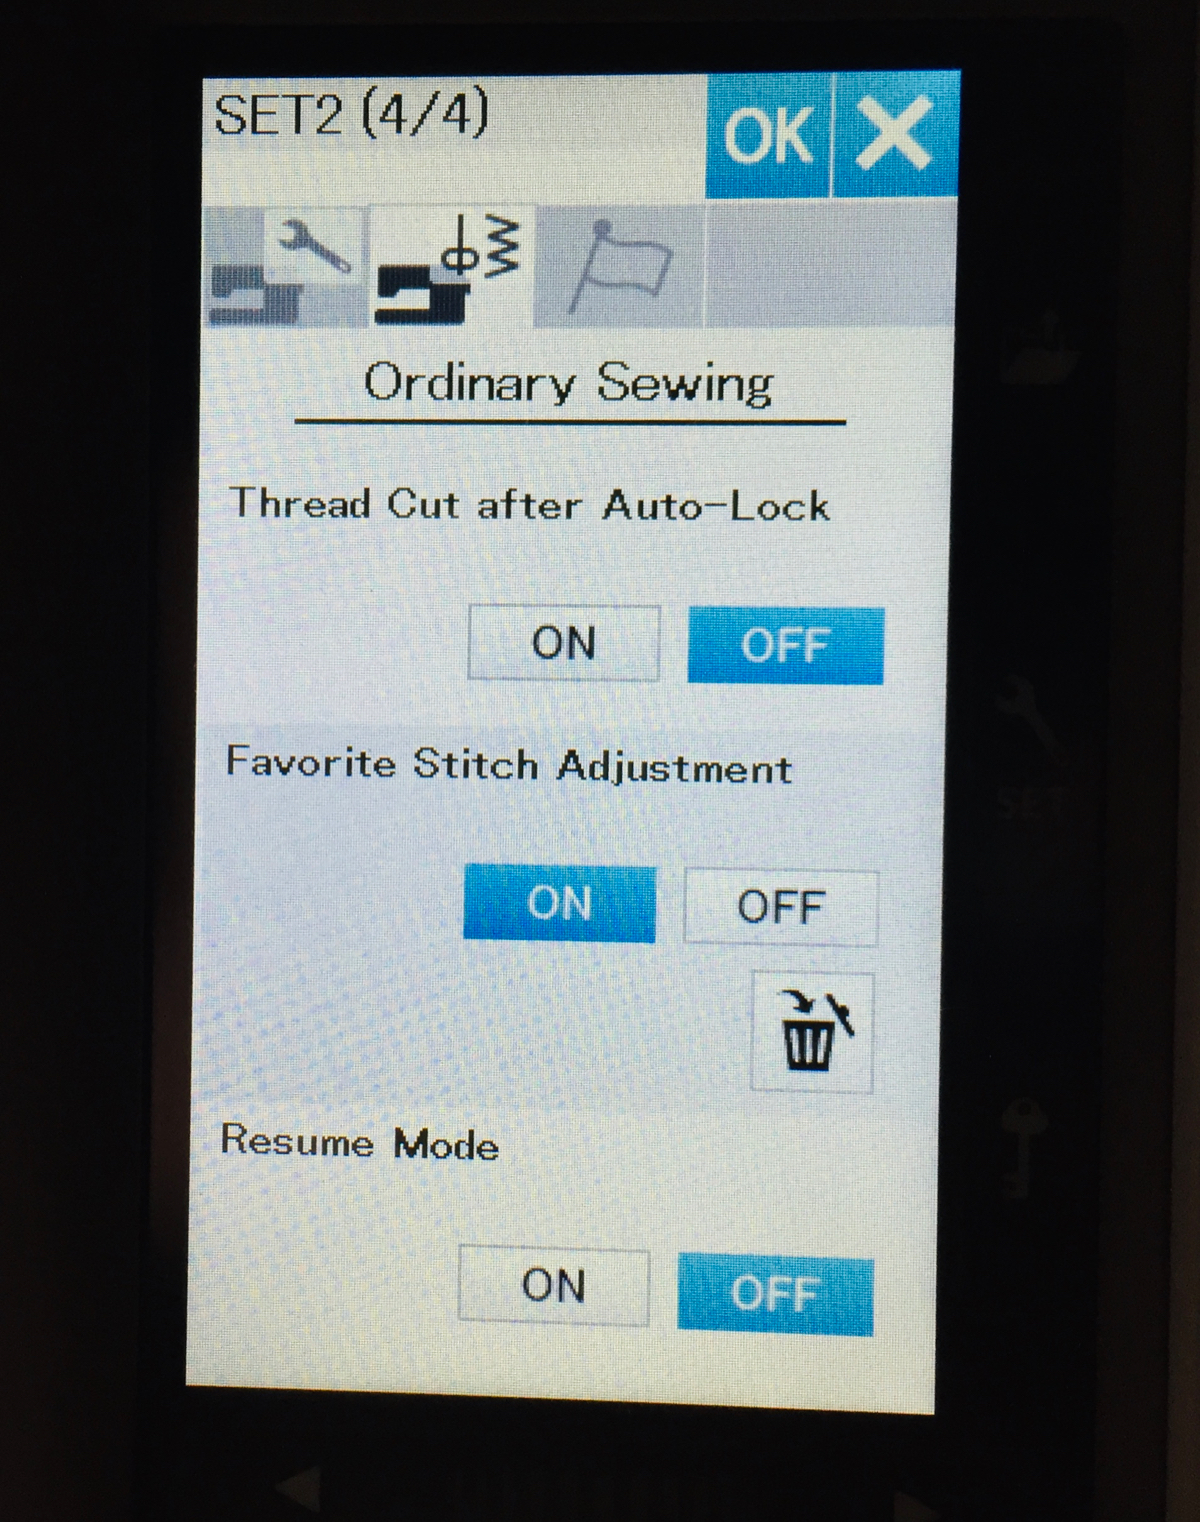
Choose and practice your decorative stitches to ensure that they are the width and length you want before stitching them to your project. Click here for information on saving your adjusted stitches on the Janome MC9450. Put fabric stabilizer behind the fabric or sandwich to ensure that the decorative stitches won’t scrunch up.

I like to use a larger piece of fabric than I actually need and trim it up after all of the stitching is done. This way I don’t run off the fabric as I increase the size of my circles.

Start with smallest circle and work out from there. Leave space between each circle and check to ensure that there is enough fabric so the circles won’t stitch off it.

For this hanging ornament, I layered the top fabric, batting and fabric stabilizer before attaching this sandwich to the Circular Sewing Attachment. I stitched 3 circles, starting with the smallest one and working out. After I’d stitched the circles, I added the backing using the pillowcase method, ensuring that the hanging loop was inserted in the sandwich before stitching. While I could’ve hand stitched the opening closed, I chose to use a glue stick to seal this open seam and pressed it with the iron. Shhh, don’t tell the quilting police!

 
Circular Sewing Attachment 9450 - 5.jpg
 

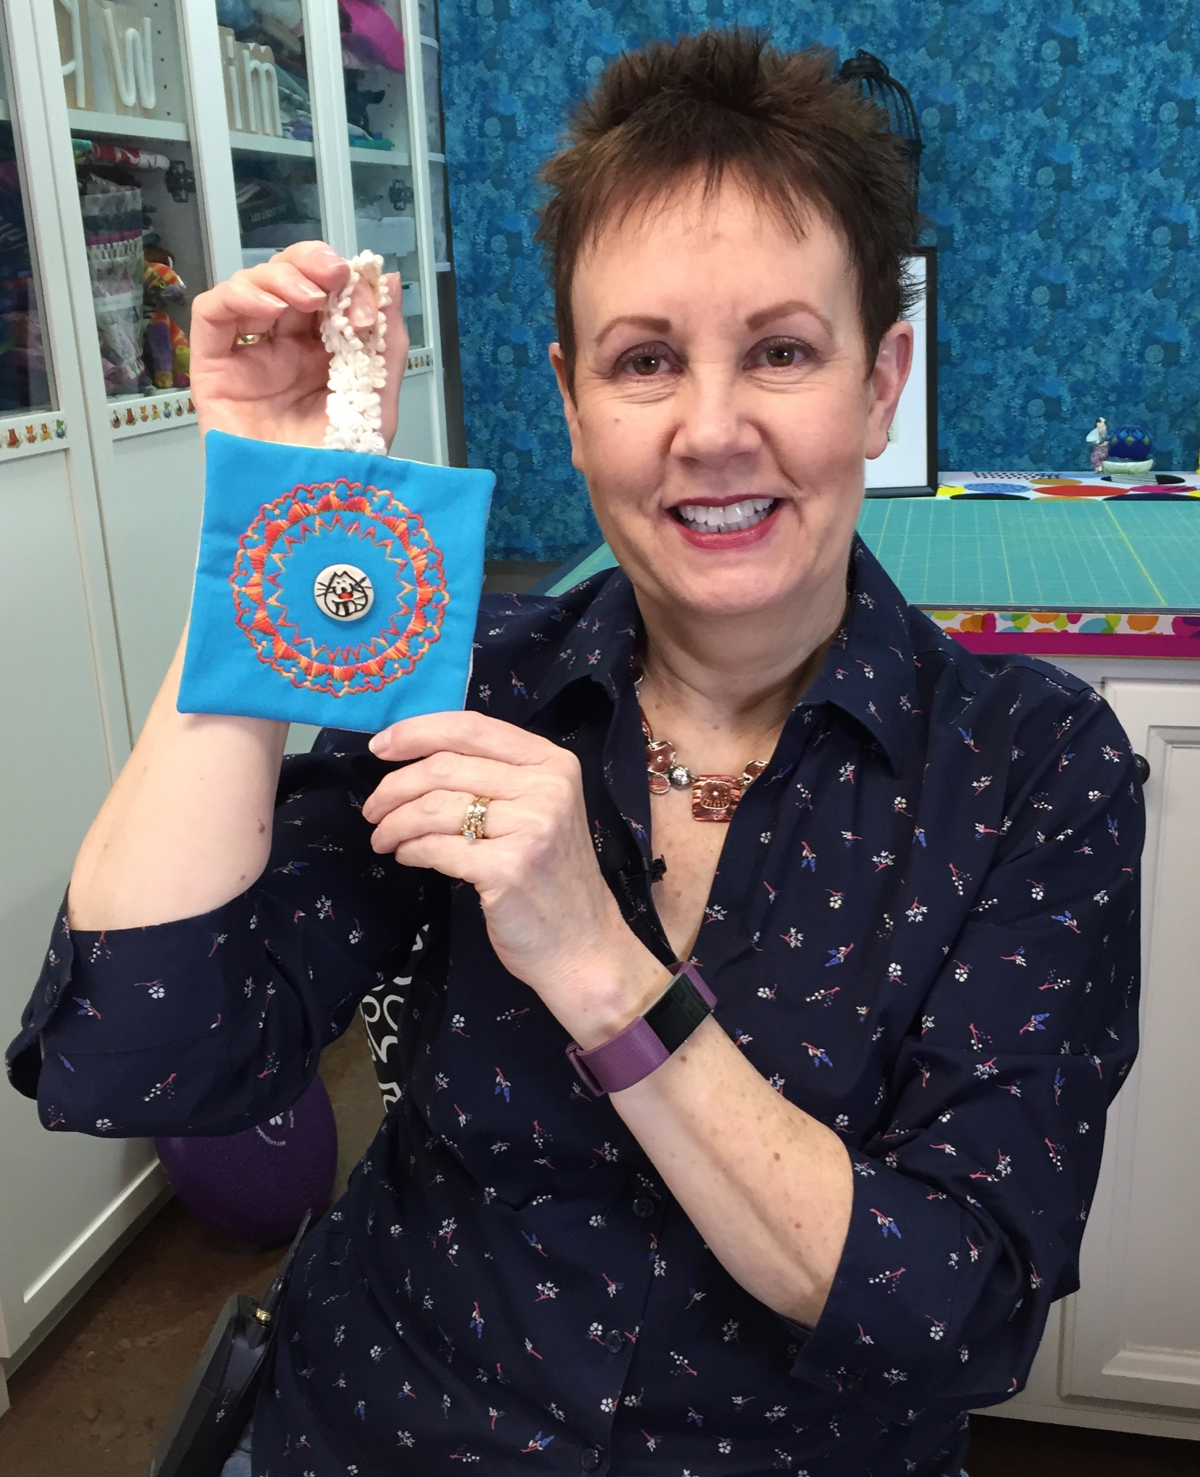
I added my special button by using Button foot T on the Janome MC9450. For information on how to use the Janome MC9450 to sew on a button, click here.

For more information on creating an ornament with the Circular Sewing Attachment, click on the image below.


What other uses can you think of for the Janome Circular Sewing Attachment? Leave your ideas in the Comments below.

Creatively,

Kim's signature small aqua.jpg
 

P.S. Are you serious about improving your quilting? Do you want to connect with other committed quilters in a supportive, safe environment?  If you answered “yes” to these questions, you need to join The Quilter’s Way. The Quilter’s Way is the only quilting membership site that includes both training and an active, supportive online community. Don’t wait another day! Join now.

P.P.S. Did you know that you can sign up to receive emails full of FREE quilting goodness? Click here to receive FREE content directly in your email inbox every few weeks from Chatterbox Quilts. I know you'll be glad you did!

P.S. I am an Amazon affiliate and, if you purchase items by clicking through the links in this post, I will receive a small amount of commission. This doesn’t cost you any more $$$, but helps me to continue creating free content for you. Thanks!

Button Sewing on the Janome MC9450

Did you know that you can use your Janome MC9450 to sew buttons to your projects or garments? It’s so easy and saves hand sewing those buttons on – and I love to avoid this part of the process!

You can sew on a variety of button types, from flat buttons to those with shanks. I’ve tried both and the Janome MC9450 works really well in either situation. You’ll need to use the Button foot T for this technique. It’s the cute little open toe blue foot! Attach this to your foot holder and then to your Janome MC9450 and you’ll be almost ready to start.

To start, you’ll need a button and the garment or fabric on which you want to stitch the button. I guess this is fairly obvious, but still…

 
Circular Sewing Attachment 9450 - 1.jpg
 

You next need to use the “Button” setting on the Janome MC9450. You can find it in the Sewing applications area (the t-shirt icon). Scroll through the various options until you find the Button setting and select it. You’ll notice that there are two choices: one for flat buttons and one for buttons with a shank or for which you will create a shank with thread. If you choose the shank button option, you’ll need to use the button shank plate, which you will place between the fabric and the button. In my particular situation, I didn’t need to use this as I was attaching a flat button.

Before you start stitching, the Janome MC9450 will ask you to drop the feed dogs. Once you do this, you are ready to go!

 
Circular Sewing Attachment 9450 - 2.jpg
 

Decide where you want to attach the button, and, using the handwheel, slowly drop the needle into the left button hole. Again, using the handwheel, drop the needle into the right button hole. You may need to adjust the stitch width to ensure that the needle will go into the buttonhole and not into the button! Once you are sure that the stitch width is appropriate for your button, you can use your foot pedal to stitch on the button. The Janome MC9450 will automatically stop stitching when the button is secure. Cut the thread and you are done.

To see this process in detail, click on the image below.


Creatively,

Kim's signature small aqua.jpg
 

P.S. Are you serious about improving your quilting? Do you want to connect with other committed quilters in a supportive, safe environment?  If you answered “yes” to these questions, you need to join The Quilter’s Way. The Quilter’s Way is the only quilting membership site that includes both training and an active, supportive online community. Don’t wait another day! Join now.

P.P.S. Did you know that you can sign up to receive emails full of FREE quilting goodness? Click here to receive FREE content directly in your email inbox every few weeks from Chatterbox Quilts. I know you'll be glad you did!

P.S. I am an Amazon affiliate and, if you purchase items by clicking through the links in this post, I will receive a small amount of commission. This doesn’t cost you any more $$$, but helps me to continue creating free content for you. Thanks!

Favorite Stitch Adjustment Feature on the Janome MC9450

You know that you can adjust the width and length on most of the decorative stitches on the Janome MC9450, right? But… do you know how to save those adjusted stitches? It’s easy! Let me show you how it’s done.

All of the stitches on the Janome MC9450 have a default setting which will show up when you select a particular stitch. This is the optimal setting for this stitch, but you can adjust many of the stitches on the sewing machine. Once you have made your adjustments you can save these as “Favorite Stitches”, but this setting has to first be turned on in the Settings area.

 
Janome MC9450 top stitches - 1.jpg
 

To activate the Favorite Stitch Adjustment feature on the Janome MC9450, click on “Set” on your display screen. Next, go to the second sewing machine icon in the Settings menu and click on it. You will then see a variety of options that are available on several pages. Use the arrow at the bottom of the display screen to go to the fourth page where you will see “Favorite Stitch Adjustment”. Be sure that it is set to “On”. If it is set to “Off”, you won’t be able to save any of the adjustments you’ve made to stitches on the machine.

 
Janome 9450 display - 1.jpg
 

Exit this menu area by clicking “OK” at the top of the display screen and then you are ready to go!

To see exactly how to save your “new” stitch, click on the image below.


Do you use the “Favorite Stitch Adjustment” feature on your Janome MC9450? Let me know in the Comments below.

Creatively,

Kim's signature small aqua.jpg
 

P.S. Are you serious about improving your quilting? Do you want to make new quilting friends in a supportive, safe environment?  If you answered “yes” to these questions, you need to join The Quilter’s Way. The Quilter’s Way is the only quilting membership site that includes both training and an active, supportive online community. Don’t wait another day! Join now.

P.P.S. Did you know that you can sign up to receive emails full of FREE quilting goodness? Click here to receive FREE content directly in your email inbox every few weeks from Chatterbox Quilts. I know you'll be glad you did!

P.S. I am an Amazon affiliate and, if you purchase items by clicking through the links in this post, I will receive a small amount of commission. This doesn’t cost you any more $$$, but helps me to continue creating free content for you. Thanks!

Book Review: Text It!

Don’t you just love projects with words or phrases on them? I definitely do and so really enjoyed checking out Text It! by Sherri Noel. This book contains pillows, wall hangings, smaller quilts, and other projects to decorate your home and quilt studio.

 
Photo courtesy of Martingale Publishing

Photo courtesy of Martingale Publishing


One of the things I really liked about Text It! is that it contains 7 different alphabets in a pull-out at the back of the book. All of these alphabets are full-size so you won’t need to enlarge them to use them in the projects. If you want to change the look of any of the projects in Text It!, you can choose one of the other alphabets included in the book and substitute it for the one used in the pattern..

 
Photo courtesy of Martingale Publishing

Photo courtesy of Martingale Publishing


Sherri includes information on various forms of appliqué in the back part of the book so you can use your favourite one to create the projects in Text It!.

I loved the cute designs in Text It! and thought that they would make wonderful gifts for quilting and non-quilting friends.

Click on the image below for a detailed look at the projects in Text It!

Get your own copy of Text It! at https://amzn.to/2TLAcYt.

Creatively,

Kim's signature small aqua.jpg
 

P.S. Are you serious about improving your quilting? Do you want to connect with other committed quilters in a supportive, safe environment?  If you answered “yes” to these questions, you need to join The Quilter’s Way. The Quilter’s Way is the only quilting membership site that includes both training and an active, supportive online community. Don’t wait another day! Join now.

P.P.S. Did you know that you can sign up to receive emails full of FREE quilting goodness? Click here to receive FREE content directly in your email inbox every few weeks from Chatterbox Quilts. I know you'll be glad you did!

P.S. I am an Amazon affiliate and, if you purchase items by clicking through the links in this post, I will receive a small amount of commission. This doesn’t cost you any more $$$, but helps me to continue creating free content for you. Thanks!

Easy Appliqué Pincushion Tutorial

If you’ve never made a pincushion before, you’ll want to keep reading. This project is great for using up scrap fabrics and for dipping your toes into fusible web appliqué. It doesn’t take long to make at all, so it’s a perfect “gotta have it done in an hour” gift.

 
January+2019+projects+-+5.jpg
 

If you have never tried this easy form of appliqué and want complete instructions on how to do it, you’ll definitely want to check out my course, Fusible Web Appliqué Essentials. It goes step-by-step through the whole process of making a fusible web appliqué project. (Or join The Quilter’s Way where this course is included free with your membership).

Now back to the pincushion project. Here’s what you’ll need:

Two charm squares – one for the top and one for the backing

An appliqué shape that is backed with fusible web or you can use a glue stick to adhere it to the top

Perle cotton or similar heavy thread and a long, thick needle

Polyester fill or similar filling

Usual sewing supplies

 
Filming Jauary 2019 - 12.jpg
 

Once you’ve assembled all your materials,  starch the two charm squares so they are stiff. This makes them easier to work with.

 
Filming Jauary 2019 - 13.jpg
 

Fuse or glue the appliqué to the top charm square. Finish the appliqué edges by stitching with your chosen stitch. I like to use a narrow zigzag.

Note: You might need a fabric stabilizer underneath the fabric, depending on the denseness of the stitch you have selected.

Place the top and back charm squares right sides together and stitch around them with a ¼” seam, leaving an opening on one side to turn. Clip the corners and turn it right side out, poking out the corners (I like to use That Purple Thang to do this).

Stuff with Polyfil or similar stuffing until very firm. Hand stitch the opening closed.

 
Filming Jauary 2019 - 15.jpg
 

 If you like the look of your pincushion just as it is, you can stop here, but if you want to give it a bit more definition, read on.

To give it a pincushion shape, I like to stitch through the centre of the pincushion and out the back several ties, pulling the thread taut each time. Use two lengths of perle cotton for this (a regular weight thread might break - ask me how I know!). Knot the thread and starting on the back, push the needle through to the top. Take a small stitch and then go back down to the back, pulling the thread taut. You could add a button on top while doing this if you wished. Do this 3 times and then knot the thread in the back.
Your pincushion is now done!

For a complete step-by-step tutorial on creating this pincushion, click on the image below.

Have you ever made a pincushion before? Share your ideas and experiences in the Comments below.

Creatively,

Kim's signature small aqua.jpg
 

P.S. Are you serious about improving your quilting? Do you want to connect with other committed quilters in a supportive, safe environment?  If you answered “yes” to these questions, you need to join The Quilter’s Way. The Quilter’s Way is the only quilting membership site that includes both training and an active, supportive online community. Don’t wait another day! Join now.

P.P.S. Did you know that you can sign up to receive emails full of FREE quilting goodness? Click here to receive FREE content directly in your email inbox every few weeks from Chatterbox Quilts. I know you'll be glad you did!

P.S. I am an Amazon affiliate and, if you purchase items by clicking through the links in this post ,I will receive a small amount of commission. This doesn’t cost you any more $$$, but helps me to continue creating free content for you. Thanks!